WARNING: At no point should you ever look at the Sun without a solar filter, especially through a telescope. Doing so could cause permanent damage to your eyes! Ensure that you have some sort of filter on at all times when observing the eclipse!
On August 21, 2017, millions stood outside and witnessed the most incredible display of celestial alignments one can see in the sky - a total solar eclipse. It was a rare opportunity for many, as a total solar eclipse had not been visible in the United States since 1979, and the next one will not be until April 8, 2024.
A solar eclipse is one of the most rare and incredible astronomical events one can experience. Thousands dedicate their time and energy every year to travel around the world just for a chance to photograph a total solar eclipse. However, photographing a solar eclipse can be a very difficult challenge. This article will serve as a beginner’s guide to getting incredible photographs of a solar eclipse.
What is a Solar Eclipse?
To put it simply, a solar eclipse occurs when the Moon passes in front of the Sun, blocking out its light. Here on Earth, we happen to have the incredible coincidence that the Moon has roughly the same size (also known as angular diameter) as the Sun in our sky. Because of this, if aligned perfectly, the Moon will block out the disk of the Sun, revealing in stunning detail the different layers of the Sun’s atmosphere, otherwise invisible from the ground. There are several types of solar eclipses one can see, each of them possessing its own unique beauty.
Partial Solar Eclipse
As the name would suggest, a partial solar eclipse occurs when the Moon only partially blots out the disk of the Sun. Every solar eclipse is considered a “partial” eclipse if you’re not in the path of totality.
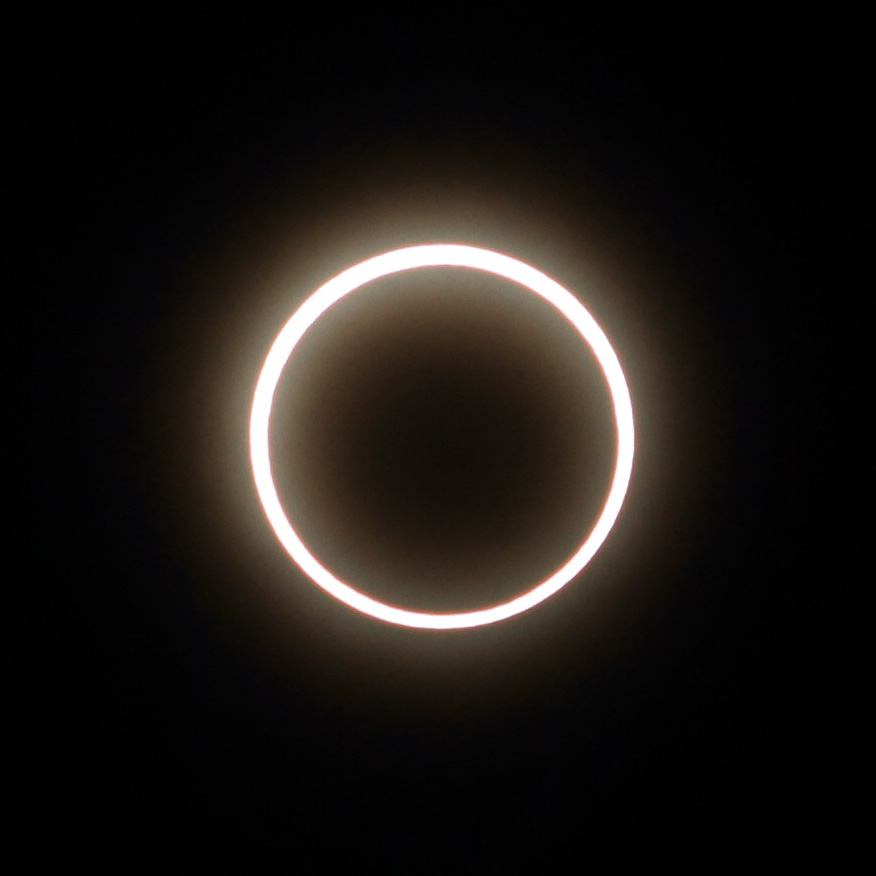
Annular Solar Eclipse
An annular solar eclipse occurs when the Moon eclipses the Sun at the highest point in orbit around the Earth (known as its “apogee”). When this happens, the angular diameter of the Moon is too small to perfectly block out the light of the Sun. From the ground, totality appears as a “ring of fire”.
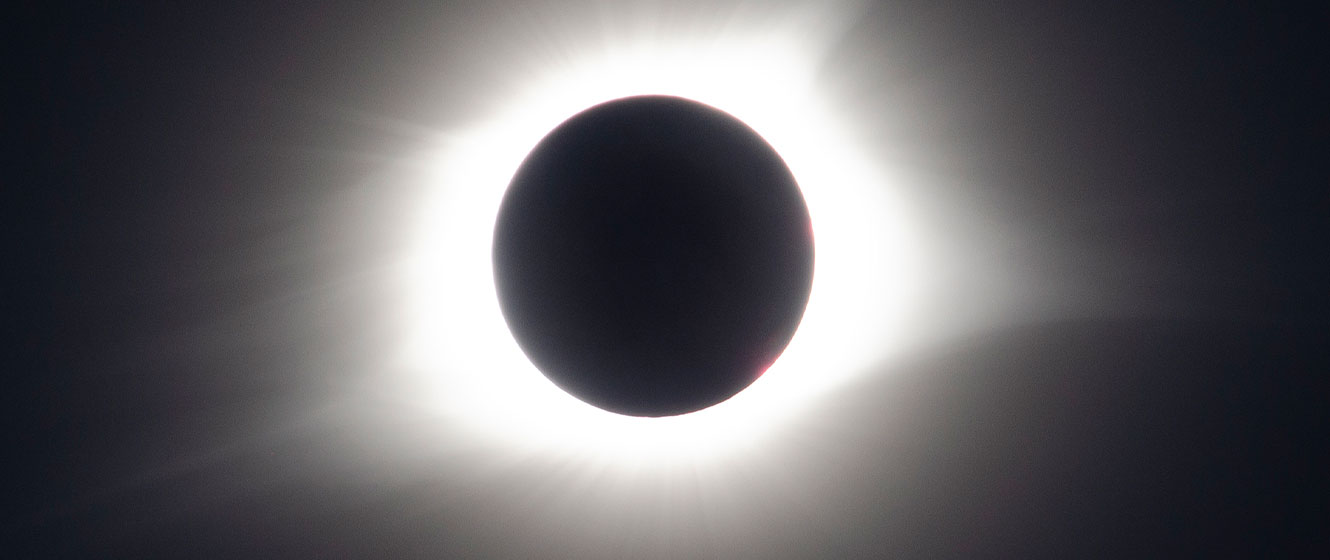
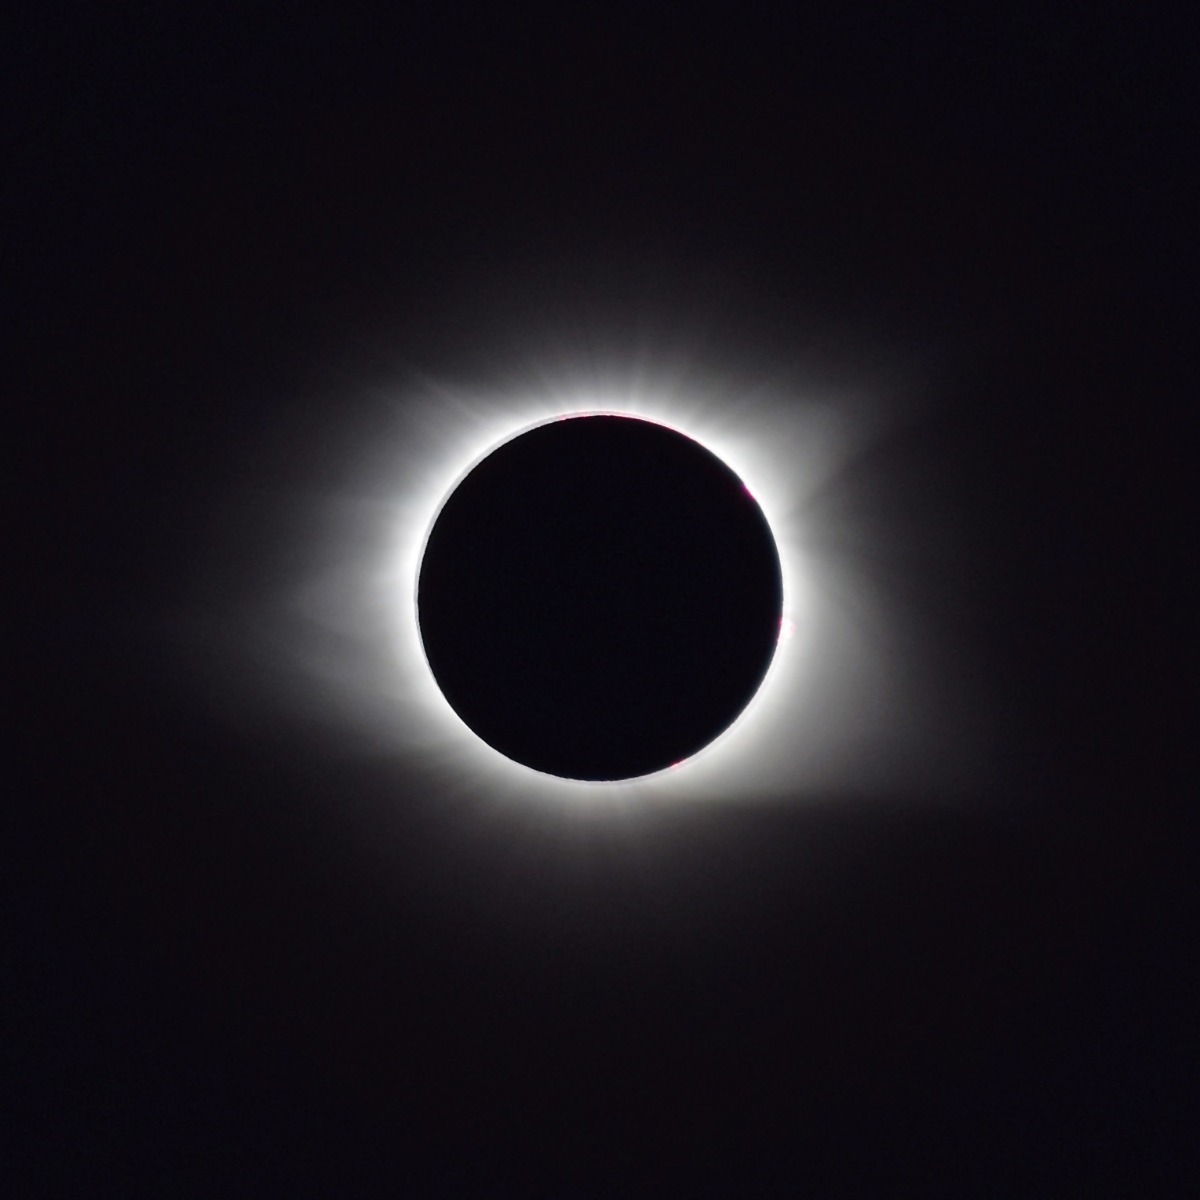
Total Solar Eclipse
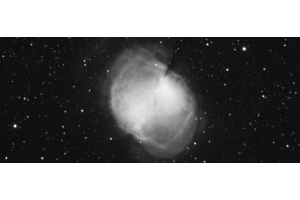
A total solar eclipse is what everyone thinks of when they hear the words “solar eclipse”. This occurs when the Moon fully blocks out the light from the Sun. As this happens, darkness falls upon the Earth as the shadow of the Moon falls over the observer. Visible are different parts of the Sun’s atmosphere such as the chromosphere and corona that are otherwise invisible to the naked eye. Stars will appear in the middle of the day; planets like Jupiter and Venus will be obvious in the sky, and the solar corona will fan brilliantly away from the Sun. A careful observer will be able to spot “prominences” around the limb (or edge) of the Moon; these are extremely hot areas of ionized gas larger than the planet Jupiter extending away from the Sun.
Hybrid Solar Eclipse
A hybrid eclipse is a rare type of eclipse that appears as both a blend of an annular eclipse and a total eclipse depending on where it’s located along the path of totality. These types of eclipses only occur a few times a century.
 Click to Enlarge Image
 Click to Enlarge Image
 Click to Enlarge Image
Which Solar Filter Should I Use?
To safely observe a solar eclipse, a solar filter is critical. The only time you should observe the Sun without a filter is those few minutes of totality during a total solar eclipse, where the light of the Sun is 100% blocked out by the Moon. Solar filters are usually made up of highly reflective material, such as mylar, that reflects >99% of the brightness of the Sun, making it safe to observe. There are two main types of eclipse filters: an off-axis filter and a full-aperture filter. While observing the eclipse, you may find observing the Sun through a large telescope even with a solar filter may be uncomfortably bright. An off-axis filter is recommended for those using larger telescopes, such as larger Newtonian and Schmidt-Cassegrains, as they block off most of the aperture from the Sun, reducing the brightness further. A full aperture filter is recommended for those observing or imaging the eclipse through smaller telescopes, such as refractors.
You might also prefer to use a white light solar filter. These enable you to observe the Sun in a more accurate, neutral-white color instead of a deep orange color created by other filters. The AstroZap Visual Baader Solar Filters would be ideal for this purpose, as they use the Baader AstroSolar Safety Film to safely observe the Sun in neutral colors. Additionally, you may also prefer to use a glass filter instead of film, as glass filters are far less susceptible to tears or punctures. Spectrum Glass Solar Filters are a fantastic choice to enhance your enjoyment of the solar eclipse.
Before purchasing your solar filter, we strongly recommend measuring the exterior diameter of your optical tube assembly (OTA). An 8-inch telescope doesn’t necessarily have a diameter of 8-inches. While we offer returns on glass solar filters, we do not offer returns on solar filters made of film, so you need to ensure that the exterior diameter of your telescope is correctly measured should you choose to buy a film solar filter. If you’re unsure how to do this, please reach out to our product advisors for assistance.
Planning for the Solar Eclipse
Finding the Right Mount and Telescope
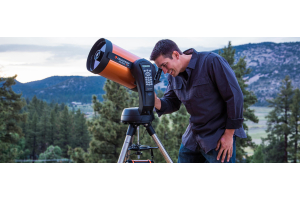
Should you be looking to take photos of the eclipse, we strongly recommend purchasing a portable setup that’s capable of tracking the sky during the eclipse. The reason a portable setup would be useful is that you can take it with you on a plane; or should you need to move your setup in the event of clouds, you can quickly relocate and setup. The Sky-Watcher SolarQuest Alt-Azimuth Solar Mount is a great portable solar mount. This lightweight, highly capable mount comes with a built-in GPS and Helio-Find technology that can automatically locate the Sun in the sky. Additionally, the mount comes with a payload weight of 11 lbs, enabling you to use a smaller telescope like the Apertura 60EDR, the Coronado PST Personal Telescope (great for partial and annular eclipses), the Sky-Watcher Skymax 90mm, and many others. Please note that while the payload weight is 11 lbs, for ease of use we recommend keeping the payload weight to about half the capacity of the mount (~6-7 lbs), including the weight of your DSLR, finder, et cetera.
Should I use a DSLR or can I just use my smartphone?
Now that you’ve identified a mount and telescope to use, it’s time to think about what type of photograph you’d like to take of the eclipse. It is possible to get decent photographs of any type of solar eclipse with your smartphone camera, as your smartphone’s camera app will automatically adjust for the proper exposure. You will need an adapter to place your smartphone into your eyepiece. We recommend the Celestron NexYZ Universal smartphone adapter to adapt your phone to your eyepiece. However, if you have the option, we strongly recommend using a DSLR to photograph a solar eclipse, as the ability to quickly adjust the exposure and the easy ability to attach to a telescope will save you significant headaches. Please note the rest of the article will assume that you’re using a DSLR to photograph the eclipse.
How will I know when the eclipse starts for my area?
If you’re looking to photograph the eclipse, you’ll need to know exactly when the eclipse begins. We recommend using TimeAndDate’s solar eclipse calculator, as it will be able to provide you the exact time the eclipse starts for your area. Additionally, planetarium software such as Stellarium and SkySafari are able to provide you with the exact timing for the eclipse depending on your location.
Photographing a Partial or Annular Solar Eclipse
So you know what setup you’re planning on using and the time the eclipse starts, now what are the best settings to use once the partial phase of the eclipse begins? Remember, even though the filter will block out most of the light from the Sun, it’ll still be quite bright. You’ll want to keep the camera’s ISO relatively low (around 100) and keep the exposure very short (1/4000 to 1/2000). This will be enough to capture the disk of the Sun without overexposing it. If you’re looking to do a timelapse, aim to take a fresh exposure every 5 minutes to see the eclipse progress. Remember, at no point during the partial phase should you remove your solar filter from the front of your telescope!
Photographing a Total Solar Eclipse
If you’re fortunate enough to be in the path of a total solar eclipse, you’ll have anywhere from 2-5 minutes to capture tons of different detail in the Sun’s atmosphere. These different features can be captured by adjusting your exposure and getting the timing just right. IMPORTANT: During totality, it is safe for you to remove your solar filter. Do not forget to remove your solar filter, as you’ll miss out on getting great photos of the solar eclipse! This is the only point during a solar eclipse where it’s safe to remove a filter while looking at the Sun.
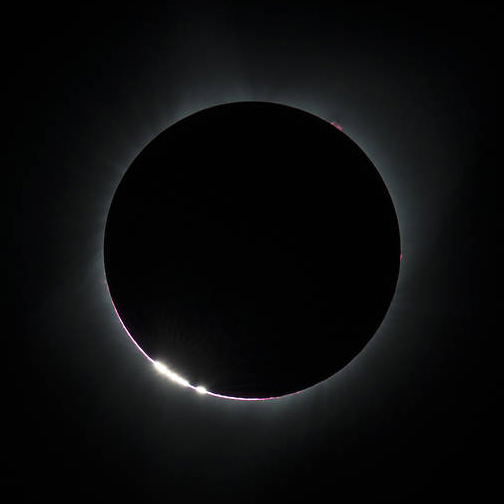
Baily's Beads
Baily's beads occur just moments before second contact (or the point where the disk of the Moon fully eclipses the Sun), right as you’re probably removing your filter. You can use the same settings you would for the partial phase to photograph this portion of the eclipse. This occurs as bright sunlight passes through valleys and hills along the edge of the lunar surface, giving a beady effect to the eclipse.
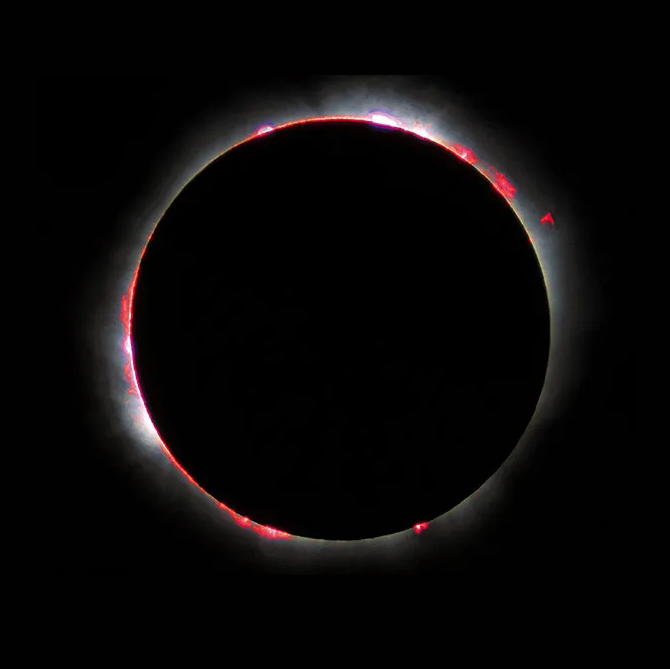
Solar Chromosphere
The chromosphere is a deep-red layer of the Sun’s surface right above the Sun’s photosphere and marks the transition region to the Sun’s corona. It’s normally invisible due to the brightness of the Sun, but during an eclipse, it’s visible around the edge of the Moon. Use the same settings you were using for Baily's beads and the partial eclipse to capture them (low ISO, very short exposure time).
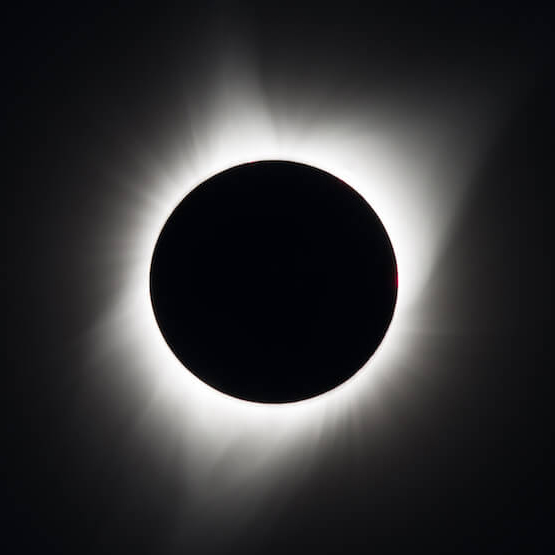
Solar Corona
The solar corona is the next layer of the Sun’s atmosphere that is visible. It’s a pretty faint layer of the Sun, but it’s absolutely massive. Additionally, while the corona is not very dense, it is incredibly hot, with temperatures over 1,800,000 degrees Fahrenheit! To capture the stellar corona, you’ll need to up your exposure to around 1-2”. A longer exposure will capture more of the corona.
Earthshine
Earthshine is the reflection of light from the Earth off the surface of the Moon. Appears slightly bluish in hue due to the blues of our ocean. To capture earthshine, you’ll need to up your exposure to >5”. At this point, you also will likely capture some background stars too!
Other Tips
Shutter Speed Calculator for Solar Eclipses
If you want to remove the guesswork for getting the right exposure during any part of the eclipse, check out Xavier M. Jubier’s Solar Eclipse Time Exposure Calculator! It’s a fantastic tool for you to be able to calculate the exposure required to get the perfect shot for your setup, and will save you a lot of hassle figuring out the settings during the eclipse.
Automating Your Eclipse Photography
If you don’t want to be viewing the eclipse through your camera viewfinder the entire time, consider some software to automate your eclipse photography so that you can enjoy the eclipse while getting stunning photographs! The best software is Solar Eclipse Maestro; it’s a fantastic piece of free software that can be used with most Canon and Nikon cameras. This program will enable you to precisely calculate the exact shutter speed and ISO for your setup to get the best images possible. Unfortunately, Solar Eclipse Maestro is only compatible with Mac OSX, specifically with those using an OS version before MacOS Catalina. However, those with Windows can look to Moonglow Technologies’s Eclipse Orchestrator to automate their eclipse photography.
Just Have Fun!
Lastly, the most important tip for photographing a solar eclipse - just have fun! We just presented a lot of information, and some of it may be overwhelming. If this is your first eclipse, just try to get the best photo of the totality you can. Whatever you do, do not spend the entire time behind the viewfinder! An eclipse is an experience that is felt with all the senses, not just what you see through a camera. In fact, if this is your first eclipse, you might not even want to bother to take a photograph at all! Just sit back, relax, and enjoy the incredible sight and feeling of the Moon’s shadow falling upon you.
This Article was Last Updated on 07/18/2023