ZWO astronomy cameras are known for their precision engineering, sharp performance, and deep integration with modern astrophotography workflows. One standout quality is their high quantum efficiency for efficient photon capture, translating into better detail and contrast in deep-sky images. ZWO offers a wide range of models, from entry-level planetary cameras to full-frame deep-sky imaging powerhouses, all designed with robust build quality and compact form factors. Most models support USB 3.0 or higher for fast data transfer, minimizing bottlenecks during high-frame-rate captures. Cooling systems in these cooled cameras help reduce thermal noise. Integration is another strength: ZWO cameras work seamlessly with their ecosystem of accessories like filter wheels, off-axis guiders, ASIAIR control units, and with third-party software like ASIStudio, SharpCap, and NINA. ZWO cameras offer a rare combination of technical performance, modular flexibility, and price-to-value ratio.
Highlighted Products
AM5N Equatorial Mount and Tripod
ZWO has enhanced its AM5N Equatorial Mount and Tripod with Bluetooth connectivity, reduced periodic error, and a cable management solution, offering a lightweight, high-performance foundation for amateur astrophotographers.
ZWO 200 mm Pier Extension
The ZWO 200 mm Pier Extension is a versatile solution for ensuring your imaging train doesn't collide with your tripod. It adds 200mm to the top of your tripod, providing increased clearance. The ZWO AM5 mount is compatible with various tripods and has a 110 lb. payload capacity.
ZWO Filter Drawer
The ZWO Filter Drawer is a 2" mounted filter designed with ZWO ASI-cooled cameras and EOS lenses. It is compatible with Canon EF-S lenses and features strong magnetic absorption for easy installation and removal. It also includes an M54M-M42F adapter for a full-frame camera connection.
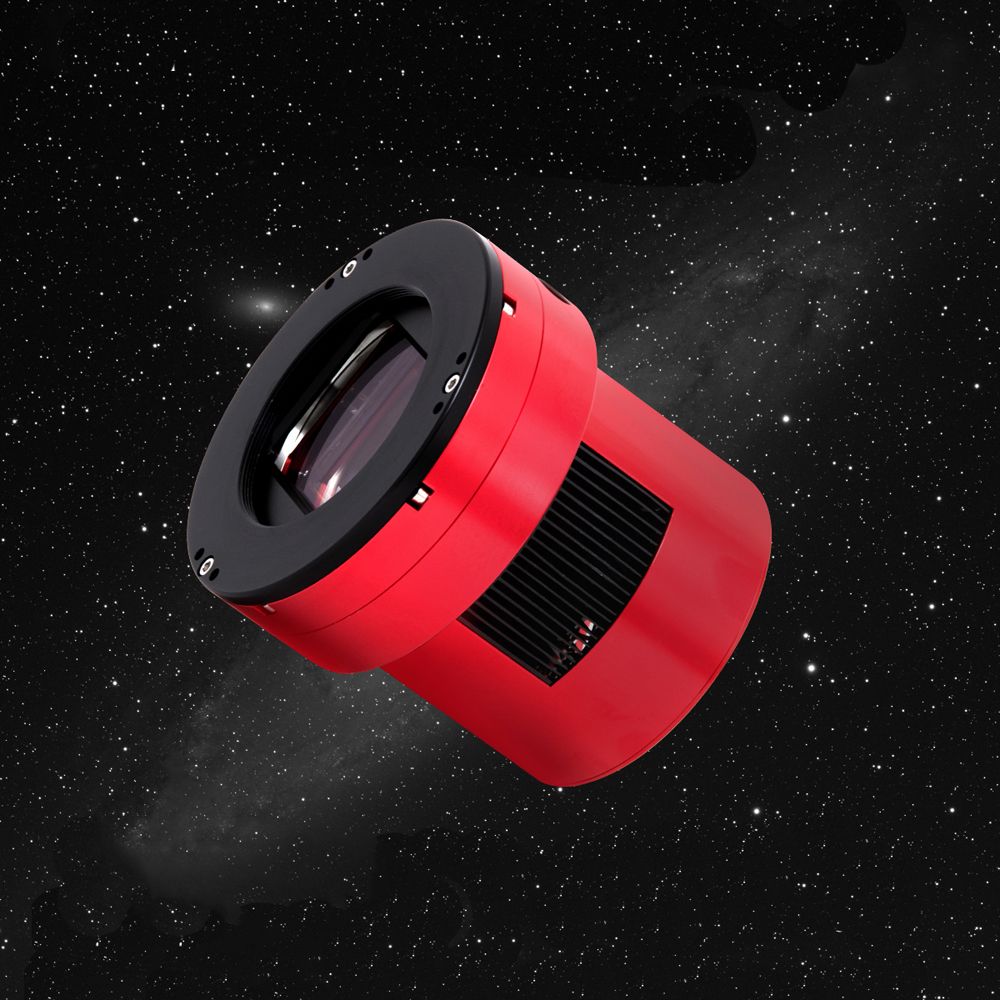
ZWO ASI662MC
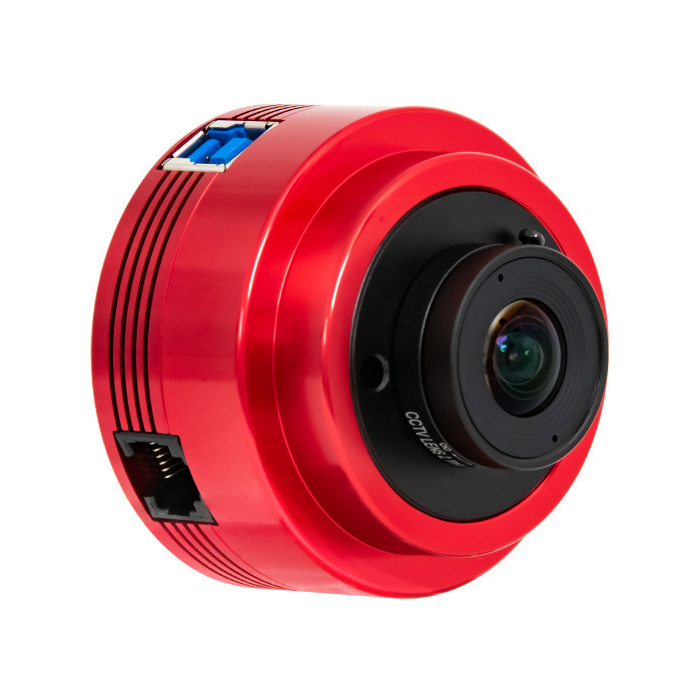
The ZWO ASI662MC is a high-performance color astronomy camera designed for planetary, lunar, and solar imaging. Featuring the back-illuminated Sony IMX662 sensor with STARVIS 2 technology, it offers 91% quantum efficiency, ultra-low 0.8e read noise, and a large 38.2Ke full well capacity. Its 2.9µm pixel size and 1920x1080 resolution capture crisp detail at up to 107.6 FPS via USB 3.0, supported by 256MB DDR3 memory for smooth, high-speed imaging. The camera includes amp glow reduction, a 12-bit ADC, and an ST4 guiding port, making it ideal for imaging and autoguiding.
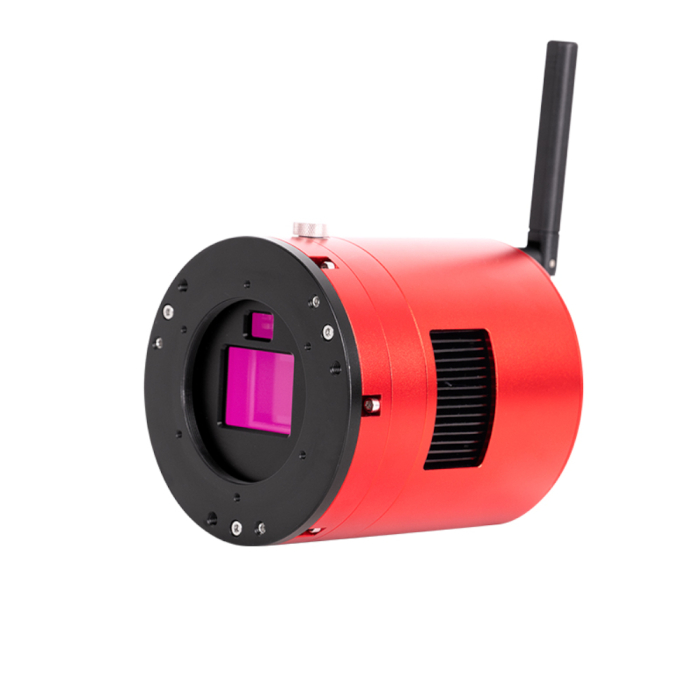
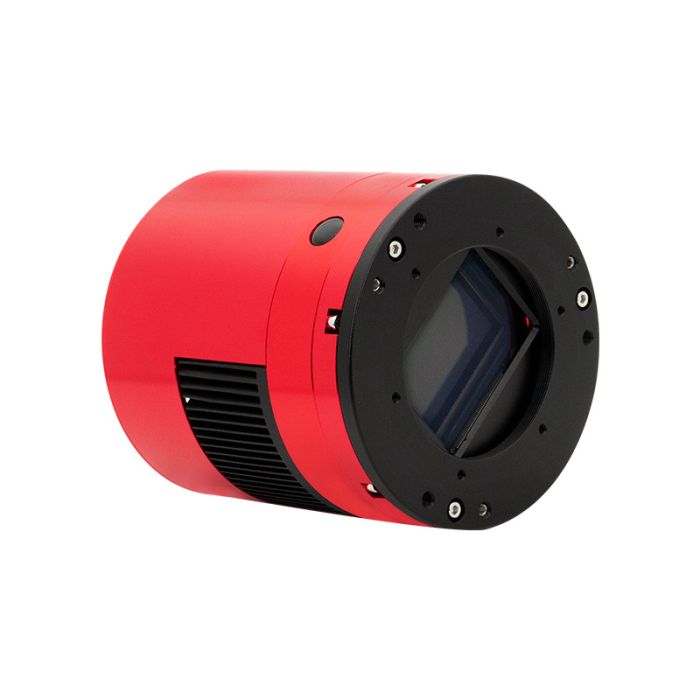
ZWO ASI2600MC-Air Wireless Smart Camera and Guider
The ZWO ASI2600MC-Air Wireless Smart Camera and Guider is an all-in-one imaging solution that combines a high-performance APS-C Sony IMX571 color sensor, a built-in SC2210 guide sensor, and the full functionality of ASIAir wireless control. With 26MP resolution, 80% quantum efficiency, 16-bit ADC, and low read noise (0.9e–4.2e), it delivers stunning deep-sky images. Its integrated ASIAir system supports WiFi and Bluetooth for wireless control, eliminating cable clutter. A 4-port USB hub, power outputs, 256GB storage, and full software support make it ideal for streamlined, high-quality astrophotography.
More About This Category
ZWO Astronomy Cameras are appreciated for their high performance, versatility, and ingenuity and have become industry staples in astrophotography and observational astronomy. Nevertheless, what makes these cameras especially significant in astronomy, and how should they be maintained?
Importance in Astronomy
High Resolution
Renowned for their excellent high resolutions, the ZWO cameras are utilized for astronomical observation. They have highly developed CMOS sensors with minimal noise and excellent sensitivity, which allows them to catch nebulae, galaxies, and star clusters. The cameras' versatility and variety of models devoted to various types of astronomy, including planetary imaging, deep sky picture imaging, and even live video astronomy, are additional features. As the previous discussion has shown, ZWO cameras are preferred by astronomers of all stripes due to their adaptability.
Innovative features
ZWO is a new feature that sets CMS apart and improves imaging quality and outcomes. Its characteristics include a temperature control mechanism to eliminate heat interference, a high data transfer rate, and compatibility with multiple software solutions. Another benefit of ZWO cameras is their exceptional performance at a very low cost compared to other premium solutions. The cost factor has made improved astrophotography more affordable and widely available, which promotes night sky exploration.
Proper Care for ZWO Astronomy Cameras
Some tips include caring for your ZWO astronomical camera and extending its durability and usability. To maintain performance, the camera should be cleaned gently using a soft brush or air blower. If that is not possible, unique solutions should be utilized to remove debris from the sensor without getting close to the device. Store the camera in a dry container and keep camo desiccant packs to help eliminate moisture accumulation. A dew heater can help prevent structural condensation and protect interior structures from moisture in moist conditions.
Astronomy cameras should be handled carefully, particularly while attaching or removing them from your telescope. To reduce thermal stress, keep them from extremely hot or cold conditions. To improve features and performance, routinely check for and install ZWO firmware upgrades. To avoid damage from cable tension and disruptions during imaging sessions, make sure all cables and connectors are firmly fastened. Strain relief devices can be used to achieve this.
Can ZWO cameras be utilized for deep-sky and planetary imaging?
ZWO offers a range of cameras that can fit different types of astronomical imaging. Many of their planetary cameras, such as the ASI120MM, are ideal for planets since they are otherwise designed for high-speed imaging at frame rates. ASI1600MM is one of the best cameras regarding STs, low noise, and high sensitivity, which allows researchers to identify the fine details of distant celestial bodies.
Some benefits people get from monochrome ZWO cameras include using monochrome cameras such as the ASI1600MM Pro, which will give you higher sensitivity and overall resolution than a color camera. They are handy for deep-sky imaging, where imaging even faint object details are essential. Specimen monochrome cameras may also capture vibrant colors by using filters for images with color overlay through LRGB imaging, in which images are captured separately through luminance, red, green, and blue filters.
ZWO astronomy cameras have revolutionized astrophotography by providing reasonable, flexible, and affordable cameras. They are highly recommended for any kind of astronomer because of the numerous integrated features and the vast support their users have. It is so much fun and highly possible to follow and photograph the night sky with your ZWO camera, provided that you protect it correctly and can sustain superb results.
The most excellent full-frame monochrome camera for high-resolution astrophotography is the ASI6200MM Pro. The gadget has a Sony sensor, delivering a breathtaking resolution of 61.2 megapixels. With a pixel size of 75µm and a DR of 14 Stops, the provided JPEG images are among the purest available. This contemporary mechanical design includes TEC cooling to minimize noise, an anti-dew heater to keep moisture out, and a no-amp glow feature that simplifies post-processing prints. An additional component that ensures data processing security is a 512 MB DDR3 memory cache. They rank this camera among the finest because of its superb build, quality, and numerous settings that enable it to capture amazing photos of space.
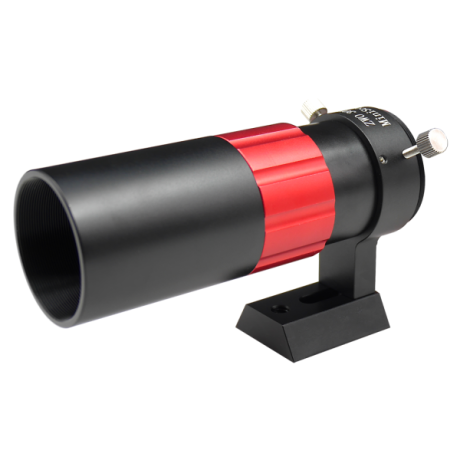
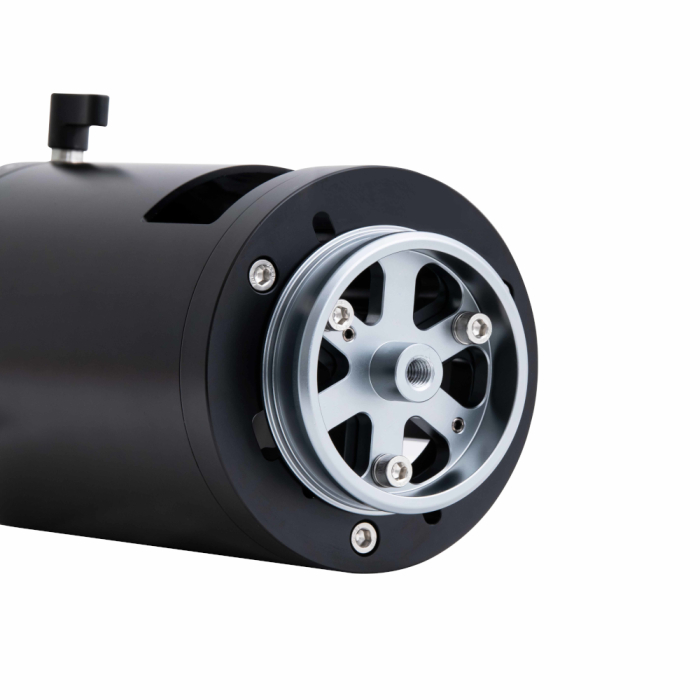
A small and light (460g) astronomical refractor, the ZWO 30mm f/4 Mini Guide Scope is intended to aid with astrophotography. It works with the majority of mounts and telescopes. The mirror features a dovetail and guide rings for uncomplicated installation; however, a t-ring unique to the DSLR camera manufacturer is needed to secure it. The scopes' multi-coated and cemented optical lenses provide sharp, vivid images. Its 1. maintains accuracy. The mount's usefulness is increased by its single guider ring with alignment screws and Synta-style dovetail, as well as its dual-speed, 25" front focuser with 20mm focus travel and lock thumbscrews.
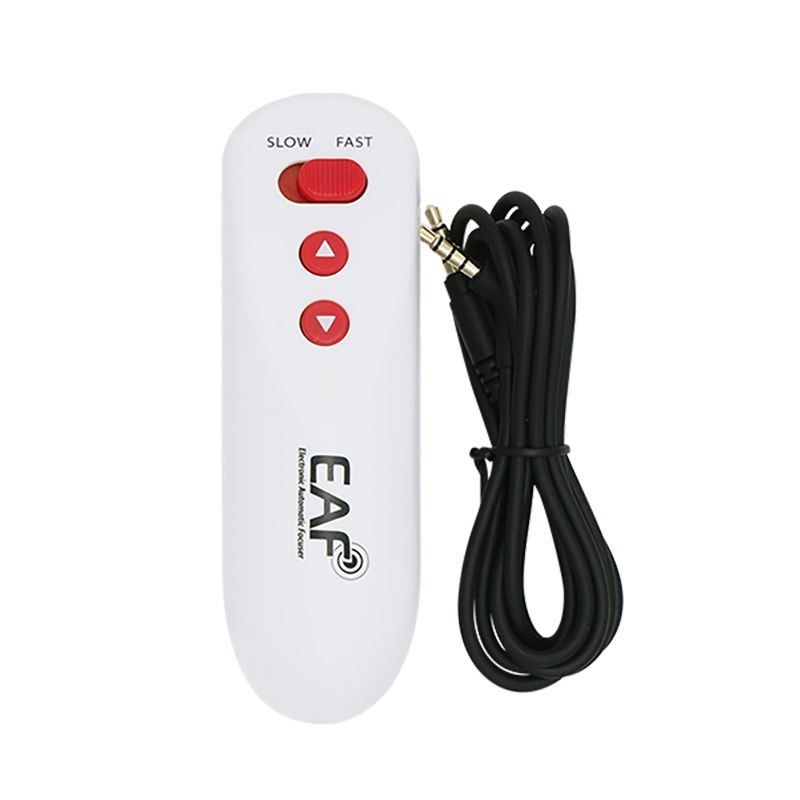
The ZWO Electronic Automatic Focuser and the ZWO Hand Controller for Electronic Automatic Focuser (EAF) have consecutive appearance of smooth APS-material shell. Its contoured slender design assures comfort and ease of handling of the product. A 3. Some controller components comprise a 5mm female connection, buttons – IN & OUT for proper focusing, a 2-line display for clear reading, and the option of slow/fast focusing control. This hand controller is a well-advised tool for any ZWO EAF user because it offers an effortless method of adjusting the focus of one’s telescope. Besides the impressive performance and quality, I found that it has a relatively solid build and could not find any issue with the interface.