500 Rule
In astrophotography, the 500 rule refers to how long of an exposure you can have when taking a non-tracking photo with a camera on a tripod. Any longer of an exposure and the stars will begind to trail. To find this exposure length, you will need to divide 500 by the focal length of your lens. For example, if you have a 35mm focal length for your wide angle lens, then you would do the following: 500/35 = 14.28 seconds of exposure.
Arc Minute
An arc minute is a unit of measurement that denotes the angular size of an object within our night sky. There are 60 arc minutes within a degree of the night sky, and 60 arc seconds within an arc minute. For instance, the Moon is 31 arc minutes in apparent size, and therefore approximately 0.5 degrees, and 1860 arc seconds.
Arc Second
An arc second is a unit of measurement that denotes the angular size of an object within our night sky. There are 60 arc seconds within an arc minute, and 60 arc minutes within a degree. For instance, the Moon has an apparent size of 1860 arc seconds, 31 arc minutes, and about 1/2 a degree.
Auto-Focus
Automatic focusing utilizes software to shift the focus of a telescope in and out to determine the precise focal point of the optics. It does this by reading the star size at each focus point, creating a graph of this data, then finds the minimum star size; bringing the optics into sharp focus.
Backfocus / Backfocal Distance / Backspacing
All optical systems have a point at which an in-focus image is formed, and for astrophotography it is at this location that the camera sensor should be placed. When the telescope is used without corrective elements, this is done easily with the focuser mechanism; and so long as an image can be brought into focus, optimal optical performance will be achieved. However with corrective elements, oftentimes there is a certain distance that the camera sensor needs to be placed away from the rear of the corrector for optimal performance. This will be listed as the backspacing or backfocal distance for the corrective element.
Bortle Scale
The Bortle scale measures how light polluted a particular area is, and classifies the level of brightness from 1 to 9, with 9 being the brightest. This scale is incredibly helpful for astronomers, as the darker the sky, the more celestial objects are able to be discerned.
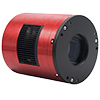
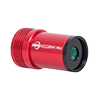
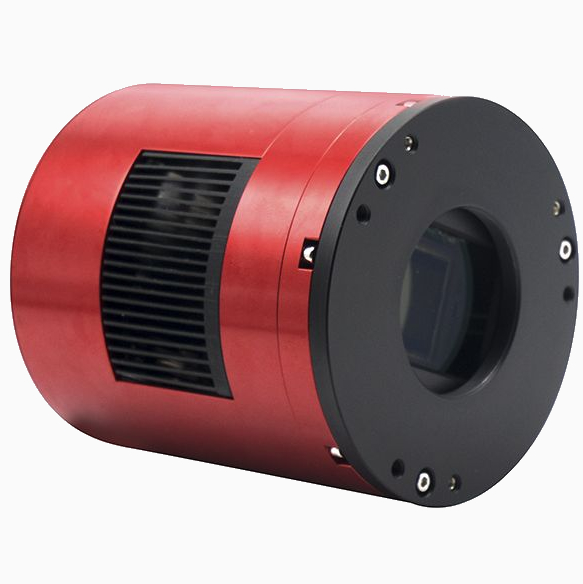
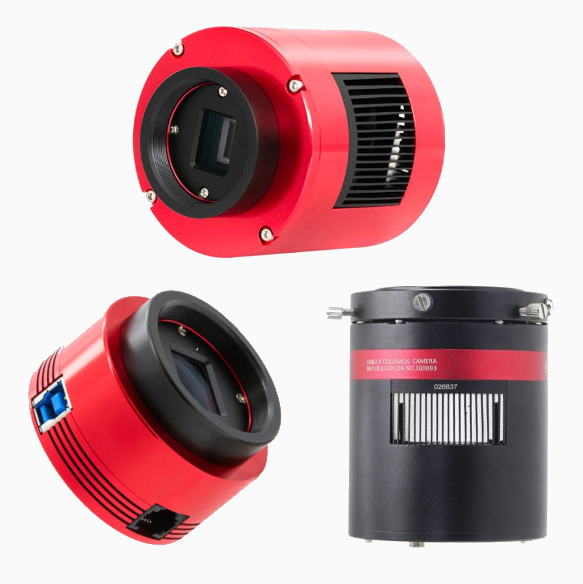
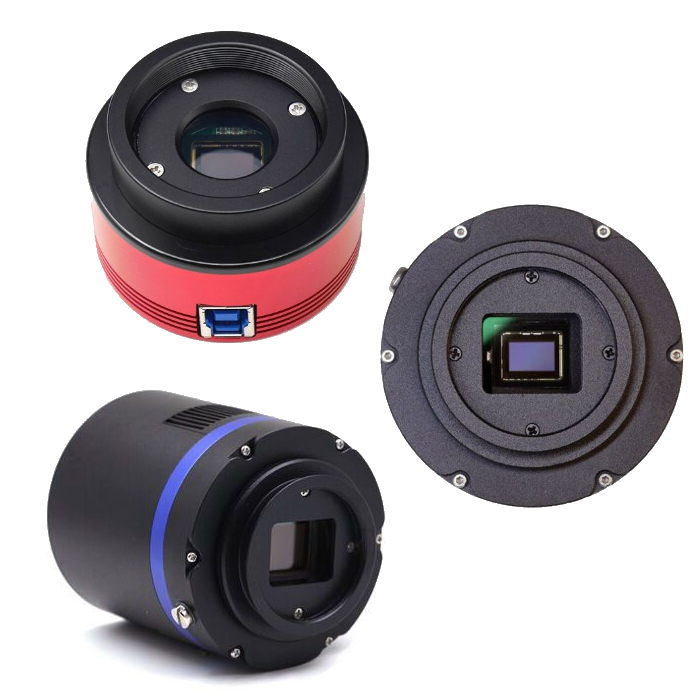
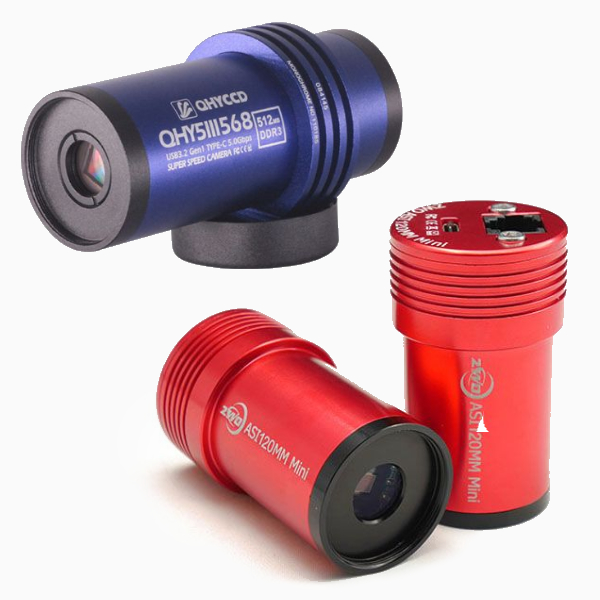
Dedicated Astronomy Camera
Dedicated astronomy cameras are cameras which were specifically designed for astrophotographic applications. They are much more sensitive than DSLR or mirrorless cameras, and are perfect for imaging dim, distant objects. Their ability to capture infrared light is incredibly useful when imaging emission nebula, as these types of celestial objects give off wavelengths within this spectrum. Also, depending on the type of astrophotography they were designed for, they are either fitted with high frame rates for capturing the planets, the Moon, or the Sun, or come with an internal cooling system ideal for deep space imaging.
Calibration Frames
Calibration frames are types of images that are applied to light frames to remove unwanted artifacts caused by a number of different factors. Dark frames are images taken at the same temperature as the light frames, and are necessary to remove hot pixels or other fixed noise for a cleaner image. Bias frames are similar in this aspect, though their purpose is to reduce the sensor’s readout noise seen within the light frames. Another type of calibration frame are flat frames, which remove dust motes or unwanted gradients for a uniform, even field.
CMOS
Complementary Metal-Oxide Semiconductor (CMOS) camera sensors are the most predominant type of sensor available within digital cameras today. Thanks to their low light performance, these cameras produce astroimages of similar quality to the Charged Couple Device (CCD) cameras that were previously used, though at a fraction of the price. Also, CMOS cameras have a much faster readout rate, making them optimal for planetary imaging.
Color Camera
Often referred to as One-Shot-Color (OSC) cameras, these cameras are able to produce an image in full color without the use of additional filters. This greatly simplifies the imaging process, and allows astrophotographers to complete a project in far less amount of time. They are especially useful for those who have limited clear nights, where they can go weeks to months without having an imaging opportunity due to their climate. These cameras are excellent choices to image the planets, the Sun, the Moon, and deep space.
Color Filter Array
With the aim to filter incoming light into each corresponding color, a color filter array lays across the camera sensor with a specific color pattern. For instance, a pixel well with a blue filter over it will only collect blue light, a green filter will only allow green through, etc. The most popular color filter array is the Bayer filter mosaic, with one red filter, one blue, and two green within in a repeating 2x2 grid.
Dark Current
Dark current is the amount of electrons that accumulate within the pixel wells with increased exposure time. These electrons contribute to the overall noise within the images, and proves problematic for long-exposure astrophotography applications. Dark current also depends on the surrounding temperature — the warmer the sensor, the worse the dark current will be. To help combat dark current, most deep sky cameras are fitted with cooling technology to help lower noise drastically.
Dark Frame
A dark frame is a type of calibration frame that aims to subtract sensor heat noise and hot pixels from your final image. These frames are taken at the same exposure length and ISO/gain settings as your light frames, though are taken with the lens cap or telescope cover on instead. In general, the more dark frames you take to subtract from the final image, the better.
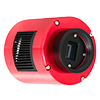
Dedicated Astronomy Camera
These cameras don’t look like what one traditionally thinks of when imaging a camera; instead taking the form of cylinders or pucks, with no physical controls, displays, or viewfinders to speak of. These require a computer or WiFi control device to take images, with more advanced models additionally requiring external power. What they give in return for all of these concessions is granular control over the sensor settings, increased sensitivity to wavelengths that more traditional cameras filter out, options for deBayered sensors (true monochrome), designs that easily connect with astronomy equipment, and in some cases cooling for increased performance.
DSLR / Mirrorless Camera
What one may consider a “regular” camera; used for everyday photography and feature an interchangeable (removable) lens system. Popular brands from this category that also enjoy wide support in the astrophotography hobby are Sony, Canon, and Nikon.
Exposure Time
Exposure time is the amount of time the camera sensor is allowed to collect light. In general, the longer the exposure time, the more light collected, and the brighter the image will become. This should be selected with caution though, as an exposure time that's too long can oversaturate the pixels and blow out the image, resulting in a loss of signal. Determining the correct exposure time is highly dependent on the aperture of the optics as well as the gain settings used. A larger aperture will produce a brighter image than that of a smaller aperture with the same exposure time. In a similar fashion, an image with a higher gain setting will be brighter than a lower gain setting image with equal exposure time. Finding the perfect balance between the aperture, gain, and exposure time will maximize image quality.
Flat Frame
Flat frames are calibration frames that aim to remove any uneven illumination, vignetting, or dust motes from your final image. They are to be taken at the same focus, camera rotation, and ISO/gain settings as your light frames. To take flat frames, the field of view is to be evenly illuminated, either by using a flat panel or with a white t-shirt laid over your telescope pointing at the daytime sky.
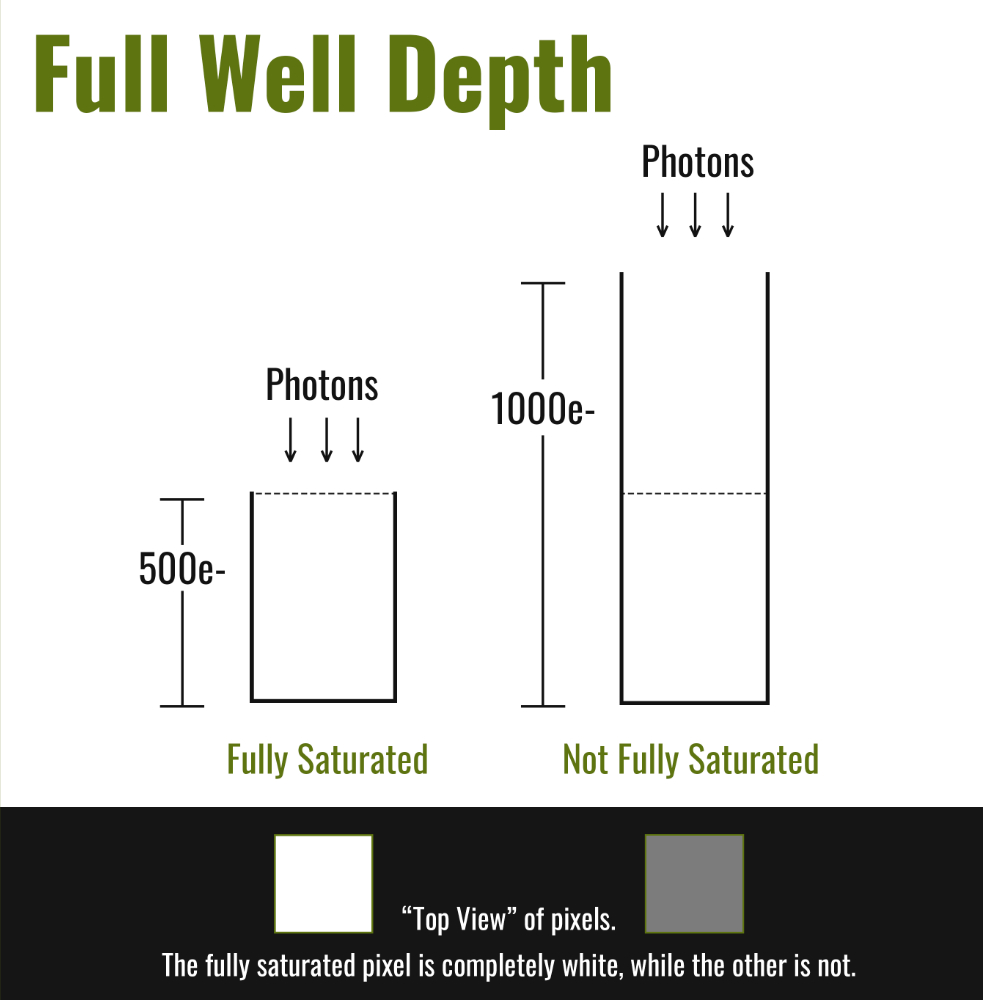
Full Well Capacity/ Full Well Depth
This refers to the amount of signal that a pixel can store before it becomes fully saturated. This becomes important especially with longer exposure times, as if pixels become fully saturated then the contrast between them and surrounding detail will be lost as those details continue to brighten but the saturated pixels remain the same. It is important understand that this is not a static figure, but rather one that much like other camera specifications changes depending on the gain setting.
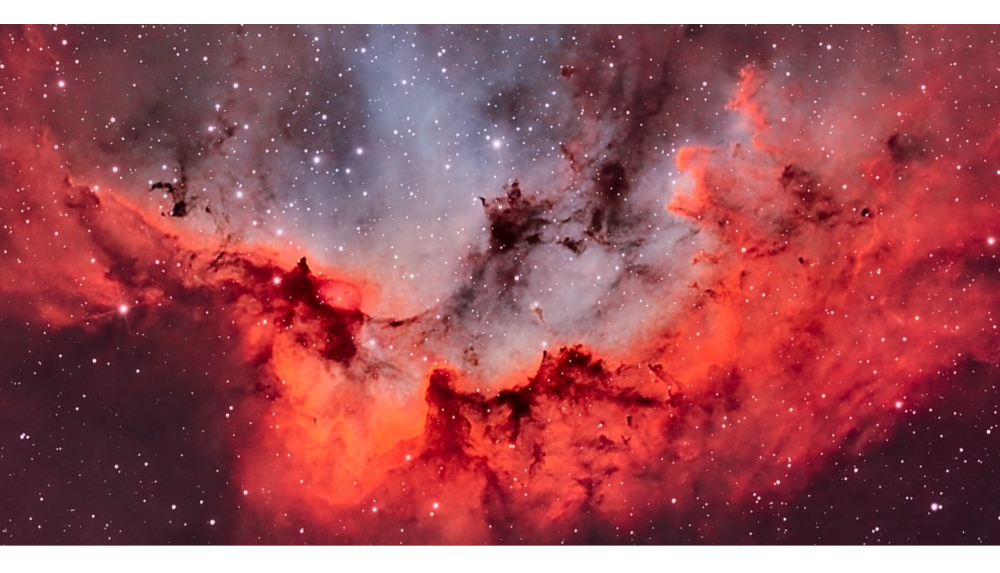
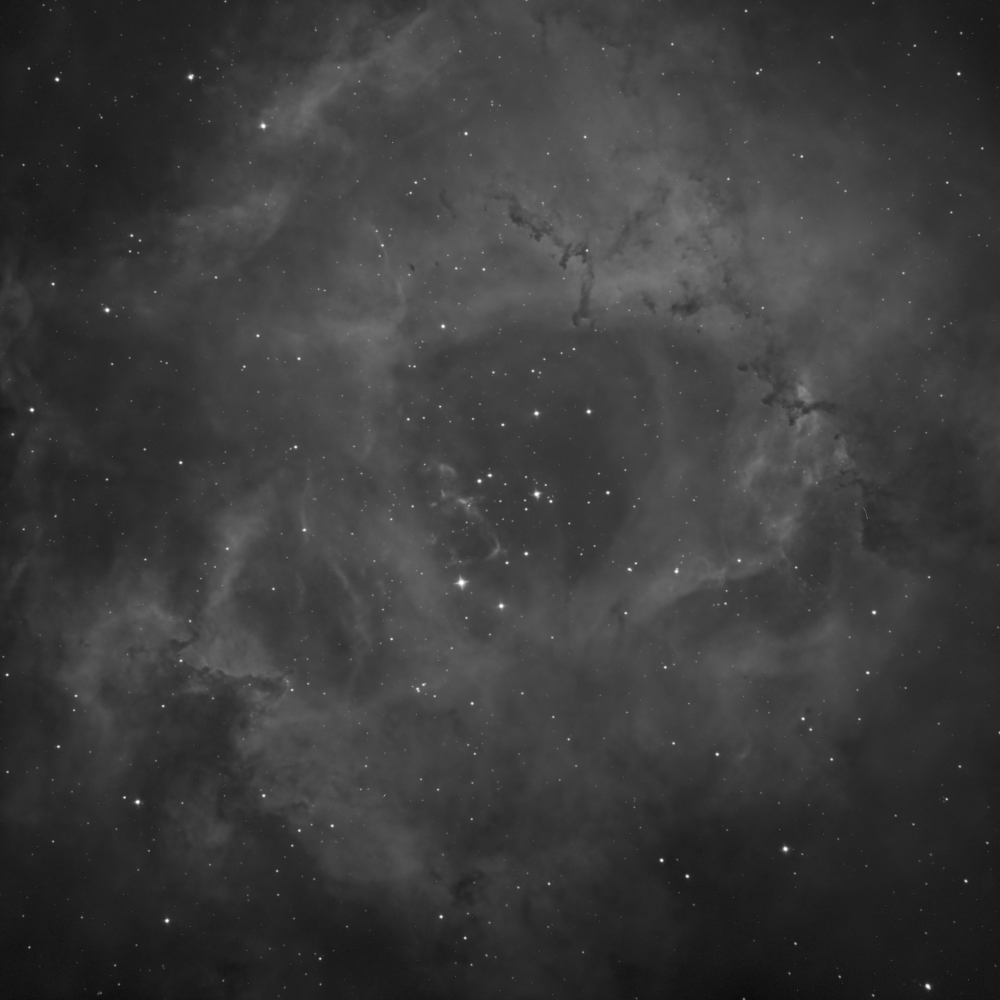
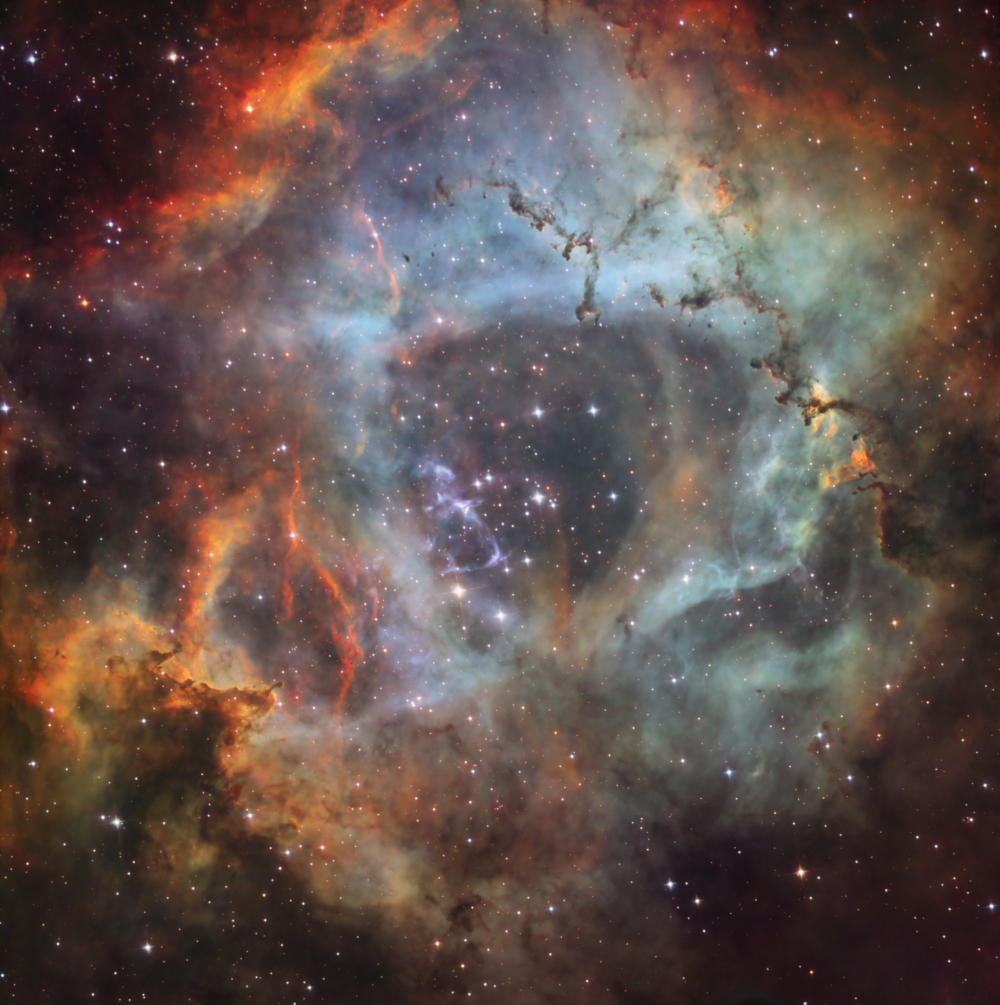
Hydrogen-Alpha (Ha, H-a, H-alpha, Hα, H-α)
In very simplified terms, when atoms change energy levels, specific wavelengths of light can be emitted. Hydrogen has one of these wavelengths (or more specifically, spectral lines) around 656.46 nm, in the form of H-alpha. This is close to red and can be observed in nebulae - or more importantly for the subject at hand, in stars such as our Sun. When being written, H-alpha is commonly shortened to simply Ha in the astronomy community.
Image Capture Software
Astrophotography image capture software are specialized pieces of software designed to operate your astrophotography equipment. There are plenty of options available, though some of the most popular ones are N.I.N.A, Astro Photography Tool, Sequence Generator Pro, and SharpCap, just to name a few. These applications have been designed to provide seamless imaging sessions, allowing extensive opportunities such as target selection, target framing, plate solving, autoguiding, image acquisition, camera cooling, automation, and plenty more.
Image Circle
This specification refers to the area where an image is formed by the optics/ corrective element. This is useful for assessing whether a certain camera sensor size will be supported by the optics, or if vignetting/ poor performance will be seen in frame.
Imaging Train
Your imaging train is your telescope, camera, and any other accessories that are fixed between them, such as filters, filter wheels, off-axis guiders, focal reducers, etc.
Megapixels
A megapixel is one million pixels, and refers to the number of pixels a sensor contains. For example, if a sensor has 2,000,000 pixels, then this would be a 2-megapixel (2MP) sensor. These pixels capture light and color from the subject, and when combined, the signal collected results in an image. This measurement of the pixels available determines the resolution of a sensor and overall quality of the image produced. In general, the more pixels a sensor has, the higher resolution images that sensor will yield.
Modified DSLR / Mirrorless Camera
A type of DSLR or mirrorless camera that has had a filtering component removed. This component, a piece of glass, is put in place to block out frequencies that would otherwise make “regular” images look unnatural; as modern sensors are sensitive to a wider range of frequencies than the human eye can perceive. However there are some frequencies on the edge of this range that are important to astrophotography (mainly Ha), which these filters block to some degree. Accordingly removal of this filter will provide better astrophotography performance, but impact “regular” photo taking unless a clip-in or lens filter that filters these frequencies is used. Given the difficulty of removing this filter, this is something most users need to work with 3rd parties on.
Monochrome Camera
Monochrome cameras deliver the most detail and sensitivity out of all other camera options. Color cameras have an arrangement of pixel filters in a 2x2 grid, typically consisting of two green, one red, and one blue, which is then repeated across the entire sensor in what is known as a Bayer pattern. Monochrome cameras however, have photosites that do not contain an alternating pattern of those red, green, and blue light pre-filters. Instead, their photosites collect all incoming light regardless of color – allowing for up to 3x the collection of signal (red, green, and blue light). Because the camera itself is not pre-filtering each color, in order to produce a full color image, they must be paired with filters to create a full color image. These filters can range from simple RGB filters to narrowband filters, and the collected data is then combined in a photo editing software. Though light is still passed through an external filter, every pixel well is utilized, resulting in 4x more red or blue signal and 2x more green signal compared to a color camera.
Native Backfocus / Flange Distance
These terms are used to describe the distance from the camera’s connection point to its sensor.This is important for back spacing calculations, to account for spacing the camera will be “adding” on its own. Each term is used to describe the same concept with two different systems, with Native Backfoucs being used with dedicated astro cameras and flange distance used with DSLR/ mirrorless cameras; however this rarely comes into play with DSLR/ mirrorless cameras as the T-Rings produced for these systems add the requisite amount of space to for a 55 mm backfocus system.
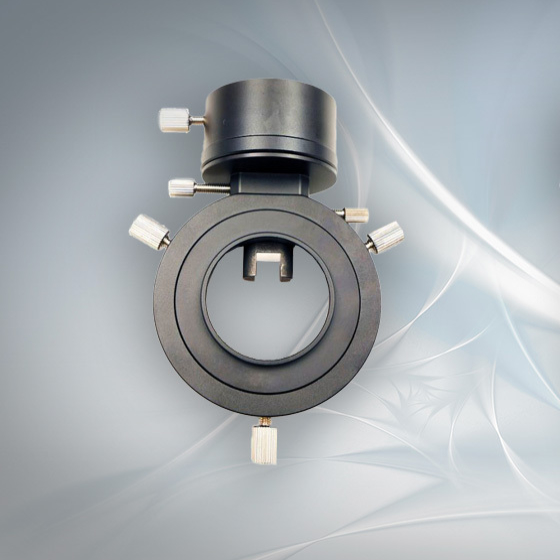
Off-axis Guider (OAG)
As opposed to using a guide scope, off-axis guiders are fitted into the main imaging train itself, and utilizes the incoming light from the primary telescope for guiding. It achieves this via an internal prism that sends light into the guide camera. When using traditional guide scopes, these scopes can alter in position slightly through the night of imaging, causing the issue of differential flexure. But utilizing the main imaging rig’s incoming light, off-axis guiders eliminate this issue.
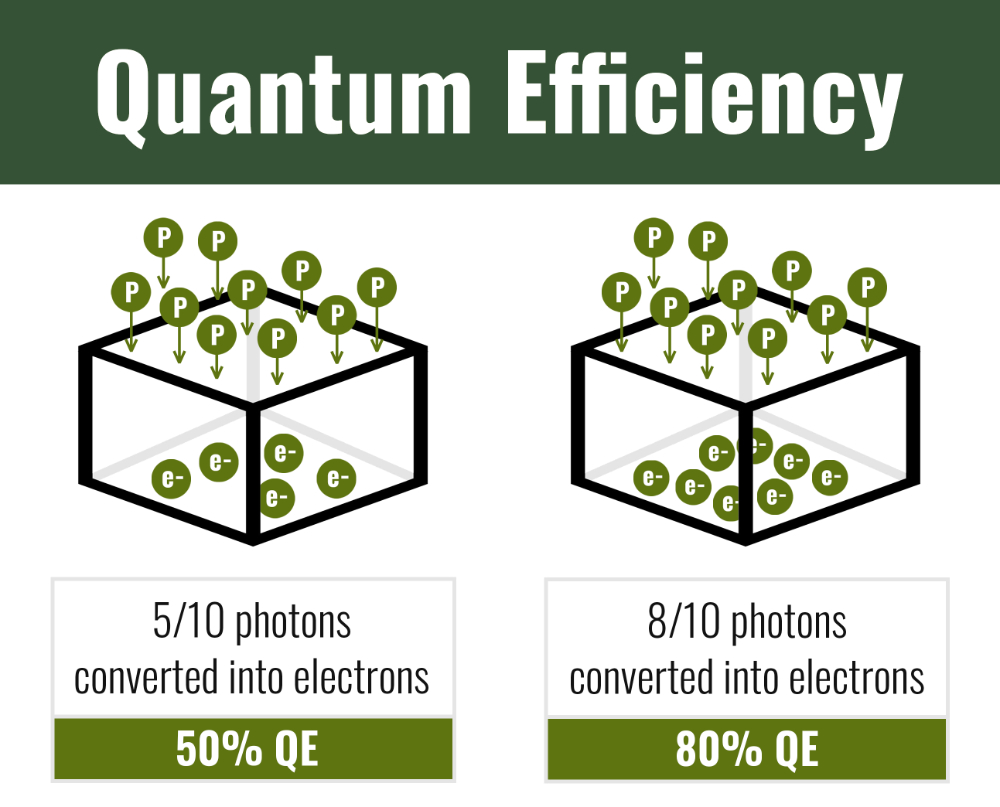
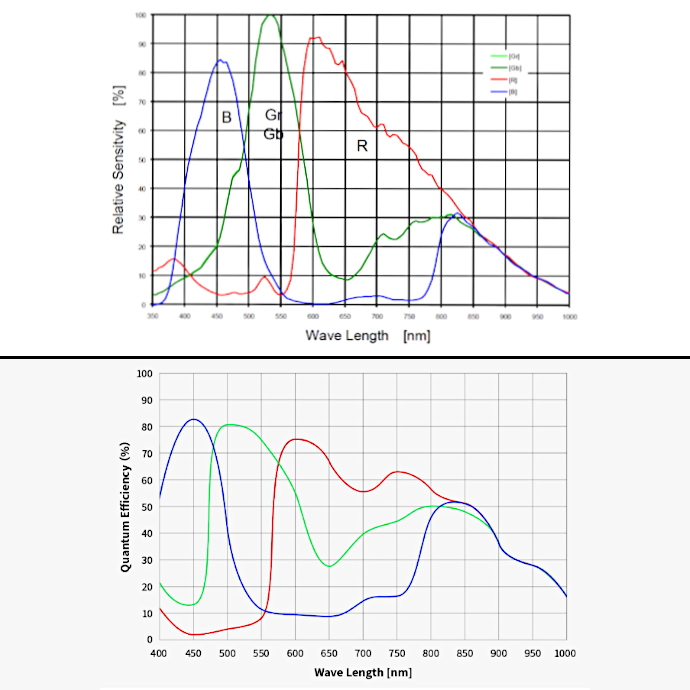
Peak QE
Camera sensors have differing sensitivities to different wavelengths, which are often described as a percentage of how much light of a certain wavelength is converted to actual signal. These are plotted on a graph, which often overlays the sensitivity of the green pixels, red pixels, and blue pixels for each wavelength. The peak quantum efficiency, or peak QE value, is the highest percentage measured across all of the pixels on the camera sensor.
Pixel
Digital images are made up of many, many, small boxes arranged in a grid, and these boxes are called pixels. To create these digital images, camera sensors are similarly made up of thousands or millions of small light measuring components arranged in a grid. These too are referred to as pixels.
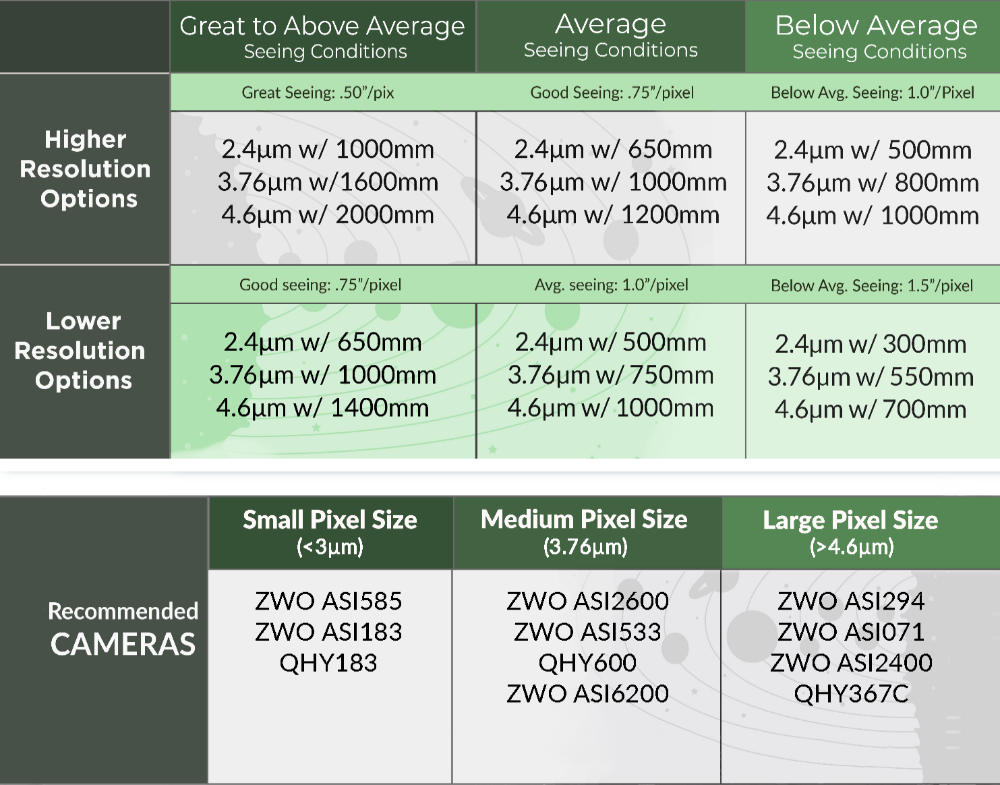
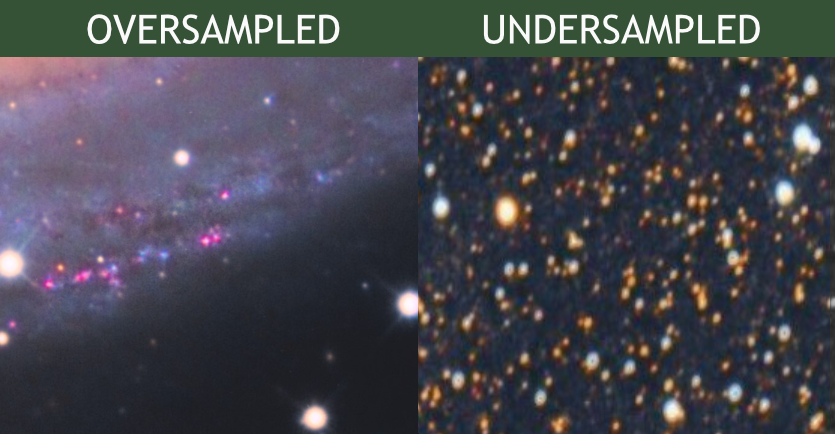
Pixel Size
When describing camera sensor pixels, the pixel size refers to the measurement across one pixel, corner to corner. This is listed in μm (micrometers, also called microns). The larger the pixel size, the more surface area available to collect light, resulting in a higher signal-to-noise ratio. In contrast, the smaller the pixel size, the less of a chance of photon collection, though more detail will be able to be resolved when light is captured. Pixel size also plays a huge role in the sampling of the image. It's important to ensure your telescope's focal length and chosen pixel size will yield images that are not too oversampled nor too undersampled for the best possible image quality.
Post-Processing
In order to complete an astroimage, it’s necessary to bring the captured frames into software to perform post process editing. This action varies for different types of astrophotography, though in general, it involves image stacking to reduce noise and remove artifacts, and image editing to enhance the captured detail and color.
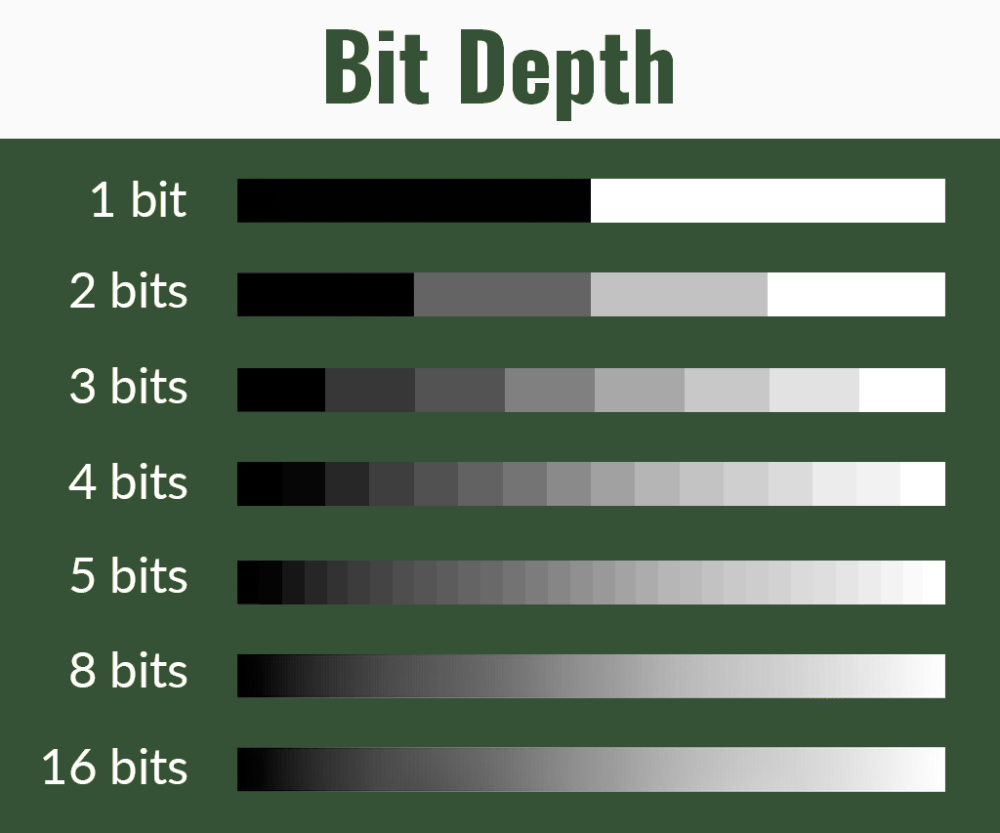
Resolution / Resolving Power
In terms of camera sensors, the resolution is the number of pixels each image contains. It will typically be listed either in a width-by-height format, such as 1920x1080, or as the total number of pixels (given in megapixels). More resolution is generally better as it provides more detail, the ability to zoom in or crop an image more before pixelation becomes visible, or the ability to present or print the picture larger. As a frame of reference, a typical Full HD TV or monitor is 1920x1080 (2.1 MP) with 4K screens coming in at 3840x2160 (8.3 MP).
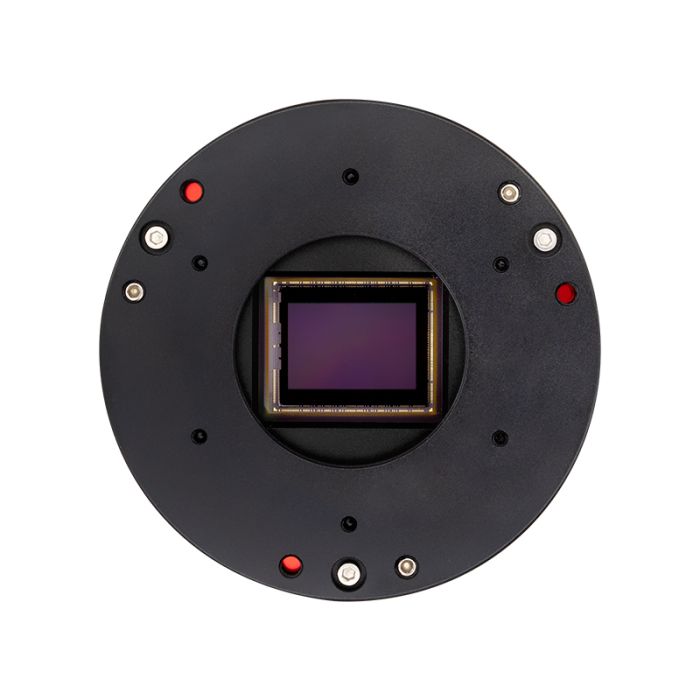
Sensor
A camera sensor is the main component of a DSLR, deep sky camera, or smart telescope that turns incoming light into data that can then be displayed on digital devices like mobile phones or computers. Accordingly, these are just as important as the optics of a system for a quality image. There are a wide variety of specifications that are important for a sensor - physical size, pixel size, resolution, dynamic range, amounts of image “noise”, and other technologies such as back-side illumination. As a result there is also a wide variety of sensors available that attempt to balance these in differing ways for different applications and price points.
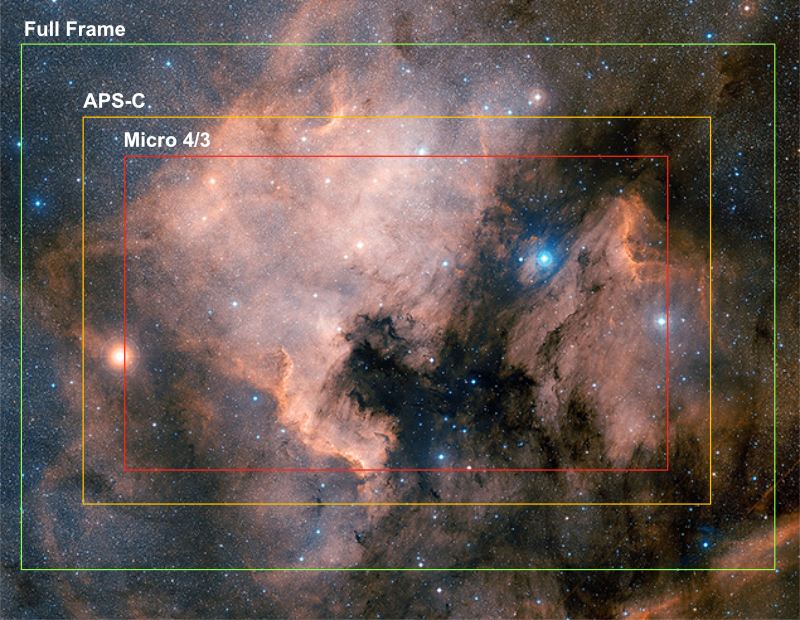
Sensor Size (Full Frame, APS-C, Micro 4/3, Etc)
Imaging sensors come in many different porportions, such as 4:3 or 1:1, and physical sizes. There are some common combinations that have received a name - full-frame, APS-C, micro four thirds (4/3). The most important component of sensor size for astrophotography is the measurement from corner to corner (diagonal) of the sensor, which can then be compared to a telescope/ corrective element's image circle to assess how well the two may pair.
Spacer
These are fairly simple components, designed to add spacing to an imaging system. While there are some sizes that have become common due to corrective element backspacing, dedicated astronomy camera native backfocus, and popular accessory thicknesses coalescing around certain spacing distances, there are still plenty of unique sizes and thickness available for unique builds/ equipment.
Stacking
A method used to bring out what would otherwise be faint or invisible detail and contrast in an astrophotography image. When imaging a target, the longer an exposure is, generally the more faint detail will become visible. However as exposure time becomes longer several complications emerge - motion blur due to compounding small deviations or errors in tracking, increased sensor noise and glow, and overexposure of the bright areas of an image. Stacking mitigates these issues by combining a number of shorter exposure images, commonly called sub exposures, sub frames, or simply “subs”, into one image that effectively has a longer exposure time. The stacking process can further improve the resulting image with the use of calibration frames that help identify and compensate for visual artifacts introduced by the optics or sensor itself.
T2/ T2 Thread
Connections listed as T2/ T2 thread/ T2 thread diameter are referencing a M42x0.75 standard. This shorthand originates from the days when astrophotography was done with film and remains popular to this day, though referring to this type of connection simply as M42 is becoming more prevalent. It is noteworthy that at this point in time that there is no consensus on what thread pitch should be used for M42 (or M48) threads, though most are close to the 0.75 mm specification. As a result, while most all T2 thread size/ M42 components will thread together, on occasion you may encounter components with these labels that do not work together.
T-Adapter
Typically this is used to describe an accessory for SCT telescopes, which is threaded to the back of the OTA or reducer (replacing the visual back). These spacers add enough space to the imaging train such that only the industry standard 55 mm of backspacing remains. For information on the adapter that connects directly to a DSLR/ mirrorless camera, see T-Ring.
USB
Universal Serial Bus or USB is a protocol for data transmission, and is by far and away the most common way astronomy equipment will communicate with a PC in a wired capacity. There are a number of USB connectors, such as USB-A (the rectangular port you’re likely familiar with), USB-B, USB-C, and micro USB; as well as a number of different revisions (2.0, 3.0, 3.1, etc.) that have brought more speed, power, and reliability to the protocol.
Vignetting
Vignetting is seen as the darkening of the corners of the frame within an image. This happens when the camera sensor is not exposed to enough light, resulting in a shadow effect along the borders of the image. This issue presents itself for a number of reasons, though most commonly occurs when using incompatible sensor sizes and image circles, and using too small of filters for the imaging assembly.