ZWO OAG Off-Axis Guider
Elevate Your Guiding with This ZWO OAG Off-Axis Guider
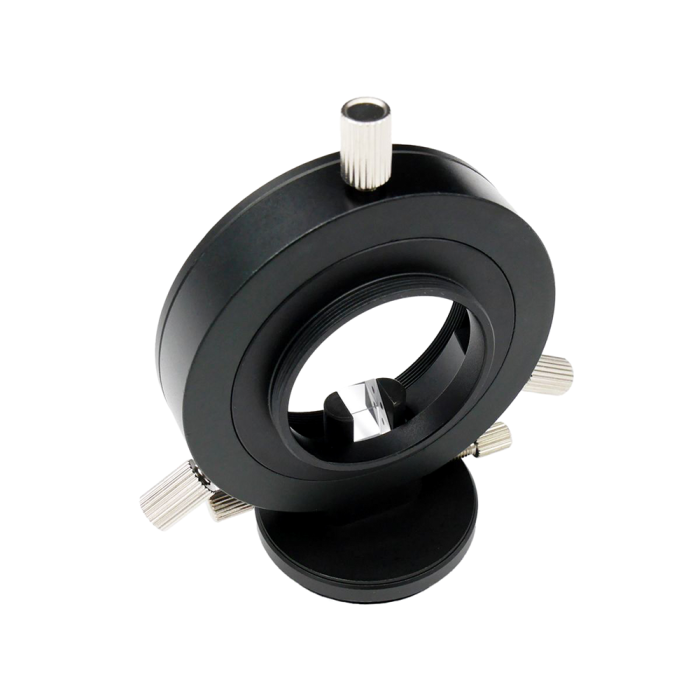
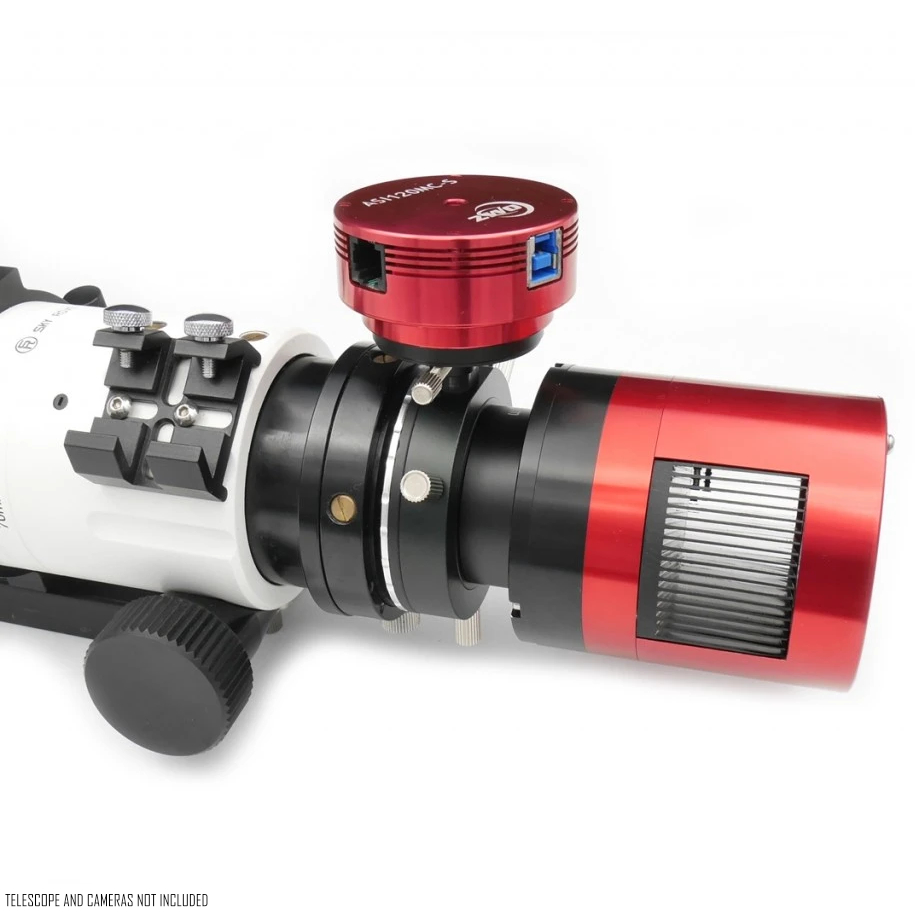
If you’re looking to take your guiding to the next level, the ZWO Off-Axis Guider (OAG) is the perfect choice! Simple in design, this device eliminates the need for a separate guidescope, and fits directly into your imaging train. Utilizing a small prism to point incoming light from your main telescope into your guide camera, your imaging camera and guide camera will have the same field of view, therefore the issue of differential flexure is dramatically reduced. Also, without an external guide scope, the use of this ZWO OAG helps keep the weight and size of your imaging system to a minimum. Thanks to the ingenuity from ZWO, this OAG is a must have within your astroimaging toolkit!
Lightweight in design, this ZWO OAG adds very little bulk to your system, and is 16.5 mm in width for seamless integration into your imaging train. The 8*8 mm prism itself is large enough to collect an abundant amount of light for your guide camera, while also small enough to stay out of the way of your main imaging camera’s light path! This ZWO OAG comes fitted with an M48 adapter and an M48-M42 adapter, making it easy to adapt to your imaging camera and telescope, and is compatible with all the latest ZWO ASI cameras. Also, its rigid build ensures a secure fit to minimize any flexing within the imaging train. With its compact size, versatile design, and sturdy construction, this Off-Axis Guider from ZWO is the perfect for anyone building or updating an astroimaging system imaging in 2025!
The Guiding Solution for You!
This Off-Axis Guider is designed to offer a simple yet effective approach to enhance your guiding experience. Its robust design ensures stability, while its adjustable nature makes it easy to adapt to just about any imaging system. Read more as we take a deeper dive into the aspects of this ZWO OAG below!
Improved Guiding Accuracy
Solving the problem of differential flexure, that is, the misalignment between the guide camera and main camera’s field of view, off-axis guiders ensure both cameras share the same optical path for the best possible results. This means any small shifts due to wind, temperature change, vibrations, or more, equally affect both cameras. This results in better tracking performance and sharper stars! Off-axis guiders are particularly useful for long focal length imaging, as even the slightest of tracking errors can become quite detrimental.
Focusing Made Easy
For accurate results, both your imaging camera and guide camera must come into focus simultaneously. This means the distance from the prism to your imaging camera must be the same distance from the prism to your guide camera. You’ll first want to focus your imaging camera, then move to focusing your guide camera afterwards. Pro tip: it’s best practice to find focus during the day, as to ensure accuracy and preserve clear sky time. To find focus with your guide camera, you will simply loosen this thumb screw (circled in the image to the left) and adjust the positioning of your guide camera until the image becomes sharp and clear. Once you have found focus, retighten this thumb screw and you’re all set! As long as you are imaging with the same main imaging camera, you will not need to refocus your guidescope very often, given the back focal distances will be preserved. If you’d like to make your focusing routines much easier, you can do so by adding this 1.25” helical focuser (not included) offered by ZWO.
Effortless Prism Adjustment
To ensure the prism does not obstruct the light path to the main imaging sensor, ZWO has made it easy to adjust its positioning. The three large thumb screws found on the side of the OAG body can be loosened, enabling rotation for side-to-side adjustments to the prism. If you need to adjust the prism up or down, first loosen the bottom M4 set screw (circled in the image to the left) with the included M4 hex wrench. Next, slide the prism up or down, ensuring it’s out of the way of the imaging sensor. Once you have found the proper positioning, retighten the M4 set screw, and you’re all set to image!
Astronomy Hub: Your one-stop-shop for Astrophotography Knowledge!
Our Gear Experts have compiled a wealth of information to help expand your astrophotography knowledge! Below you’ll find links to articles, videos and "how-to" guides. Just one more reason that our Astronomy Hub is a one-stop-shop for all your astronomy and astrophotography needs!
| Off-Axis Guiding |
| Autoguiding |
| ZWO ASIAIR Ultimate Guide |


