


What is a Total Lunar Eclipse?
A total lunar eclipse occurs when the Moon passes through the Earth’s shadow in space. Since lunar eclipses can only happen at full Moon, you might think it’s possible for a lunar eclipse to occur every month, but that’s not the case. This is because the Moon’s orbit is inclined at an angle of 5 degrees, so the Moon will typically pass just above or below the Earth’s shadow as it moves along its orbit. As a result, lunar eclipses usually only occur twice a year.
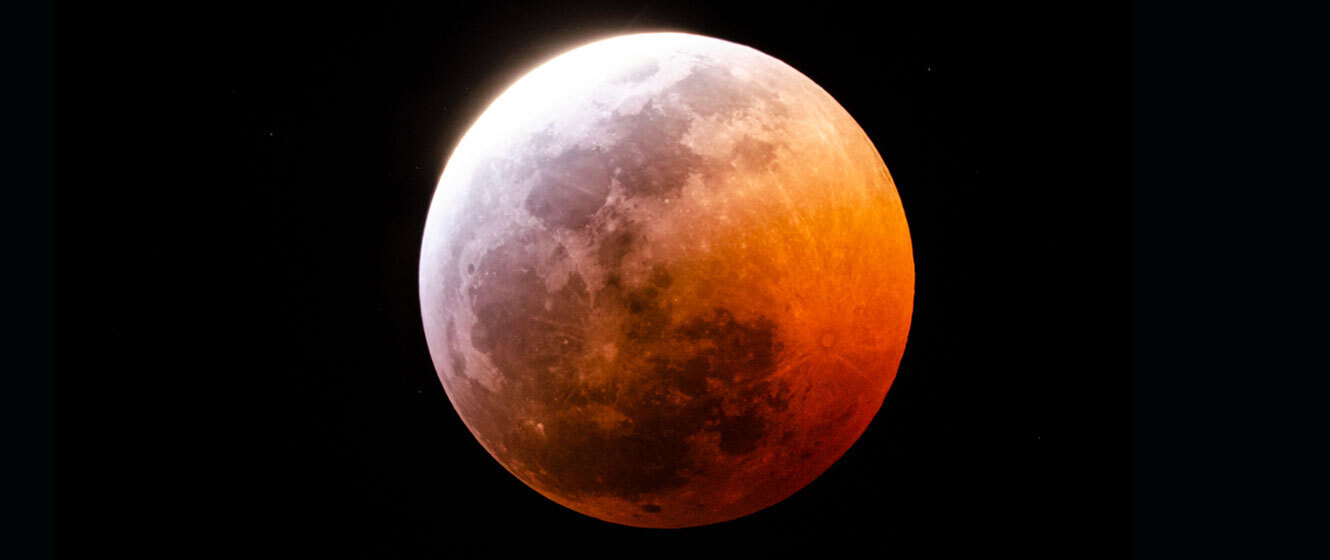
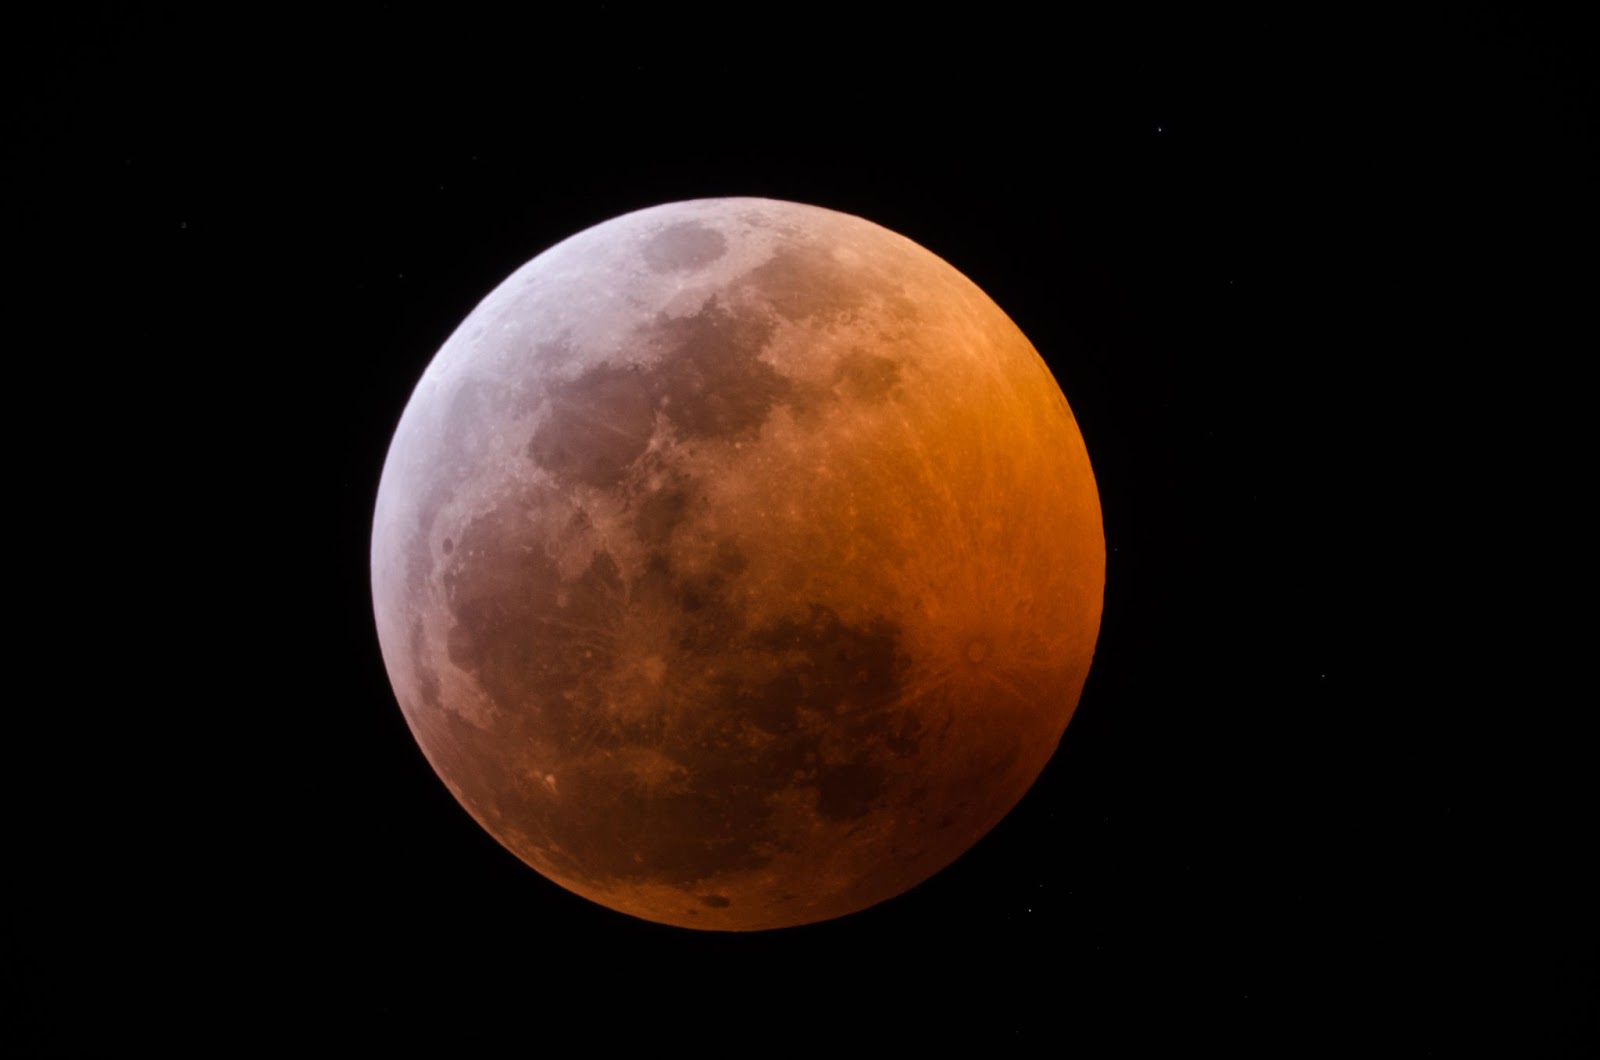
During an eclipse, the Moon takes on an orange-red appearance. This is due to the scattering of light by the Earth’s atmosphere, with the strength of the color dependent upon the pollutants present in the atmosphere at the time. For example, lunar eclipses occurring after a volcanic eruption have been known to be darker.
The Stages of a Lunar Eclipse
First contact: The first stage of a lunar eclipse is called P1 (first contact), and it occurs when the Moon enters the penumbra - the outermost region of Earth’s shadow. Since this is the lightest portion of the shadow, there may only be a slight darkening of the Moon, and the chances are you might not notice any difference at all.
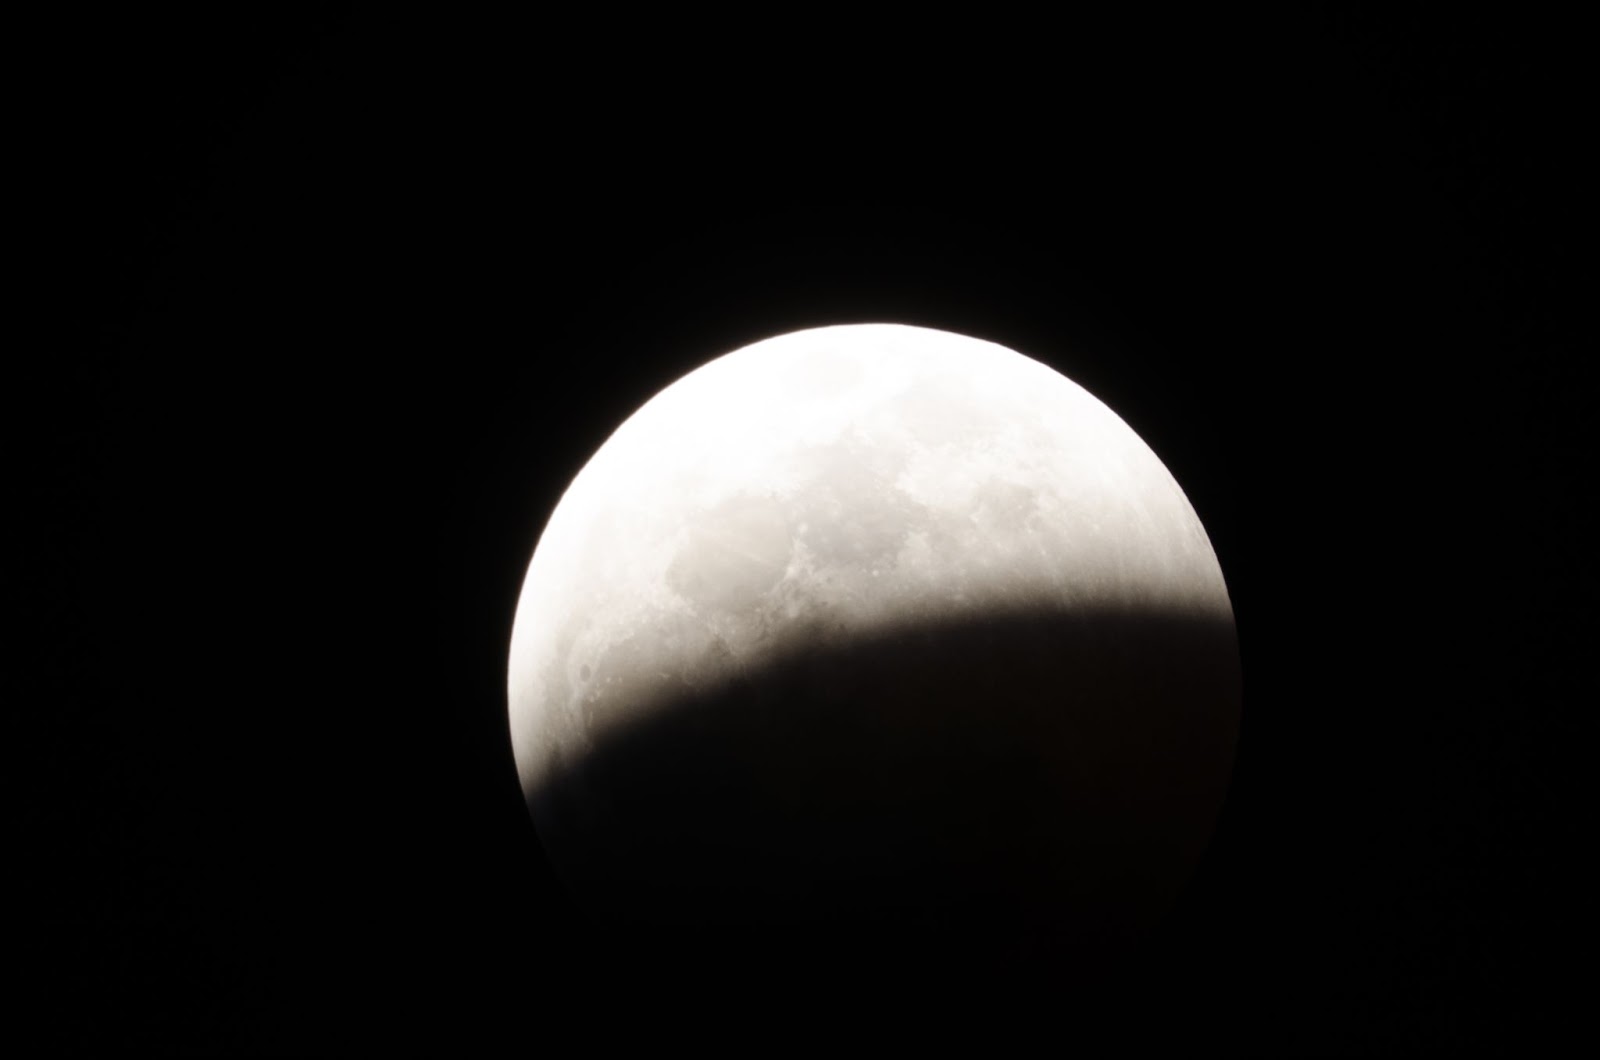
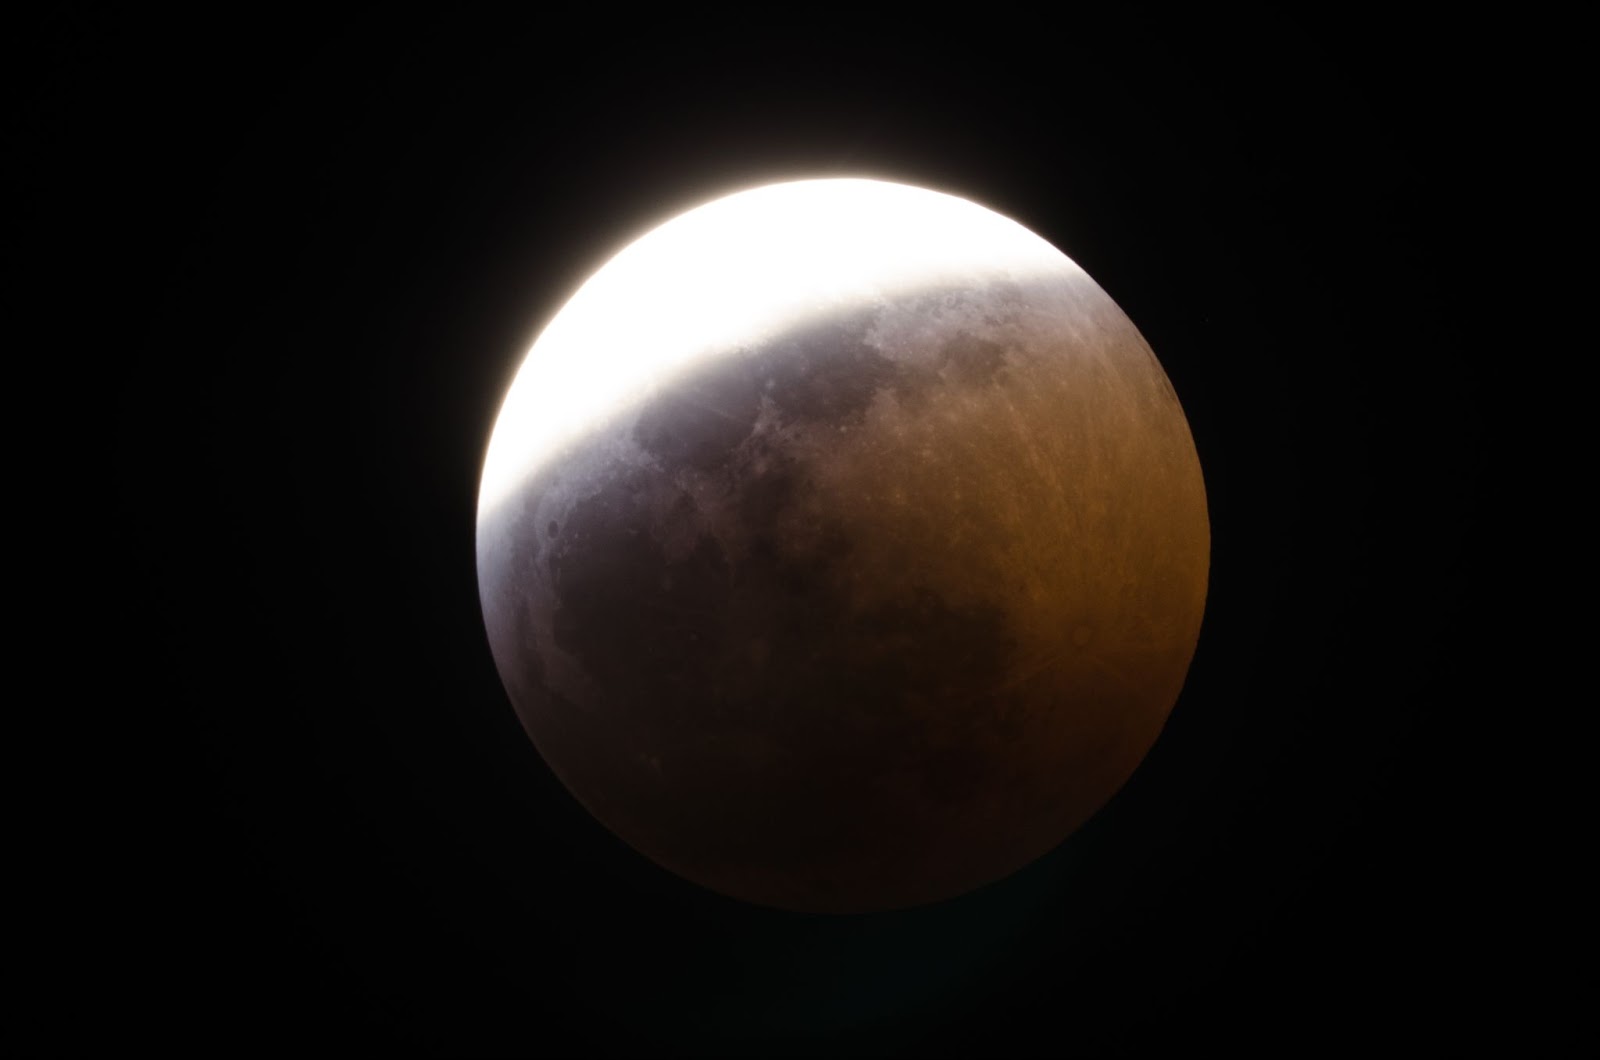
Second contact: Also known as U1 (second contact), this is when the lunar eclipse truly begins, as the Moon crosses into the portion of the Earth’s shadow called the umbra. The umbra is the center of the shadow, and is therefore the darkest. This phase lasts about an hour, and you’ll see the Moon’s disc progressively turn orange as the shadow moves across its surface.
Third contact: Known as U2 (third contact), this occurs once the Moon is completely engulfed by the umbra, and marks the start of totality. At this point, the Moon’s entire disc appears orange-red, and you’ll notice fainter stars appearing in the sky that would otherwise be washed out by moonlight. If you’re at a dark sky site, you may be in for a special treat, as the Milky Way might even appear.
Fourth contact: Known as U3 (fourth contact), this is when the Moon starts to leave the umbra, and you’ll start to see the orange shadow slowly retreat across the Moon’s disc. At this point, totality has come to an end, and the eclipse has entered a second partial phase. This continues up through U4 (fifth contact), where the Moon has completely left the umbra and appears its usual color. Finally, P4 (sixth contact) marks the end of the eclipse and occurs when the Moon leaves the penumbra.
Planning for a lunar eclipse
As you plan for the eclipse, it’s important to consider how you intend to capture your images. Here’s a breakdown of some examples of lunar eclipse photography, and while this is by no means an exhaustive list, it does cover a good range of photos you can take.
Smartphone Attached To Telescope
If you’re looking to take a few quick snapshots of the partial phases of the eclipse, a simple smartphone camera may be sufficient. We recommend using the Celestron NexYZ Universal 3-Axis Smartphone Adapter to securely attach your camera to your telescope eyepiece. Your smartphone’s camera can automatically adjust the shutter speed to get good photos during the partial phase, but the darkness of the Moon during totality may make it difficult for it to get a clear shot at that time.
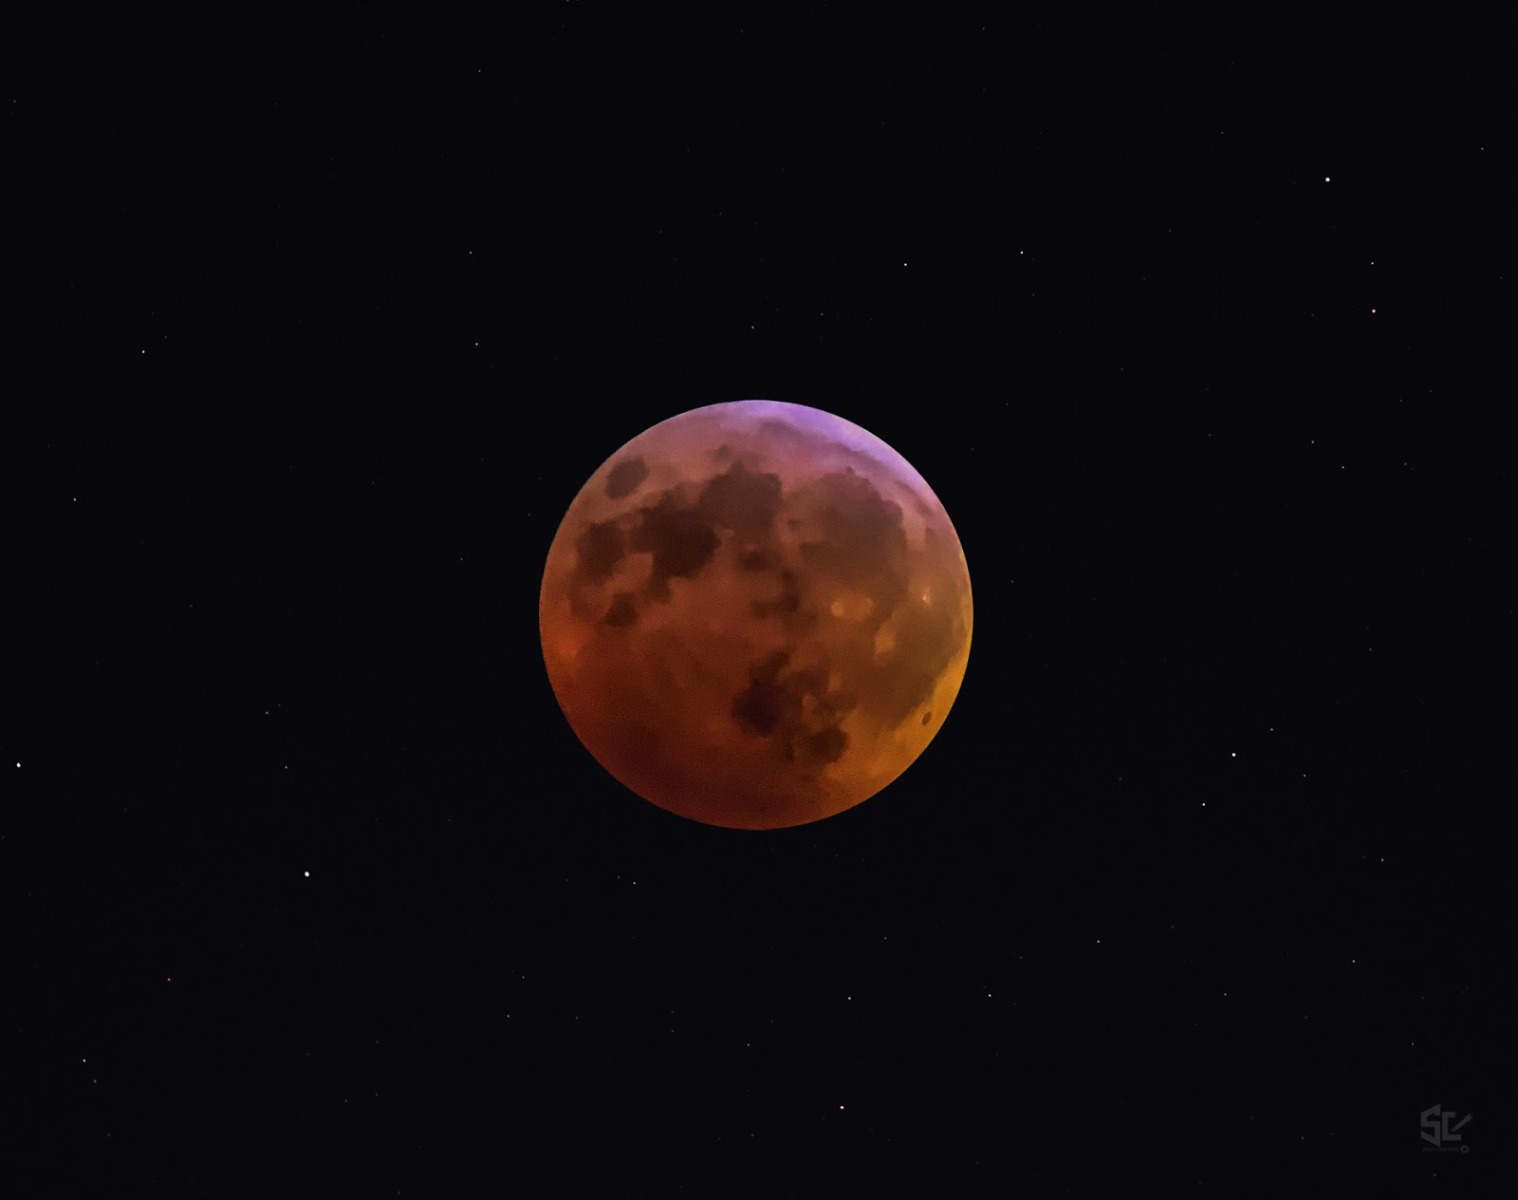
Image of the January 2019 total lunar eclipse with a smartphone camera. Credit: Samil Cabrera
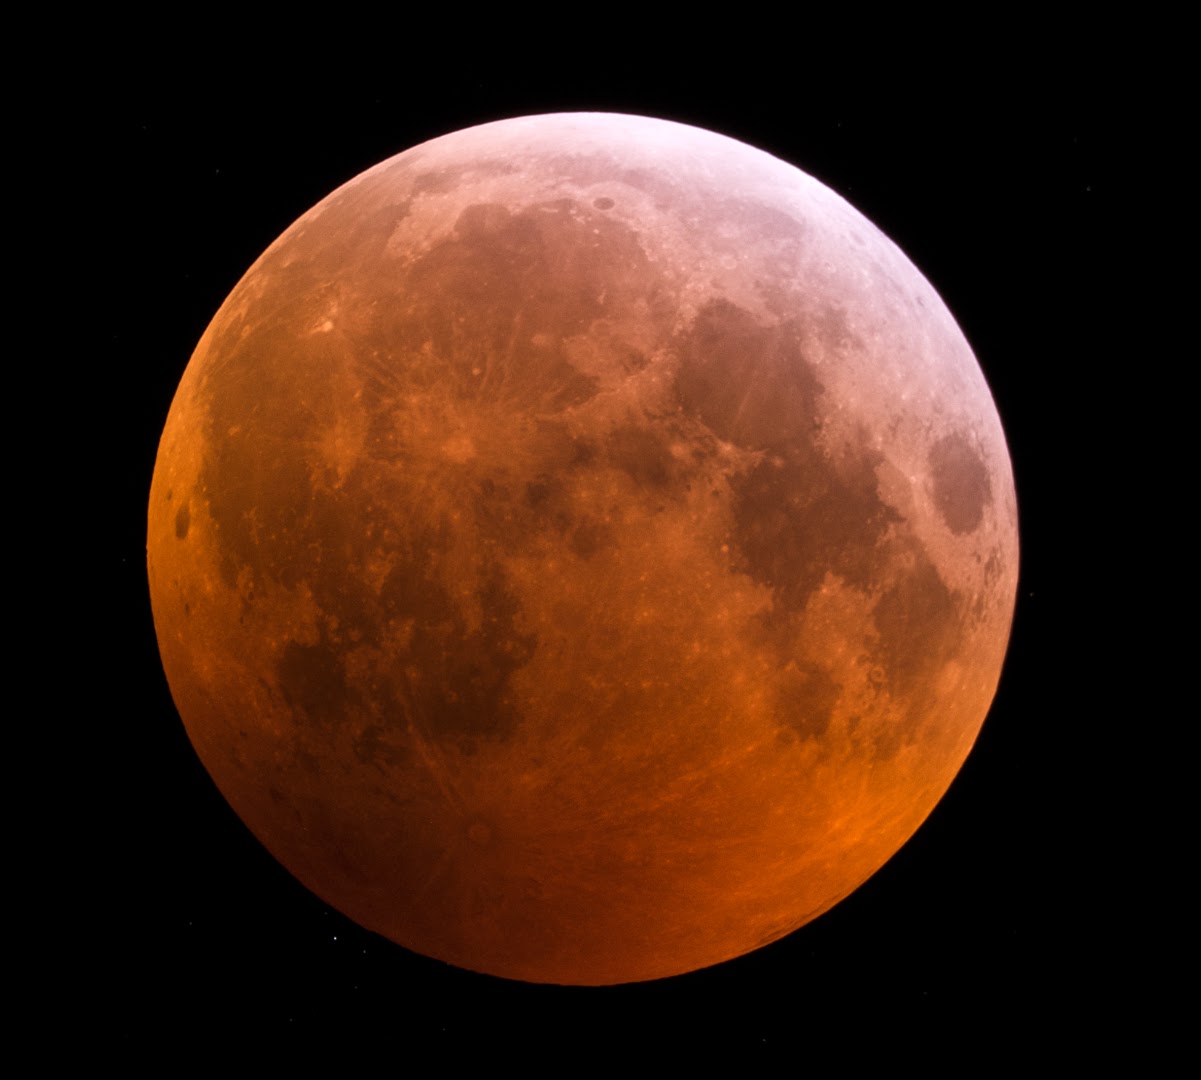
Image of the January 2019 total lunar eclipse taken with a Nikon D5100 through a Celestron 6SE telescope
DSLR attached to telescope or telephoto lens
For the best possible results during totality, we strongly recommend using a DSLR. A telescope or a camera lens with a focal length of 400-800mm, (such as the Apertura 72EDR) would be ideal for your first lunar eclipse.
If you’re attaching your DSLR directly to a telescope, we recommend using an Apertura M42 T-Ring for your Nikon or Canon DSLR, along with a Baader 2” T2 Nosepiece. Combined, these two accessories should enable you to reach focus and take some stunning photos. However, make sure your focuser can accept 2” eyepieces.
Wide-angle star trail
This is by far the most simple type of photograph you can take of a lunar eclipse. If you’re using a lens with a focal length of anywhere from 10-20mm, you can take a series of 30 second to 1 minute exposures over the duration of the eclipse. Then, using a program like StarStaX, you can turn your images into a single star trail.
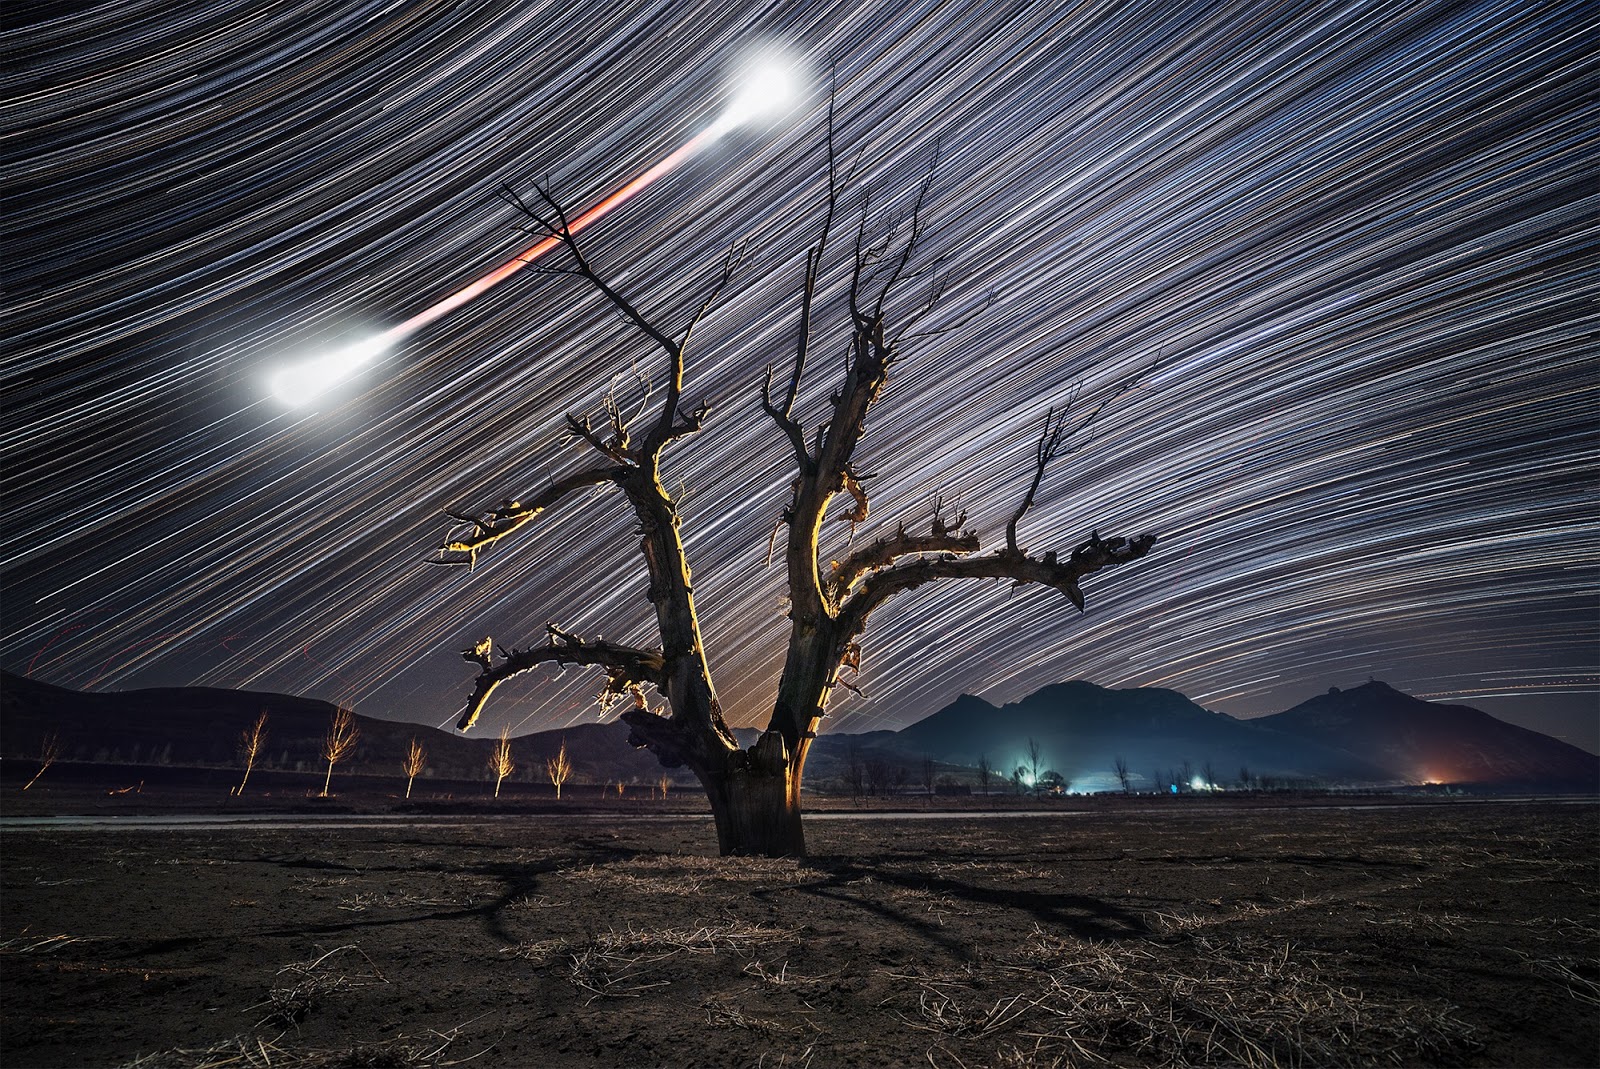
Image Credit & Copyright: Haitong Yu
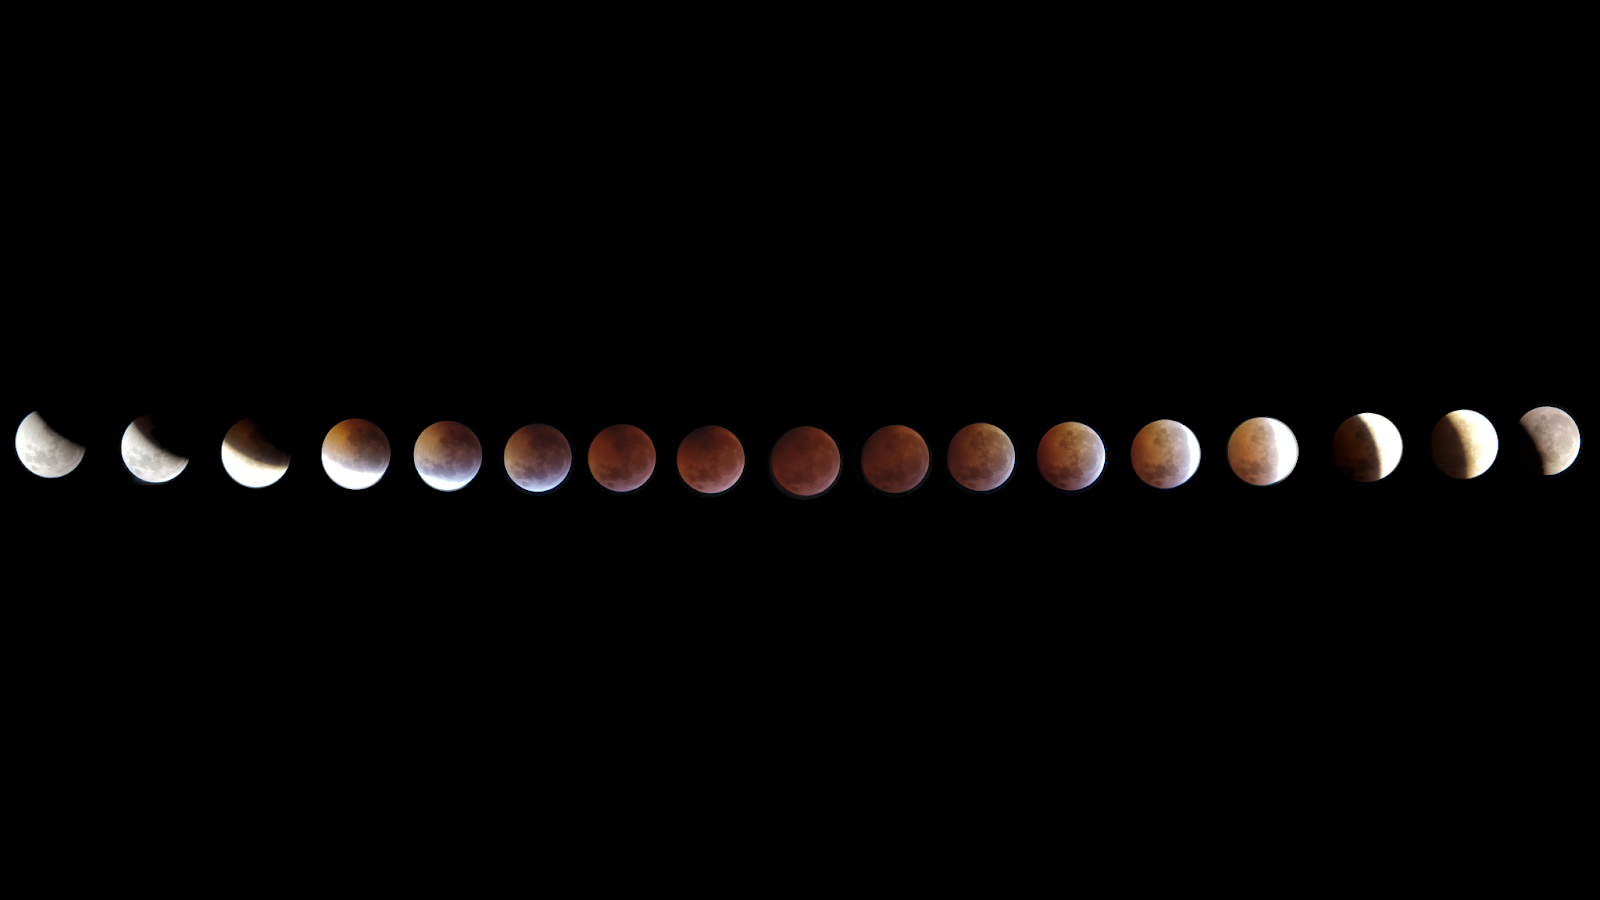
Timelapse composite of the January 2019 total lunar eclipse taken with an 8” Newtonian. Image credit: Jona Krahl
Timelapse
Making a timelapse video is another awesome method of capturing the eclipse. By taking hundreds of shots over the span of a few hours, you can make a video capturing the progression of the Earth’s shadow as it moves across the Moon!
To do this, it’s recommended you use an equatorial mount, otherwise the Moon will appear to rotate throughout your timelapse as the eclipse progresses.
While planning for the eclipse, it’s also important to know your exact location, as you’ll need to know when each phase of the eclipse begins. Timeanddate.com is a fantastic online resource, while Stellarium, or a similar planetarium software or app, will be able to give you precise timing at your location for each portion of the eclipse.
What Not to Use to Photograph a Lunar Eclipse
Smartphone With No Optical Aid
If you’re hoping to point your smartphone up to the sky and get a good picture, you’ll be sorely disappointed, as the camera’s low magnification and wide field of view will result in the Moon appearing as a small point of light in your image. Additionally, the image will appear grainy, and won’t be nearly as impressive as it appears with the naked eye or through a telescope.
As such, we strongly recommend purchasing at least a small telescope if you want to get decent images with your smartphone.
CMOS / CCD Camera
While it’s certainly possible to get breathtaking images with your CMOS or CCD camera, if this is your first lunar eclipse we recommend against it.
Here’s the reason why: CMOS and CCD technology requires the camera to first cool down, which, in turn, reduces noise and produces a better image. Consequently, the amount of time it requires for you to fiddle around with software connections, cool the camera down, and adjust the gain and exposure time, will all take away from your enjoyment of the eclipse. The ease of a DSLR camera will really shine in comparison.
Other Tips to Photograph a Lunar Eclipse
Calculating the exact exposure time for your camera can be frustrating, especially as the Earth’s umbra appears to quickly engulf the Moon. However, you can easily calculate the perfect shutter speed and ISO for your setup by using Xavier M. Jubier’s Shutter Speed Calculator for Lunar Eclipses (v1.0.2). This fantastic tool will save you a lot of time, while also maximizing your enjoyment of the eclipse.
Automating your Eclipse Photography
If you don’t want to be viewing the eclipse through your camera viewfinder the entire time, you also should consider using software to automate your eclipse photography. That way, you’ll get the best of both worlds: you can enjoy the eclipse and produce some stunning photographs!
If you have a Mac, the best software is Lunar Eclipse Maestro; it’s free, and can be used with most Canon and Nikon cameras. This program precisely calculates the exact shutter speed and ISO for your setup, allowing you to get the best possible images. Unfortunately, it’s only compatible with those macOS releases prior to Catalina.
Meanwhile, anyone running Windows 7 or higher can install DigiCamControl, which allows the creation of custom scripts to photograph the eclipse. While more complex than using Lunar Eclipse Maestro, this method - with the right time invested - provides even more flexibility in your eclipse photography.

Any Questions? Contact Us!
If you have any additional questions about what gear you should purchase for the lunar eclipse, please reach out to our gear experts! We love astrophotography and we are happy to assist you in getting the best photo possible.

Contributing Writers
 Kyle
KyleDenny
Click the arrow above to see MLA, APA, and Chicago Manual of Style citations.
MLA:
Denny, Kyle. "How to Photograph a Lunar Eclipse," AstronomyHub, High Point Scientific, 24 Jul. 2023, https://www.highpointscientific.com/astronomy-hub/post/how-to-photograph-a-lunar-eclipse.
APA:
Denny, K. (2023, July 24). How to photograph a lunar eclipse. High Point Scientific. https://www.highpointscientific.com/astronomy-hub/post/how-to-photograph-a-lunar-eclipse
Chicago Manual of Style:
Bibliography:
Kyle Denny. "How to Photograph a Lunar Eclipse," AstronomyHub (blog), High Point Scientific, July 24, 2023. https://www.highpointscientific.com/astronomy-hub/post/how-to-photograph-a-lunar-eclipse.
Footnote:
Kyle Denny, "How to Photograph a Lunar Eclipse," AstronomyHub, High Point Scientific, July 24, 2023, https://www.highpointscientific.com/astronomy-hub/post/how-to-photograph-a-lunar-eclipse.
This Article was Originally Published on 06/21/2021


