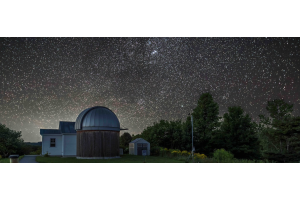
PixInsight is an incredibly powerful tool for an astrophotographer, however, it has a huge learning curve to it. You can do things such as remove light pollution, color calibrate your images, reduce noise, and so much more. We’re going to review our preferred method for creating stunning images of the night sky with PixInsight.
Keep reading to follow our step-by-step instructions, or check out the video below to see examples of how this is done, using three images submitted by our followers on Instagram:
Basic Post-Processing with PixInsight Tutorial (2022)
Step One
Open the saved image. This will usually be a .tiff, .fts, or .xisf file.
Step Two
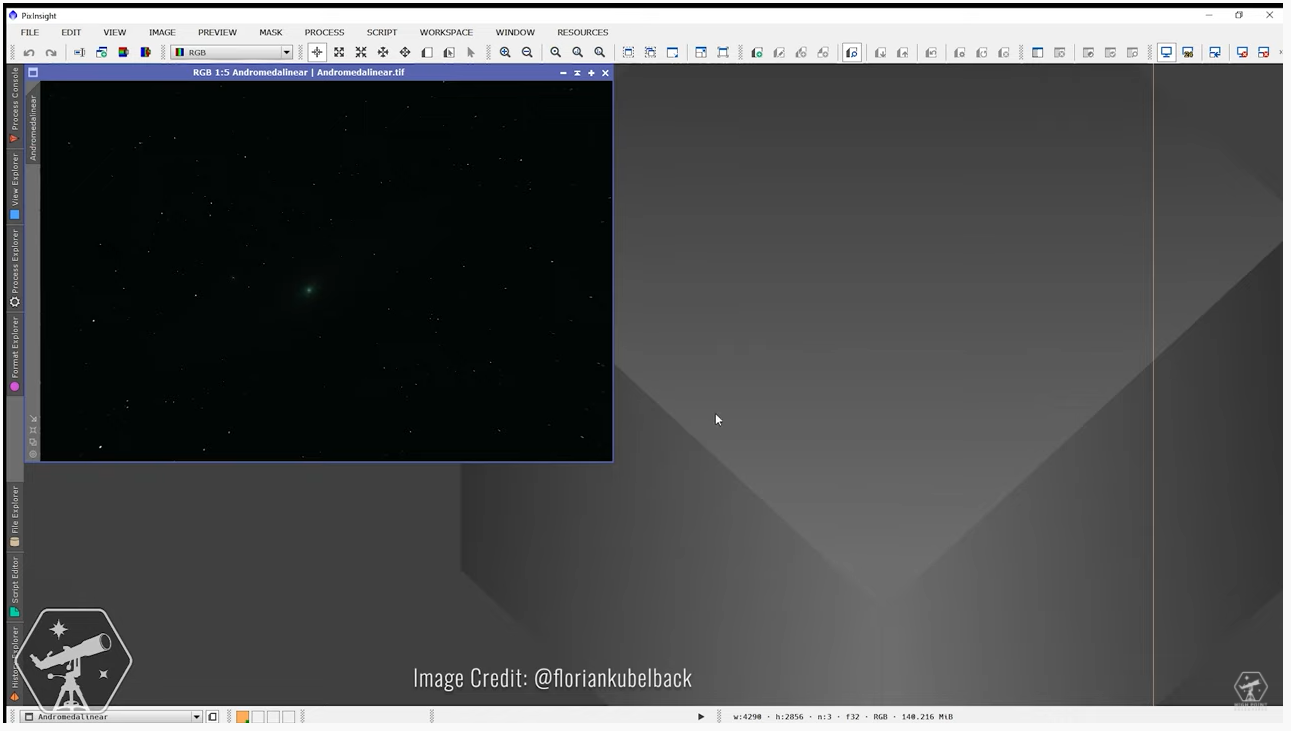
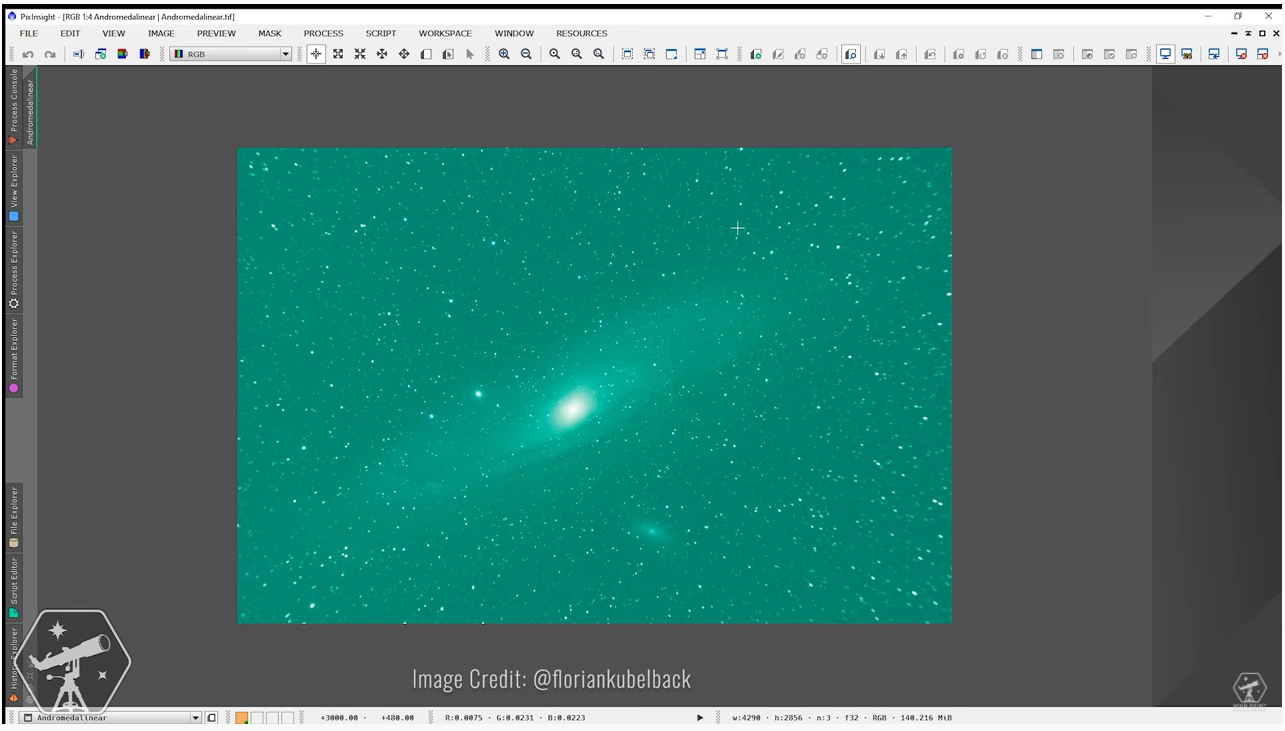
Apply an autostretch to the image (ctrl+A on Windows) to display a preview of what PixInsight believes to be the best stretch for the image.
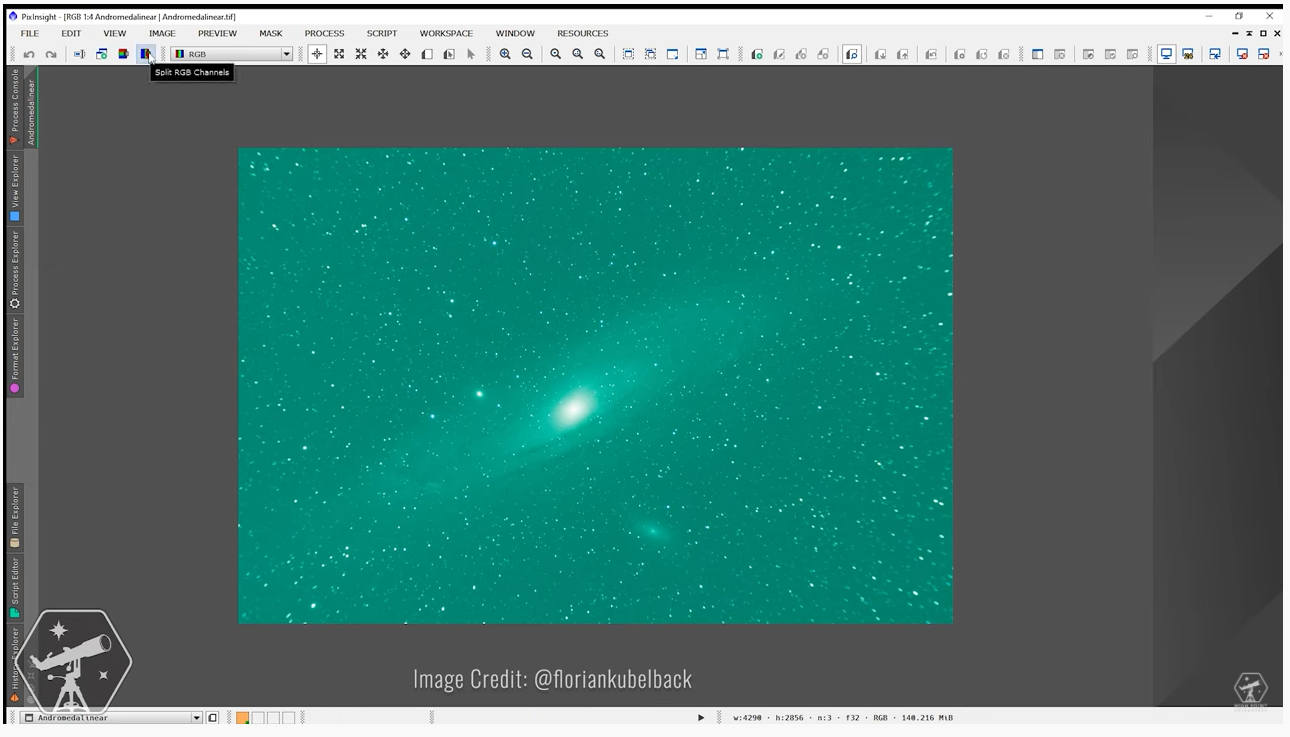
Step Three
Split the RGB channels so that we can get ready to apply a linear fit to fix the green color cast. You can find the split RGB tool on the toolbar above the image, usually on the left-hand side.
Step Four
Go to Process > All Processes > Linear Fit. Use the green channel as your reference frame, then apply the linear fit to the red and blue channels. Linear fit will give you more accurate color consistency in your image that is inherently off, especially when using a cooled CMOS sensor or similar.

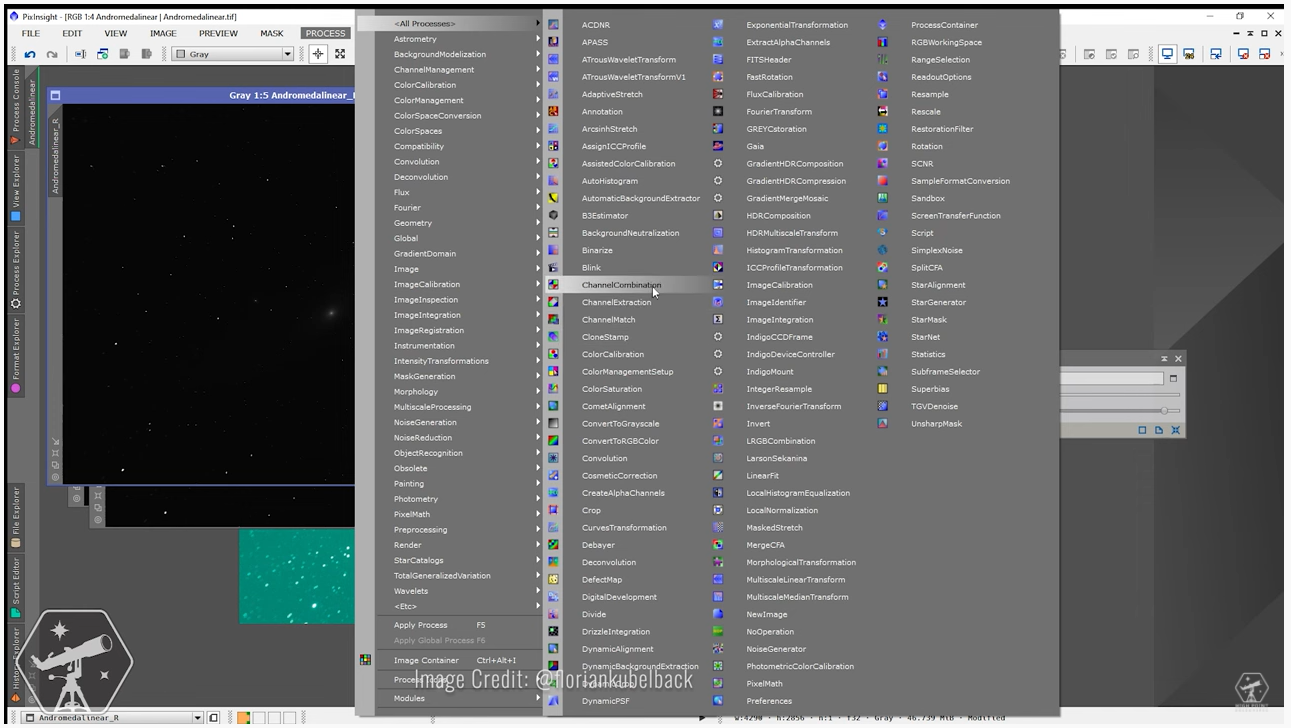
Step Five
Go to Process > All Processes > ChannelCombination. Make sure Color Space is set as “RGB”. Then under Channels / Source Images, apply each of the correct channels that you extracted earlier. Click the circle that says “Apply Global” or press F6.
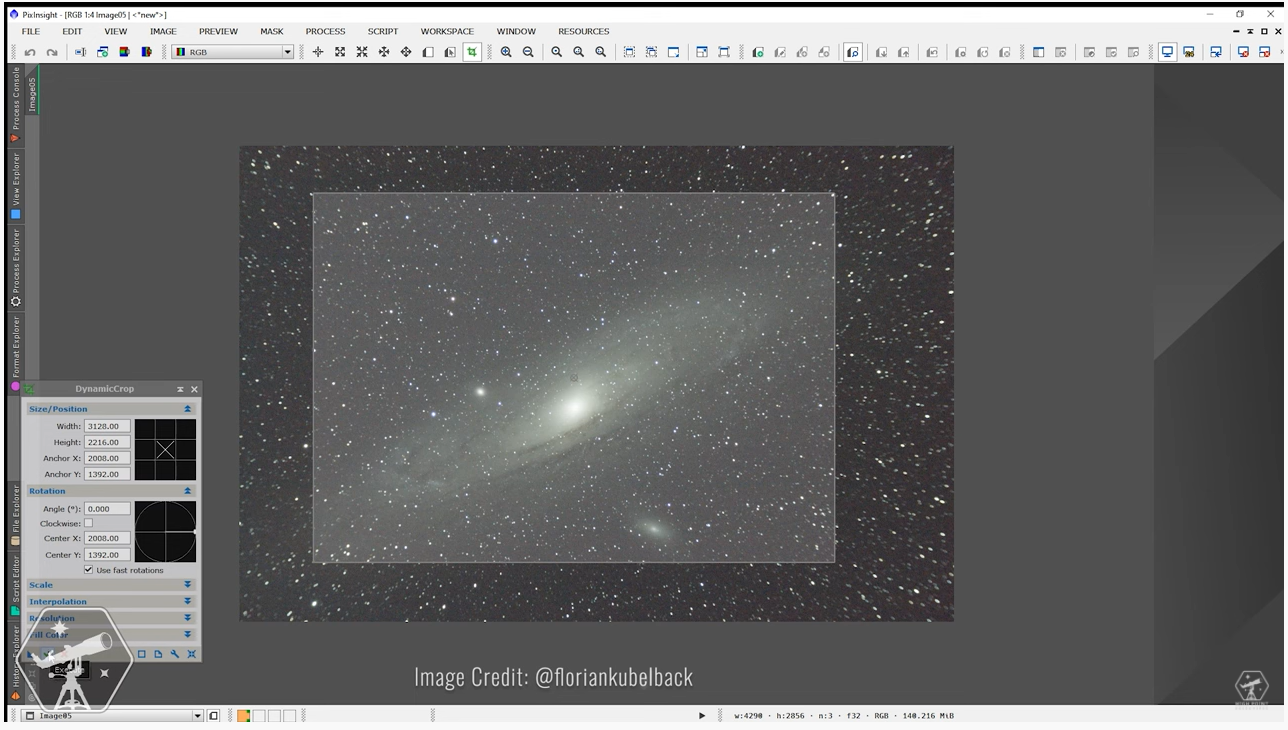
Step Six
Time to fix the oblate-looking stars in the corners or any other imperfection. Go to Process > All Processes > Dynamic crop and crop out the corners.
Step Seven
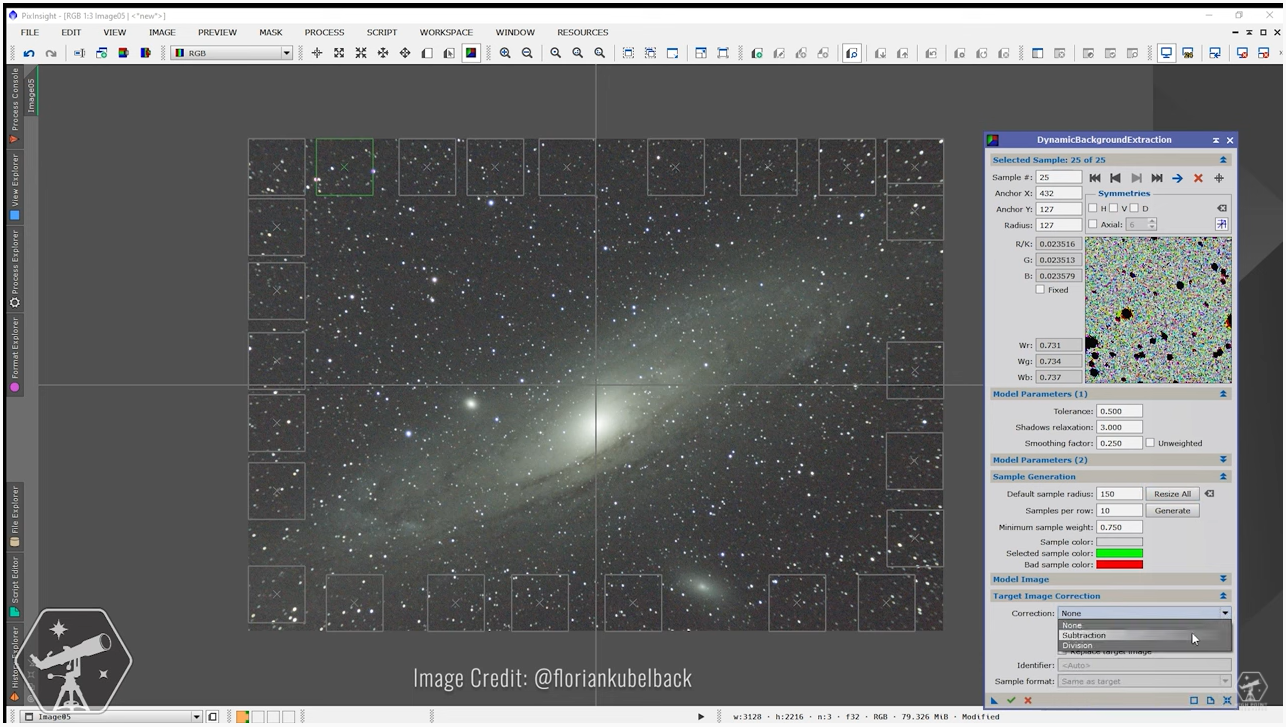
Let’s get rid of some of the gradients caused by light pollution. Open the DynamicBackgroundExtraction tool, under “Sample Generation” increase “Default sample radius” to 150. Add sample points around the image.
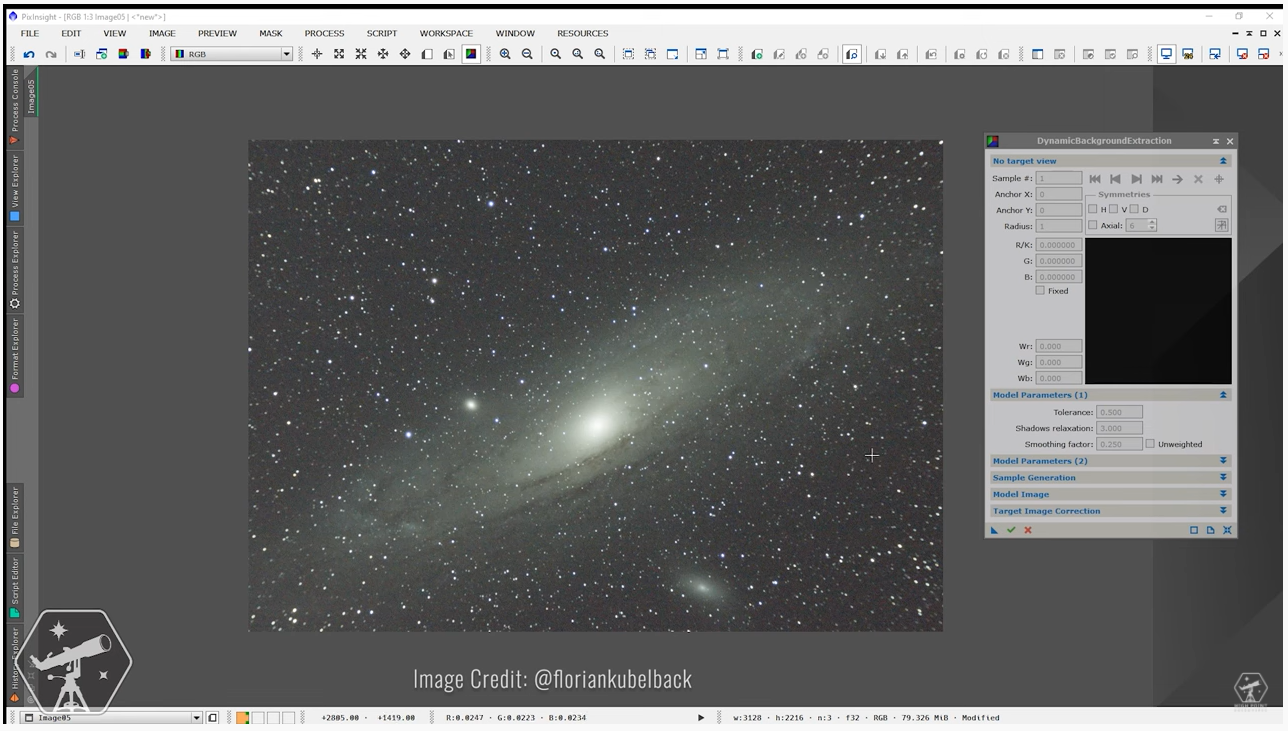
Step Eight
In the DBE tool, go under “Target Image Correction'' and change “correction” to “subtraction”. Click execute. Preview the background gradient & apply an autostretch to the new image to investigate.
Step Nine
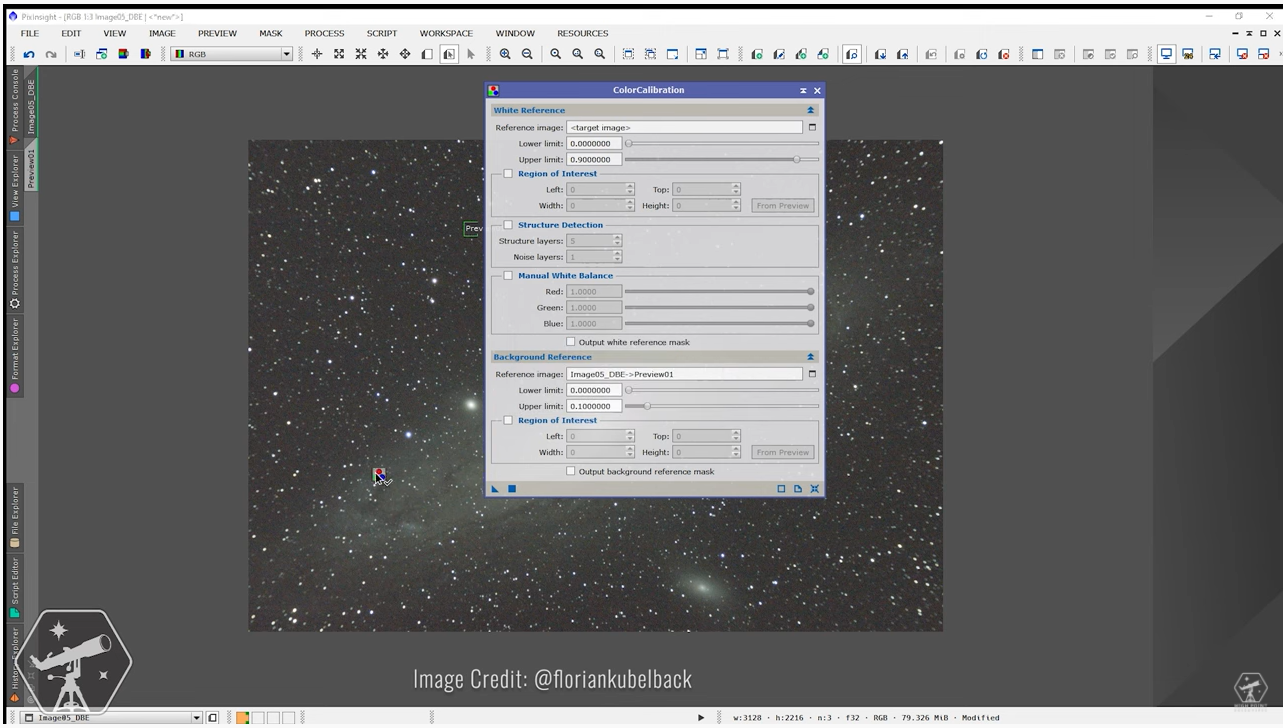
Now we need to neutralize the background. This equalizes the red, green, and blue components to yield a neutral gray rendition of the sky background (from PixInsight’s manual). Create a new preview (Alt+N), find a region of the image with little-to-no-stars, and create a new preview.
Step Ten
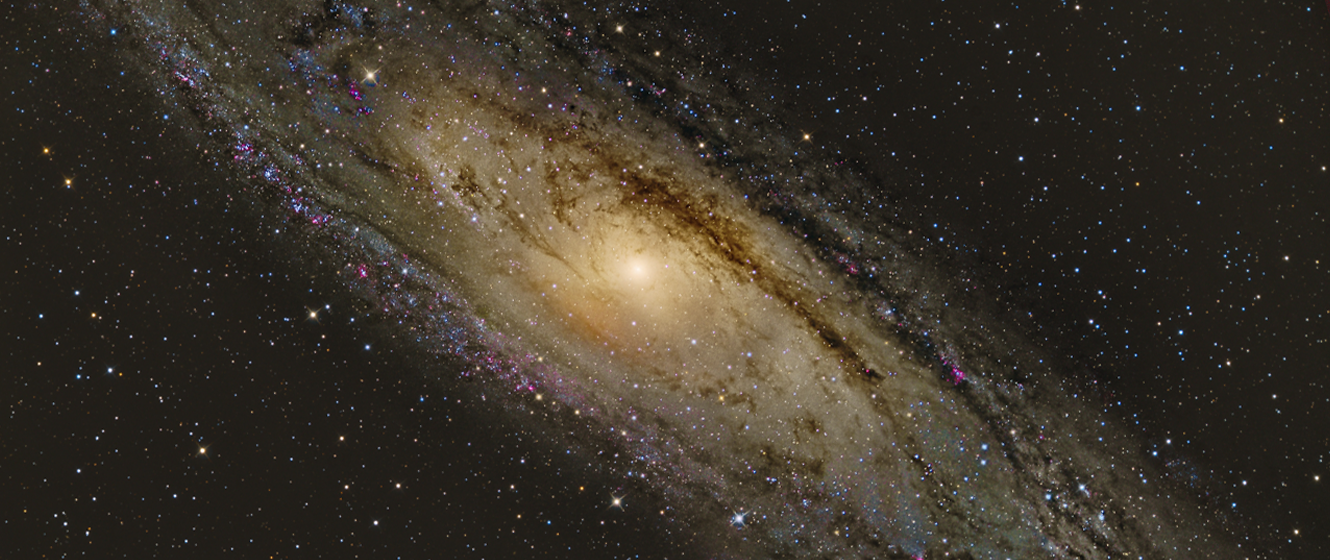
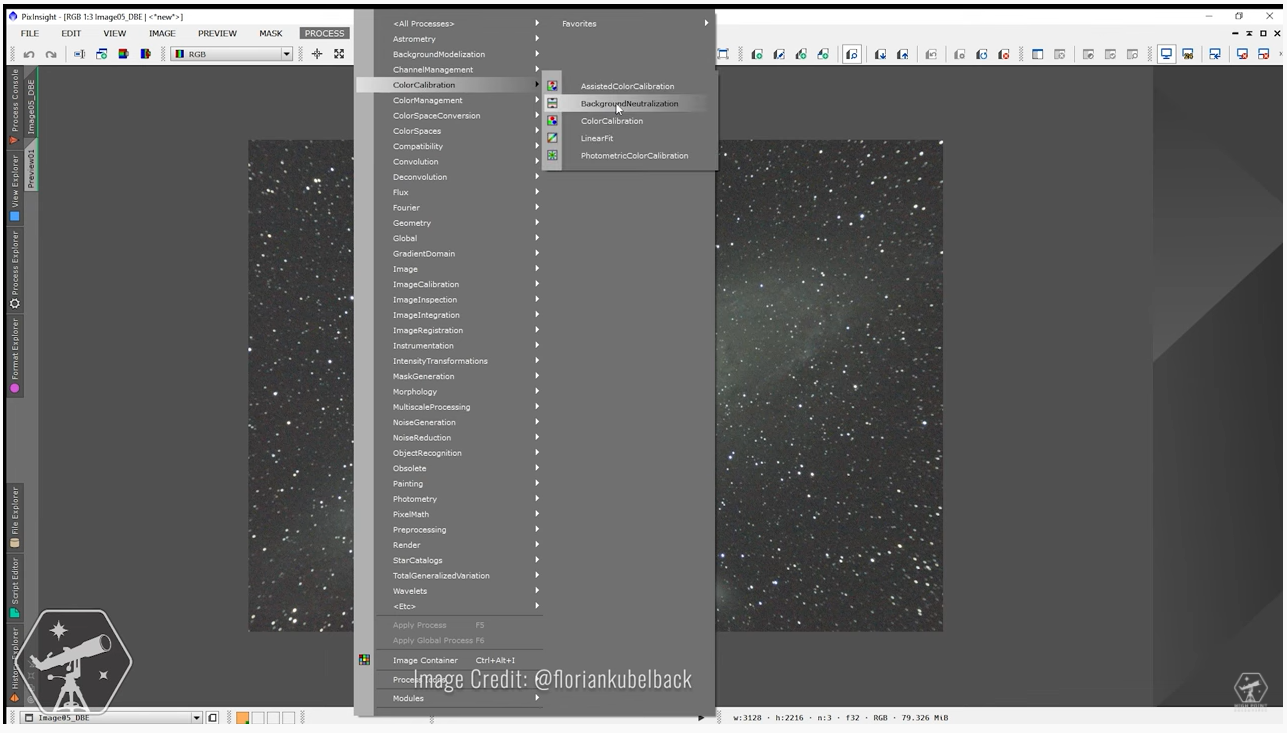
Now it’s time to accurately color calibrate this image. Go to Process > Color Calibration > ColorCalibration. This tool will ensure that the colors in your image are more accurate to the real thing. Set the Background reference image to the preview used in the last step, and (optional) set the white reference as the core of the Andromeda Galaxy.
Step Eleven
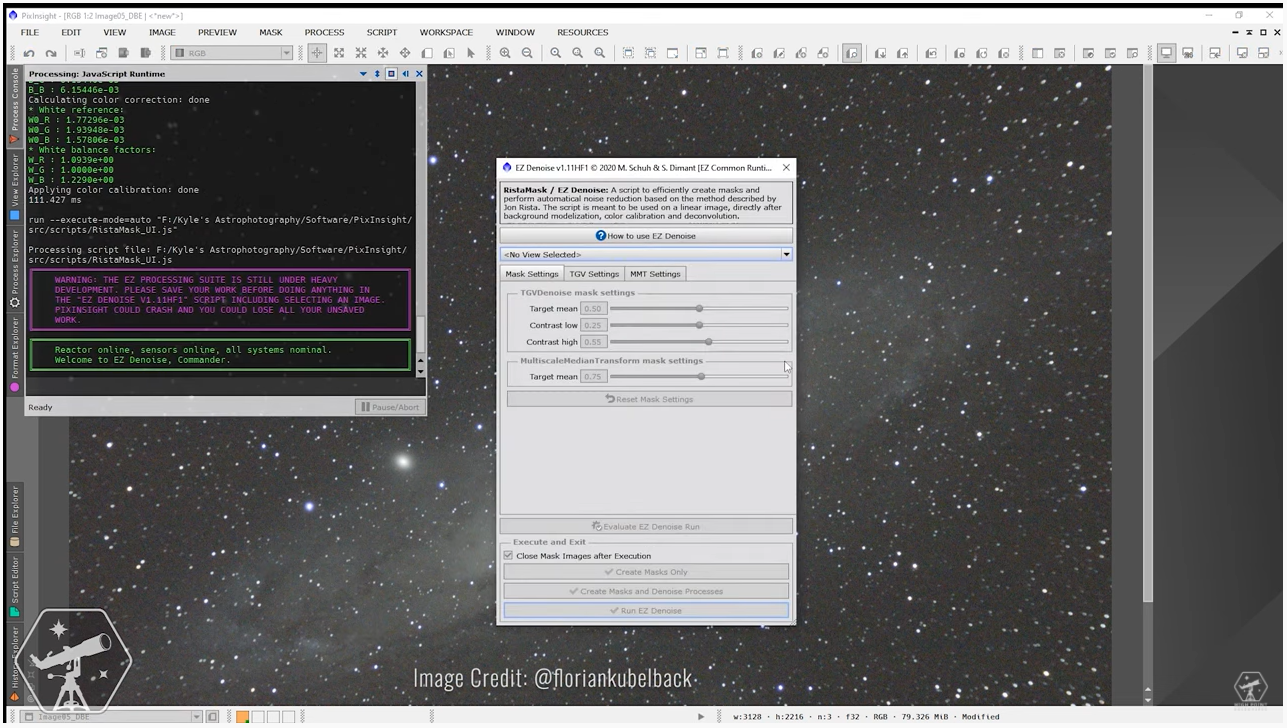
Now we need to reduce the noise in the image. We used EZProcessingSuite in the video, which can be downloaded here (follow the instructions in the forum to be able to install it into PixInsight). This will take a few minutes depending on your computer’s processor.
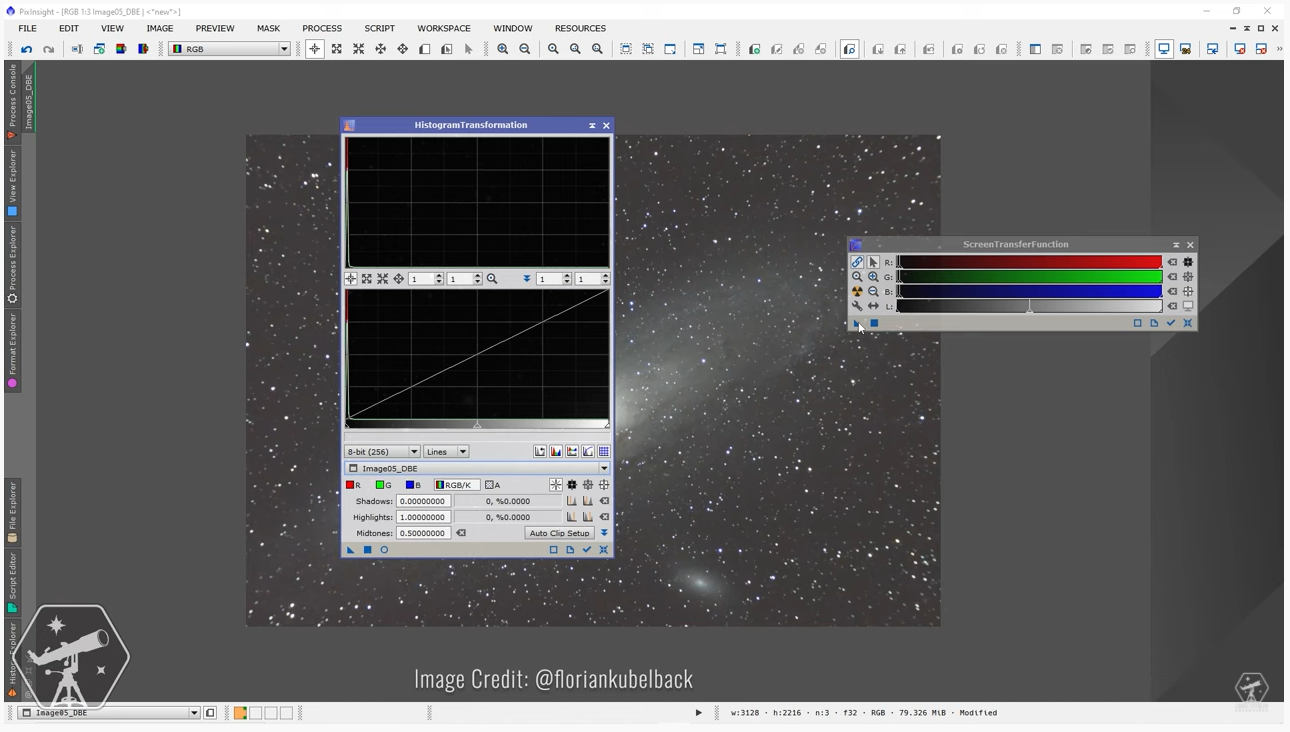
Step Twelve
Now we need to apply the AutoStretch to the Histogram. Go to Process > All Processes > ScreenTransferFunction and HistogramTransformation. Select your image in HistogramTransformation, then drag the arrow in the ScreenTransferFunction over to HistogramTransformation. This will apply the stretch to your histogram. Then press “apply” or the blue square on the bottom of the HistogramTransformation tool. Turn off the preview, and the image will be now stretched (or non-linear) and ready for further processing.
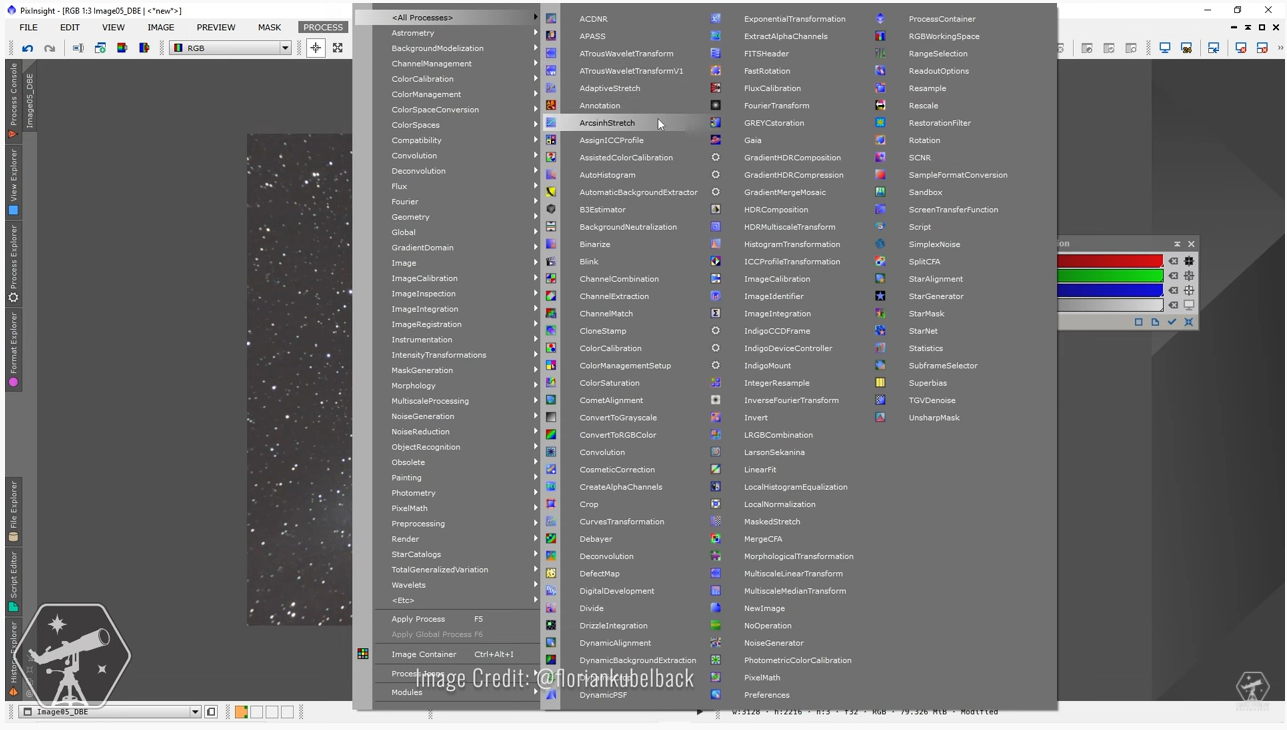
Step Thirteen
Apply the ArcsinhStretch tool to the image by adjusting the Black point up and the stretch factor up. The goal here is to increase the contrast in your image to have the background less grey. Apply to your image.
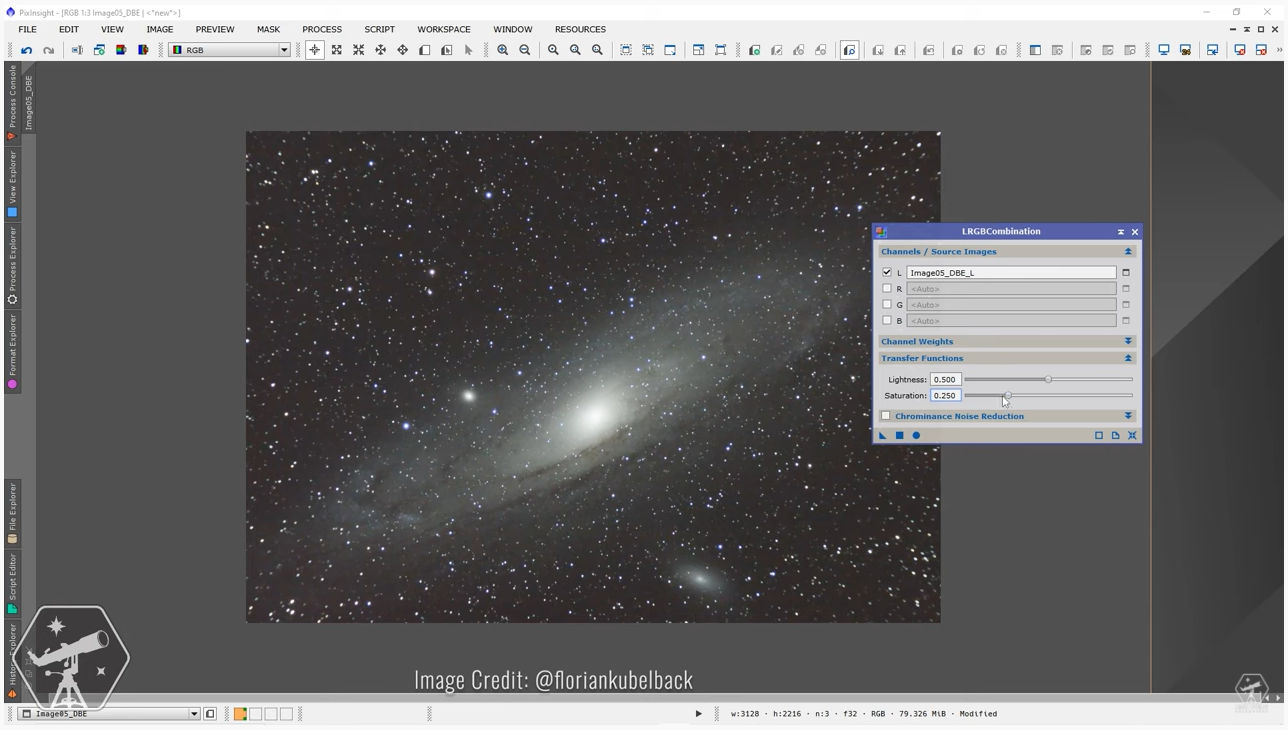
Step Fourteen
Now let’s increase the saturation. Extract the Luminance channel from the image, then go to Process > All Processes > LRGBCombination. Apply the Luminance to the “L” channel. Under Transfer Functions, decrease the saturation slider to your preference. Apply to your image.
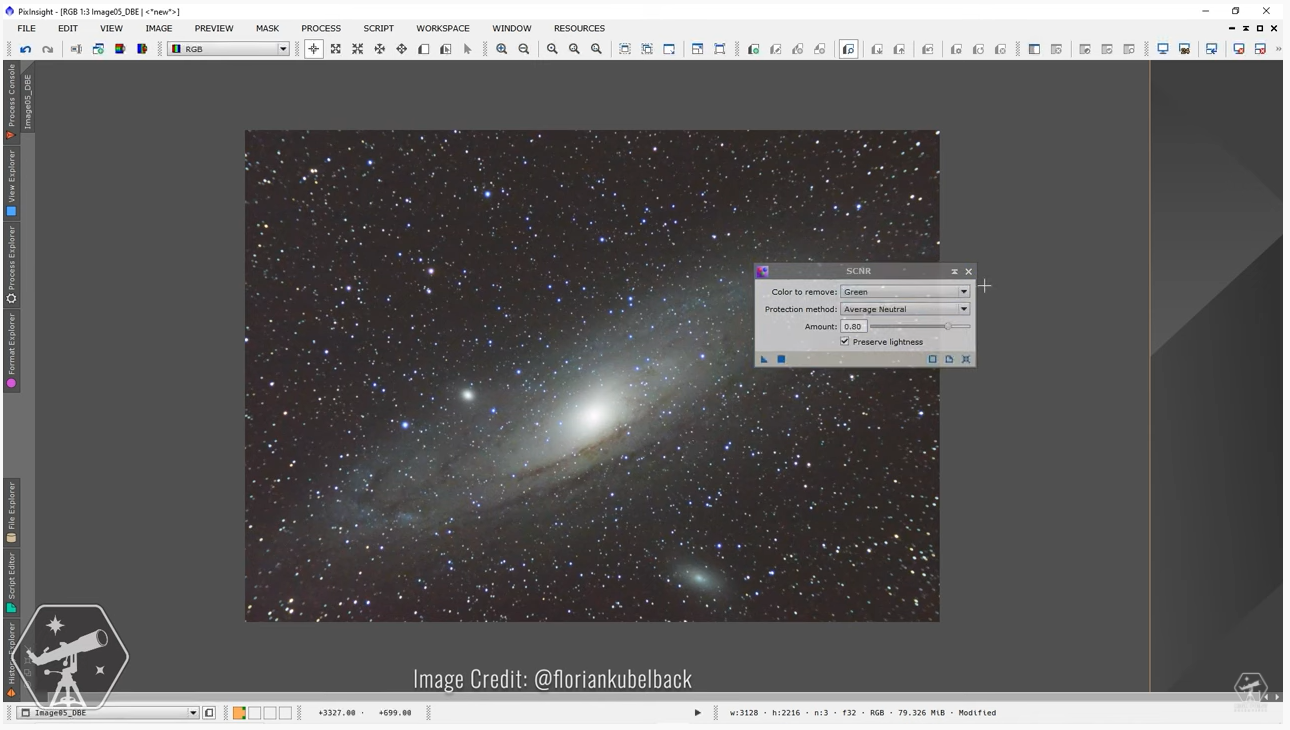
Step Fifteen
The image will look too green now. We need to reduce some of that using the SCNR tool. Go to Process > All Processes > SCNR, keep selected “color to remove” as Green, and protection method “average neutral.” Change the amount to whatever you desire. Apply to the image.
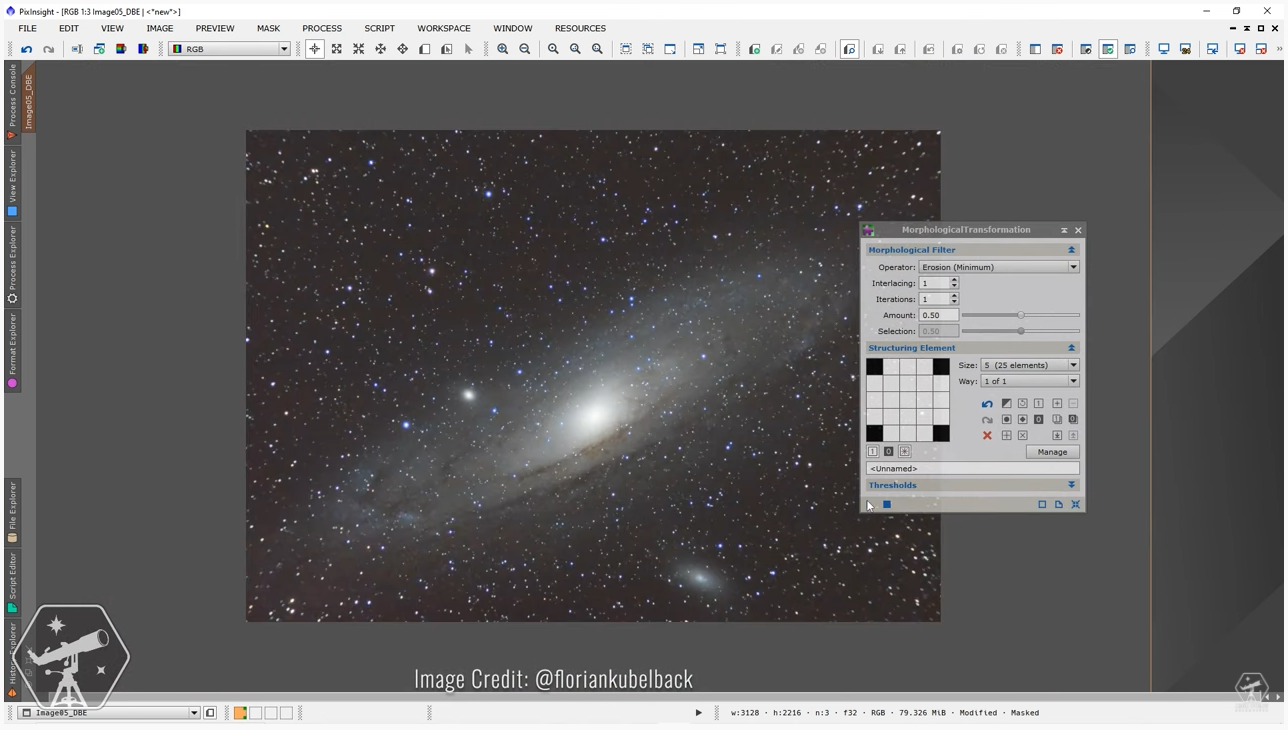
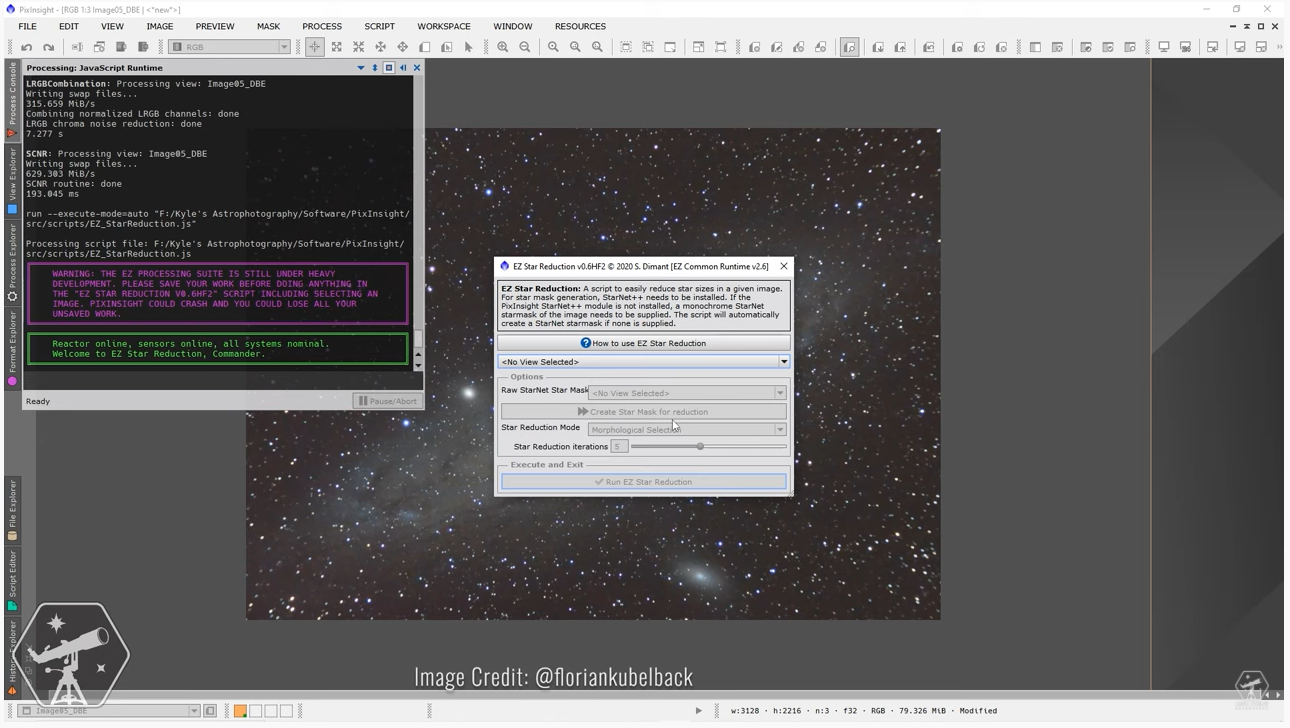
Step Sixteen
Now let’s reduce the star size. Not necessary if you used a triplet refractor. Pull up the EZ Star Reduction tool, select your image, and click “Create Star Mask for reduction”. You will need StarNet++ installed for this step.
Step Seventeen
Apply the mask you just created to your image. Turn off the mask preview. Pull up the “MorphologicalTransformation”. Leave the operator as “minimum”, increase the size from 3 (9 elements) to 5 (25 elements). Change the amount to 0.50. Apply to the image.