There are many ways to improve your astrophotos but beginner imagers should focus on perfecting a few things. One of those things is taking proper calibration frames. It is important to be able to look at your astrophotos and determine what kind of calibration frames it needs and how to take said calibration frame! In this article, we’ll be discussing the types of calibration frames that we deem most important: flat frames and dark frames. Hopefully, by the time you are finished reading this, you will have a better understanding of what they are, why they're so important, and how to take them!
What Do Flat Frames Do?
Flat frames are taken to eliminate vignetting/light falloff and other artifacts in your image due to dust, dirt, or smudges on your sensor or filters. Flat frames are arguably one of the most important calibration frames but they can also be the most frustrating. Although it becomes easier once you are familiar with what the results should look like. This is a standard Hydrogen Alpha flat frame taken with a ZWO ASI294mm dedicated CMOS camera. This is also what a standard flat frame may look like when exposed correctly.
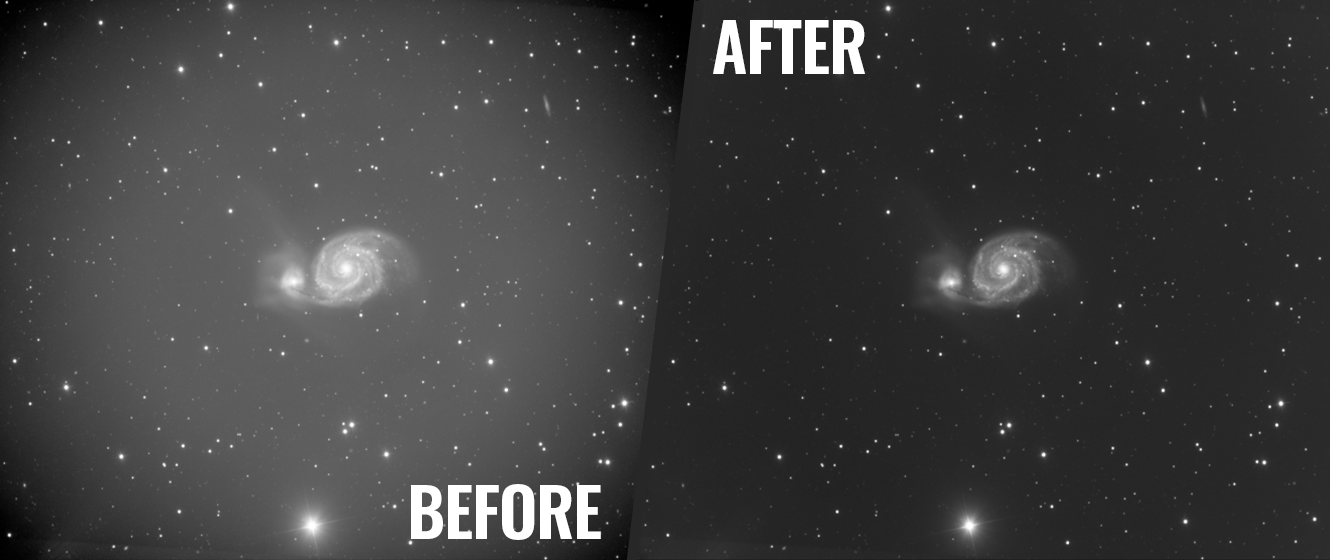
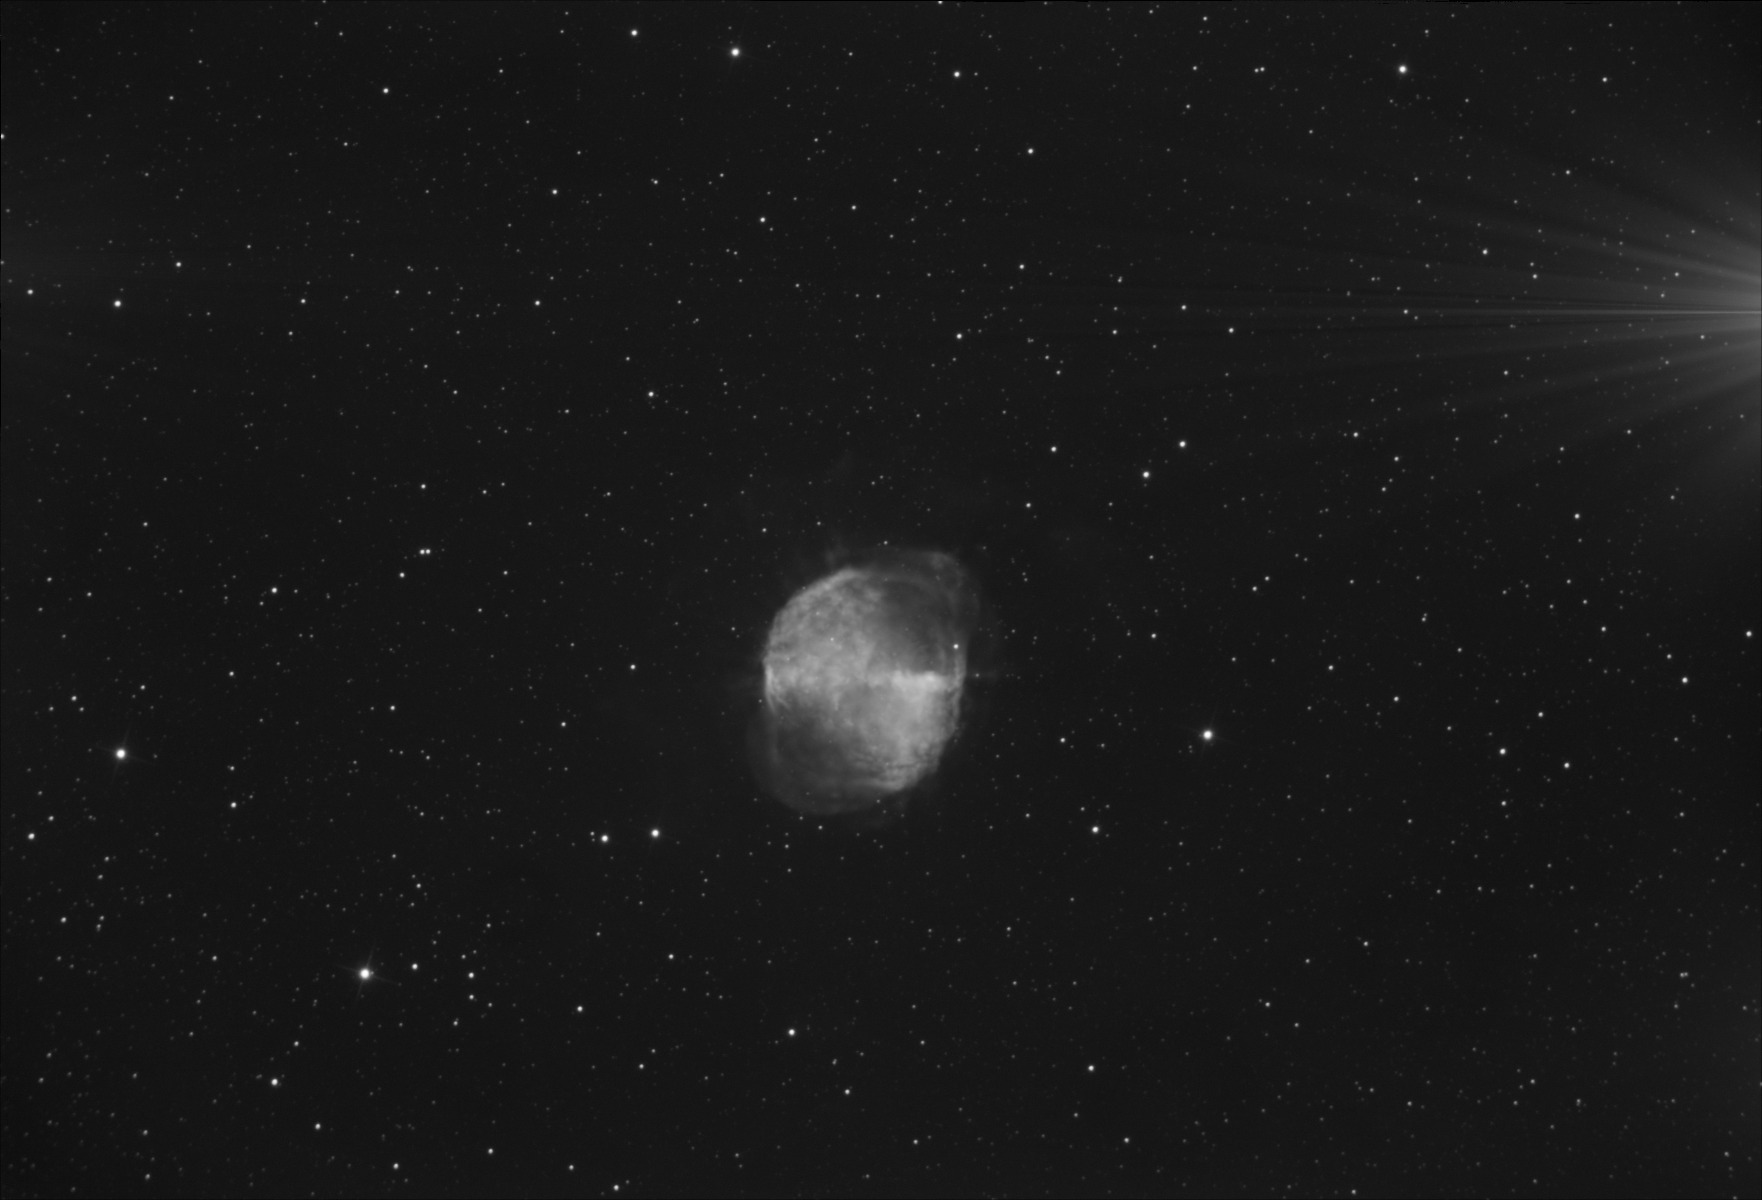
If we take a look at this image of M51, we can see a few things that need immediate fixing. First is the vignetting. This is the light falloff towards the outside of the frame that resembles a dark circle. We shouldn't get light falloff confused with obstruction! It is important to note that the field flattener or filters that are causing vignetting in this image are not OBSTRUCTING the sensor. When you see this, flat frames will correct it.
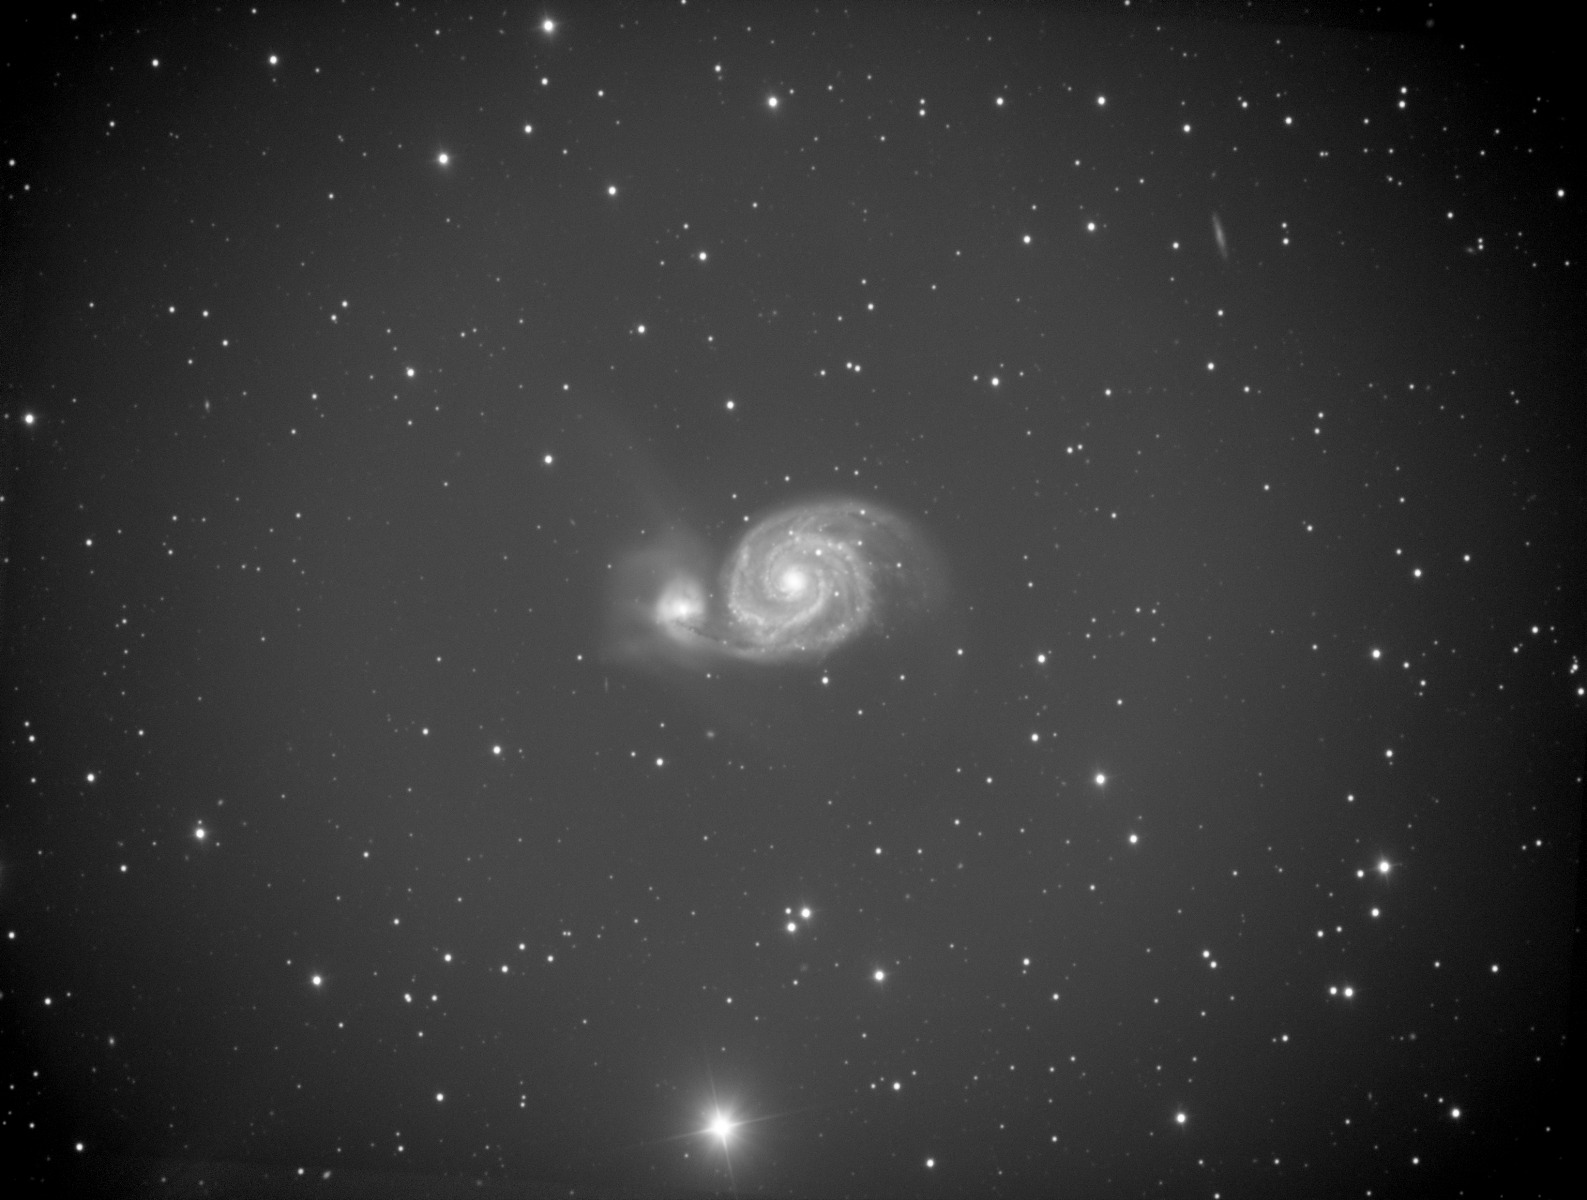
M51 without flat frames.
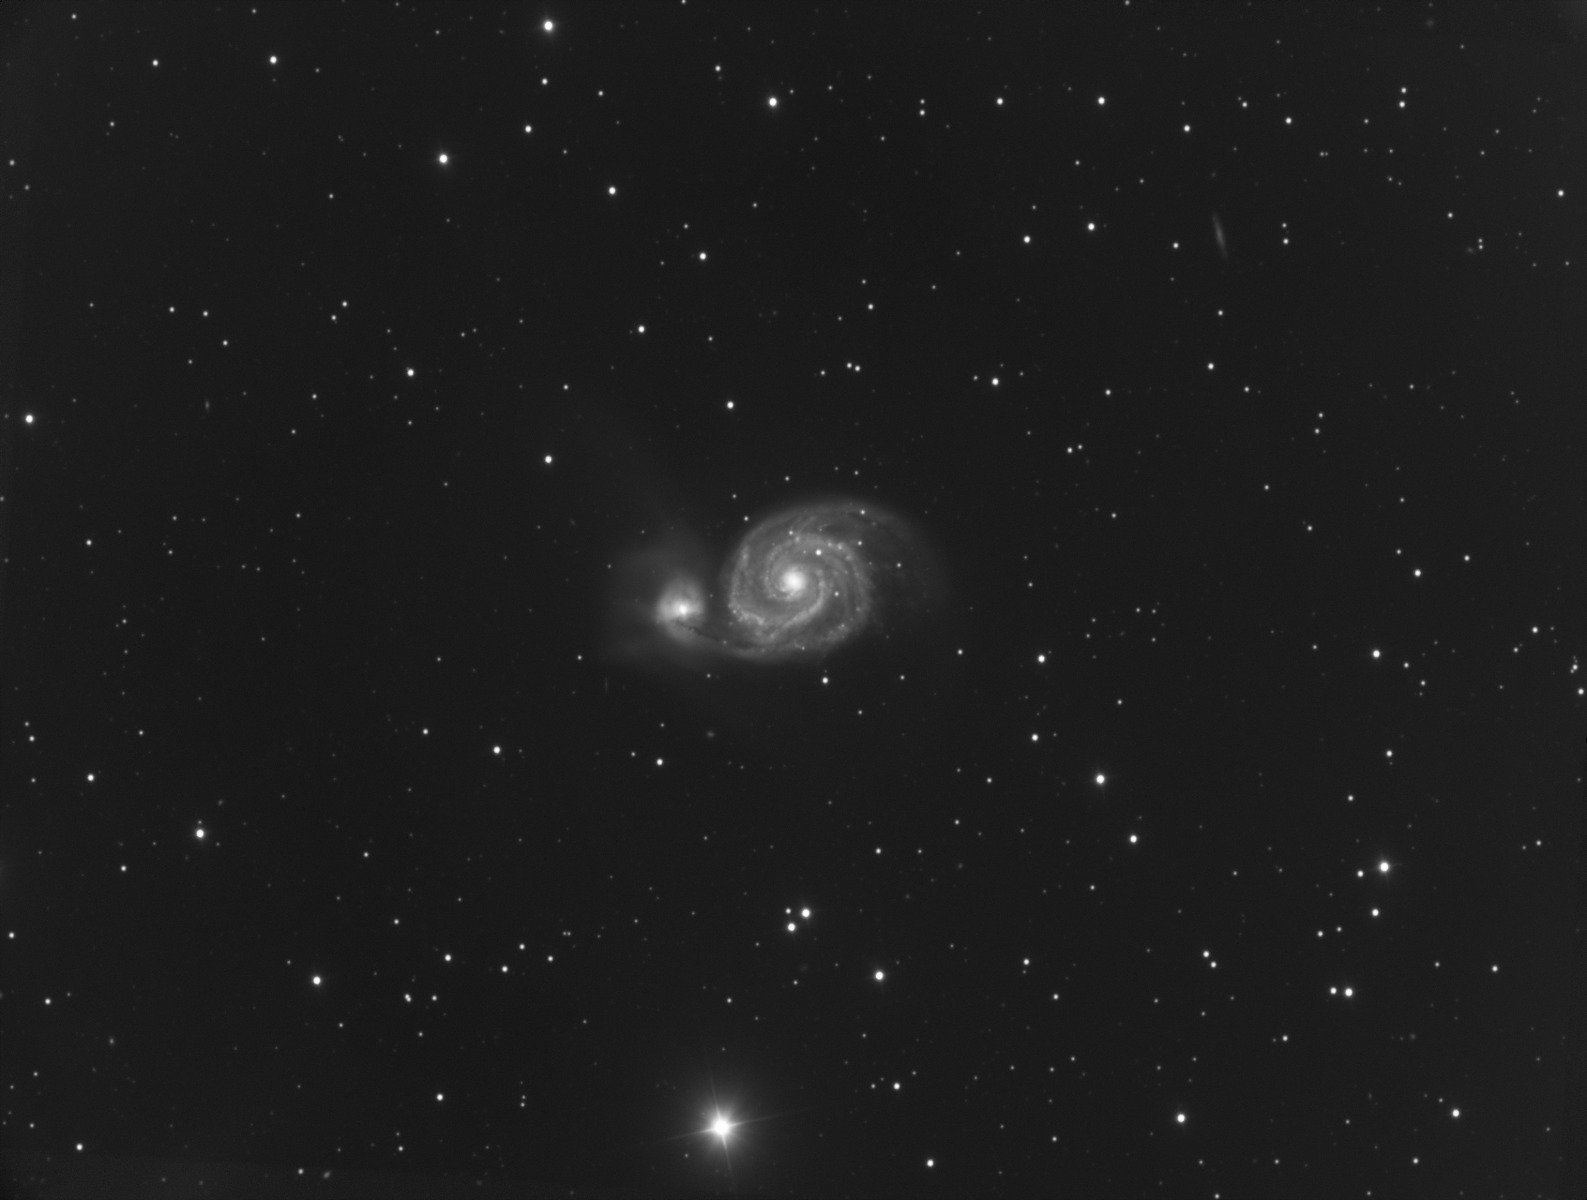
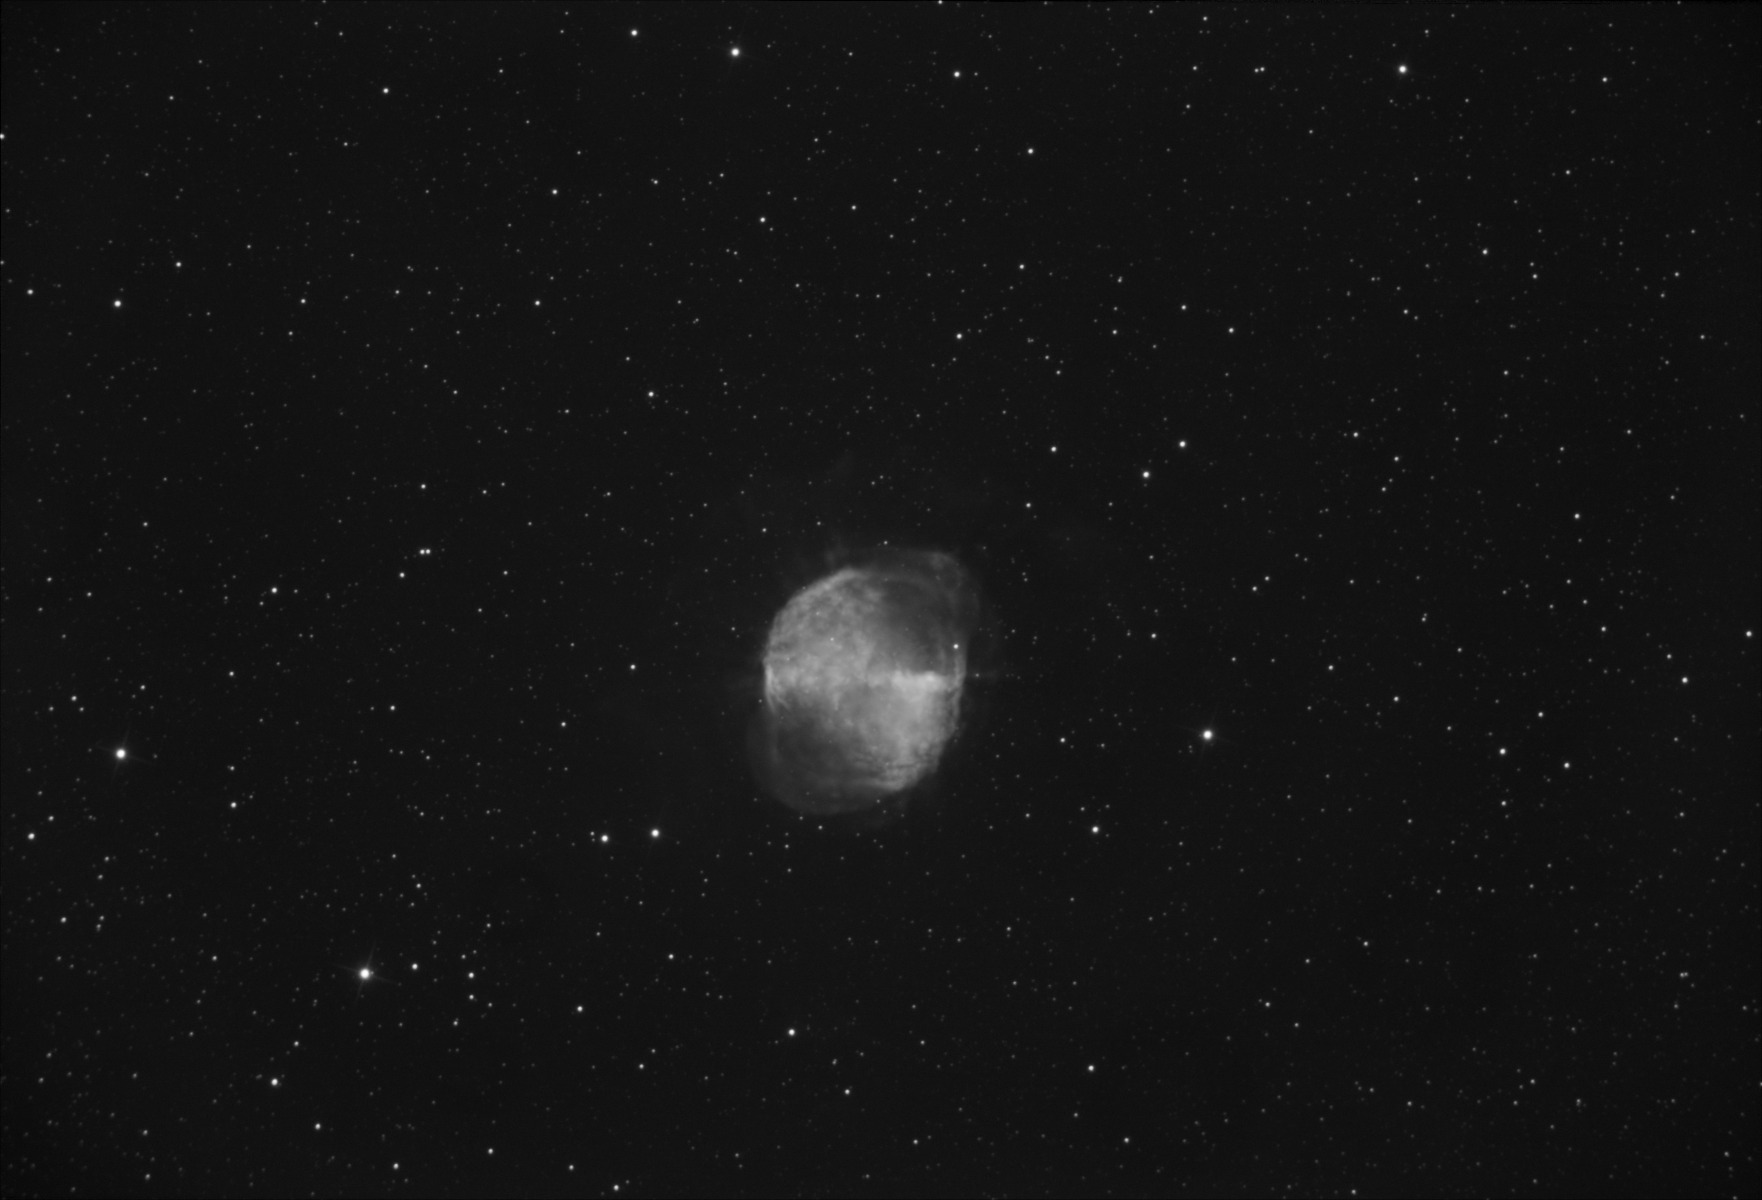
M51 corrected with flat frames.
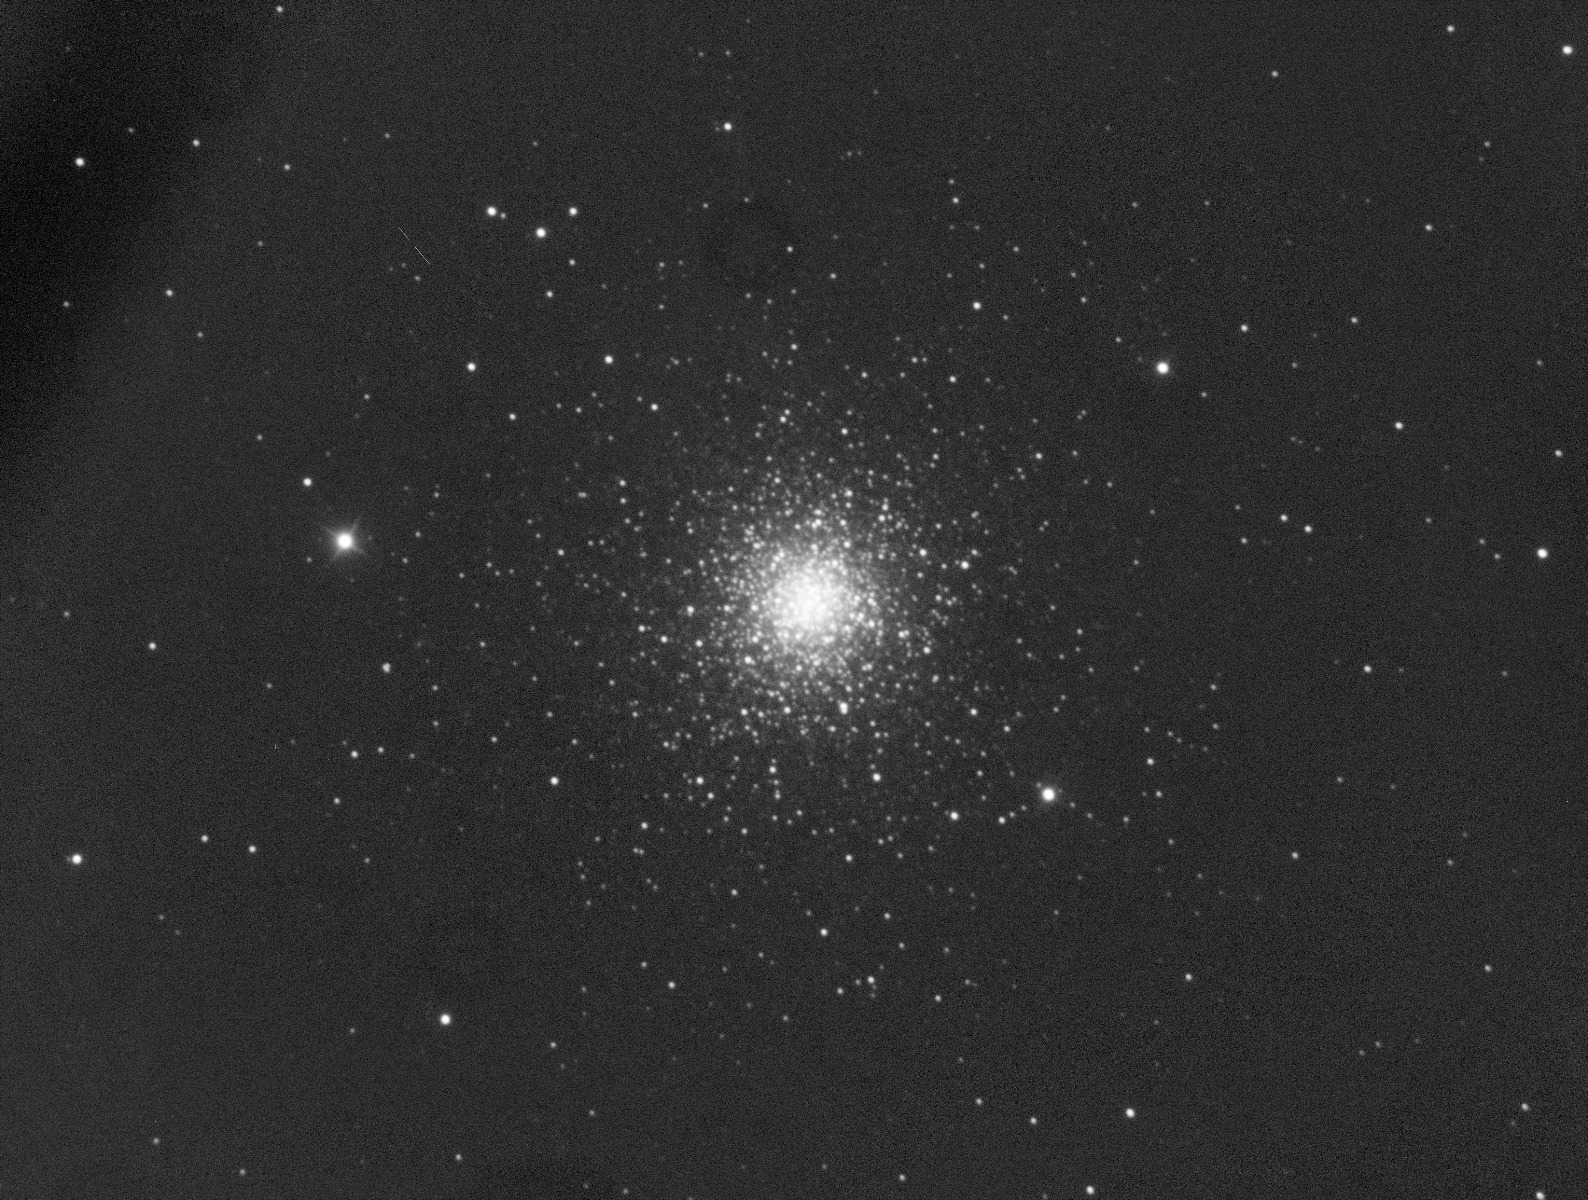
In this image, you can clearly see dust specs and dark circles where dirt has fallen on my sensor window and filters. If you see completely opaque spots, it likely means that there is dirt on the sensor itself. If they are out of focus and look like donuts, the dirt is lying somewhere within the imaging train, likely on your filters or your sensor window.
How To Take Flat Frames
Firstly, flat frames are not temperature or duration-dependent. The only thing that matters here is that your ISO/Gain settings are the same as your light frames and that you DO NOT, under any circumstances, rotate your camera or adjust focus after your imaging sessions. Flat frames need to be taken at the same level of focus with the same camera orientation as your light frames. Otherwise, the vignetting/light falloff and the dust artifacts will not be correctly removed. In fact, it will introduce more gradients into your image! Our advice to you when taking flat frames is to take them the next morning or the night of your imaging session (with a flats panel) to ensure that nothing in your imaging train has changed. If you are using a monochrome camera, you also need to take flat frames for EACH FILTER! If you remove your camera before taking flat frames, odds are, you won't be able to take proper flats for that imaging session.
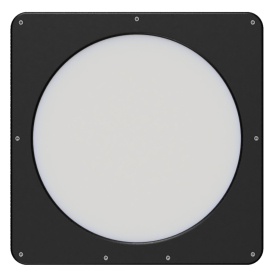
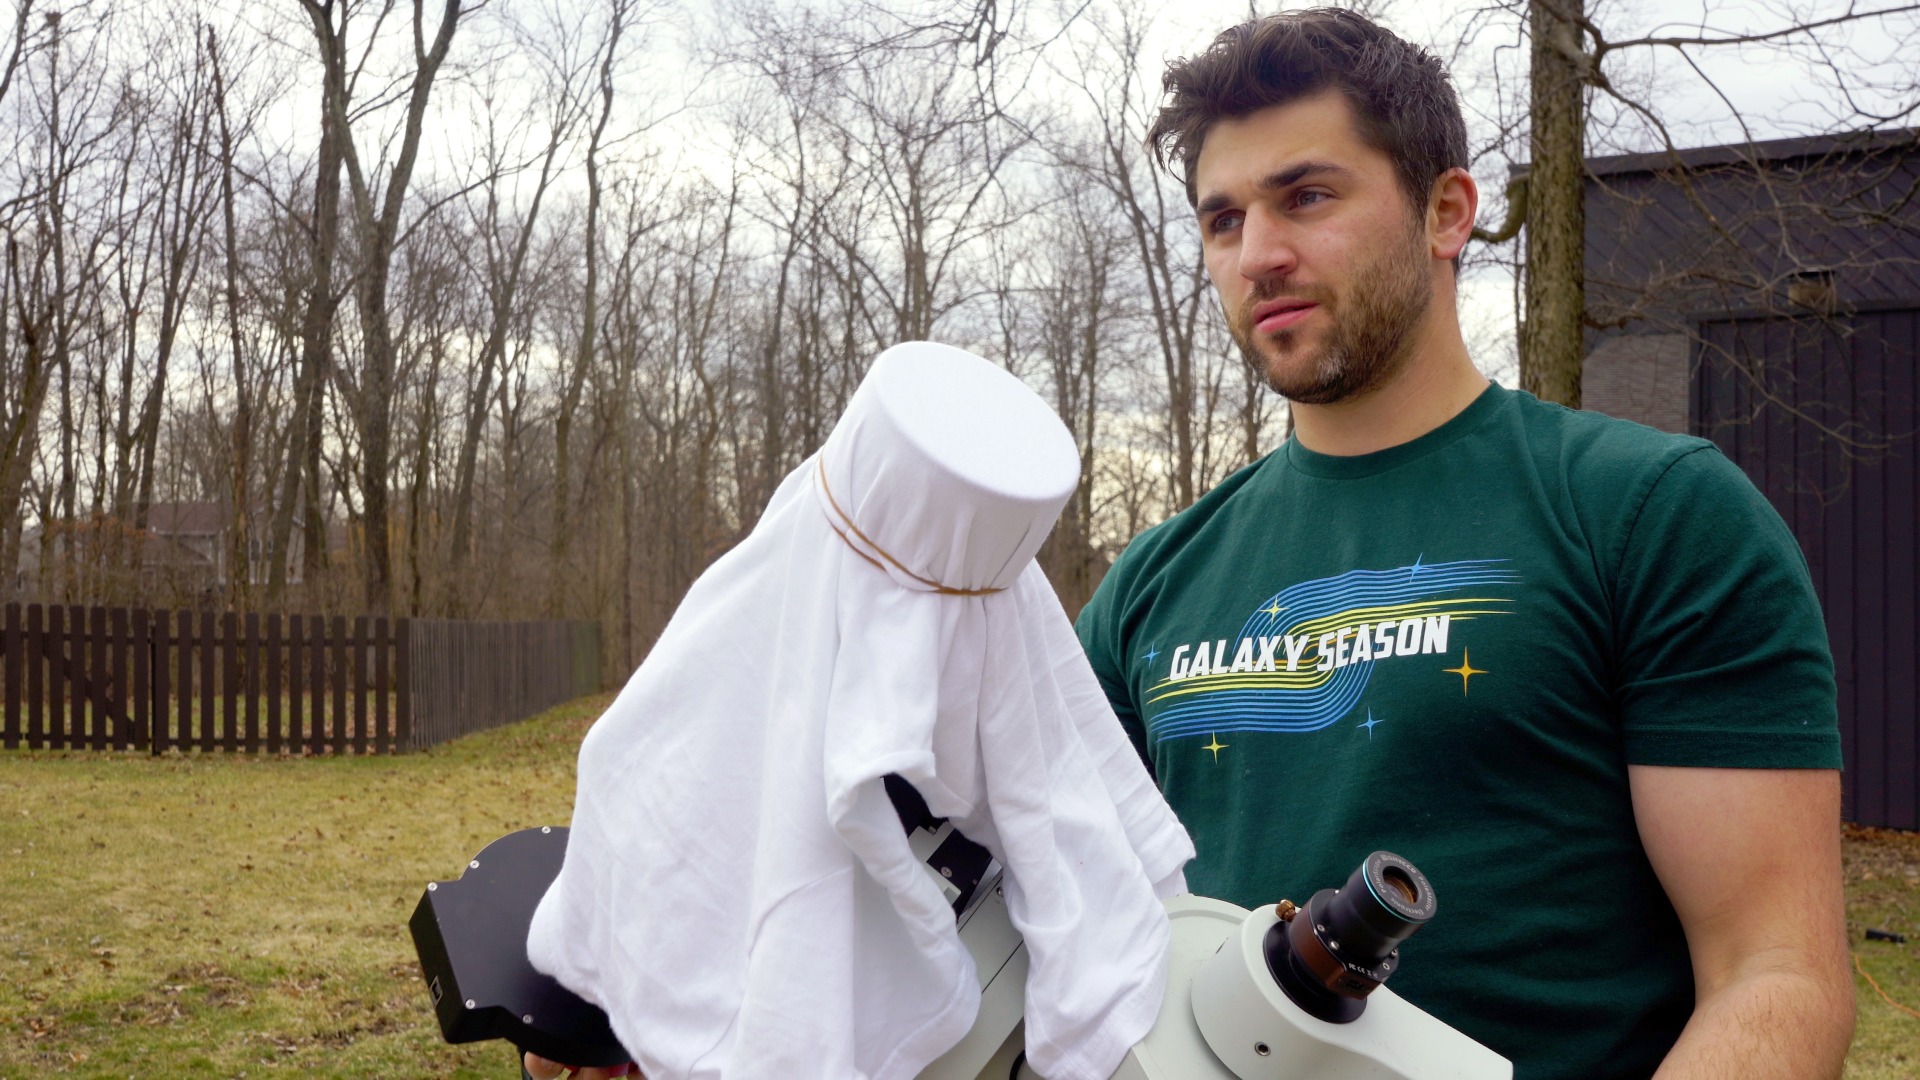
The process of taking flats is important but rather simple. An evenly illuminated source of light is crucial. Sky Flats are a great place to start. You want to take a white T-shirt and cover the aperture of your scope and secure it with a rubber band. The shirt should be taught without any wrinkles over the aperture. Point your scope directly upwards towards the sky.
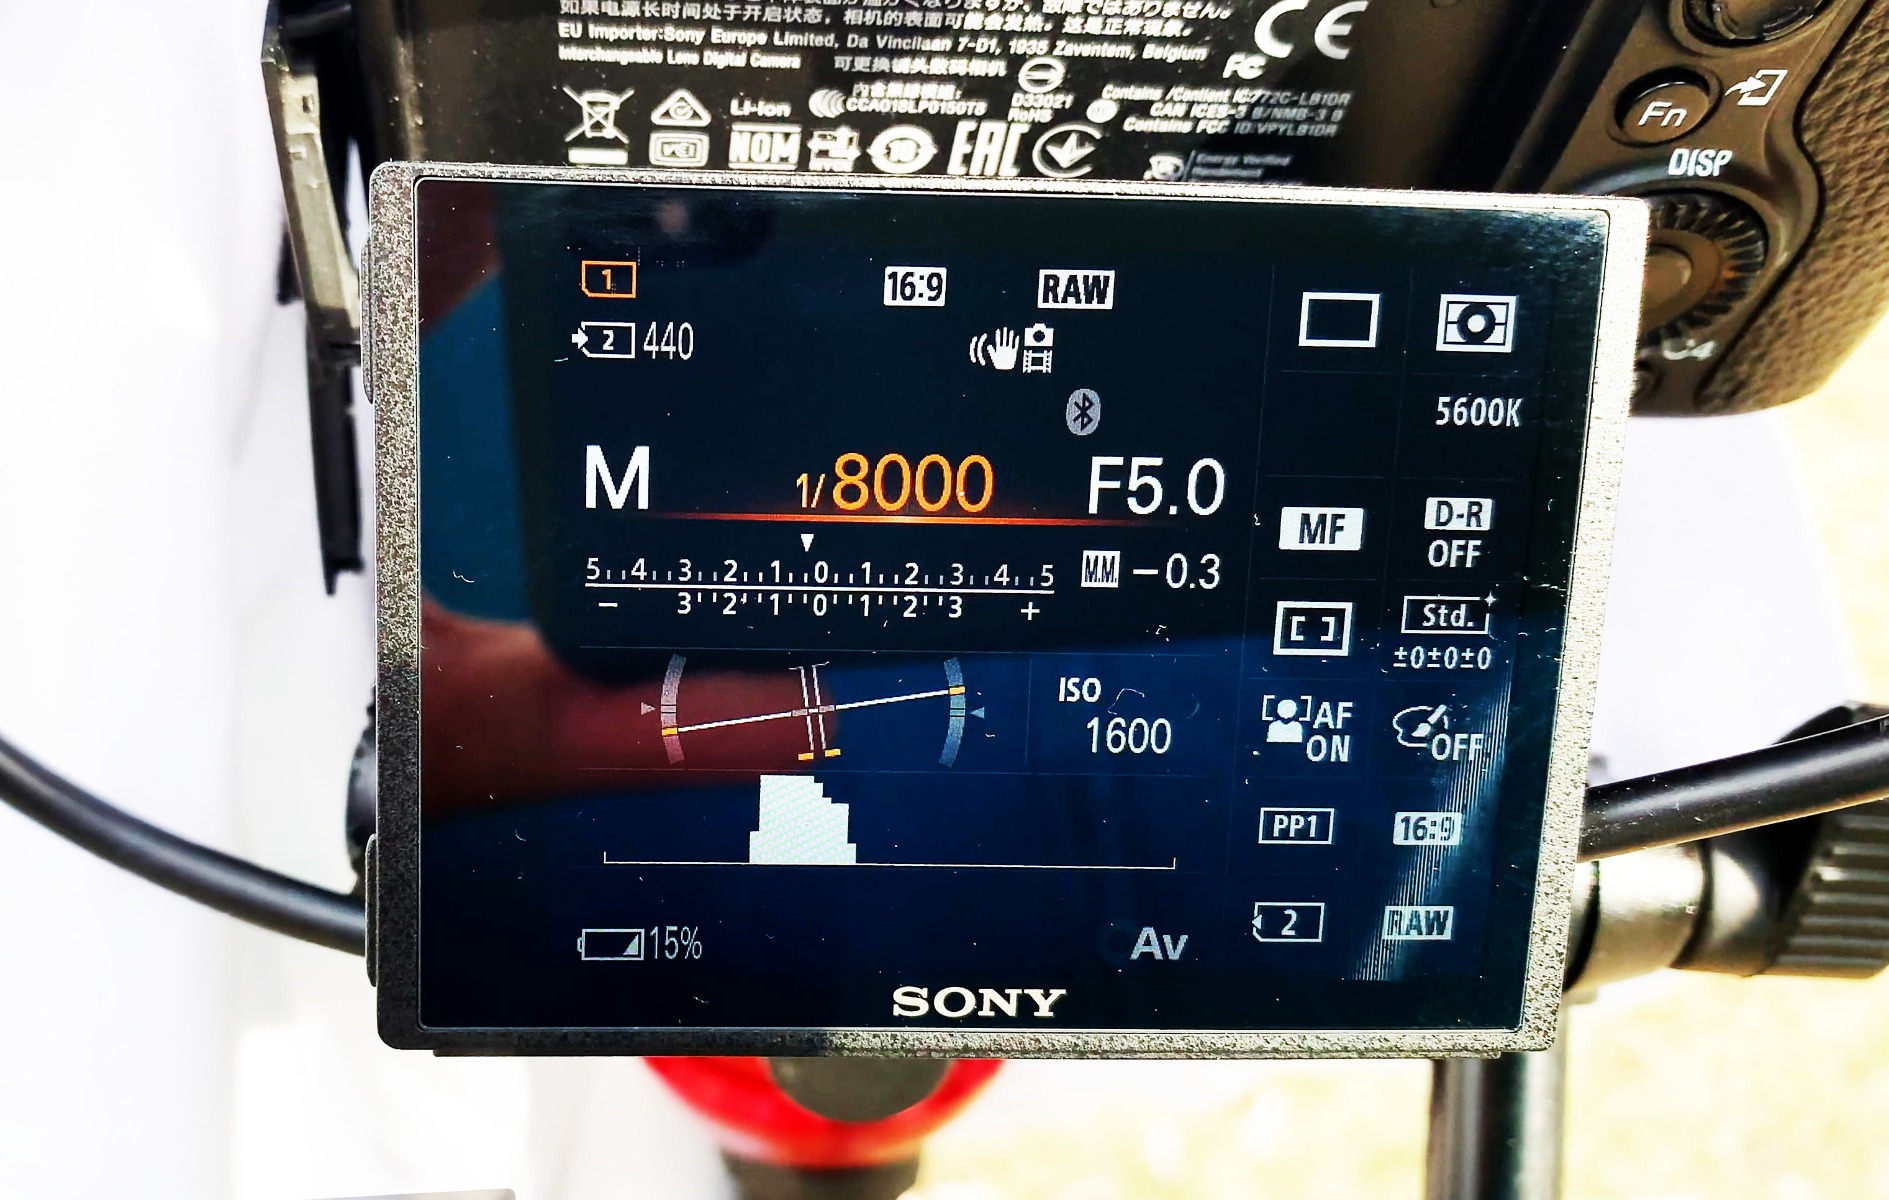
We also recommend the Pegasus Flat Master for easy flat frames as well! To properly expose your flat frames, you want to experiment with your exposure length. If you are using a DSLR camera, you only want an exposure long enough to the point where your histogram is displayed as ½ to ⅓ from the left.
For cooled astronomy camera users, typically a target ADU of 15,000 to 30,000 will suffice. A total of 30-50 flat frames is recommended. Depending on your capture software, there should be a way for you to locate this information and give you an idea if you need to increase or decrease your flat frame exposure. Just like everything else in this hobby, experience will help you to understand what works best for your equipment.
What Do Dark Frames Do?
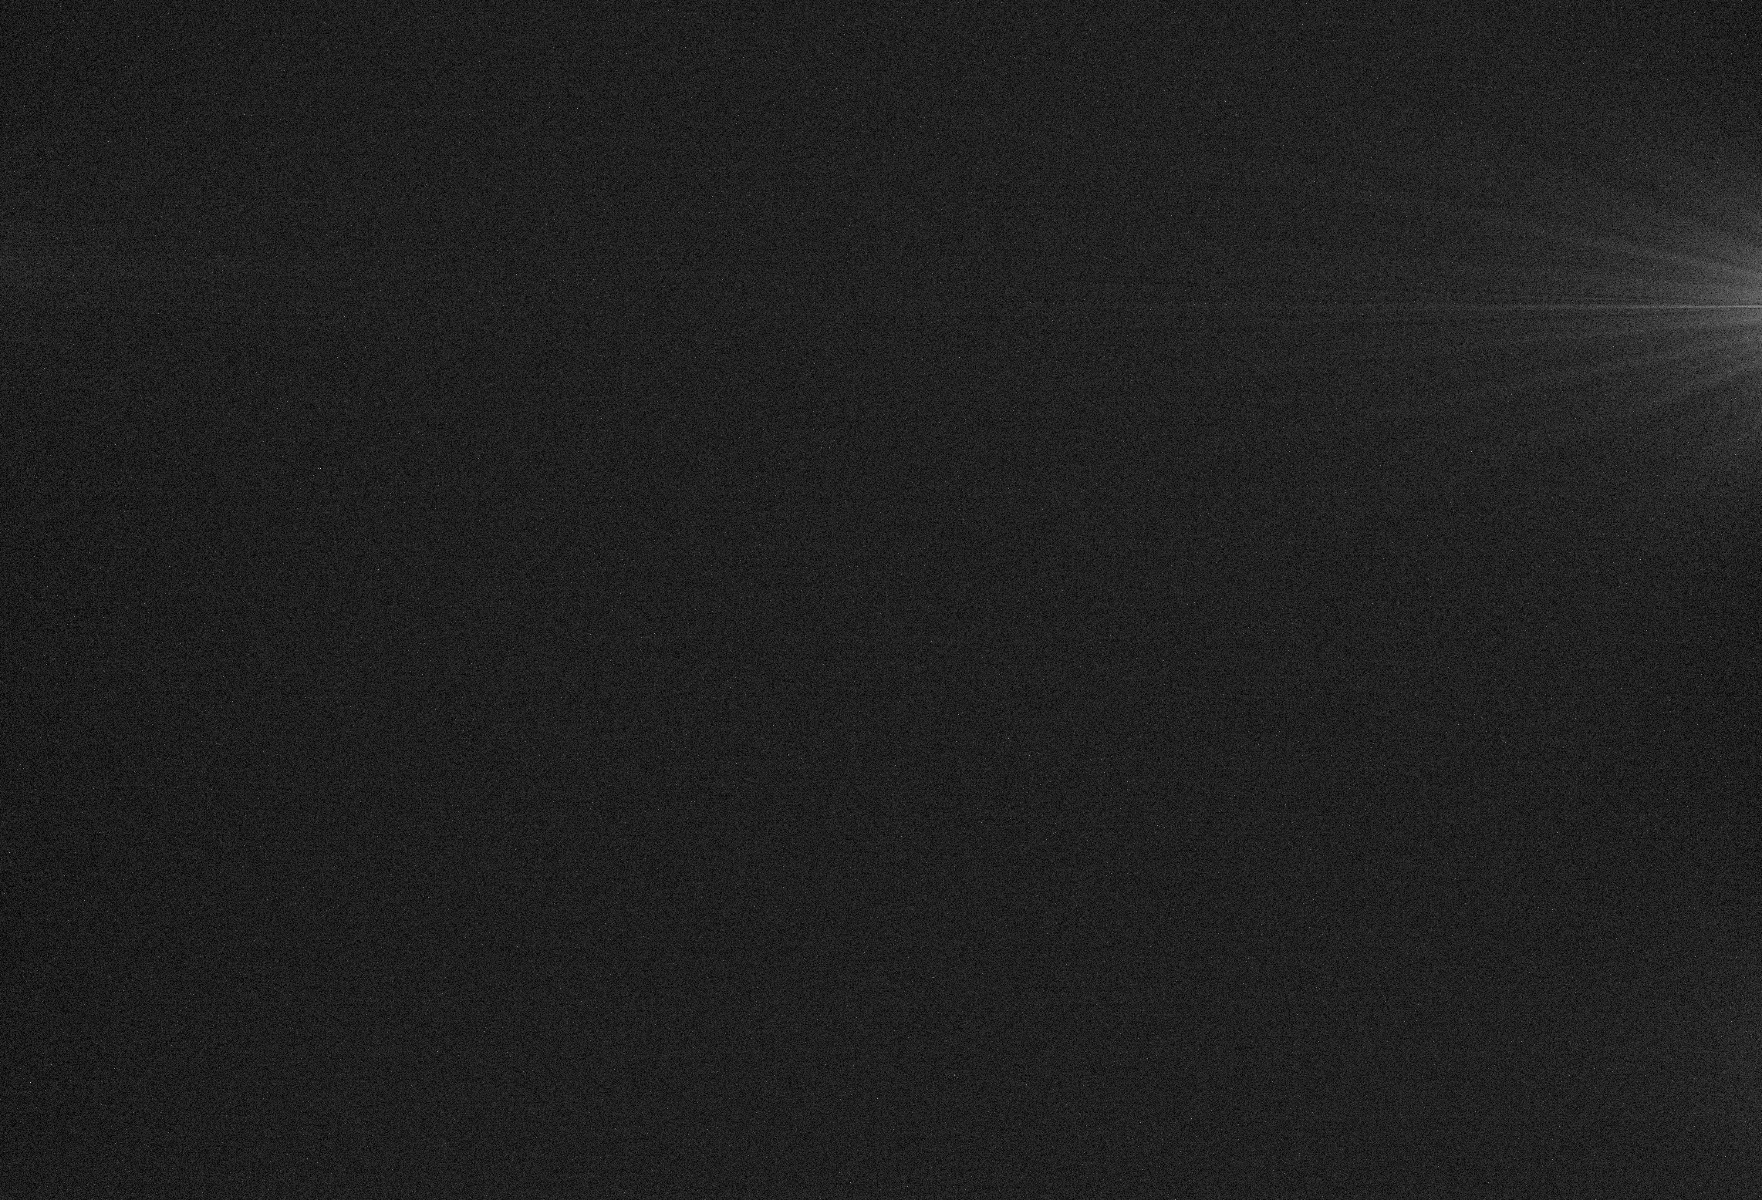
Dark frames are used to increase the signal-to-noise ratio in your photo. They will also help in reducing hot pixel count and amp glow present in many cooled CMOS cameras. In this photo, you’ll see an example of amp glow. Dark frames should eliminate this completely.
How To Take Dark Frames
Dark frames should be approached a bit differently between cooled CMOS cameras and DSLR cameras. Cooled dedicated camera users can create a “dark library” and use their dark frames over and over again and aren't required to take a set of dark frames after every imaging session. This is because cooled cameras cool the camera sensor to a stable temperature despite the ambient temperature. Having a dark library allows you to spend more time imaging and less time taking these calibration frames.
To take a dark frame with a CMOS camera, ensure the cap of your telescope is on and well sealed. It’s good practice to leave your cooled CMOS camera sitting out on a table where it has plenty of room to breathe while the fan is running. Connect your camera to your laptop, choose your temperature, gain, and exposure time settings, and start taking your desired number of dark frames. You need to be sure that your Gain/Offset, sensor temperature, and exposure length settings are identical to the light frames from which you are subtracting your dark frames. We also recommend that you take anywhere from 20 to 30 dark frames. Generally speaking, the more the better. When you stack your dark frames with your light frames, stacking software such as Deep Sky Stacker subtracts this noise and any amp glow from your light frames resulting in a cleaner image!
If you look at this example photo of Messier 27, you can see the bright starburst on the right side of the image. This is in fact amp glow and is present in many cooled CMOS cameras. When taken and integrated properly, darks will eliminate this completely.
There are some astrophotographers who swear by subtracting dark frames when using a DSLR camera, others recommend against it. We recommend you try both and see which gives you a cleaner image. Now, you cannot create a dark library with a DSLR as the ambient temperature changes from imaging session to imaging session. However, the process is similar. You can keep your DSLR either on or off your scope when taking dark frames. If you finish your imaging session, you can pop your dust cap back over your aperture and continue shooting using the same exact settings as you were with your light frames!
What Are Dark Flats And Do I Need Them?
Dark flats are essentially dark frames for your flat frames! If you are using a cooled CMOS camera, you may want to consider dark flats if your flat frames exhibit amp glow. They are calibration frames for your calibration frames. Now, these aren't always required but may be something to consider if you are shooting your flat frames with high gain settings. Taking dark flats is very simple. After you are finished taking your flat frames, cover your aperture with your dust cap and proceed to take your dark flats with the same exposure length and settings as your flats. Just add the dust cap and continue shooting! Like flat frames, dark flats need to be taken for every filter because your flat frame exposure length will vary from filter to filter!
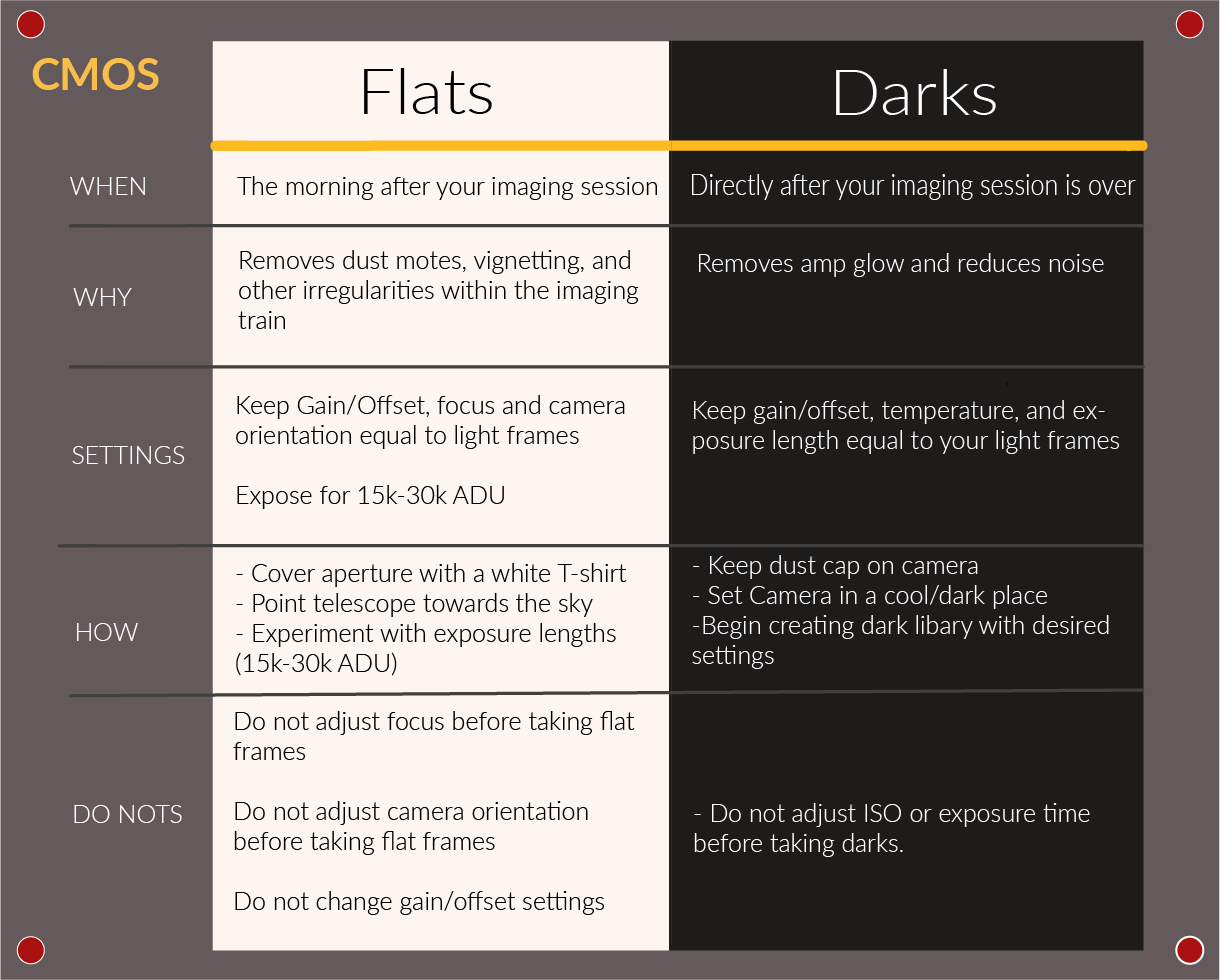
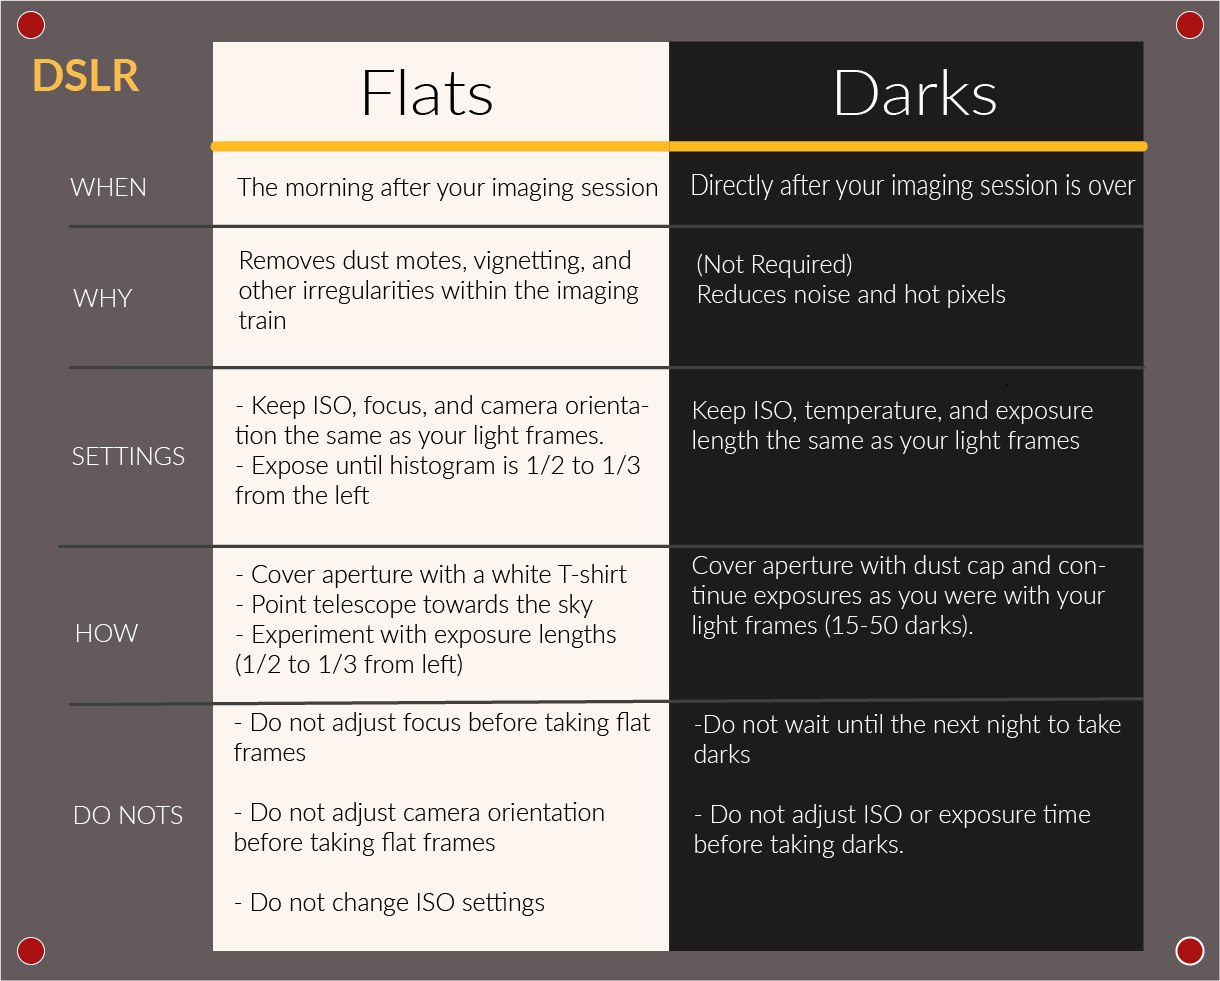
For extra assistance, there are two charts below to help identify important points when taking darks and flats with both a CMOS camera and DSLR camera. We hope that our article has helped you in taking better calibration frames and overall improving the quality of your astrophotos! Our team at High Point Scientific is always happy to help should you have any questions!

Questions? Contact Us!
Still struggling to take proper calibration frames? Need more information about something we talked about here? Send a message to our non-commissioned product advisors! Our team of telescope experts are happy to point you in the right direction.