Astronomy is a fascinating hobby that literally allows you to explore the universe like no other. Maybe you’ve already read some books and magazines or seen some stunning images online. Maybe you’ve been inspired by the unmanned space probes we’ve sent to the Moon and planets. Or maybe you wanted to buy a telescope after seeing Saturn through someone else’s scope for the first time.
No matter how or why you got started, you’re probably wondering what you can see with a telescope and how those sights will appear. In this guide, we’ll talk about exactly that - the Moon, planets, stars, and everything that lies beyond! But first, let’s start with a brief overview of what you should know about your scope and which accessories are essential when you’re just beginning your exploration of the cosmos.
If you’re currently shopping around for a telescope, you can always reach out to us for some free, impartial advice. Our gear experts are non-commissioned, so you won’t be sold anything that’s either beyond your experience or your budget.
If you’ve already bought your telescope, congratulations! If you bought it from High Point Scientific, you can be sure you’re in possession of a top-quality scope that’s capable of providing you with years of enjoyment.
Either way, if you’re new to the hobby, it’s worth knowing these basics so you can make an informed decision with your next purchase.
What Are the Different Types of Telescopes?
In essence, there are two main types of telescopes: refractors and reflectors. A refractor is probably what many people imagine when they think of a telescope. The light enters the telescope through a lens, travels down the telescope tube, and then exits through the eyepiece at the bottom.
Reflectors are a little different. There’s no lens, so the light enters through the open end of the tube, hits a large mirror at the bottom (called the primary mirror), and is then reflected back up the tube. It then bounces off a smaller mirror (called the secondary mirror) before exiting through the eyepiece.
The distance the light travels from the entry point to the eyepiece is called the focal length and is measured in millimeters. It’s an important number to know as it determines the magnification of any eyepiece used with the telescope. The longer the focal length, the greater the potential magnification.
Since a reflector telescope bounces the light back up the tube, it effectively doubles the focal length, allowing for the same magnification as a comparable refractor but with a tube half the size. This allows reflectors to have a larger mirror, enabling them to see fainter objects, but with a shorter tube.
Generally speaking, a refractor is capable of producing a better quality image, but in reality, a refractor is restricted by the size of its lens and its tube. It’s simply not feasible for most refractors to have a large lens, as that would require the tube to be impractically long in order to support it.
Since reflectors use mirrors to bounce light and are effectively half the tube length, they’re not typically impacted by this restriction.

A third option, known as a catadioptric (or simply as a hybrid or compound) telescope, is a combination of the two primary types. It has a lens like a refractor but also uses mirrors like a reflector, so you can have a better quality image with a larger mirror and a shorter tube.
Why Is Aperture Important?
So which option is right for you? To some extent, it depends on the aperture of the telescope and what you want to do with it. The aperture is the diameter of the telescope’s lens or mirror. The larger the aperture, the more light it can gather. The more light it can gather, the fainter the object it can detect and the more detail you can see.
Aperture is usually measured in millimeters, but you might also see it measured in inches. Good amateur telescopes will usually range in size from 70mm (2.8 inches) to 508mm (20.0 inches) and, as you might expect, there’s a correlation between aperture and price. The larger the aperture, the bigger the price tag!
Due to their design, many manufacturers don’t produce refractors larger than about 152mm (6.0 inches) but they’re great for observing the Moon, planets, multiple stars, and many open star clusters. That’s because those targets are bright and/or large and therefore don’t require a lot of aperture to see them.
While reflectors can also be used for observing those same targets, they’re also great for observing nebulae, globular clusters, and galaxies. As those are usually fainter, you’ll need the larger aperture of a reflector to gather more light and enable you to see more detail.
Ultimately, bigger is better, but it will depend upon what you can afford. The best thing to do is to decide how much you’re looking to spend and try to find the best scope with the largest aperture for that price. Be sure to check the reviews and stick to a reputable manufacturer. Some of the best and most popular are Apertura, Celestron, and Sky-Watcher, but if you buy from High Point Scientific you can be sure you’re getting the best quality scope at the best possible price.
A good mid-sized scope, with an aperture of between about 150mm (roughly 6 inches) and 250mm (about 10 inches) is the Apertura AD8 8" Dobsonian Telescope, while a good, large aperture scope (larger than 250mm, or 10 inches) is the Apertura AD12 12" Dobsonian Telescope. Any one of these telescopes is a great choice for a beginner; not only are they highly rated and affordable, but they’re also easy to set up and use.
How to Calculate the Magnification of Your Telescope
If you’ve ever looked at some of the telescopes in a department store, you may have seen some small, cheap telescopes that boast of being able to magnify up to 1,000x. In theory, any telescope can magnify 1,000x, but unless you have enough aperture and good quality optics to match, all you’ll see is a blur. It should come as no surprise to learn that those small, cheap telescopes have neither!
Realistically, your telescope has a maximum usable magnification, which is related to the aperture of its lens or mirror. Opinions vary, but many observers simply double the aperture, as measured in millimeters (or multiply by 50 if you’re measuring the aperture in inches). For example, a 130mm aperture telescope has a maximum usable magnification of about 260x, or roughly 255x if you calculate the magnification based upon its aperture in inches. That’s more than enough to enjoy some great views of the best targets in the night sky.
But how do you calculate magnification? Like a telescope, every eyepiece has a focal length and, as a result, every eyepiece will produce a different magnification. To calculate the magnification of an eyepiece, divide the focal length of the telescope by the focal length of the eyepiece.
For example, the Apertura AD8 Telescope has a focal length of 1200mm and comes with two eyepieces. One has a focal length of 30mm while the other has a focal length of 9mm, giving magnifications of 40x (1200 / 30) and 133x (1200 / 9) respectively.
Top Tips to Get You Started
You’re probably excited to get outside and put your telescope through its paces, but before you do, here are a few tips and pointers that will help you make the most of your time under the stars.
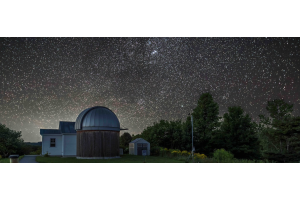
- Get to a dark location: The lights from your neighbors or from a nearby town or city will brighten the sky and make it hard to see fainter objects, and the objects you can see won’t look nearly as good as they would from a truly dark location. More than that, seeing thousands of stars and the Milky Way stretching overhead truly makes it all worthwhile.
- Let Your Eyes Adapt To The Dark: When you first step outside from a well-lit room in your home, it takes a few seconds for your eyes to adjust before you’re able to see anything. Realistically, it can take up to 30 minutes for your eyes to adapt enough that you can start observing, and up to two hours for them to become fully dark-adapted.
- Let your scope adapt to the temperature: Just as your eyes need time to adapt, so does your scope. If you’re storing your scope inside and it’s cooler outside than in, you’ll need to allow the air that’s trapped in the tube some time to cool down. A refractor cools more quickly than a reflector, and the amount of time will increase with the aperture. If the air in the tube is warmer than the ambient air temperature, the currents in the tube will cause image distortion. It’s therefore a good idea to take your telescope outside a good hour or so before you plan to start observing.
- Leave the Moon and planets for last: Since your eyes can take some time to adapt to the dark, start with multiple stars and star clusters before heading on to fainter targets, such as nebulae and galaxies. Try to avoid ruining your night vision by staring at the Moon halfway through an observing session. If possible, the Moon should be the last target before you head inside as observing it first will delay your eyes’ dark adaptation. Similarly, Venus, Jupiter, and Mars (when at their best) can appear particularly bright at low magnifications, so it’s a good idea to leave those for last too.
What Essential Accessories Will You Need?
While your telescope comes with everything you need to get started, there are a few items that’ll help you make the most of every observing session - and they won’t cost you an arm and a leg!
- A red flashlight: You’ve been outside for a while now, your eyes are fully adapted to the dark and you’re about to start hunting down your next faint, fuzzy target. You reach for your star charts, but of course, it’s too dark to see what you’re doing. A regular flashlight with a white beam will instantly ruin your night vision - and possibly put an early end to your observing session. However, red light doesn’t affect your eyes in the same way, and a red flashlight is a perfect tool to help you see in the dark. For example, the Apertura Astro Vision Red LED Flashlight is small enough to fit inside accessory cases while being powerful enough to provide the light you need.
- A lunar filter: The Moon, of course, is the second-brightest object in the sky (after the Sun) and can be a dazzling sight when seen through a telescope. A lunar filter will block out the vast majority of the light, allowing your night vision to be preserved and providing you with a more comfortable observing experience. The Apertura ND96-0.9 Neutral Density Filter blocks 87% of the light and preserves the natural color of the Moon.
- A Barlow lens: Your telescope probably came with two eyepieces; one for a low magnification view and the other for medium magnification. That’s a good start, but you’ll want more options than that. A Barlow lens can increase the magnification of any eyepiece you attach to it, effectively doubling the range of magnifications available to you. Barlow lenses typically come as either 2x, 3x, or 5x; in other words, a 2x Barlow will double the magnification of the eyepiece, a 3x will triple it, and a 5x will increase the magnification five-fold.