Here at High Point Scientific, we love the night sky, and regardless of whether we’re observing the Moon, planets, stars, or something further afield, we never miss a chance to take a telescope outside and explore the universe. Chances are you feel the same way, and you’re looking to buy your very first scope. That said, it’s not a good idea to simply rush out and buy whichever one takes your fancy! To help you out, we’ve compiled a list of the top 10 things you should know before buying your first telescope.
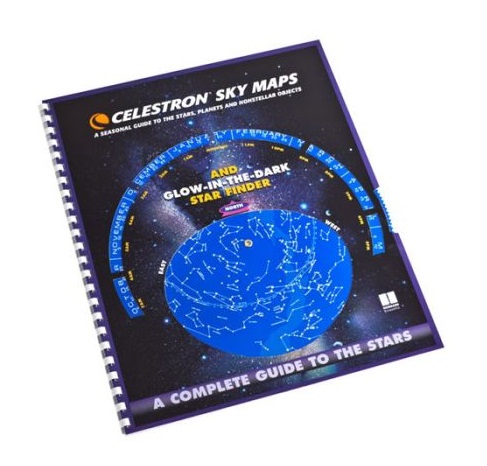
1. Get to Know the Constellations
Not everything is visible in the sky every night. The stars and constellations are seasonal, so while you’ll be able to see Orion the Hunter in the winter, you won’t be able to see him in the summer. The reason for this is a topic for another time, but suffice it to say that you need to understand which constellations are best seen during which season.
More importantly, you need to learn the constellations in order to find the objects you want to observe. It’s no use knowing that the Orion Nebula can be found in Orion if you don’t know when Orion will be above the horizon or what to look for. Sure, computerized scopes can take the guesswork out of observing, but these aren’t always a good choice for a beginner (and we’ll learn why as we review these ten points).
2. Understand What You Can See
Besides the Moon and planets, there are literally thousands of objects you can see with a telescope. Everything from multiple stars and star clusters to nebulae and galaxies are all within your reach, but what’s the difference between an open star cluster and a globular cluster? Or a diffuse nebula and a planetary nebula? Here’s a quick run-down of the basics to get you started:
- Diffuse nebulae - these are huge clouds of gas and dust, spanning light-years of space, from which the stars themselves are born. They can be a little elusive, but the larger and brighter examples will often show a fair amount of texture.
- Multiple stars - these stars often appear as single stars to the naked eye, but when observed with a telescope they’re split into two or more components. Many will show different colors too.
- Variable stars - these stars vary their brightness over time. Some are predictable and will repeat the same cycle within a set period of time, while others can remain the same brightness for months or years before suddenly flaring up.
- Open star clusters - these are groups of young stars that were born from the same nebula but have yet to drift apart from one another. Being young, the stars usually appear blue-white in color and will often form shapes and patterns that spark the imagination.
- Planetary nebulae - these are shells of gas thrown off by stars as they reach the end of their lives. Most are very small and require a high magnification to be properly observed. They’re so-called because many will show discs like a planet through the eyepiece.
- Globular star clusters - these are spherical globules comprised of thousands of stars. These clusters are typically billions of years old and thousands of light-years away. They usually require a higher magnification to resolve the individual stars.
- Galaxies - these distant citadels of stars come in many shapes and sizes, with some appearing as face-on spirals, and others appearing edge-on. There are also spherical and irregularly shaped galaxies and pairs of galaxies that are passing one another in space.
It’s worth knowing that you won’t be able to see every example of every type of object - for example, every galaxy in the night sky - although the larger your telescope, the more you’ll be able to see.
3. Learn How to Star Hop
Star-hopping is an important skill for any astronomer to master. While some targets are bright enough to be seen with the naked eye and others appear close to a bright star, others are not so easily found.
This is where a good, sturdy star chart and the experience of star-hopping come in handy. Star-hopping is when you start at a bright star and then use fainter stars to hop to a fainter object. It’s an important skill to learn, as it enables you to find countless objects that would otherwise remain undiscovered.
What about a computerized scope? These telescopes have a built-in database containing thousands of objects for you to choose from. The scope will then turn toward the object, thereby making it easier to locate your targets.
This sounds great in principle, but there are a number of reasons why they’re not the ideal choice for beginners.
For example, the telescope will have a list of objects you can see that night, but some will be far better choices than others. If you’re not familiar with the stars and what you can see, how do you know which ones are best?
Similarly, the database and software probably aren’t specific to your telescope; in other words, you could be looking at the same list regardless of whether you have the smallest available telescope or the largest. The problem here is that while all the objects will look better in the largest scope, some may not be visible in the smallest scope at all.
Another consideration is that the object won’t always be within your field of view. It’s not unusual for the scope to stop moving and for you to look through the eyepiece and see… nothing. Your target is most likely just outside the field of view, but if you’re not familiar with the constellations and the object you’re looking for, you may not know how to find it.
Lastly, if you don’t know what you’re looking for, you won’t know if you’ve found it. Do you know what to expect when you’re looking for a particular globular cluster, nebula, or galaxy? We’ll talk about this a little more below!
4. Who, What, Why, Where, and When?
When you buy a car, there are always a number of factors you’ll want to consider. For example, who’s going to be driving it? What will it be primarily used for? Why do you need a new car? Where will you park it? And when will you be using it?
Those same questions are just as important when it comes to buying a telescope. Who will be using it? What will you observe with it? Why do you want a telescope? Where will you use it and store it? When will you be using it?
If you want a telescope the whole family will enjoy, then you’ll need to take everyone’s ages into account. There are some great kid-friendly options available; for example, the Celestron FirstScope is an outstanding choice if you’re buying the scope for a younger child, while the Apertura AD8 is an excellent all-rounder the entire family can enjoy.
What will you be observing? If you’re only interested in the Moon and planets, then a refractor (see below) might be your best choice. However, if your interests lie with fainter objects further afield, you might need something that can gather more light, such as a reflector telescope.
Why do you want a telescope? Is it because you’ve always loved the stars and have wanted to explore them further, or is it something more whimsical? This is an important question to ask, as a telescope can be a big investment, especially if you’re going to lose interest in it later.
Where will you be observing? Do you need something portable that can be easily transported to a different location? Do you want to take it camping or on vacation? Where will you be storing it? Do you have room for it?
Lastly, when will you be using it? Is this something you’ll be using every time there’s a clear night, or just once in a blue moon? Again, it might not be a smart investment to spend a lot of money on something that won’t see the dark of night very often!
5. Understand Telescope Technicalities
Choosing a telescope can be a bewildering process, especially if you’ve never owned one before. There are a lot of technical details, and they all seem to be important, so which ones should you pay particular attention to? Let’s start with the basics.
What Is Aperture and Why Is It Important?
The first thing to understand is aperture. This is the diameter of the telescope’s lens or mirror, and as you might expect, the larger the aperture, the more light it can gather. This means you’ll be able to see fainter objects and be able to see more detail on those objects.
It also has an impact on magnification. Put simply, the greater the aperture, the more you’ll be able to magnify an object. Ignore those cheap, department store telescopes that promise magnifications of 1,000x! Theoretically, any telescope can magnify 1,000x, but very few will be able to produce a decent quality image. (And they’re not cheap, either.)
That’s because, without the extra light-gathering power of a larger aperture, all the telescope will do is simply magnify the image it has. And if the image isn’t that great to start with (and it’s a safe bet to say those department store scopes are not good quality) then all the imperfections will be magnified too, and you’re left with a blurry mess.
What Are the Different Types of Telescopes
There are essentially three types of telescopes: refractor, reflector, and catadioptrics (aka, compound telescopes).
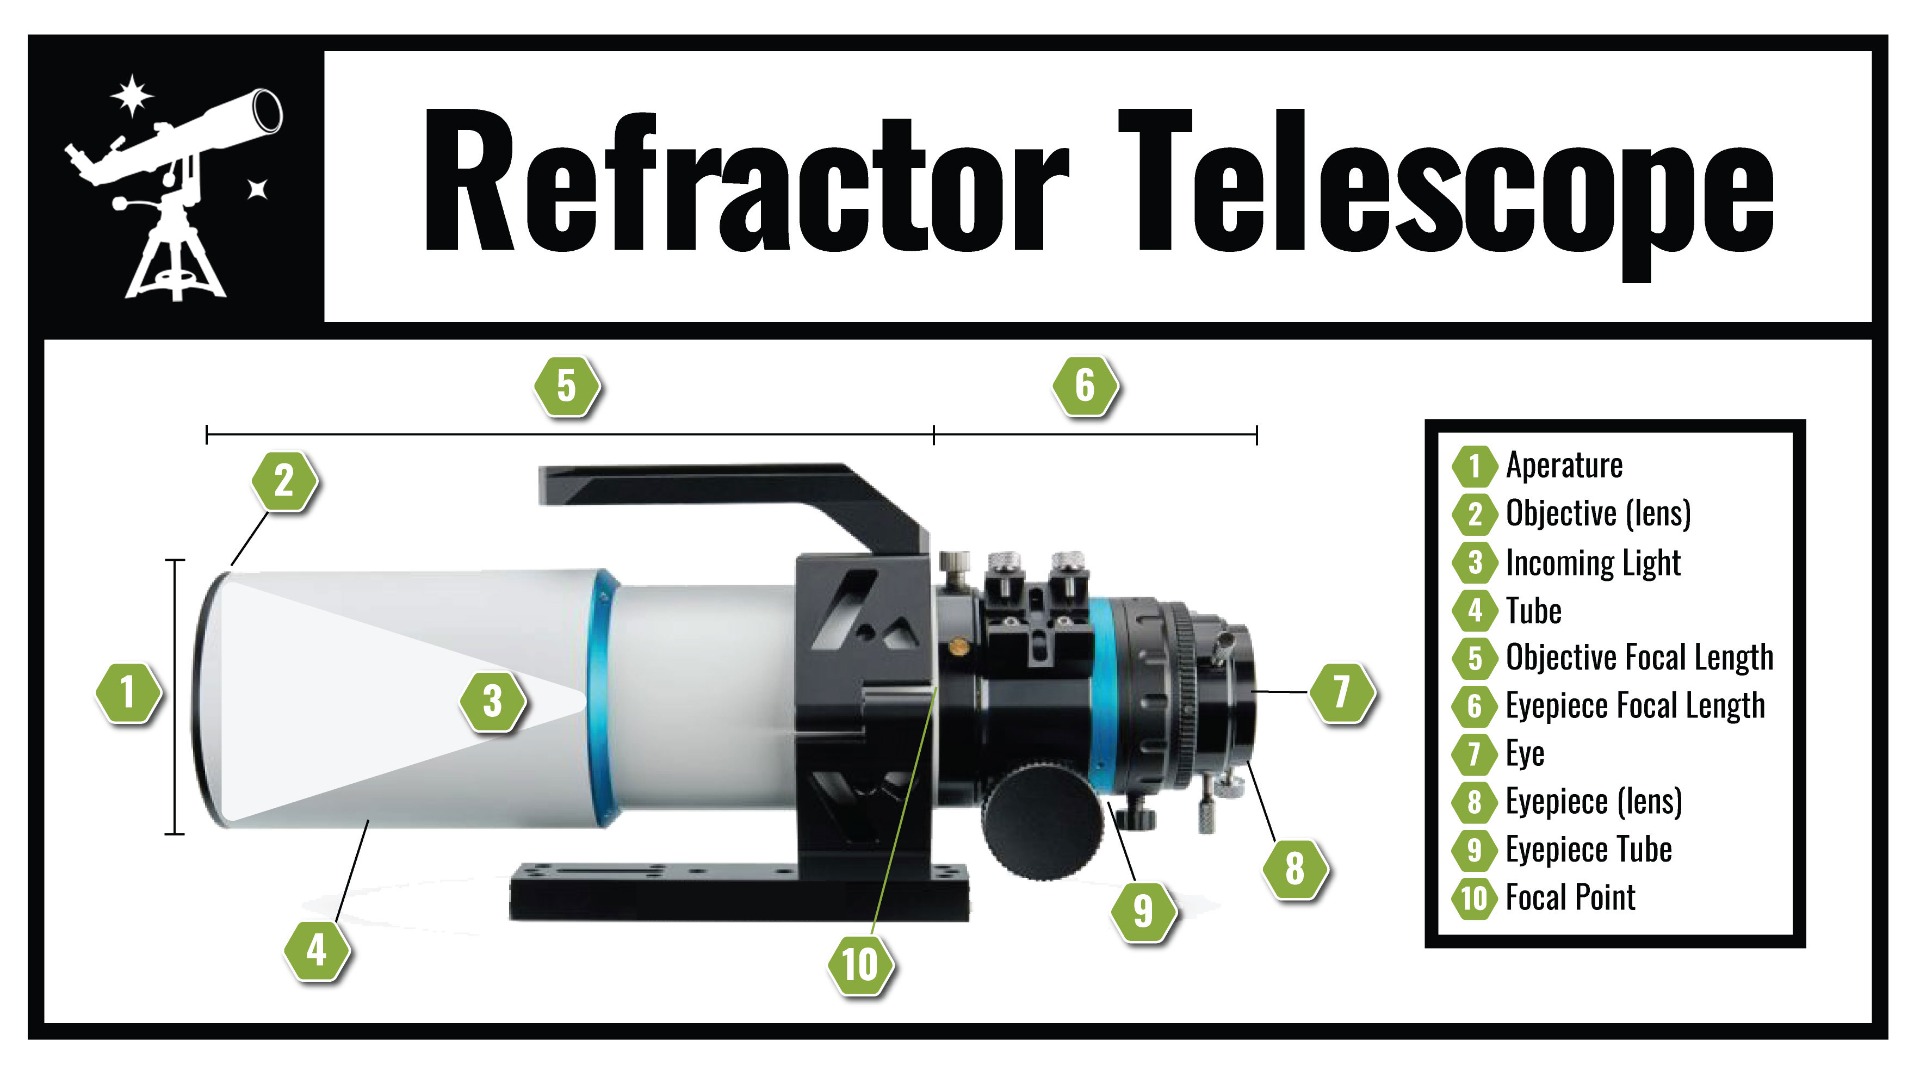
Refractor telescopes are the oldest type of telescope. Light enters through a lens at one end of the telescope and then exits through the eyepiece at the bottom. Refractors are capable of high magnifications and the lenses can produce a good quality image, but due to the nature of refractors, manufacturers typically won’t produce refractors with lenses larger than six inches in diameter.
(The glass is expensive to produce and the telescope itself would be longer and heavier.)
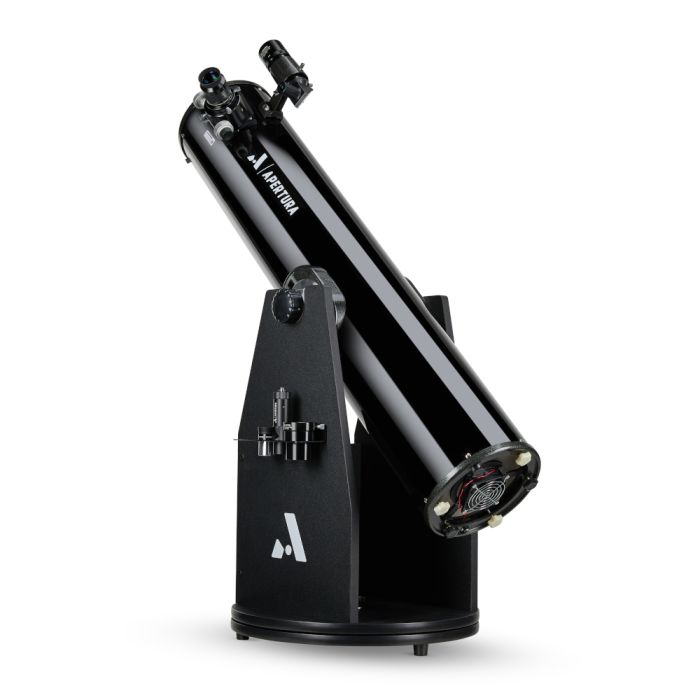
Reflector telescopes use mirrors instead of lenses. Light enters through the open end of the telescope and travels the length of the telescope tube to a mirror (called the primary mirror) at the bottom. The light is then reflected back up the tube to a much smaller, secondary mirror that bounces the light out of the tube via the eyepiece.
The advantage of a reflector is that the mirrors allow the telescope tube to be half the length of a refractor. This allows manufacturers to easily produce telescopes with larger mirrors that can gather more light and allow you to see fainter objects and more details. The downside? Mirrors lose more light than glass lenses, so you’re likely to get a slightly lower-quality image.

The third kind of telescope is called a catadioptric. It’s essentially a hybrid between a refractor and a reflector, which is why it’s also known as a compound telescope. Light enters through a lens, like a refractor telescope. It then reaches a primary mirror at the opposite end of the tube and is reflected back up toward the secondary mirror, like a reflector.
However, unlike a reflector, the secondary mirror is actually in the center of the lens, but it serves the same purpose. The light is reflected back down the tube where it exits through the eyepiece - which, like a refractor, is located at the bottom of the tube.
The practical upshot is that you have a relatively compact larger aperture telescope (like a reflector) that’s able to produce better quality images (like a refractor). The downside is that they tend to cost more - and the cost is definitely something you should keep in mind when making your selection!
6. Understand the Different Types of Mounts
The days when you could hold a telescope with your hands and then point it toward your target are long gone. For one thing, telescopes are simply too large and heavy and it’s next to impossible to hold your telescope steadily.
With that in mind, telescopes need to be secured to some kind of mount. There are two types in common usage.
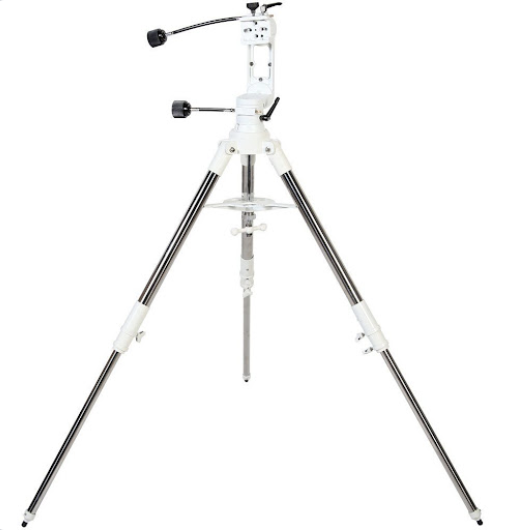
The first, the alt-azimuth mount, is the easiest to operate and is therefore probably the best for beginners. It moves in a simple vertical up/down motion (altitude) and a horizontal left/right motion (azimuth).
In turn, there are two basic types of alt-azimuth mount - a traditional tripod and a Dobsonian mount. A tripod mount, of course, consists of the telescope sitting atop the three legs of the tripod, thereby providing the stability needed to enjoy a steady view.
Dobsonians work a little differently. Made popular by the amateur astronomer John Dobson, the telescope is cradled at the top of a rectangular, box-like structure, which, in turn, is attached to a rotating disc at the bottom of the mount. The cradle allows the scope to point up and down while the disc allows it to turn to the left and right.
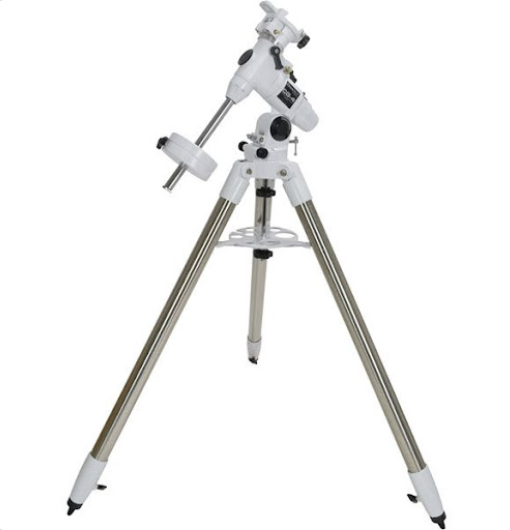
Besides alt-azimuth mounts, the other primary type of mount is an equatorial mount. These are a little more complicated. The problem with manual alt-azimuth mounts is that you can’t easily follow an object as it moves across the sky (although this is not an issue with computerized mounts.) Objects don’t rise and set in a simple vertical and horizontal motion - they rise above the horizon at an angle and then arc across the sky before setting, again at an angle.
The angle of its movement depends upon the position of the object and the observer’s location. An equatorial mount resolves this issue by tilting the mount at an angle to match the angle of the object. The reason this can be a little complicated for beginners is that it involves setting the telescope up so that it aligns with Polaris, the Pole Star.
An equatorial mount also requires the use of weights to properly balance the equipment.
If you’re looking for a scope just for yourself or you’ve used this type of mount before, an equatorial mount is a viable option, but if you’re looking for a scope the whole family can enjoy and/or you’re an absolute beginner, a Dobsonian altazimuth mount is probably the best way to go.
7. Know How to Calculate Magnification
As you look at different telescopes, you might notice something called focal length listed in the specifications. The focal length of a telescope is the distance that light must travel from its entry point into the telescope (either at the objective lens of a refractor or catadioptric telescope or the open end of a reflector) to its exit point at the eyepiece. This is measured in millimeters.
Eyepieces also have a focal length, which is also measured in millimeters and is also the distance light must travel from the entry to the exit point.
These numbers are important to know as you’ll need them both to calculate magnification. You can do this by dividing the focal length of the telescope by the focal length of the eyepiece. For example, if you use a 20mm eyepiece with a telescope with a focal length of 1000mm, you’ll get a magnification of 50x.
There are three things to keep in mind here:
- The longer a telescope’s focal length, the higher the potential magnification
- The longer an eyepiece’s focal length, the lower the potential magnification
- You can use the same eyepiece in different telescopes and get different magnifications, depending on the focal length of the telescopes.
Most eyepieces range in focal length from about 6mm to 20mm, and most manufacturers will ship a couple with your telescope. (Typically a short focal length eyepiece - around 10mm - and a longer focal length eyepiece of around 20mm.)
While a telescope with a longer focal length and higher magnifications might sound like the best option, it really depends on what you want to observe. Galaxies and planetary nebulae are often small and faint, so a scope with a longer focal length is a better option. It’s a similar story with planets, as you’ll need the higher magnification to prise out the details. You’ll also need a larger aperture to gather the light required to produce a good quality image at higher magnifications.
However, star clusters and nebulae are often best observed at low magnification, and while you can buy eyepieces with longer focal lengths to get the lower magnifications you need, they tend to cost more than the eyepieces within the 10mm-20mm range.
8. Know Your Budget
It should come as no surprise to learn that the larger the aperture, the larger the cost. However, the question isn’t only “how much can you afford?” but also “how often will you use it?”
If you know you’ll use it frequently because you love the stars and you go outside whenever you can, then you may be willing to spend a little more on a larger, good-quality scope. For example, Apertura produces an outstanding range of Dobsonian scopes that range from 152mm (6 inches) to 305mm (12 inches) in aperture.
If, however, you’re buying a telescope for a young child, you’re new to astronomy or you’re relatively inexperienced, it’s a good idea to go for an inexpensive option. That way, if the interest wanes you haven’t lost too much from your investment.
9. Know Which Accessories You'll Need
Your new telescope will almost certainly come with a couple of eyepieces to get you started, but depending on which one you buy (and who the manufacturer is) you might get a few bonus goodies. Either way, there are four must-have accessories every astronomer keeps in their telescopic toolkit:
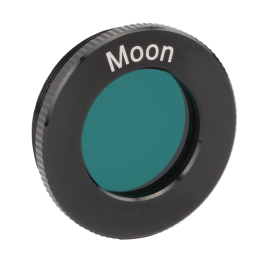
Lunar Filters
Contrary to popular belief, almost every astronomer hates to look at the full Moon as its light can be dazzling. That’s where a lunar filter comes in. This inexpensive (but invaluable) accessory will block a portion of the Moon’s light and allow you to observe the Moon without being dazzled by it. (Incidentally, it’s worth buying a neutral density filter, as this will allow you to enjoy the natural color of the Moon without it being discolored by the filter.)
Red Flashlight
Our second essential accessory is the humble red flashlight. Giving your eyes enough time to fully adapt to darkness will allow you to see more stars, plus fainter objects and details. However, it can take at least 20 or 30 minutes for this to happen, and the last thing you want is your night vision to be ruined by a bright flashlight.
Fortunately, again, there’s an inexpensive solution. Your eyes are not sensitive to red light the same way they are to white, so a red flashlight will allow you to read your books and charts, and make notes and sketches without losing your valuable night vision.
Additional Eyepieces
Your scope will most likely come with several eyepieces to get you started, giving you a low and a high magnification, but you’ll soon find you’ll need a greater range than that. Some objects look great at low magnification and others at high magnification, but there is a wide selection of objects that are best observed at magnifications somewhere in-between.
It’s therefore essential that you add a few more eyepieces to your collection. For example, three to four eyepieces is usually a good starting point, and it’s a good idea to have one eyepiece for each of the following focal length ranges:
- 1x 6mm to 10mm
- 1x 11mm to 15mm
- 1x 16mm to 20mm
- 1x 20mm or more
Bear in mind that eyepieces with a shorter focal length produce a higher magnification, but with a smaller field of view. You should also know that your telescope will accept eyepieces with either a 1.25” barrel (most common) or a 2” barrel, so be sure to verify the size of the barrel you need before you buy.
If you don’t have a lot of time, money, or storage, you could go for the all-in-one option - a zoom eyepiece. As its name implies, this type of eyepiece allows you to adjust the focal length, thereby giving you access to a range of magnifications in the process. While this is certainly convenient, the trade-off is that the image quality is not usually the same quality as a regular eyepiece.
Barlow Lens
Lastly, we come to the accessory that is possibly the most useful add-on since the invention of the telescope itself - the Barlow lens. Put simply, this will increase the magnification of any eyepiece you attach to it, usually by a factor of 2x or 3x.
For example, if you have an eyepiece that normally produces a magnification of 20x with your telescope, attaching it to a 2x Barlow will give you 40x. A 3x Barlow will give you 60x and a 5x Barlow will give you 100x. As an added bonus, you keep the same field of view.
Treat yourself to a Barlow and you instantly double the range of magnifications available to you. If, for example, you only had two magnifications available, 30x and 75x, a 2x Barlow would give you two more - 60x and 150x.
(Incidentally, 2x Barlows are the most versatile, as 3x and 5x Barlows are best with long focal length eyepieces or larger telescopes that are capable of producing good quality, high magnification images.)
10. Know What To Expect
Regardless of how much you spend on your scope and accessories, it won’t come anywhere near the $1.5 billion it costs to develop and launch the Hubble Space Telescope - and you obviously shouldn’t expect the same stunning views either.
The same is true of the images captured by more earthbound photographers. While they’re using the same equipment you can buy for yourself, you won’t be able to see the same stunning colors and detail you can see in those images.
Those amazing images are the result of painstaking work by the astronomers and scientists responsible for producing them. Depending on the photo, it could have taken many hours to capture the scene, plus many more hours to process the raw result to bring out the color and the detail.
The reason your eyes can’t see those colors and details is that they’re not sensitive enough to detect them. However, while many galaxies will typically appear gray, you can still expect to see some color here and there.
For starters, you’ll certainly notice some color in the planets and in many of the stars (both single and multiple). Open star clusters are often young, so their stars are usually blue-white, but you occasionally come across an orange oddball. The individual stars of globular clusters can also appear blue-white or a faint yellow-gold.
Nebulae - both regular diffuse nebulae and planetary nebulae - will often appear gray at first glance, but if you take your time and allow your eyes to take in the view, faint greens and blues can be seen.
While you won’t see color in everything, that doesn’t mean these sights are bland and uninteresting. Bear in mind these objects lie at distances that are almost impossible to imagine and that it’s taken their light hundreds, thousands, or even millions of years to reach your eyes.
You could be looking at the birthplace of stars, hundreds of stars clustered together, two massive stars orbiting one another, a star in the last stages of its life, or - in the case of a galaxy - hundreds of billions of stars and potentially trillions of unseen worlds.
What other hobby can do that?

This Article was Last Updated on 08/15/2023