


Getting into astrophotography has never been easier, and with the release of the ZWO Seestar S30 Smart Telescope, you can explore the night sky with an all-in-one imaging system for just $399. If you’ve been waiting for the right moment to dive into this incredible hobby, this is it!
Before diving into the written review, take a moment to see ZWO SeeStar S30 Smart Telescope in action. Check out Teagan's full video review!
Intro
For years, astrophotography has been plagued by expensive and complicated gear that has kept the joy of imaging the stars just out of reach. That is, until now. With the introduction of the Seestar S30, ZWO has done something we’ve never seen before: they lowered the entry point into astrophotography without compromise!
Yes, you read that correctly: ZWO has released an all-in-one imaging system designed with everything you need to begin imaging the stars and more, while being half the cost of the latest iPhone! If you are ready to step off the sidelines and into the starlight, this is the smart telescope for you!
Follow along for closer look into everything the Seestar S30 has to offer!
Unboxing & Setup
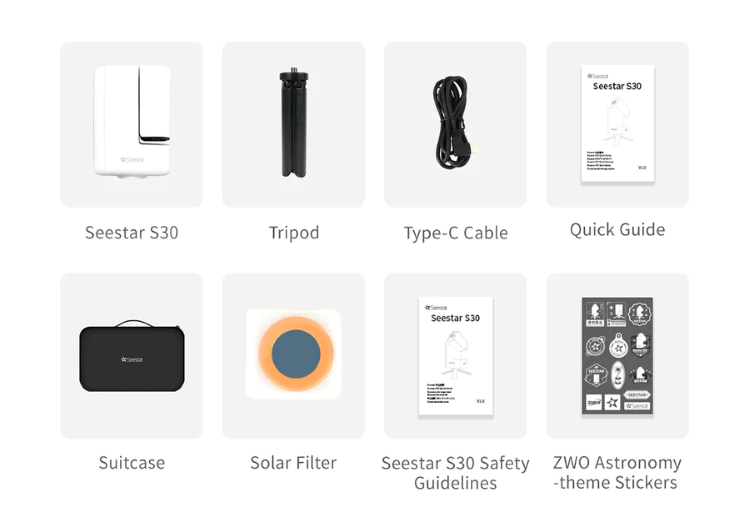
Oftentimes, unboxing astrophotography gear can be a hassle, with numerous components, hidden accessories, and layers of packaging, but unboxing the S30 is as simple as it gets. Right out of the box, you’ll have everything you need to start capturing images: a tripod, a carry case, a USB-C charger, and a magnetic solar filter. However, since ZWO sent us a pre-production model for testing purposes, we didn’t receive a carry case. But don’t worry, ZWO informed us that production models will include a custom-fit S30 suitcase.
Follow along for a closer look into this exceptionally simple 2-step setup!
Mounting and Leveling: The included ⅜16th tripod easily threads to the bottom of the S30, but you can place an Apertura leveler in between for a bit more control when you are on uneven ground. Unlike the Seestar S50, the S30 does not ask you to level. However, it is an option available in the advanced settings.
Connecting: First, make sure you’ve downloaded and installed the Seestar app. Then, press the power button. If it’s your first time connecting, you’ll need to hit the reset button, but after you do this, you’ll only need to long press the power button to begin the sync process. Once your smart device locates the S30, follow the in-app instructions to connect! (You might need to manually input a password if you are using an Android device). Once you’ve successfully connected, tell the S30 to “extend its arm” and choose one of the imaging modes. You can start exploring scenery, solar system objects, or dive into the deep sky imaging from star gazing mode!
That’s it! All you need to do now is head outside and start imaging!
First Light & Star Gazing Mode
For my first light, I wanted to focus on the Star Gazing mode as this is the most anticipated feature of the Seestar S30 and likely the main use of this smart telescope for those interested. So with that, let’s dive in! .
Deep Sky Imaging
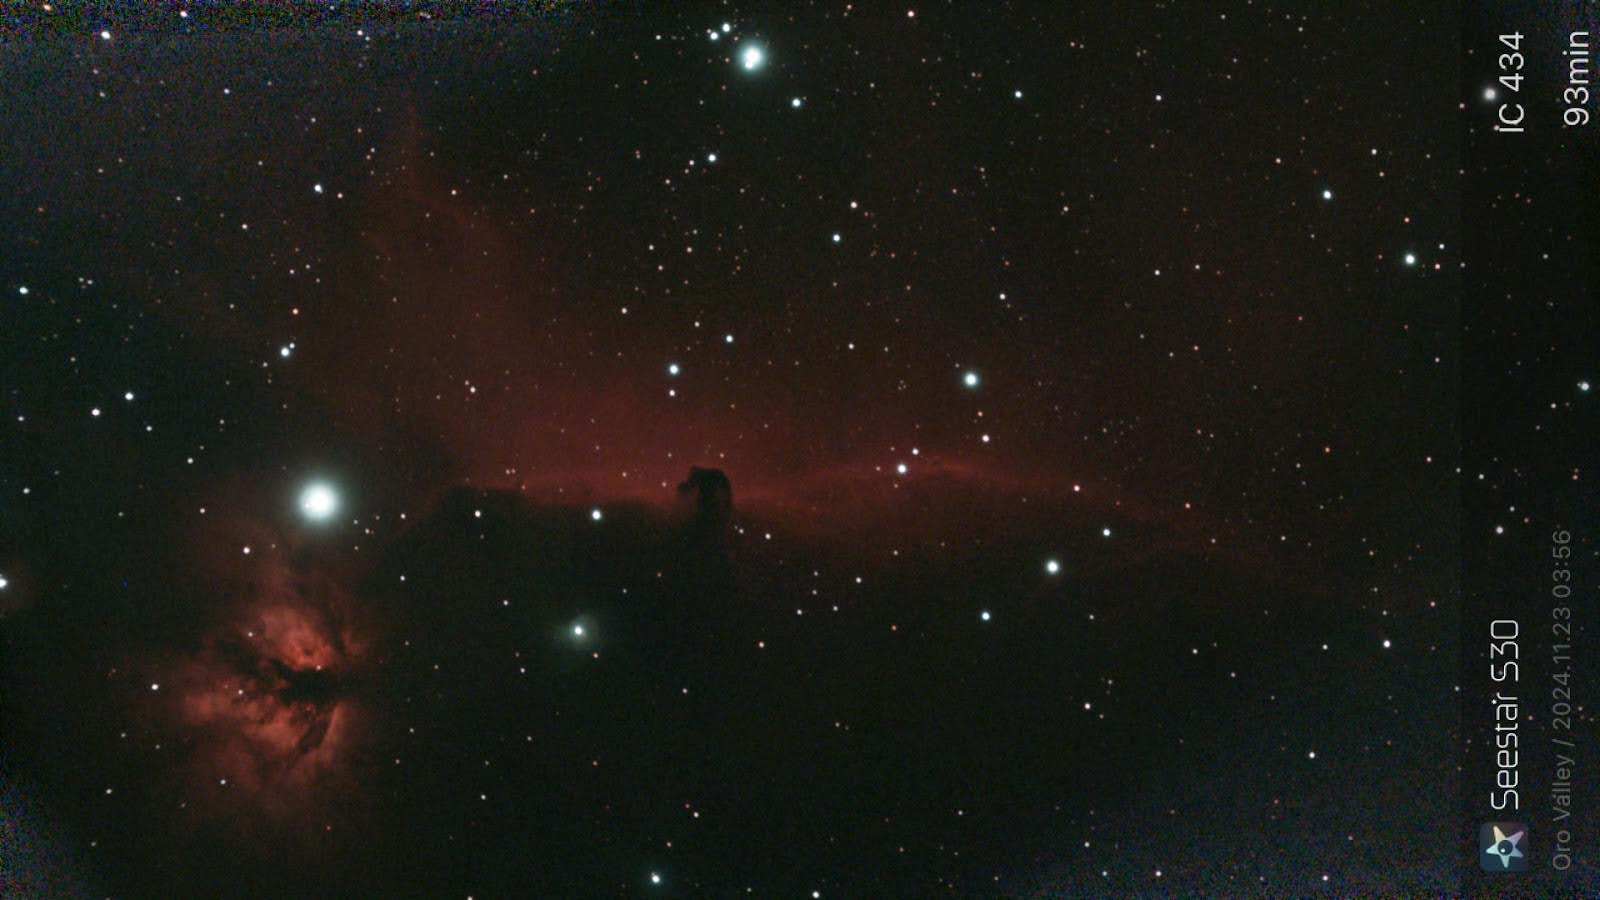
Initiating the S30’s deep sky imaging mode is a simple 3-step process: open the star gazing mode or in-app sky atlas, select an object from the catalog, use the “go-to” function to center the object in the scope, and let the S30 do the rest! In mere minutes the S30 will begin capturing and stacking pictures in real time, almost immediately showing you deep sky details normally hidden from the unaided eye. If you're capturing astro-photos from light polluted areas, you can easily choose between two built-in filters, a UV/IR cut filter or a dual band filter optimized for capturing the delicate details of emission nebulae. You can switch between either filters by pressing the circular icon on the top right of the live view screen! Really, it's that easy!
For my first test of this exciting imaging mode, I chose NGC 7000, also known as The North American Nebulae. Since NGC 7000 is an emission nebulae, and I was under moderately light polluted skies, I used the built-in dual band filter. Check out the results below!

Mosaic Mode
Next, we have the Mosaic Mode. This powerful addition will expand the framing of your deep sky images and allow you to capture even more of the object in the night sky. All you need to do is hop over to the in-app sky atlas to find an object you want to image. After you have the object located, you can kick off a mosaic imaging session by selecting “framing” from the options on the right-hand side. This will open a menu that allows you to “zoom” between “1x and 2x” (with 2x being a larger frame) and rotate the frame to your liking. After setting up the framing, all you have to do is press go-to, and S30 will do the rest!
In just an hour, I was able to capture this thrilling wide field image of the North American Nebulae! Check out the awesome difference the Mosaic mode offers!

Other imaging modes: Solar System & Scenery
The Seestar S30 is an innovative all-in-one imaging system with numerous features that will support your astrophotography journey, but capturing the cosmos is not the only thing this pocket-sized observatory can do! Beyond the deep sky imaging mode, you’ll find a solar system imaging mode, a scenery imaging mode with an AI object tracking function, and a full selection of in-app image processing capabilities that can bring your astrophotos to the next level! If you want to know how to get the most out of your S30, dive into the details below!
Solar System Mode
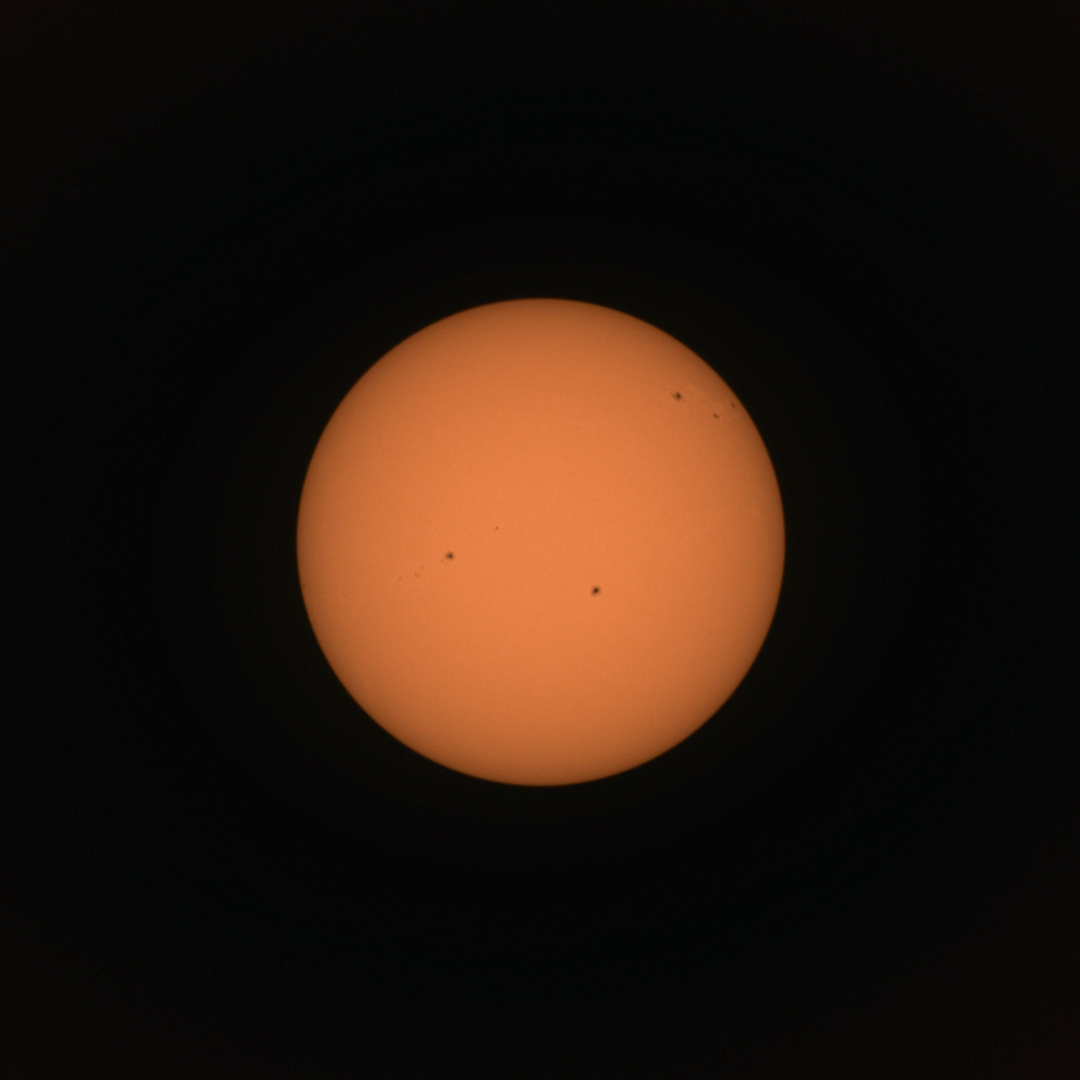
Much like the larger Seestar S50, the S30 is more than capable of capturing vivid images of our closest star, the Sun! All you need to do is attach the magnetic solar filter and navigate to the solar system mode from the app's home page. Then, select the Sun from the menu, and let the S30 begin its search!
Note that one issue for the bigger brother, the SeeStar S50, is that if it fails to find the Sun there is no easy way to center it. With the Seestar S30, on the other hand, and the addition of the wide field lens, centering the Sun has never been easier.
After initiating the solar tracking mode, let the S30 get into position, then use the “fast” joystick controls to center the Sun in the wide field view. Once centered, switch over to the telescope view and use the “slow” joystick controls to make small adjustments to the framing. And that’s it! You can capture photos, videos, and even a solar time-lapse! If you want to really bring out the fine details of the solar surface, use the “raw” function in the video mode to capture a stackable .avi video file!
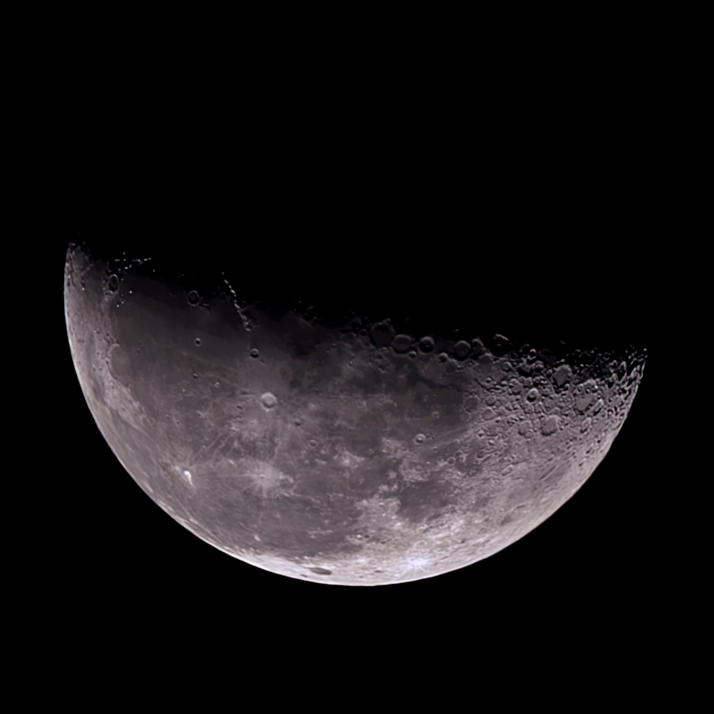
To capture photos of our closest celestial satellite, the Moon, follow the same step as above, minus the solar filter. It's really that simple! Alternatively, you can use the wide field capture to capture beautiful landscape lunar shots.
While the app will allow you to track any of the major planets, the S30’s focal length is far below what's needed to capture photos of even the brightest and largest planets. But to be fair, this isn’t something we expected from a smart telescope built to bring distant galaxies and faint nebulae within reach.
Scenery & AI Tracking Mode
One of the most exciting bonus features of the S30 is the dual lens scenery imaging mode. With this mode, you’ll be able to capture wide field landscape photos, zoom in on far-off terrestrial scenes, and automatically track moving objects. All you need to do is select the scenery mode from the home page of the Seestar app and start exploring! The possibilities are truly endless!
Post Processing
Within the Seestar app, you’ll find numerous functions to edit and process your photos! From the home page of the Seestar app, head over to the “my album” section to begin processing your astro photos and more!
Intelligent AI Denoising
The first option you’ll find is the Intelligent AI Denoise function, which can be initiated from either the photo library or during deep-sky live stacking sessions. When reviewing images in the photo library, you’ll see a magic wand icon on the top right-hand side of the screen. Simply select the icon, and the app will begin its denoising process! Check out the side-by-side comparison below!
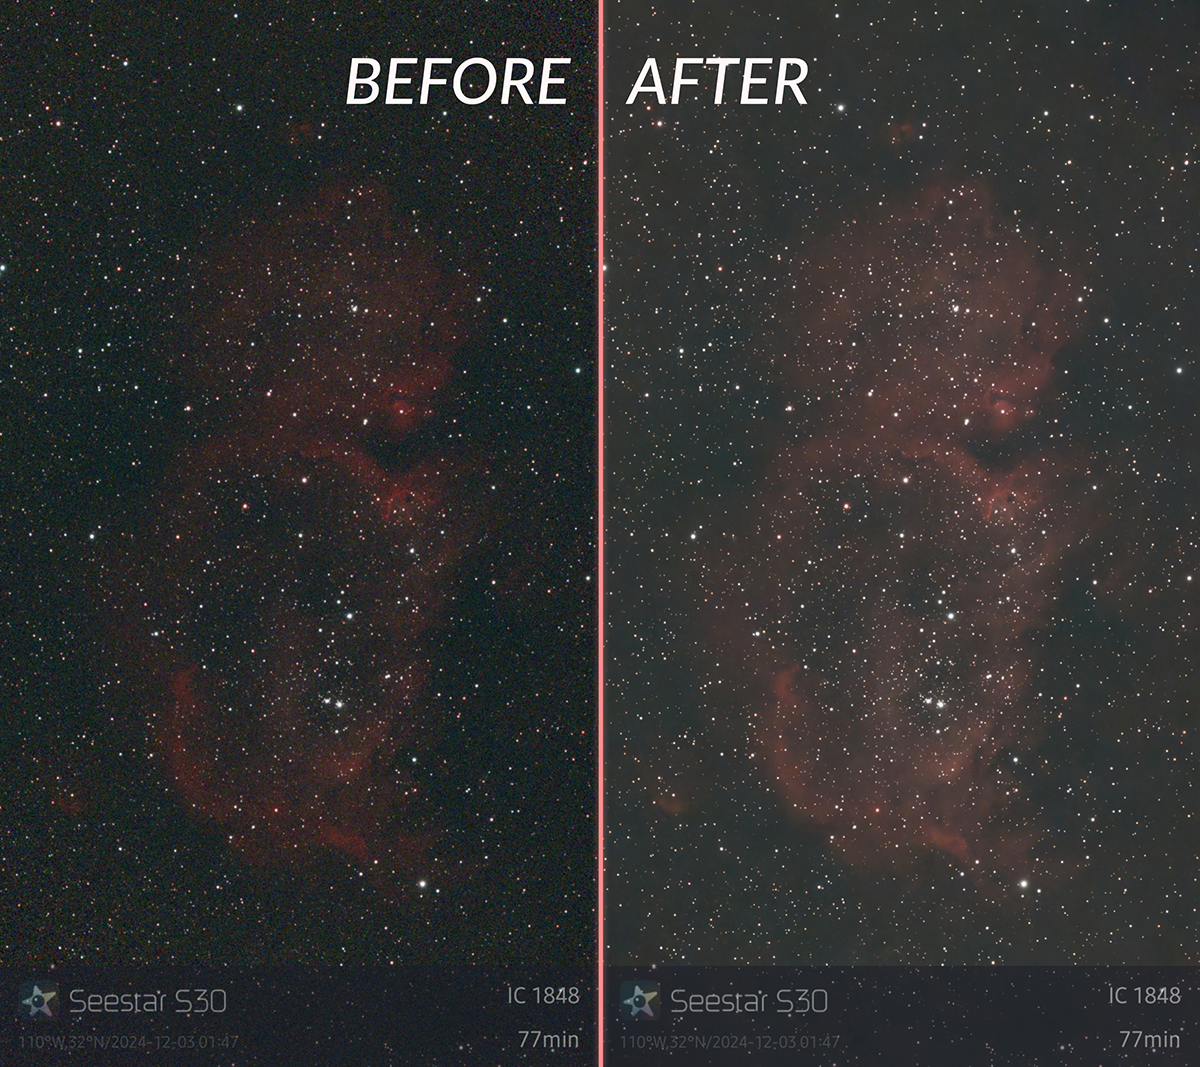
Photo Editor
The Seestar app features a photo editor with brightness, contrast, saturation, and denoising sliders that will give ample control over the creative process.
Deep Sky (Re)Stack
A really enjoyable feature for those who like to tweak their photos, both in real-time or after their session is complete, the restacking process gives you access to the individual “light frames” as they are captured, allowing for real-time review of unwanted artifacts. You can also restack these frames after the imaging is complete, selecting only those you want to stack (instead of simply stacking every frame sequentially). This is done from the deep sky stack option on the home menu and can really enhance your photos.
Further Processing
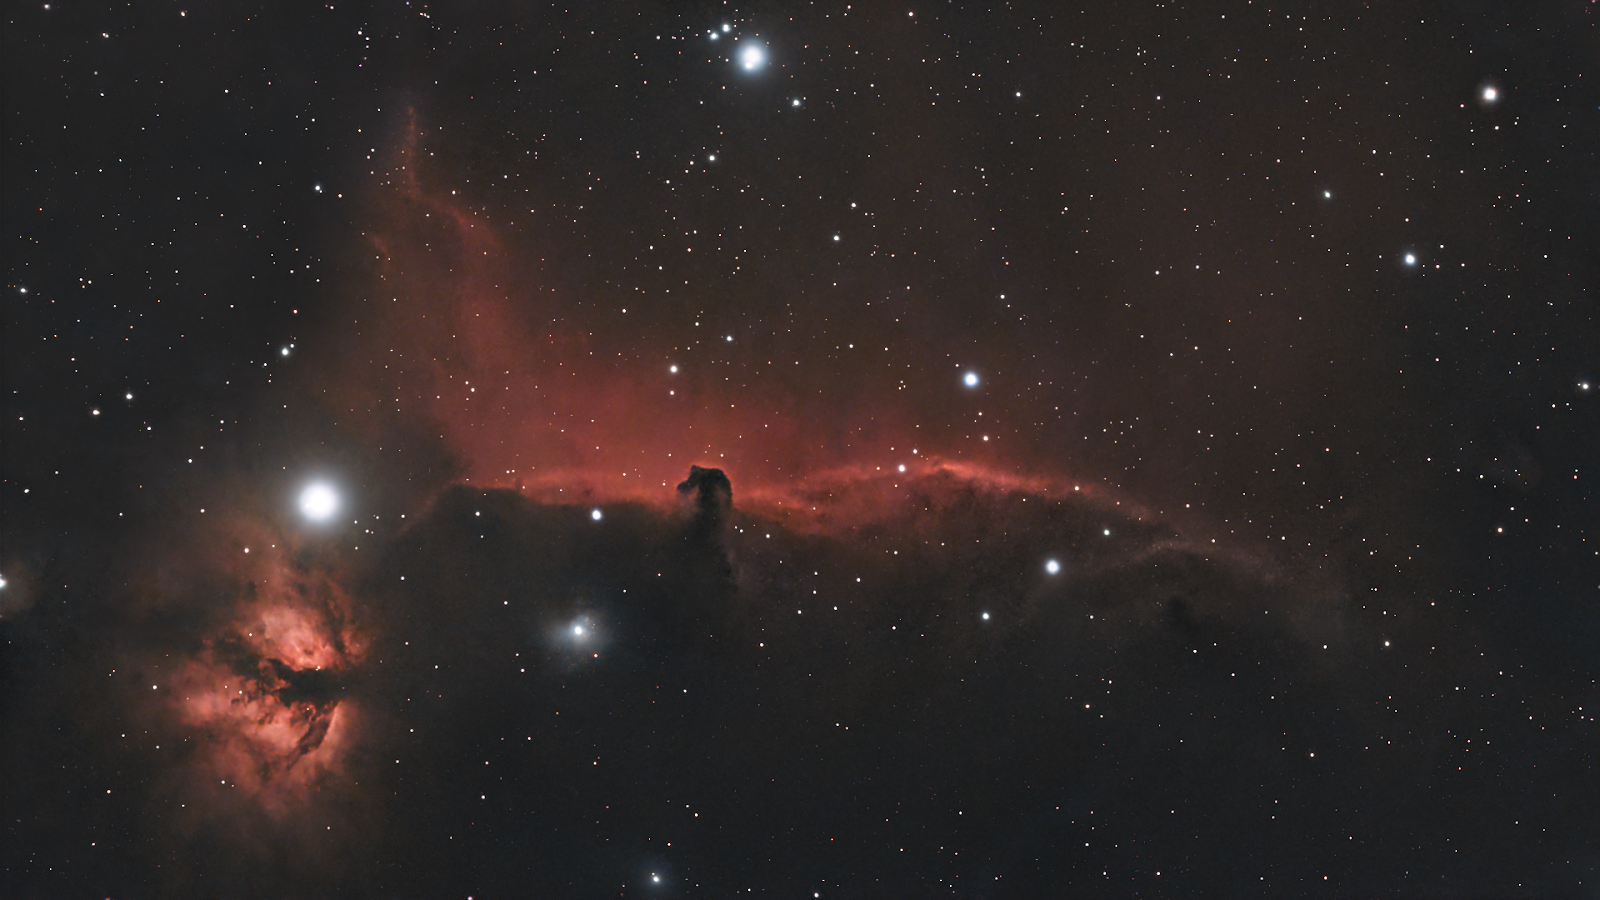
For those who are looking for even more creative freedom, you’ll be happy to hear that you can easily download all your data from the S30 to edit them in more capable programs like Photoshop, Pixinsight, and many more! If you want to learn more about processing deep sky images from your Seestar S30, check out one of our gear experts, Diana’s, Seestar S30 & S50 post-processing tutorial! This processing guide will teach you how to make the most of your Seestar data using Photoshop and a few simple yet effective astro-plugins!
Concluding thoughts, what comes next?
The S30 exceeds expectations at every level. It is extremely user-friendly, portable, lightweight, and can be set up in less than 5 mins. It produces high-quality photos straight out of the app (which deserves just as much praise as the smart telescope itself). The onboard sky atlas provides straightforward target framing and endless opportunities for exploration. With the addition of the mosaic mode, you’ll have the freedom to frame celestial objects how you see fit. With the bonus imaging modes, wide-angle camera, and post-processing potential, not even the sky is your limit!
FAQs
Can the S30 capture images of the Milky Way?
As of writing this review, the S30 is not suited for Milky Way photography. It does not offer the level of control needed to track the Milky Way and capture long exposure images with the wide field camera.
Can the S30 capture images of the planets?
While the Seestar S30 can locate and track any of the major planets, it cannot capture detailed planetary photos. Due to is compact size and short focal length, it lacks the resolving power necessary to capture the fine details of even the largest planets.
What happens if your smart device disconnects while imaging with the S30?
If your device disconnects while actively capturing images, the S30 will continue to capture and stack frames, but your view will not update until you reconnect with the S30. If the S30 reaches a low battery, it will end the live stacking session and return to the home position.
Do you need to tell the S30 how many frames to capture?
There’s no need to tell the S30 how many frames to capture or how to save the frames. By default, each frame will be saved as a FITS file, and you can simply end the session once you have enough frames.
Do you need to capture dark frames when capturing and stacking deep sky images?
There’s no need to capture dark frames. The S30 has a built-in dark filter, so once you begin a live stacking session, the S30 will automatically capture and apply dark frames!
Does the S30 have a replaceable Battery?
The S30 battery can be replaced in the event that it fails; however, ZWO does not recommend doing this yourself as it could void the warranty if done improperly.
Does the Seestar S30 have a station mode?
You can connect the Seestar S30 to your home Wi-Fi and then connect to the device via your home Wi-Fi. This is useful for anyone who wants to stay connected to the internet while using the S30.
Is the S30 really smaller and lighter than a medium-sized soda bottle?
Yes, the Seestar S30 is in fact smaller and lighter than a medium size soda bottle!

Click the arrow above to see MLA, APA, and Chicago Manual of Style citations.
MLA:
Burchett, Daniel. "ZWO Seestar S30 Smart Telescope Review & How-To Use," AstronomyHub, High Point Scientific, 20 Dec. 2024, https://www.highpointscientific.com/astronomy-hub/post/zwo-seestar-s30-review-how-to.
APA:
Burchett, D. (2024, December 13). ZWO Seestar S30 Smart Telescope Review & How-To Use. High Point Scientific. https://www.highpointscientific.com/astronomy-hub/post/zwo-seestar-s30-review-how-to
Chicago Manual of Style:
Bibliography:
Daniel Burchett. "ZWO Seestar S30 Smart Telescope Review & How-To Use," AstronomyHub (blog), High Point Scientific, December 20th, 2024. https://www.highpointscientific.com/astronomy-hub/post/zwo-seestar-s30-review-how-to
Footnote:
Daniel Burchett, "ZWO Seestar S30 Smart Telescope Review & How-To Use," AstronomyHub, High Point Scientific, December 20th, 2024, https://www.highpointscientific.com/astronomy-hub/post/zwo-seestar-s30-review-how-to.


