
All coupons, tax, shipping, store credit and gift cards will be applied during checkout.
Milky Way
Table of Contents
x
Contents
Photographing the Milky Way
×
![]()
Learn how to capture the Milky Way!
If you’ve ever attempted to photograph the Milky Way, you’ve likely encountered some frustrations and disappointing results. Whether it’s star trails, grainy details, or hazy gradients from light pollution, there are countless ways that things may go wrong. If you’re seeking solutions to these problems, or you simply want to learn how to capture a stunning photograph of the Milky Way, take a breath and put your worries to rest—we are here to help!
In the following sections, you’ll find informative articles, carefully curated lists of gear recommendations, and guides designed to give you the confidence to venture into the exciting world of astrophotography! Scroll down to begin your Milky Way imaging journey, or if you know what you’re looking for, use the links below to jump to the relevant sections.
Looking for Gear Recommendations?
Imaging the Milky Way is surprisingly straightforward, making it a great target for anyone looking to learn more about astrophotography. While it doesn't require a lot of equipment, having the right tools for the task will make all the difference. To ensure you capture the Milky Way with confidence, our team of astrophotography experts have carefully complied the following catalogs of gear recommendations. Click the links below to jump directly to the gear you're looking for, or scroll down to learn more!
Check Out the Basics
How big is the Milky Way? Where is our solar system within the galaxy? How was the Milky Way formed? If you are looking for answers to these question and more, we've got the resources for you! Our astronomy hub is constantly growing with content that will keep your curiosity quenched! From imaging and processing guides to interactive educational articles and so much more. On the nights you can't spend imaging, stay in and explore the wonders of the cosmos from the comfort of your home!
| Milky Way Articles in Our AstronomyHub | |||||
|---|---|---|---|---|---|
| Milky Way 101 | How To View The Milky Way | 10 Things You Need To Know About The Milky Way | |||
| Imaging Guides | Beginners Guide to Imaging the Milky Way | 10 Things You Need To Know About Milky Way Photography | |||
Milky Way Star Trackers
Move Shoot Move is on a mission to make Milky Way photography more accessible than ever before! Which why we are proud to bring you their latest and most innovative Milky Way Star Tracker: The Nomad.
The Nomad makes capturing photos of the Milky Way easier than ever before. All you need to do is mount your camera, quickly align to Polaris or Sigma Octantis, and start tracking! With even a basic alignment, you'll be able to expand the exposure time of your photos and capture the rich details of the Milky Way. Explore the selections below and find a Nomad package that best fits your needs!
Multi-Purpose Star Trackers
The secret to the capturing a stunning Milky Way shot is tracking! By attaching your camera or smartphone to a mount that can track the subtle movement of the sky, you can extend the exposure time of your images and significantly increase the signal to noise ratio. To help you venture into the exciting realm of Milky Way Photography, our gear experts complied a list of the most popular star trackers on the market. Check out their selections below!
Accessories
Capturing a photo of the Milky Way doesn't require a lot of gear, but with the right accessories, you can bring you Milky Way imaging sessions to the next level! Check out the selections below to learn more about the best accessory items for Milky Way photography!
Tripods
A sturdy tripod is a must for Milky Way photography. If you want a reliable tripod that will provide the support needed to capture Milky Way photos that are truly out this world, our gear experts recommend the Apertura V2 Compact Aluminum Tripod.
This compact, lightweight, and easily transportable tripod is the perfect match for with popular star trackers, such as the Nomad, Star Adventurer 2i, and more! Complete with a dual thread, this tripod will work great for Star Trackers and as a stand alone photographic tripod.


Mounting Accessories
By attaching an Equatorial wedge, like the Move Shoot Move Wedge, you'll be able to hone in your polar alignment procedure with precise azimuth and altitude adjustments! This sturdy machine CNC wedge easily attaches to the Move Shoot Move Nomad or any equipment that is compatible with a Arca-Swiss style saddle.
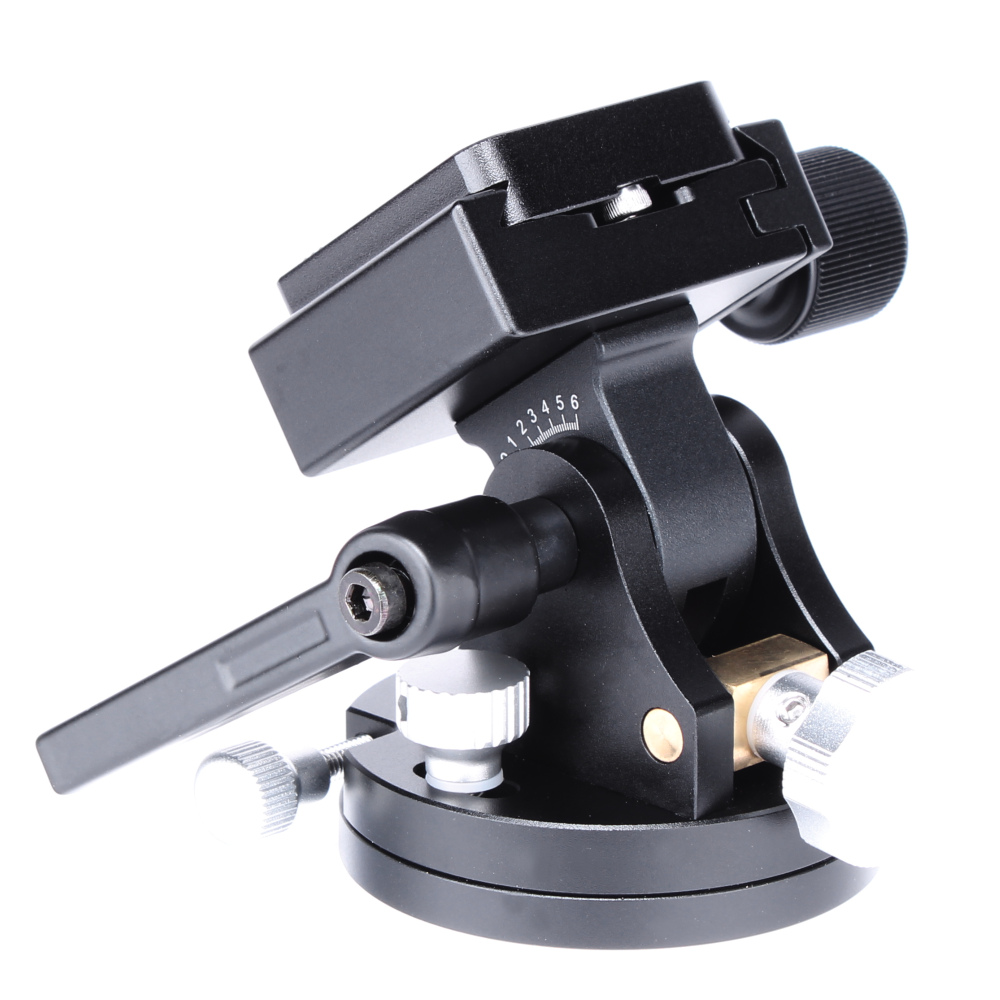
If you want even more freedom when framing your Milky Way photos, the Move Shoot Move Ball Head is the accessory for you! This versatile mounting accessory provides up to 90° of angle adjustment and a full 360° of rotation, allowing you to frame your Milky Way photos however you see fit. With the quick release Arca-Swiss Style Saddle and smooth locking screws, adjusting your gear with be easier than ever before!

Polar Alignment Accessories
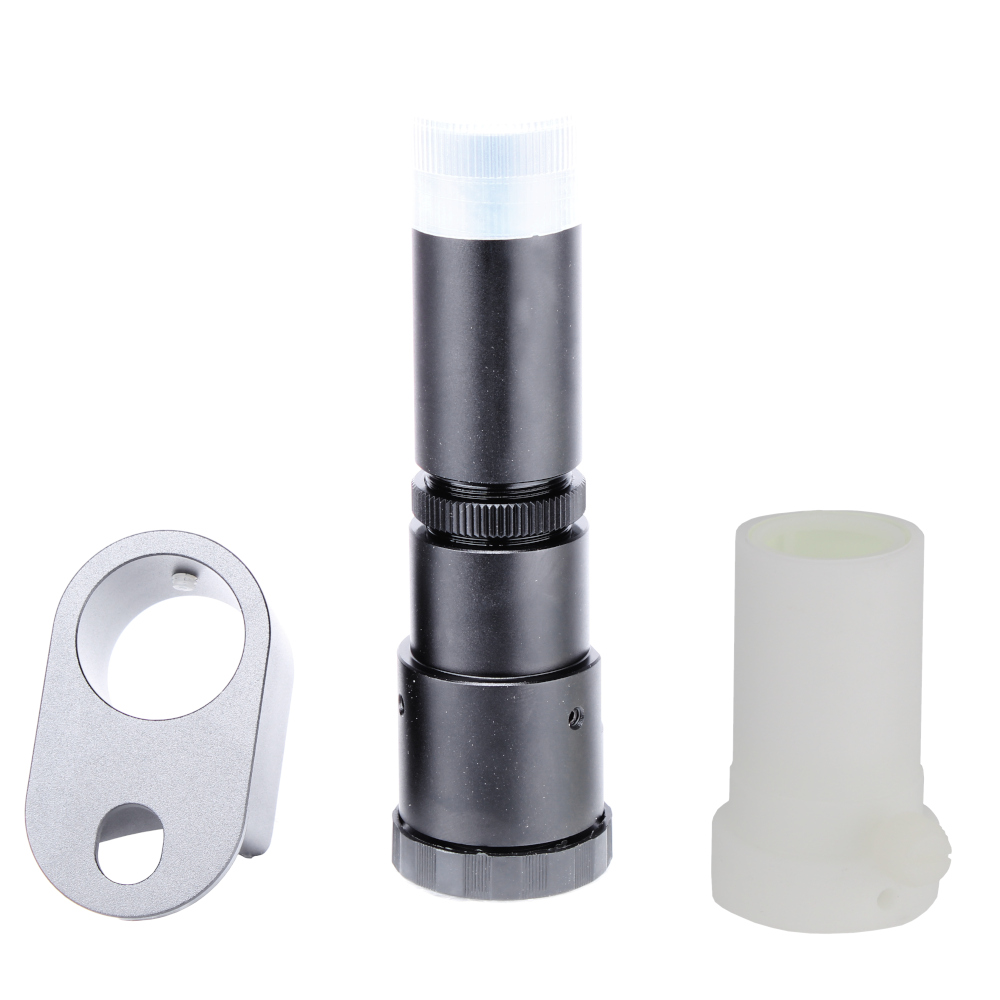
Polar alignment doesn't have to be pain! By attaching a Move Shoot Move Polar Scope, Adapter, and Illuminator Kit, to your Nomad, you'll have the tools needed to blast through your alignment procedure and expand your exposure times longer than ever before! This upgrade kit includes (3) alignment accessories: an etched reticle polar scope, a Nomad adapter plate, and a polar scope illuminator cap.
If you prefer laser guided alignment, check out the Calibrated Pointer Adapter kit. This polar alignment upgrade includes a Calibrated Laser Pointer, a Nomad nosepiece adapter, and a rechargeable battery pack!

Smart Phone Adapters
Bring your mobile planetarium to the Move Shoot Move Nomad with this Smart Phone Adapter Kit! This kit contains Move Shoot Move's robust smartphone adapter and the dedicated Nomad adapter bracket, giving you everything you need to upgrade your Nomad.
Installation is simple — just remove the threaded red dimple or Move Shoot Move Calibrated Laser from the back of your Nomad, place the adapter plate on the back of the unit such that the top and side guardrails touch the housing, and then thread the dimple cap or laser back in place.


How to Image the Milky Way
Capturing an image of the Milky Way doesn't need to be complicated. Follow along with the basic imaging guide below to learn how to use your gear to take a simple, yet stunning, photograph of our galactic core!
Still waiting for your gear to arrive?
Click the box below to download a package of complimentary data and follow along with our processing tutorial! When the time comes to process your own data, you’ll have already mastered the post-process workflow!
In the Drop Box folder, you'll find all the data you need to follow along with the guides below. Each folder will be labeled by the corresponding processing method, and you'll be able to download the full folder by navigating to the dropdown menu in the top right corner.
Processing Methods
Basic Editing Tutorial

A straightforward method for processing a single image of the Milky Way using RAW compatible software, such as Adobe Lightroom or Affinity photo. Click the photo to jump to the step-by-step guide!
Stacking In Photoshop

This method is for those looking to enhance the quality of their Milky Way images. Click the photo above to learn how to align and stacking multiple images of the Milky Way in Photoshop!
Stacking In Sequator

An advanced stacking method to help you bring your Milky Photography to the next level! This method uses a free software to stack and calibrate multiple images of the Milky Way. Click the photo to learn more!
Basic Foreground Method

Click the photo above to learn how to stack, mask, and align Milky Way images with a foreground using Photoshop. This tutorial will guide you through the process of combining several exposures to create a stunning Milky Way image with a rich and detailed foreground!
Advanced Processing Guide

Coming Soon!
Planning Your Shot
When it comes to imaging the Milky Way, planning is necessary. You'll need to know a bit about the Lunar cycle to avoid planning a session on nights where the Moon is outshining the Milky Way. You'll also need to know how to locate the Milky Way, especially If you plan to capture an image with a foreground. You can use a celestial simulator like Star Walk or Stellarium to streamline this step, and if you want to be extra prepared, you can use PhotoPills to map out your imaging location. Once you've made your preparations, move on to the next step!
Overview of Settings
To successfully image the Milky way, you will need to be comfortable shooting in "manual mode", which allows you full control of the cameras settings. While there is some variation between models, every DSLR, Mirrorless, and astrophotography camera uses the same elementary settings: ISO, Shutter Speed, Aperture, and File type.

Aperture
An aperture is an adjustable opening inside of a camera lens that controls the amount and angle of light that reaches the sensor. Also known as the f-stop, this setting is usually represented as a range of numbers between f/0.7 - f/45. Higher values make aperture narrower while lower values make it wider. Widening the aperture will let more light in, and when it comes to imaging the Milky Way, more light means shorter exposures. So, you'll want to keep the f/# at the lowest value available (ideally, less than f/4).

Shutter Speed
Shutter speed determines how long the sensor is exposed to light when capturing an image. It is measured in seconds (and fractions of a second), and most cameras can capture exposes up to 30 seconds. However, this limit can be expanded with the addition of an intervalometer. Since the Milky Way isn’t bright enough to be imaged quickly, you need to decrease the shutter speed to allow the sensor to collect enough light.

ISO
ISO defines how sensitive your camera sensor is to incoming light. Increasing the ISO value makes the sensor more sensitive to light and decreasing the ISO makes it less sensitive to light. Much like the aperture and shutter speed settings, understanding ISO is vital to capturing a properly exposed image of the Milky Way. Fortunately, adjusting the ISO is straightforward. Once you've framed your shot, start imaging with the highest ISO value and gradually lower it until you find a good balance between the light (signal) graininess (noise). If you’re using a tracking mount, you can keep the ISO low, but you’ll need to increase the exposure time (shutter speed) to compensate for reduced sensitivity.

File Type
Roughly speaking, file type refers to the instructions your camera uses to process the data received by the sensor. Some file types (JPEG & PNG) compress this data, while others (RAW) preserve it. In most cases, more data means more details, and more detail means more flexibility when processing the image. While most modern cameras give you the option to automatically convert the image file to a JPEG or PNG, this will only introduce unnecessary limitations to the editability of the image. So, when imaging the Milky Way, it’s best to set your camera’s file type to RAW.
Rule of 500
For Milky Way imaging, you’ll need to take long exposures. However, if you are not using a tracking mount, you need to limit the exposure time to avoid star trailing. This can be easily figured out by using the rule of 500. Simply take the focal length of your lens and divide it by 500; the result will be the maximum exposure time before star trailing occurs. If you are not using a full frame camera, you’ll need to multiply the focal length of your lens by the sensor’s crop factor before dividing it by 500.
Polar Alignment: Rough is Enough!
The Polar alignment process is relatively straightforward. While it will vary depending on the equipment you use, the general logic is the same. Simply point your mount north, and set the incline to your latitude! Since the sideral motion of the sky is less noticeable at low focal lengths, a rough polar alignment will go a long way. If you want to learn how to precisely align your mount to Polaris, or polar align during the day, check out our AstronomyHub for alignment guides and more!
Set Up Tips
Once you’ve mastered the settings, the next step is to set up. Your setup procedure will depend on the equipment you’re using, so it’s a good idea to practice setting up (and breaking down) in a well-lit area before your imaging session. It's also a good idea to pick up a dedicated red LED headlamp like the Apertura Ember. This headlamp was design by astronomers, for astronomers! With 4 brightness modes to choose from, you'll be able to adjust the brightness to your liking, and the comfortable head band gives you the freedom to stay focused on your gear. It even has an built-in rechargeable battery!
Check out the tips below to learn more about setting up your gear for Milky Way phototgraphy!
Choose an imaging location: If you plan to use a tripod or tracking mount, make sure you find a good location with a clear view of the sky. If you are using a tracking mount, ensure you have a clear view of Polaris, and nothing obstructing your southern horizon. Polar alignment can take a bit of time, so be sure you do this step before aligning your mount.
Inspect your lens or telescope: Don't let dust and smudges come between you and a breathtaking image of the Milky Way! Before you begin your imaging session, take a moment to inspect your optics. Make sure to bring along a portable cleaning kit like the Apertura Optics & Sensor Cleaning Kit. That way, you'll have everything you need ensure your optics and sensor deliver top performances!
Locate the Milky Way: Like the Sun, Stars, Moon, the Milky moves across the sky from east to west and will stay above the horizon for approximately 12 hours. If you are having trouble locating the Moon, try using a celestial simulator like Stellarium or Star Walk, or check out our Milky Way Viewing Guide!
Frame your shot: After you locate the Milky Way, experiment with the framing. Keep the ISO on the high and exposure short, then work in small increments until you home in on the ideal framing.
Remember, with time and practice, each of these steps will become easier. However, its important to not let perfection get in the way of progress. If you feel like you're getting stuck, take a breath and simplify the steps.
What's next?
After setting up, capturing your images, and breaking down, all that’s left is processing the data. Upload the image files to your computer and start editing! If you need help, we've got you covered, check out our full "Beginner's Guide to Imaging the Milky Way"
Milky Way Imaging FAQ: What You Need to Know
What is astrophotography?
Broadly speaking, any image of a celestial object in the night sky could be considered an astrophotograph—from the Milky Way, the Moon, other planets in our solar system, to galaxies, star clusters, nebulae and more! While the process and equipment used for capturing all these objects can differ, all these fall within the same exciting and ever expanding amateur astrophotography hobby.
What goes into making an astrophotograph? How do we capture these images?
This process varies depending on what we’re trying to image, but on a basic level, an object is tracked across the sky while data is collected by the camera, and then this data is all combined into a single image through a process known as stacking. This process allows us to capture fine, faint details that only reveal themselves with enough time spent imaging/recording a target!
What is the Milky Way?
The Milky Way is an average-sized spiral galaxy located in the Virgo Supercluster. It is our home galaxy, and our solar system is situated near the edge of one of the minor spiral arms. However, there is a common misunderstanding when it comes to how we talk about the Milky Way, and it requires a brief history lesson to fully understand.
The Milky Way was named by ancient astronomers for its faint, milky appearance, but the object they were referring to was actually the luminous halo of the galaxy, known as the galactic core. It wasn’t until the first telescopes were invented that astronomers began to unravel the true nature of our galaxy, and it would take another hundred or so years for anyone to realize that our galaxy is just one of billions. During these discoveries, many names were considered, but eventually, astronomers began referring to our galaxy by its Latin name via lactea, which translates to “milky way” or “milky path.” The other “island universes” were later named after the Greek phrase galaxias kýklos (meaning “milky circle”) or just “galaxy” for short. Unfortunately, these changes in nomenclature were poorly communicated, so it is still common to refer to the galactic core as The Milky Way.
What is the best camera for Milky Way photography?
Choosing the best camera for Milky Way photography is tricky because manufacturers are constantly improving their models. More importantly, you don’t need the best or newest camera on the market to capture stunning Milky Way images. However, there are some factors to consider when buying a camera for Milky Way photography.
First, you’ll want to look for a full-frame model, as the larger sensor offers a wider field of view, giving you more flexibility in how you frame the Milky Way. Secondly, you’ll want a camera with a high-resolution sensor and good low-light performance. Brands like Sony, Nikon, and Canon have plenty of great options that meet these criteria. Another factor you’ll want to consider is the type of camera. DSLR cameras are versatile but have limitations for astrophotography. For example, the movement of the reflex mirror can cause blurring and the optical viewfinder can make it difficult to focus on dim objects. On the other hand, mirrorless cameras have fewer moving parts, and the live view feature makes it much easier to focus an image. Finally, you may want to consider purchasing a modified DSLR or mirrorless camera, as they can capture more wavelengths of light and reveal hidden features in the Milky Way.
What does the Milky Way look like?
When viewed with the naked eye under relatively good conditions, the Milky Way looks like a cloudy band of stars with a light gray backdrop. It doesn’t appear as bright or colorful as it does in photographs because our natural night vision is primarily black and white. The rods, one of two types of cells in the outermost layer of our retina (the back of your eyeball), are more sensitive to luminance than the cone cells, which allow us to perceive color. So, even under ideal conditions, the Milky Way appears washed out and much less colorful than many expect. However, if you are lucky enough to view the Milky Way under Bortle 1 skies, it may appear bright enough to cast a faint shadow.
How do you locate the Milky Way?
The easiest way to locate the Milky Way is by using a celestial simulator like Star Walk 2 or Stellarium. These apps provide a real-time view of the objects currently visible in the sky, regardless of the time of day.
If you want to locate the Milky Way without an app, you’ll need to know when and where it will be visible. This is relatively simple, but it helps to have a diagram, as the Earth, solar system, and Milky Way are all moving at different speeds and directions. If you want to explore these mechanics in detail, check out our article covering How to View the Milky Way
How much of the Milky Way can we see from earth?
Our solar system is located within one of the spiral arms of the Milky Way, so we can only see a slice of the galaxy at any given time. Depending on the time of year and location, you can either see the galactic core or one of the outer arms. Since our solar system and our planet are slightly tilted relative to the galactic plane, observers near or south of the equator see a more complete view of the galactic core when viewing or imaging the Milky Way.
How do we know what the Milky Way Galaxy looks like?
We know what the Milky Way looks like because astronomers have created extremely accurate models of the galaxy. They do this by measuring the distance between our planet and the other celestial objects in the galaxy, then plotting those distances to infer its shape and size. While these models are accurate to observation made by astronomers, they are not actual images of the galaxy.
What are the best settings for Milky Way photography?
The best settings for imaging the Milky Way depend on your camera, imaging conditions, and equipment. Modern cameras with advanced sensors are more sensitive and perform better in low light, allowing you to increase the ISO and decrease the exposure time, but if you are using a tracking mount, exposure length is less of a worry.
Imaging conditions also affect the best settings. Dark, clear skies offer the most flexibility. However, in light-polluted areas or when the Moon is above the horizon, you’ll need to limit the exposure time to avoid overexposing the image, even with a tracking mount. The only constant setting for Milky Way photography is the f/stop, which should always be set to the widest aperture available.
What is the best lens for Milky Way Photography?
The best lens for Milky Way photography depends on the type of image you intend to capture. Typically, wide-angle fast lenses are the most effective for capturing wide-field landscape images of the Milky Way. Any lens with a focal length less than 35mm is considered wide, but 18mm to 14mm lenses are ideal, as they allow you to fit more of the Milky Way in a single frame. If you want to explore the rich details in the Milky Way, you can use a lens or telescope longer focal length, although, you'll only capture a small area of the Milky Way.
It is also important to consider the focal ratio of the lens. Fast lenses, or lenses with a low focal ratio, have a wide maximum aperture, which will allow more light to reach the sensor over a shorter period of time. This is especially important if you are not using a tracking mount to capture the Milky Way, as long exposures will result in star trails.
Can you image the Milky Way with an APS-C camera?
Yes, you can easily image the Milky Way with an APS-C sensor camera. However, your field of view will be narrower compared to a full-frame camera using the same focal length lens. This is because APS-C cameras have smaller sensors than full-frame cameras.
For example, an 18mm lens on both an APS-C and a full-frame camera has the same focal length, but the APS-C camera captures a smaller portion of the scene. So, an 18mm lens on an APS-C camera provides a field of view similar to that of a 27mm lens on a full-frame camera.
Can you photograph the Milky Way with a cell phone?
A lot of cameras can captures image of the Milky Way; however, it will ultimately depend on how much control you have over the settings. Modern smartphones use small but fast lenes and even smaller sensors. Due to the limitations of the lens and sensor, many smart phones now use multiple sensors and complex software to enhance their imaging abilities. If your smartphone allows you to take longer exposures, then you may be able to capture an image of the Milky Way. Some smartphones even give you the option to save and edit RAW files, which is curial for astrophotography. However, you’ll likely notice star trailing, and other unwanted artifacts when using a smartphone, as they are not designed for astrophotography.
Are there any filters that help with Milky Way photography?
Yes, there are a few camera filters that can enhance Milky Way photography. Ultra High Contrast (UHC) filters and other light-blocking filters can help reduce the effects of light pollution. However, since they block light, you’ll need to increase the length of exposure, and you’ll likely need a tracking mount. Dedicated astrophotography cameras, or modified DSLRs and mirrorless cameras, offer a wider range of filter options, giving access to more of the electromagnetic spectrum; but, they designed specifically for astrophotography use.
What are the best conditions for Milky Way photography?
The best conditions for any type of astrophotography are clear, dark skies with the Moon below the horizon. This holds true regardless of the equipment or style of image. However, since Milky Way photography is typically done with a fast wide-angle lens, there is some flexibility. The biggest factors to consider are cloud cover and light pollution. Clouds will ruin Milky Way images and make them appear washed out, hazy, and smeared. While this can sometimes be corrected in the post-processing stage, it’s best to just avoid imaging when clouds are present. Light pollution is less detrimental, but imaging within a bright city is difficult even with specialized filters and the results are often worth the hassle.
Can you image the Milky Way during a full moon?
You can image the Milky Way during the full moon; however, it will be difficult to properly expose the image. During the full moon phase, the sunlight reflected by the Moon scatters in the atmosphere, making it appear less transparent. This isn’t always noticeable to the naked eye, but it will show up in a long exposure image. Ideally, should aim to image the Milky Way when the Moon is near or below the horizon.
Where is the Milky Way in the late summer?
The Milky Way is relatively fixed when compared to the Earth. So, broadly speaking, it’s always in the same place. However, the movement of the Earth around the Sun, and the rotation of the Earth around its axis, means the Milky Way is only visible during specific viewing windows. In the late summer, this window begins about an hour after sunset to around 3-4am.
How do you include a foreground in a Milky Way photo?
There are various ways to include a foreground in a wide-field Milky Way image. A simple yet effective method is to capture two sets of images: one set of Milky Way images and another set of foreground images. You then independently stack each set of images, mask out the sky from the foreground set, mask out the foreground from the Milky Way set, and layer the foreground set atop the Milky Way set. This straightforward method produces an image with a properly exposed Milky Way and a detailed foreground.
Why does the Milky Way appear curved in some photos?
The Milky Way appears significantly curved if captured with a super-wide-angle lens because the lens elements are designed to warp the image, effectively increasing the field of view. When viewed with the naked eye, the Milky Way appears much less curved. However, like a camera lens, our atmosphere also warps the light from the Milky Way, making it appear to curve near the horizon.
Why is it important to shoot in RAW?
When you capture an image in a compressed file format like JPEG or PNG, the camera processes the data to reduce file size. This processing includes adjustments to color, contrast, and sharpness, as well as compression that discards some of the image data. While this makes the files smaller and easier to share, it means that some of the original detail and dynamic range are lost. On the other hand, RAW files are composed of uncompressed and minimally processed data directly from the imaging sensor. This gives you more flexibility when editing the image and preserves more details.
How do you find dark sky locations?
Imaging under dark skies is both rewarding and fun. But how do you locate a good dark sky location? The easiest way to find a dark sky imaging location is by using a Bortle scale map. These maps use satellite imagery and the 9-step Bortle scale (9 being the most light-polluted and 1 being little or no light pollution) to represent the spatial effects of light pollution. Once you review one of these maps, you’ll want to find a public park or private residence that falls within an area on the lower end of the Bortle scale (1-4). For Milky Way photography, it’s important to keep in mind the direction of the light pollution. For example, if you are in an area with little or no light pollution, but there is a heavily light-polluted city between you and the relative direction of the Milky Way, you may end up with an overexposed area in the image.
Milky Way Imaging Terms To Know
Aperture
Aperture is the diameter of a telescope's primary mirror or lens listed in millimeters or inches. The bigger the aperture of a telescope, the more light it will gather, allowing the observer to see more detail on celestial objects and ascertain finer details that a telescope of lesser aperture may not see.
Astrophotography
This refers to photography of astronomical bodies and phenomena. Astrophotography is not new, for example the popular T threading still used today harkens from Tamron’s T-mount developed for their 35 mm cameras - however it has seen a notable increase in popularity with improvements in cameras, mounts, filters, and software making astrophotography much more accessible. This is not limited to celestial bodies such as nebulae, planets, or galaxies either, as solar imaging is now more within the reach of the average consumer than ever before.
Bortle Scale
The Bortle scale measures how light polluted a particular area is and classifies the level of brightness from 1 to 9, with 9 being the brightest. This scale is incredibly helpful for astronomers, as the darker the sky, the more celestial objects are able to be discerned.
Calibration Frames
Calibration frames are types of images that are applied to light frames to remove unwanted artifacts caused by a number of different factors. Dark frames are images taken at the same temperature as the light frames and are necessary to remove hot pixels or other fixed noise for a cleaner image. Bias frames are similar in this aspect, though their purpose is to reduce the sensor’s readout noise seen within the light frames. Another type of calibration frame are flat frames, which remove dust motes or unwanted gradients for a uniform, even field.
Chromatic Aberration
Different wavelengths of light travel at different speeds based on the medium it occupies. When white light is exposed to glass such in a telescope or lens, blue light, red light, and green light slow at varying rates. This change of speed causes each wavelength to come to focus at different points along the focal plane, resulting in color fringing seen within the images taken.
Dark Frame
A dark frame is a type of calibration frame that aims to subtract sensor heat noise and hot pixels from your final image. These frames are taken at the same exposure length and ISO/gain settings as your light frames, though are taken with the lens cap or telescope cover on instead. In general, the more dark frames you take to subtract from the final image, the better.
Dedicated Astronomy Camera
These cameras don’t look like what one traditionally thinks of when imaging a camera; instead taking the form of cylinders or pucks, with no physical controls, displays, or viewfinders to speak of. These require a computer or WiFi control device to take images, with more advanced models additionally requiring external power. What they give in return for all of these concessions is granular control over the sensor settings, increased sensitivity to wavelengths that more traditional cameras filter out, options for deBayered sensors (true monochrome), designs that easily connect with astronomy equipment, and in some cases cooling for increased performance.
Dobsonian Telescope
The Dobsonian telescope consists of a Newtonian reflector optical tube assembly mounted on a very simple alt-azimuth box-style mount with a lazy susan base. This base was invented by John Dobson to encourage people to make their own telescopes from start to finish. Up until that time, telescopes required a heavy equatorial mount that produced a financial or weight barrier for some otherwise enthusiastic budding astronomers. John Dobson and his base changed all that, and even today, Dobsonian telescopes still provide the most light-gathering dollar for dollar.
Earth
Also known as the Pale Blue Dot, Earth is the unique planet we are standing on right now. It's located between Venus and Mars in the goldilocks zone of our solar system, making it the third planet from the sun. Our Earth is estimated to be around four billion years old and is currently the only known planet to support the necessary conditions for life.
EdgeHD Telescope
EdgeHD is Celestron's top of the line flat field aplanatic Schmidt-Cassegrain telescope series. You can buy a variety of apertures, from 8 to 14 inches, as an OTA or as part of a telescope/mount package. EdgeHD telescopes are great for visual use, but they really shine for astrophotography. With a wide field of view that is three times flatter than a standard SCT, you will see beautiful, pinpoint stars across the entire field, even if you have a full frame (35 mm) CMOS or CCD camera sensor to satisfy.
Equatorial Mount
An equatorial mount is an astronomy instrument that features two axes of rotation: right ascension (RA) and declination (DEC). Equatorial mounts also feature an additional axis, called the polar axis, that these RA and DEC axes rotate about. This polar axis is to be lined up with Earth’s celestial pole to accurately counteract Earth’s rotation. These mounts are ideal for astrophotography applications, as the addition of a polar axis eliminates the issue of field rotation within captured images.
Exposure Time
Exposure time is the amount of time the camera sensor is allowed to collect light. In general, the longer the exposure time, the more light collected, and the brighter the image will become. This should be selected with caution though, as an exposure time that's too long can oversaturate the pixels and blow out the image, resulting in a loss of signal. Determining the correct exposure time is highly dependent on the aperture of the optics as well as the gain settings used. A larger aperture will produce a brighter image than that of a smaller aperture with the same exposure time. In a similar fashion, an image with a higher gain setting will be brighter than a lower gain setting image with equal exposure time. Finding the perfect balance between the aperture, gain, and exposure time will maximize image quality.
Extra-Low Dispersion (ED) Glass
ED stands for “extra-low dispersion” and is a type of glass designed to specifically reduce the separation of wavelengths when light passes through. Coatings of magnesium fluoride, zirconium dioxide, calcium fluoride, and titanium dioxide help bridge the gap between the different wavelengths of light, providing a singular focal point for all wavelengths. This helps reduce chromatic aberration and in turn provides heightened optical performance. Also, the more coatings on the lenses, the higher the transmission rate becomes for brighter, more detailed views and images.
Eyepiece
An eyepiece is a group of lenses housed in a small package that is closest to the eye when used with a telescope, microscope, or spotting scope. The eyepiece provides a particular magnification when paired with a telescope, therefore most amateur astronomers use a variety of eyepieces to change magnification for different types of objects. The eyepiece nomenclature is expressed in its focal length in millimeters. To figure out the magnification, simply divide the focal length of the eyepiece into the focal length of the telescope. The result is the magnification provided in your particular telescope or one with the same focal length.
Field of View (FOV)
In simple terms, your field of view is the amount of sky that is witnessed by your telescope/camera combination, or telescope/eyepiece combination. This measurement is calculated in angular degrees. To calculate how much of the sky you can image with your astrophotography rig, take the width of your camera chip, multiply it by 57.3, then divide that product by the focal length of your optics. If you want to determine how much of the sky you can view through your eyepiece, take the apparent field of view of your eyepiece (provided by the manufacturer), then divide it by the quotient of your telescope’s focal length & the focal length of your eyepiece.
Finder Scope
A finder scope fits on top of the main telescope and is used to help you find and center objects in your eyepiece. A finder can be as simple as a red dot finder or it can be a high quality small telescope in its own right.
Focal Length
The focal length is the distance, usually measured in millimeters, between the primary mirror or lens and the point at which the image comes to focus. Generally, classic refractors have a longer focal length, Newtonian reflectors tend to have a focal length that is shorter, and Schmidt-Cassegrain fall somewhere in the middle.
Focal Ratio
The focal ratio is calculated by dividing the aperture (mm) of the primary mirror or lens into the focal length. Example: 2500 mm divided by 254 mm (10") equals an f/ratio of 9.84, which is usually rounded off, in this case to f/10. The focal ratio signifies how quickly a telescope gathers light and tells us something about the telescope's field of view, how long exposures will take during astrophotography sessions, and how much magnification the eyepiece will produce for that telescope.
Hemisphere
A hemisphere is a mathematical term that describes half of a sphere or globe. While the dividing line between hemispheres can be arbitrary, when talking about our planet or the celestial sphere, we tend to divide the hemispheres into west, east, north, and south.
Highest Useful Magnification
The term Highest Useful Magnification is used by telescope manufacturers to describe the most magnification you can typically be expected to use on a normal night and still bring an image to sharp focus. A basic rule of thumb for maximum magnification is 40X-50X per inch of aperture, with max magnifications generally topping out at 500X or so regardless of the aperture. You will find that maximums vary depending on the night. Observing conditions change constantly and will cause a once sharp view to become blurry or allow a blurry view to clear up in seconds. It is the nature of telescope observing on a planet with an atmosphere.
Image Circle
This specification refers to the area where an image is formed by the optics/ corrective element. This is useful for assessing whether a certain camera sensor size will be supported by the optics, or if vignetting/ poor performance will be seen in frame.
Imaging Newtonian
An Imaging Newtonian is a fast reflector telescope that is normally optimized for astrophotography or astro-imaging. Most Imaging Newtonian telescopes have an f/5 focal ratio or less, and some are not meant for visual use at all but rather, were designed to be dedicated imaging telescopes. It is common to find fast imaging Newtonian reflectors for sale as optical tube assemblies only, allowing the astro-imager to use his choice of equatorial mount.
Interstellar Clouds
Interstellar clouds are a collection of various elemental gasses, dust, and plasma left over from various galactic events, such has supernovas, galactic collisions, and even the big bang.
Light Pollution
Light pollution is the brightening of the atmosphere due to lights from streetlamps, other forms of artificial light, and even the Moon. As light enters the atmosphere, it washes out the night sky, making it very difficult to observe the stars, nebulae, and planets. In order to combat light pollution in astrophotography, special filters have been developed to cut through excess light and enhance images. These filters are known as City Light Suppression filters, commonly referred to as CLS filters.
Luminosity
Luminosity is when an object produces or reflects light and appears to shine. For astronomy, this refers to the radiant power emitted, reflected, or received per unit of time.
Megapixels
A megapixel is one million pixels and refers to the number of pixels a sensor contains. For example, if a sensor has two million pixels, then this would be a 2-megapixel (2MP) sensor. These pixels capture light and color from the subject, and when combined, the signal collected results in an image. This measurement of the pixels available determines the resolution of a sensor and overall quality of the image produced. In general, the more pixels a sensor has, the higher resolution images that sensor will yield.
Milky Way
The Milky Way is the name of the galaxy that hosts our solar system. Named for its bright milky appearance in the night sky, the Milky Way is home to countless stars, nebulae, and even a few supermassive black holes. It estimated to be over 13 billion years old, and it would take over 100,000 light years to travel from one side to the other.
Modified DSLR / Mirrorless Camera
A type of DSLR or mirrorless camera that has had a filtering component removed. This component, a piece of glass, is put in place to block out frequencies that would otherwise make “regular” images look unnatural as modern sensors are sensitive to a wider range of frequencies than the human eye can perceive. However, there are some frequencies on the edge of this range that are important to astrophotography (mainly Ha), which these filters block to some degree. Accordingly, removal of this filter will provide better astrophotography performance, but impact “regular” photo taking unless a clip-in or lens filter that filters these frequencies is used. Given the difficulty of removing this filter, this is something most users need to work with 3rd parties on.
OTA
The acronym OTA stands for Optical Tube Assembly. An OTA is simply the telescope portion of a telescope/mount/tripod package. Some telescope users prefer to buy the OTA separately so they can create a custom astrophotography set-up or use a mount they already own.
Optics
In basic terms, this refers to the system that “collects” and focuses incoming light down to a smaller, brighter, magnified image that is then viewed through an eyepiece or captured by a camera. There are different ways to accomplish this, most commonly with glass elements (refractor) or with systems of mirrors (reflector). Each approach comes with its own set of tradeoffs, whether that be chromatic aberration, coma, etc. which can sometimes be mitigated with upgraded optical components (ED glass) or additional corrective components (like coma correctors). Numbers of standard optical designs have emerged as well, such as doublets, triplets, Petzvals, Newtonians, SCTs, RCs, and more.
Orbit
An orbit is a predictable and periodic path an object follows as it moves through the space-time warped by a more massive celestial object. We have known about celestial orbits since early antiquity, however, it was not until Johannes Kepler formalized the three laws of planetary motion that we gained the ability to acutely predict the movements of our planetary neighbors
Pixel
Digital images are made up of many, many, small boxes arranged in a grid, and these boxes are called pixels. To create these digital images, camera sensors are similarly made up of thousands or millions of small light-measuring components arranged in a grid. These too are referred to as pixels.
Polar Alignment
Polar alignment is the process of aligning a telescope mount’s polar axis with the Earth’s axis of rotation. By having these two axes parallel to one another, precise counteraction of the Earth’s rotation can then be achieved. While a typical process of equatorial mounts that have three inherent axes of rotation, a similar effect can also be achieved by utilizing an equatorial wedge with two-axis alt-azimuth mounts.
Polar Scope
Polar scopes are small telescopes that assist with aligning a mount’s polar axis with the Earth’s axis of rotation. They are found within your mount and are fitted with an internal reticle that shows Polaris’s position in reference to the true celestial North Pole, and Sigma Octantis’s position in reference to the true celestial South Pole. Through alignment of these pole stars within the polar scope, the mount will then be accurately polar aligned.
Reflector Telescope
A reflector is a telescope design in which mirrors are used to gather and focus light. Reflector telescopes are commonly called Newtonian Reflectors, or simply a Newtonian in deference to their inventor, Sir Isaac Newton.
Refractor Telescope
A refractor is a telescope design that uses lenses to gather and focus light. While there are some exceptions to the rule, achromatic refractors use two lenses in their design, and while they are economical, achromats are only capable of focusing two out of three wavelengths of light. An APO telescope, or apochromatic refractor, uses 3 lenses to bring all three wavelengths of light to a single focus to produce an image virtually free of extraneous color.
SCT
The acronym SCT stands for Schmidt-Cassegrain Telescope, one of the most popular telescope designs in amateur astronomy today. A Schmidt-Cassegrain, which belongs more broadly to the Catadioptric telescope type, uses a folded optical design incorporating both mirrors and lenses to gather and bring the light to focus. The folded light path allows for a short tube assembly even with relatively large apertures of 8" or more. A shorter tube length makes the SCT far more portable than a classic Newtonian or refractor of the same aperture.
Seeing Conditions
This term refers to the overall clarity of the night sky at any given time and within any given location. This clarity fluctuates constantly, as it is based on numerous different atmospheric conditions, such as humidity, turbulence, high clouds, heat, and plenty more. To give an example, you may have witnessed stars in the night sky “twinkle.” This is due to our atmosphere distorting their incoming light, causing a twinkling effect. When it comes to astronomy, especially when observing the planets and the Moon, seeing conditions are very important to consider, as these distortions can cause the subjects to become blurred and unfocused. It’s best practice to observe celestial objects when the atmosphere is most stable.
Sensor
A camera sensor is the main component of a DSLR, deep sky camera, or smart telescope that turns incoming light into data that can then be displayed on digital devices like mobile phones or computers. Accordingly, these are just as important as the optics of a system for a quality image. There are a wide variety of specifications that are important for a sensor - physical size, pixel size, resolution, dynamic range, amounts of image “noise”, and other technologies such as back-side illumination. As a result, there is also a wide variety of sensors available that attempt to balance these in differing ways for different applications and price points.
Sensor Size (Full Frame, APS-C, Micro 4/3, Etc)
Imaging sensors come in many different proportions, such as 4:3 or 1:1, and physical sizes. There are some common combinations that have received a name - full-frame, APS-C, micro four thirds (4/3). The most important component of sensor size for astrophotography is the measurement from corner to corner (diagonal) of the sensor, which can then be compared to a telescope/ corrective element's image circle to assess how well the two may pair.
Sky Glow
As light interacts with the various component chemicals that make up our atmosphere, it occasionally changes direction and intensity. We perceive this interaction as a reduction in the transparency of our atmosphere, which can impact the visibility of objects in the night sky. Sky glow can be caused by terrestrial light pollution, sunlight, and even moonlight.
Star Tracker
A star tracker is a mini equatorial mount that has a motorized RA and static DEC axis. They are designed with portability in mind, and as such, are very lightweight and compact. They’re perfect for tucking away in a backpack, and many even run on batteries for heightened portability. While optimal for Milky Way photography and small imaging trains, some models are robust enough for carrying small refractors.
Star Trail
Star trails are a phenomenon that occurs when taking images of the sky using long exposures. These images depict the apparent motion of the stars in the sky when imaged without tracking.
Stars
A star is a luminous sphere of plasma held together by the collective gravitational attraction of hydrogen and helium atoms. Stars also contain various trace elements, such as lithium, carbon, and towards the end of their life cycle, iron. Stars come in many temperatures, colors, and sizes. High mass stars like Betelgeuse appear to shine red from our perspective because our eyes are only sensitive to a small portion of the electromagnetic spectrum. To see the true luminosity of Betelgeuse, you need specialized equipment designed to capture the appropriate wavelength of light.
Tracking
As the Earth is continuously spinning and in motion, the location of a celestial object in the sky moves over the course of a night. This becomes apparent during observation as a target moves out of view, and particularly observable in images as stars and objects quickly become a blur as exposure time and focal length increases. To compensate for this, computerized mounts and smart telescopes employ tracking techniques to keep the target centered in the optics. Depending on the motion style of the mount, the resulting image can vary. Alt-Az motion, popular in smart telescopes, keeps the object centered but cannot compensate for its “spin” without what is known as a wedge. Accordingly, these images lose information on the edges of the frame as they rotate out of view, leading to ever smaller, circular, images as time spent imaging increases.
Tracking Modes
As opposed to the tracking rate that determines the speed at which the mount will track the sky, the tracking mode of a telescope mount determines the way in which the mount will counteract the Earth’s rotation. This can be selected from either the hand controller or software. Typically, you will find the modes of: EQ North, EQ South, Off, and Alt-Azimuth. For instance, if you are polar aligned with the north celestial pole, choosing EQ North will be the appropriate tracking mode to select, while EQ South is reserved for those polar aligned with the south celestial pole. Equatorial tracking modes are optimal for astrophotography applications, while the alt-azimuth mode is ideal for those who are conducting visual astronomy.
Tracking Rates
Unlike the tracking mode which denotes the way in which the mount will track the sky, tracking rates determine the speed at which the mount will track the sky. This can be selected from the mount’s hand controller or through computer software and should be selected based on the target that is being tracked. Typically, there are three tracking rates: Sidereal, Lunar, and Solar. The sidereal tracking rate moves the mount at a speed that is equivalent in magnitude, yet opposite in direction as the speed of Earth’s rotation. This is ideal for all targets within the night sky save the Moon and the Sun, in which the lunar and solar tracking rates are appropriate for.
Tripod
A tripod is a tool that consists of three legs of varying thickness and materials, and is used to support cameras, telescope mounts, and other equipment through (most often) a threaded connection. It acts as a stand to increase height and stability.
Vignetting
Vignetting is seen as the darkening of the corners of the frame within an image. This happens when the camera sensor is not exposed to enough light, resulting in a shadow effect along the borders of the image. This issue presents itself for a number of reasons, though most commonly occurs when using incompatible sensor sizes and image circles and using too small filters for the imaging assembly.
Waning Moon
As the Moon begins to move towards the sun in its orbit around the earth, the illuminated side appears to shrink with each passing day. This period of the lunar cycle is labeled “waning” to distinguish it from the opposing, yet similar, waxing phases.
Waxing Moon
As the Moon begins to move away from the sun in its orbit around the earth, the illuminated side appears to grow larger each passing day. This period of the lunar cycle is labeled “waxing” to distinguish it from the opposing, yet similar, waning phases.