Achieving top performance from your Schmidt Cassegrain telescope is easier than most folks realize and certainly worth the effort for obtaining the best views possible from your instrument. I remember many years ago peeking through a club member’s 9.25” Schmidt Cassegrain telescope at Jupiter and being shocked at the fine details that I saw. Up to that point I never thought of an SCT as a planetary scope, but that one view changed my whole perception of what these telescopes were capable of. I personally own and frequently use an old 1974 classic C8 telescope and have spent many hours enjoying wonderful views of the moon and planets, as well as double stars, with this fine telescope. In my experience, I can tell you that accurate collimation is extremely important for these compound telescopes. If the optics are even just slightly out of alignment the views will tend to go sour very quickly. Perhaps this is why, for many years, I had looked down on these very versatile telescopes for any type of high resolution work; perhaps their owners had simply never spent the time to properly collimate them.
In this short tutorial, I will show you how you can quickly and accurately bring your telescope to an extremely high state of tune, assuring that under steady atmospheric conditions, it performs at its best.
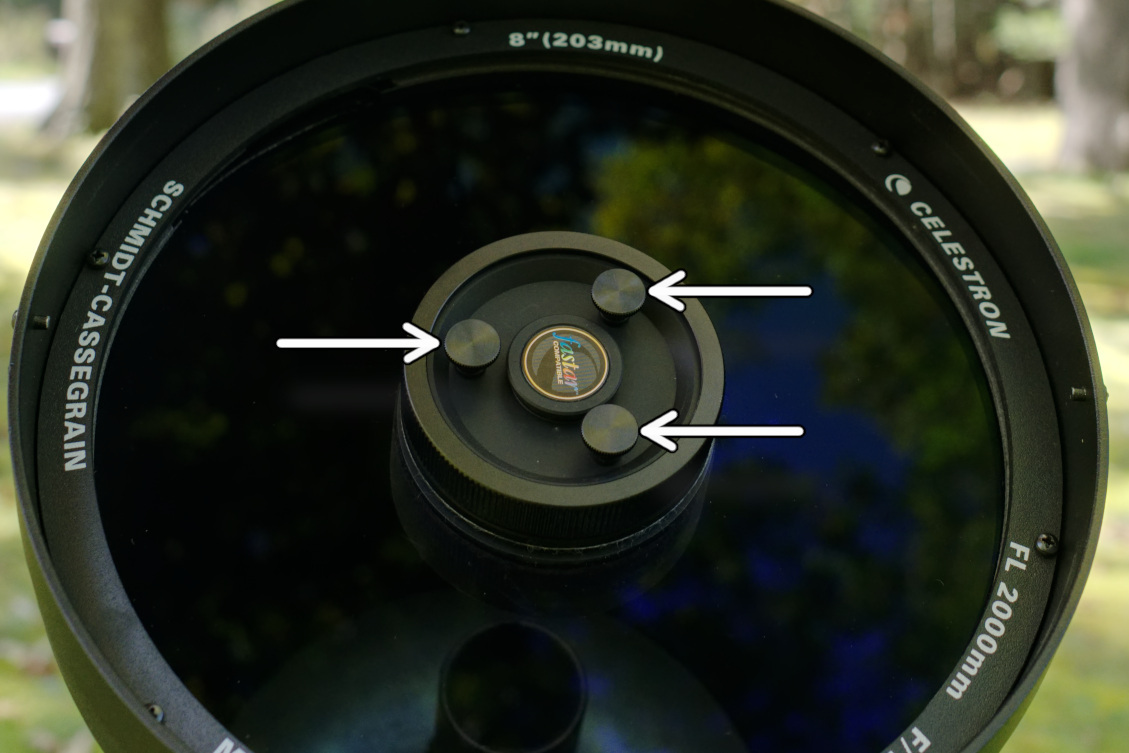
The first thing to do is to give your telescope plenty of time to acclimate to the night time temperatures, as you would need to do with any telescope, before critically checking collimation in the manner that I will present here. If you don’t already have your telescope outfitted with a set of Bob’ Knobs, then the only tool that you will need is either an Allen wrench or screwdriver properly sized to adjust the three tiny adjustment screws opposite your secondary mirror, as well as a high power 5mm to 8mm eyepiece.
You will want to find a first or second magnitude star, preferably high overhead if possible, and center your telescope’s field of view on that star. If you don’t have a tracking mount you can always use Polaris as it will drift out of your field of view far slower than any other bright star, thus making it easier to perform this operation. Some folks even use an artificial star for checking the collimation of their own telescopes and I will be the first to admit that this can certainly be more convenient than waiting for a night with clear and steady skies.
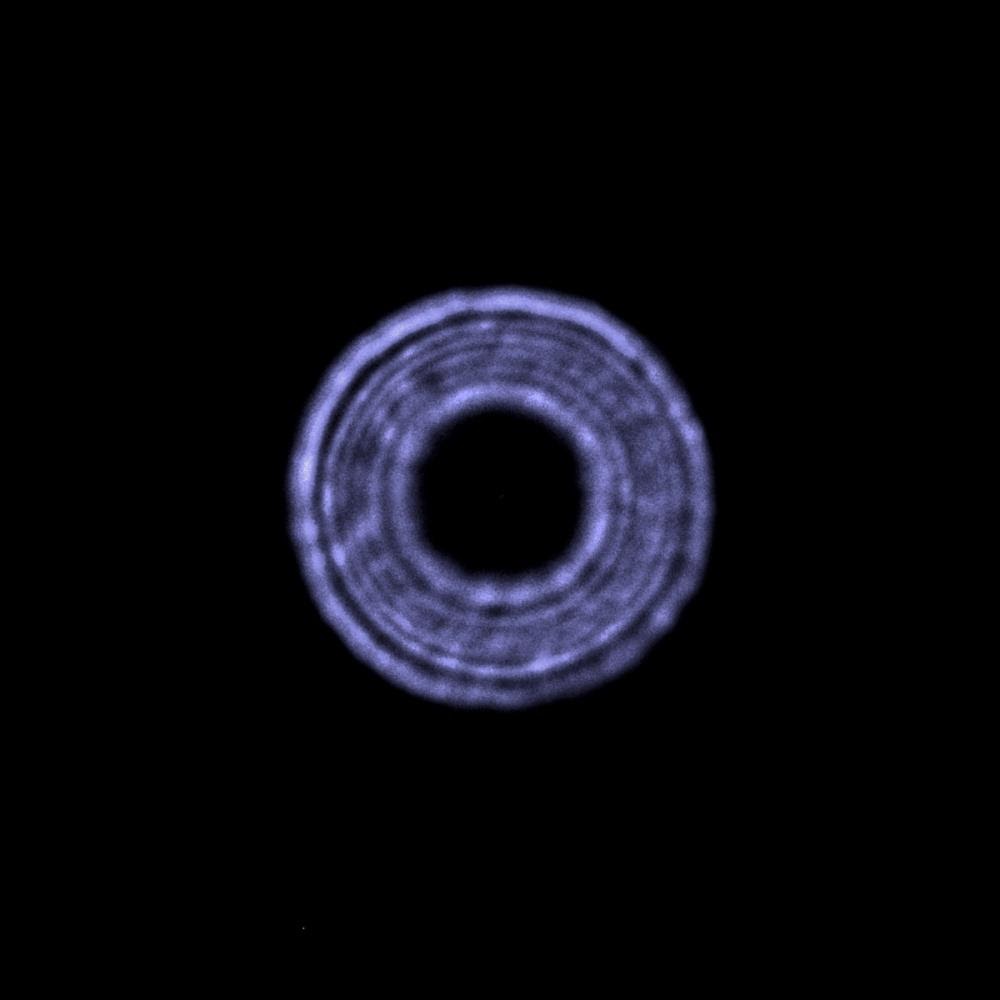
Once you have the star centered in your view, you will want to slightly defocus your telescope so that the star‘s image is roughly the size of a golf ball held at arm’s length. If the shadow of your secondary is not centered in the out of focus star image you will see something like this:
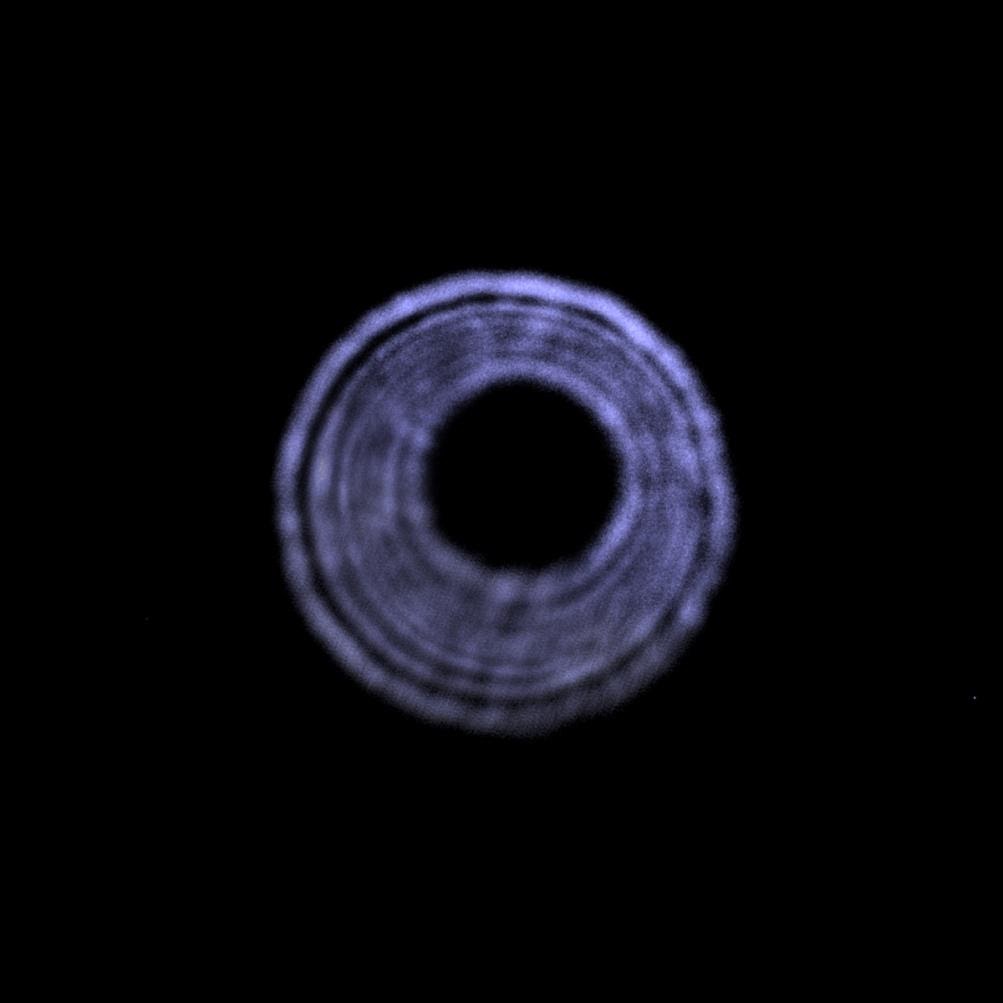
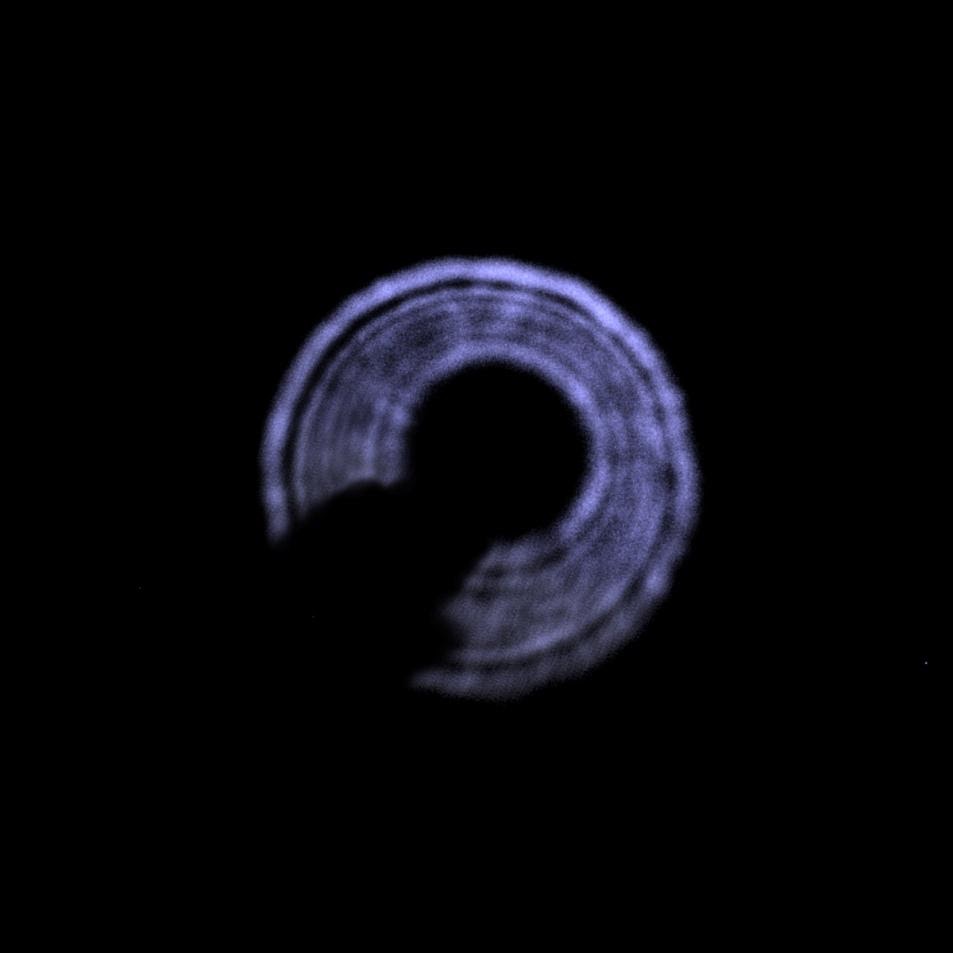
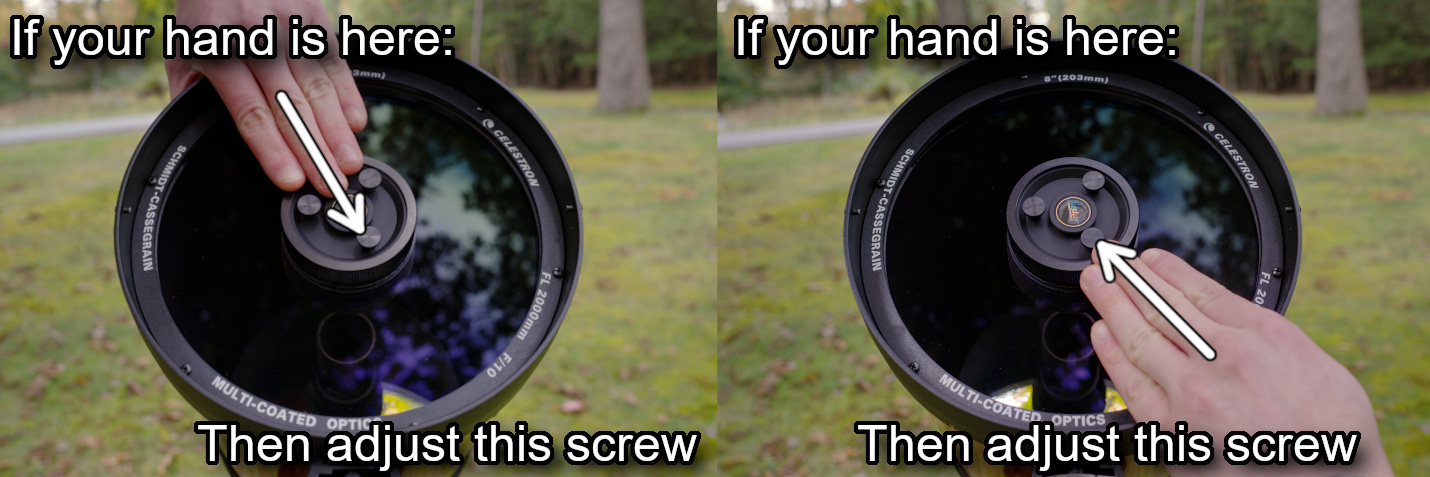
Obviously this telescope is in poor collimation! The question now is which of the three screws do you need to adjust to bring the telescope into a better state of tune. To find out, simply reach your hand around and place it in front of the telescope’s aperture, without touching the corrector plate. Then move your hand’s orientation so that its silhouette is seen in front of the widest portion of defocused light between the shadow of the secondary and the edge of the star. Doing so you will see something like this.
Once this is accomplished, walk around to the front of your scope noting the part of the tube that your hand was over and check to see if any of the three collimation screws are in that same orientation. If you are lucky enough to find a collimation screw in the same orientation then you will need to adjust that particular adjustment screw. If, however, your hand is between two collimation screws, then adjust the screw on the opposite side.
Make very small adjustments to the collimation screw, always recentering the star within your view to see the results of your efforts. If the collimation looks worse then you are obviously turning the screw in the wrong direction. You may need to adjust more than one screw to finalize collimation, however, you can use the trick mentioned earlier to see exactly which screw needs to be tinkered with. Be patient and make small adjustments until you see something like this:
When you do you are almost there, so take a deep breath and pat yourself on the back! You will want to take one more step to ensure the best results, however. Tweak your focus a bit so that the star is just slightly outside of perfect focus. If your telescope is perfectly collimated at this point you should see a tiny white dot centered within the shimmering diffraction pattern. This small dot is called “Poisson’s Spot” and it determines the true center of your diffraction pattern. Only when this spot is precisely centered can you call your work done. If it is off slightly, just keep making small tweaks to one or more of your collimation screws all the while keeping the star image as well centered as you can. If you are patient and persistent you will end up seeing something like this.

Capturing the image you see above took lots of “takes” due to the shimmering nature of our atmosphere. Your eyes will have a much easier time seeing “Poisson’s Spot” and discerning that it is indeed centered better than any snap shot ever will. When you get to this point you can truly call the job done and enjoy the benefits of a perfectly collimated telescope!
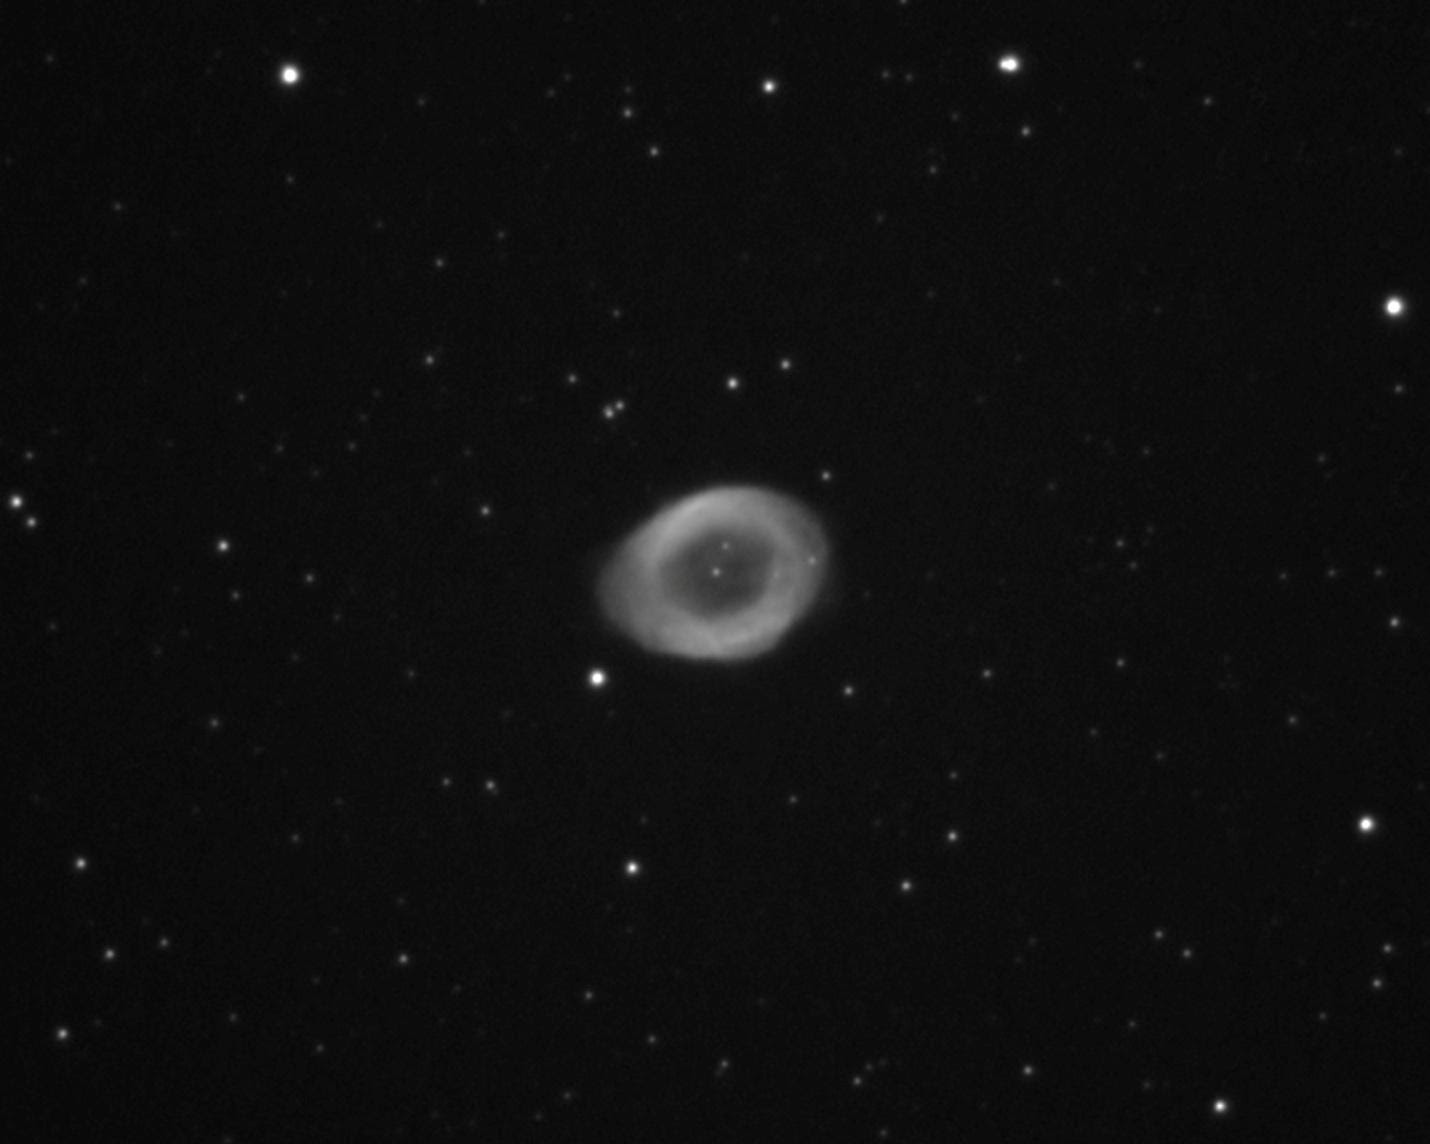
I did not want to end this tutorial without showing you the results of my labor, so shortly after capturing the image above; I pulled out my trusty 290 mono camera and using modern short exposure “Live Stacking” imaging techniques, I captured the image below.