While your telescope does the hard work of collecting light from space, your eyepiece is fundamental in translating this light into something our eyes can perceive. These bridging instruments can mark the difference between beautiful, striking sights and a sad, fuzzy mess. To help you get the most out of your telescope and ensure awe-inspiring views night after night, our team of highly knowledgeable experts have put together this comprehensive guide to eyepieces! We’ve laid out everything you need to know about these key accessories, going in-depth on everything from the various specifications to be on the lookout for to proper eyepiece care. As one of the most important accessories you’ll own, we’re committed to helping you make a better-informed decision on your next eyepiece purchase.
Aspects of an Eyepiece
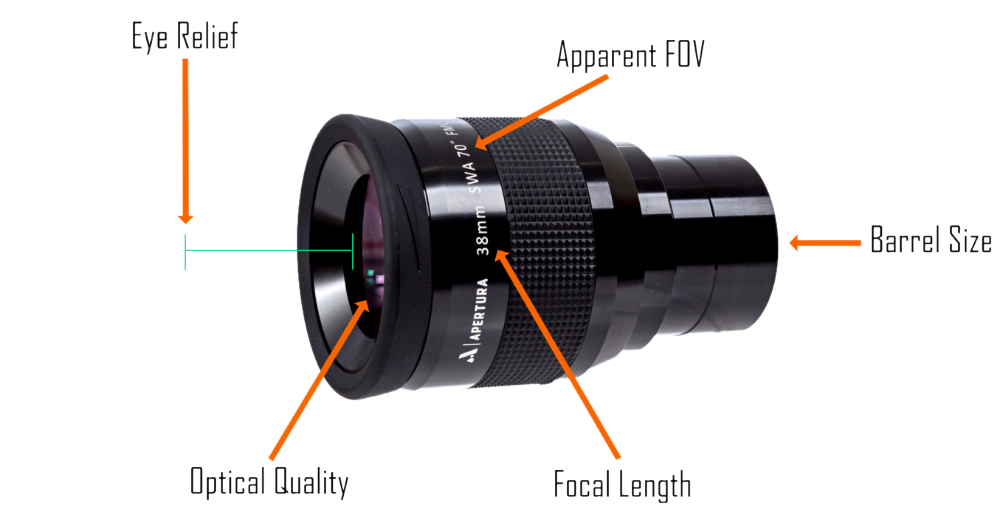
When shopping for eyepieces, each model comes with a set of details highlighted by the manufacturer. It's important to have a full understanding of these terms before deciding on an eyepiece, as they greatly affect your viewing opportunities, your observing comfort, and the compatibility with your telescope. Let’s take a deeper look at each of these key terms:
Focal Length
Focal length is arguably the most important aspect to consider when selecting an eyepiece, as it plays a vital role in determining what you can and cannot observe. Not only does it affect how "zoomed in" you will be, it also has a hand in the overall brightness of your image. In general, low eyepiece focal lengths yield high magnifications, though dimmer images. The opposite is true with higher focal length eyepieces. Selecting the right eyepiece focal length for your specific observation goals is key to maximizing your stargazing experience. We go into greater detail on how focal length impacts your observing opportunities in the Target Planning: Calculating Magnification & Exit Pupil section later on in this article.
Apparent FOV
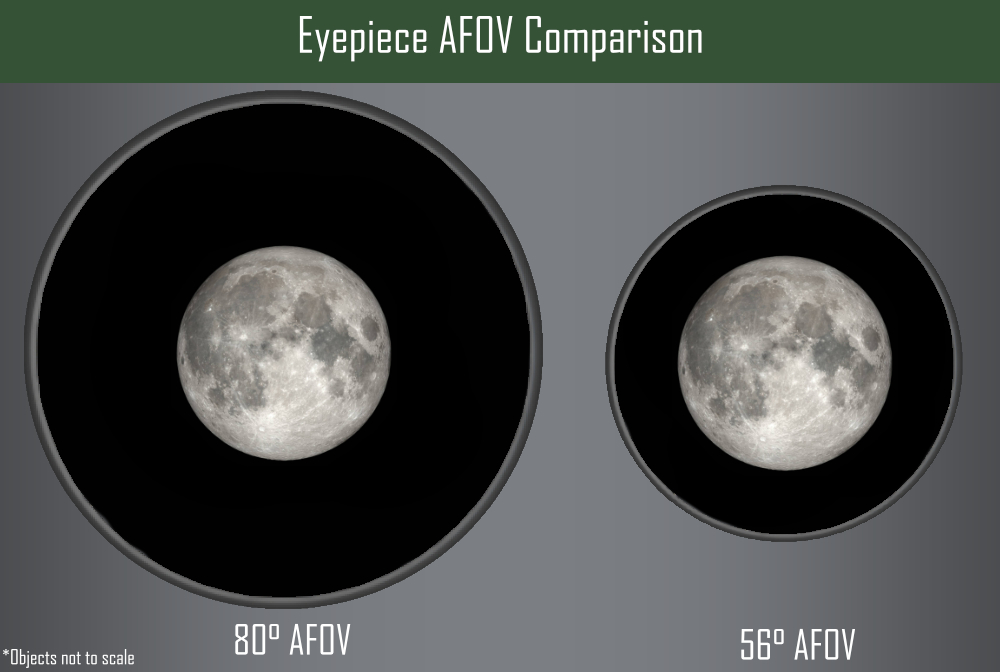
The apparent field of view (AFOV) of your eyepiece is measured in degrees, and denotes how large the field of view is as it appears to our eye. For reference, a singular, bare human eye has an approximate 150° field of view. The larger the AFOV of an eyepiece, such as 80° or 100°, the more enveloping and captivating the sensation will be during observations. A simple way to think about AFOV is to consider the size of a TV screen: the larger the screen, the more immersive the experience.
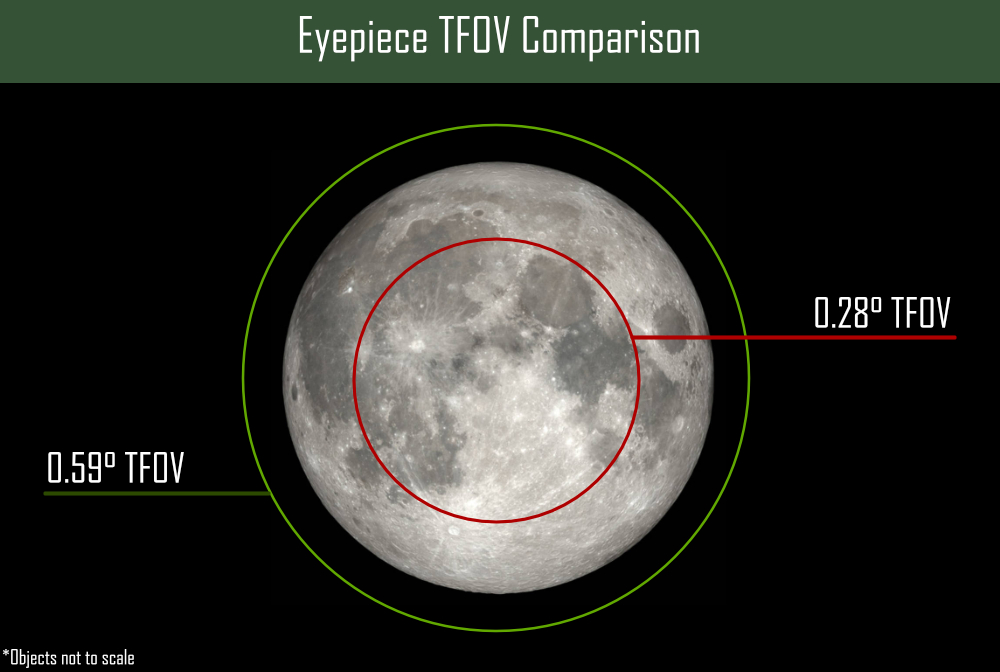
True field of view (TFOV) differs from AFOV, as it refers to the angular diameter of the “chunk” of the night sky being observed based on your system’s magnification and your eyepiece’s AFOV. Different telescope/eyepiece combinations will yield different TFOVs, helping you determine what’s available for viewing based on the angular size of the objects within the night sky. The Moon, for instance, has an angular diameter of 0.5 °. If you wish to view the entire disk of the Moon, your calculated TFOV will need to be larger than 0.5°.
TFOV is measured in degrees, arcminutes, or arcseconds, and can be calculated with the following equation: TFOV = AFOV ÷ Magnification. For example, a 2039 mm focal length telescope coupled with a 7mm 82° AFOV eyepiece will yield a TFOV of 0.28°. About half of the Moon's disk will be presented within your eyepiece with this telescope/eyepiece combination.
Optical Quality
As with any optical system, the quality of your views are reliant on the lowest quality of glass utilized within your optical train. This is why selecting an eyepiece with the highest quality of glass is essential! Premium optical elements perform better at both correcting the incoming light and ensuring maximum light throughput for brighter, higher contrast views.
In addition to glass quality, specialized coatings also play a significant role in the quality of your views. Optical coatings ensure the utmost light transmission to your eye to further enhance your viewing experience. Certain coatings also offer protective abilities to boost the longevity of your eyepiece, guarding against scratches, dirt, and moisture.
Oftentimes you’ll see premium eyepieces advertised with “blackened lens edges.” This design feature is highly beneficial to observers, as the matte black paint around the lenses puts a damper on internal reflections. With this light scatter minimized, sharpness and contrast is brought to its peak. Nearly all high-quality eyepieces include this feature to keep stray light from negatively impacting your viewing experience.
Eye Relief
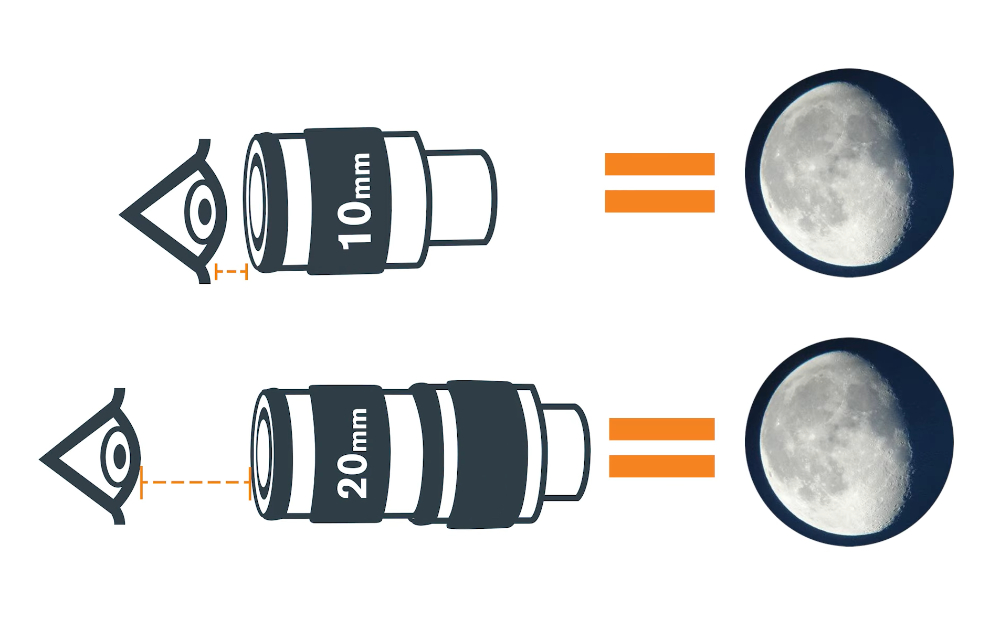
Eye relief refers to the distance your eye must sit from the eyepiece in order to view the full field of view. It’s an important factor in determining the overall comfort of your nights under the stars, especially during extended viewing sessions. Short eye relief (
Barrel Size
The barrel of an eyepiece is the section that slides into the focuser or diagonal, and it generally comes in one of two sizes: 1.25" or 2". Choosing the right size will not only depend on the diameter of your telescope’s focuser, but it will also depend on the type of viewing experience you're looking to achieve.
Typically shorter in focal length and offering a smaller field of view than their 2” counterparts, 1.25” eyepieces are optimal for viewing small, bright objects like the planets, the lunar craters, or planetary nebulae at high magnifications. A vast majority of telescopes on the market today come standard with 1.25” eyepieces out of the box, making this eyepiece format undoubtedly the most common across the astronomy community. Additionally, they’re compatible with just about any telescope, while their compact size makes them much more cost-effective than the larger 2” models.
With an increase in physical size, 2” eyepieces can house larger lenses, enabling longer focal lengths and wider fields of view. This makes them excellent for bright, expansive observations on a host of deep-sky objects. However, there are a couple of trade-offs to keep in mind: 2” models are typically greater in weight and more costly than 1.25” eyepieces. These are important factors to consider in terms of both telescope balance (especially with Dobsonians) and your particular budget. Despite these factors, many astronomers view this larger 2” form factor as a worthwhile investment thanks to the heightened immersion and extensive viewing opportunities!
Target Planning: Calculating Magnification & Exit Pupil
As mentioned above, your eyepiece's focal length plays a critical role in determining what's available for viewing. Magnification (how "zoomed in" you will be) and exit pupil (driver of your image's brightness) are both dependent on your eyepiece's focal length. A low eyepiece focal length yields a high magnification and a small exit pupil, while a high eyepiece focal length yields a low magnification and a large exit pupil. In this section we break down the importance of these two factors and how to calculate them. Take a look below at this quick overview of magnification and exit pupil before we get started:
| Magnification: | How large an object will appear in relation to the naked eye. The higher the magnification, the larger the object will appear. |
| Magnification = Telescope Focal Length ÷ Eyepiece Focal Length | |
| Exit Pupil: | The diameter of the beam of light that departs from the eyepiece, projecting the image to your eye. Larger exit pupils yield brighter images with higher resolution of detail. |
| Exit Pupil = Telescope Aperture (mm) ÷ Magnification or Exit Pupil = Eyepiece Focal Length ÷ Telescope Focal Ratio |
The Role of Magnification
What is Magnification?
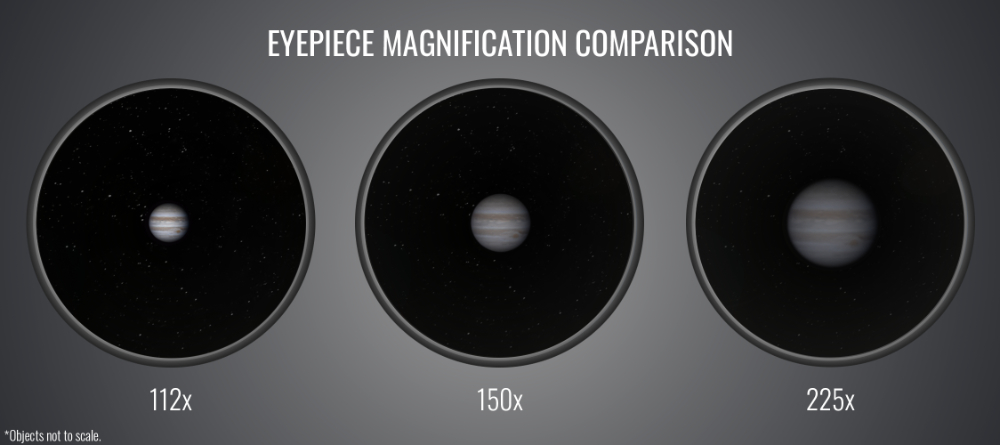
Magnification is the ratio of your telescope’s focal length to your eyepiece’s focal length. It helps you determine how large an object will appear within your eyepiece in relation to the naked eye, providing up-close detail. The larger the magnification, the larger the target will appear to be. It’s important to not fall into the trap of believing higher magnifications equate to better views, as there are certain trade-offs to bear in mind.
Calculating Magnification
The formula for magnification is as follows:
Magnification = Telescope Focal Length ÷ Eyepiece Focal Length. With any given telescope, smaller focal length eyepieces yield higher magnifications, while longer focal length eyepieces produce lower magnifications. This is why longer focal length eyepieces are utilized for object locating and centering, while shorter focal lengths are reserved for up-close views.
Magnification and Target Selection
Using a standard 8” telescope as an example, take a look at the chart below to get a better idea of the targets available at ranging magnifications:
| Magnification Rate | Celestial Objects |
|---|---|
| 30× – 70× | Open Star Clusters |
| 30× – 100× | Galaxies |
| 30× – 100× | Reflection Nebulae |
| 30× – 100× | Diffuse Emission Nebulae (H II Regions) |
| 80× – 100× | Planetary Nebulae |
| 80× – 200× | Globular Star Clusters |
| 200× – 400× | The Moon |
| 200× – 400× | The Planets |
Magnification and its Effect on Image Brightness
It’s crucial to note that your system’s magnification influences the overall brightness within your eyepiece. How exactly does this work, and why does image brightness decrease with higher magnification? With a boost in magnification, the light collected by your telescope is spread over a larger area, resulting in a dimmer, more muted image. A good analogy to think about is shining a flashlight on a wall: a narrow beam concentrates the projected light over a small surface area, resulting in a compact, bright spotlight, while a wider beam spreads this light over a larger surface area, creating a bigger, yet dimmer, spotlight. Going back to telescopes, you may then ask, how much dimmer will my image be as magnification increases? Brightness is inversely proportional to the square of your system’s magnification. This means increasing your magnification by a factor of 2 will decrease your image’s brightness by a factor of 4.
Understanding this relationship is key in choosing which objects to observe. If your telescope’s aperture is large enough, it can bring in enough light to compensate for the drop in brightness seen with high magnifications, enabling well-illuminated, up-close views of dim celestial objects like nebulae and galaxies. Otherwise, objects that are intrinsically bright, like the planets and our Moon, are more suitable for low aperture, high magnification systems.
Minding Your Local Seeing Conditions
In addition to image brightness, the relationship between magnification and your local seeing conditions is vital to account for, as it greatly influences what eyepieces you should and should not pair with your telescope. The better your local seeing conditions, the higher magnifications your system can support. Let’s take a look at how to determine your system’s maximum magnification:
For average seeing conditions, the maximum magnification your system can support is 40X to 50X that of every inch of aperture of your telescope. This means a 4” telescope can accommodate a maximum magnification of 160X-200X, depending on the atmospheric clarity on any given night. Anything above this limit and the image will be too blurry to resolve. While this formula is a useful guideline, it’s important to note that for any given optical system, it’s recommended to stay under a 300X maximum magnification. This is because your optical system magnifies everything between your telescope and your subject, including pollutants, moisture, and atmospheric turbulence. Unless your seeing conditions are exceptional, anything higher than a maximum magnification of 300X will likely yield subpar results due to atmospheric distortions.
Now that we have a clear understanding of magnification limits, let’s take an 8” 2032 mm focal length SCT as an example, and determine which eyepieces are best suited for a telescope this size. 8" means we technically have an upper magnification threshold of 400X, though as stated above, we’re going to want to stay under 300X to ensure the cleanest, sharpest views. A 7mm or 8mm eyepiece is a great fit for high magnification views of the planets and the lunar craters, while a 13mm or 14mm eyepiece provides approximately 150X magnification suitable for a host of deep sky objects. Tack on a 25mm or 30mm eyepiece for 75X magnification, a rate ideal for locating and centering objects or for viewing dim, diffuse targets!
Pro Tip: For years, the general rule of thumb for maximum magnification per inch of aperture was 50X - 60X, which is higher than we stated above. This more generous guideline assumes better seeing conditions than most are subject to, and in our experience, has led to disappointment within many amateur astronomers. Using the 50X - 60X rule, we, like many others, have found that high magnification eyepieces didn’t come into focus 95% of the time, resulting in lackluster nights under the stars. For most observers on most nights, we highly recommend sticking to our revised rule of 40X - 50X per inch of aperture, with a cap of 300X for the best possible results.
The Role of Exit Pupil
What is Exit Pupil?
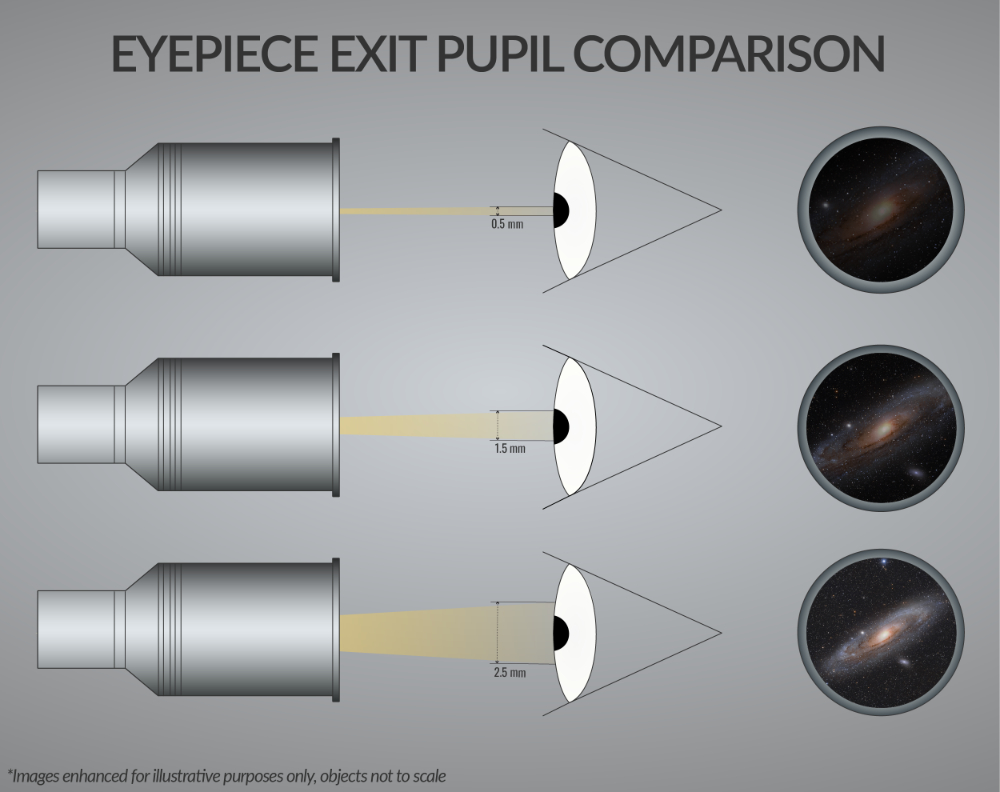
Exit pupil is the diameter of the beam of light that departs your eyepiece. It’s directly tied to the overall brightness of your image, and it’s an important factor to consider when determining which objects are available for observation. This term is analogous to our very own pupils, hence its name. As the pupil within our eye expands, more light is brought into our retina. This same concept is applicable to eyepiece exit pupils, with the larger the exit pupil, the brighter the image.
Calculating Exit Pupil
We measure exit pupil by its diameter in millimeters. To calculate the exit pupil of your eyepiece/telescope combination, use either of the two equations:
Exit Pupil = Telescope Aperture (mm) ÷ Magnification or
Exit Pupil = Eyepiece Focal Length ÷ Telescope Focal Ratio.
Exit Pupil and Target Selection
In general, deep sky objects become visible with an exit pupil of 1-1.5 mm or greater with fainter and fainter targets becoming more and more visible as the exit pupil increases. A rate of 2 mm is typically considered the “sweet spot,” offering sights on a wide variety of celestial objects.
As a rule of thumb, larger exit pupils are better suited for viewing faint deep-sky objects like galaxies and nebulae. The wider size is also highly beneficial for effortless alignment with your eye’s pupil. Smaller exit pupils, on the other hand, are typically more appropriate for viewing bright objects like the planets or our Moon. Since these solar system objects are bright themselves, smaller exit pupils are sufficient in resolving fine detail on Saturn’s rings, the cloud bands on Jupiter, countless lunar craters, and plenty more solar system wonders. Using an 8” telescope as an example again, take a look at the chart below to get a better idea of the objects available for observing with these exit pupil sizes:
| Exit Pupil Size (mm) | Celestial Objects |
|---|---|
| 0.5-1.0 | The Moon |
| 0.5-1.0 | The Planets |
| 1.0-2.5 | Globular Star Clusters |
| 2.0-3.0 | Planetary Nebulae |
| 2.0-7.0 | Galaxies |
| 2.0-7.0 | Diffuse Emission Nebulae (H II Regions) |
| 2.0-7.0 | Reflection Nebulae |
| 3.0-7.0 | Open Star Clusters |
The Relationship Between Magnification & Exit Pupil
Magnification and exit pupil are inversely proportional, meaning as magnification increases, your exit pupil decreases. When magnification is doubled, the resulting exit pupil is halved, and vice versa. Let’s take a closer a look at the formula below:
Exit Pupil (mm) = Telescope Aperture (mm) ÷ Magnification
Using an 8" telescope as an example, we can see that a calculated magnification of 100x will yield an exit pupil of ~2 mm, a decent rate for observing a wide variety of celestial objects. Take a look at this chart to compare the varying exit pupil/magnification rates with an 8" aperture.
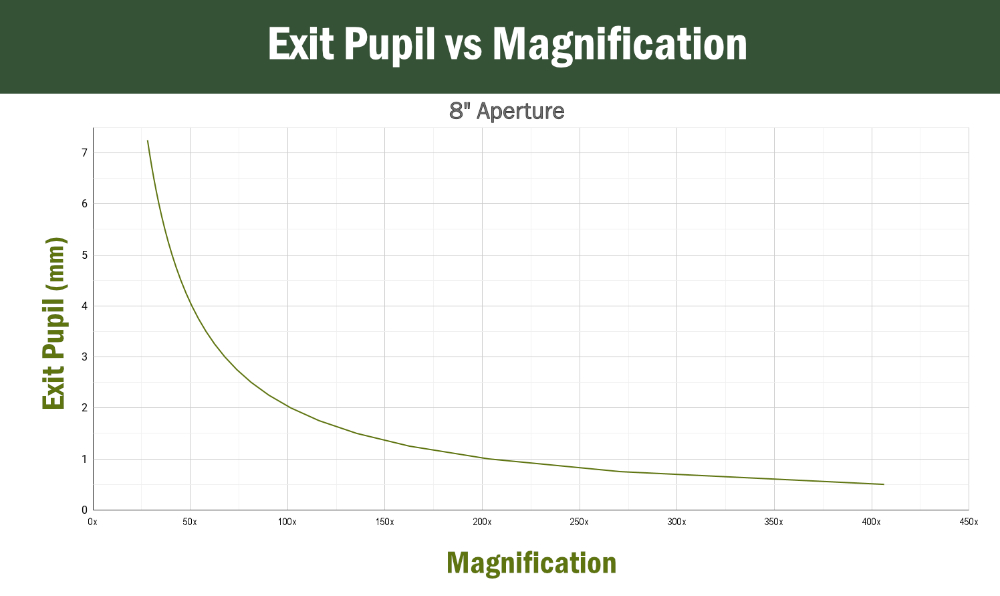 Click to Enlarge
It important to take both your calculated magnification and exit pupil into account when selecting your next eyepiece. If there’s an object you’d like to view, say the Trifid Nebula, and your system’s exit pupil is 2mm (suitable for nebulae), this doesn’t necessarily mean you’ll have enough magnification to adequately view this object up-close. In the same breath, a magnification of 150x (suitable for most nebulae) also does not guarantee a sufficient exit pupil to resolve significant detail. Finding the right balance between these two aspects will greatly assist in determining which eyepiece is best aligned with your specific observing goals.
Eyepiece Types
Now that we have a thorough understanding of what to look for in an eyepiece, the next step is to explore the types of eyepieces available. The three most common types you’ll come across are Plössls, wide angle eyepieces, and zoom eyepieces. Each design offers a unique set of benefits and drawbacks, and having a solid understanding on each is key to making the most out of your observing sessions. Let’s take a look at what each type offers and how they can shape your viewing experience:
Plössl
The most common type of eyepiece offered, Plössl eyepieces are well suited for a host of applications. This design consists of a total of four lenses arranged within two back-to-back achromatic doublets, keeping chromatic aberration and color fringing to an absolute minimum. Plössls are ideal for viewing anything from the planets to deep sky objects.
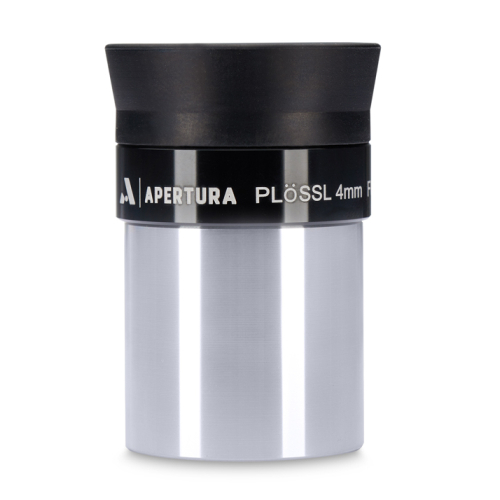
Generally inexpensive to manufacture, many telescopes come standard with at least one Plössl out of the box. A large portion of Plössls available are 1.25” in size, offering compatibility with almost any telescope on the market. The apparent field of view for the Plössl eyepiece design is right around 50°. Short eye relief is common with this type of eyepiece, which may be problematic for some eyeglass wearers.
Wide Angle
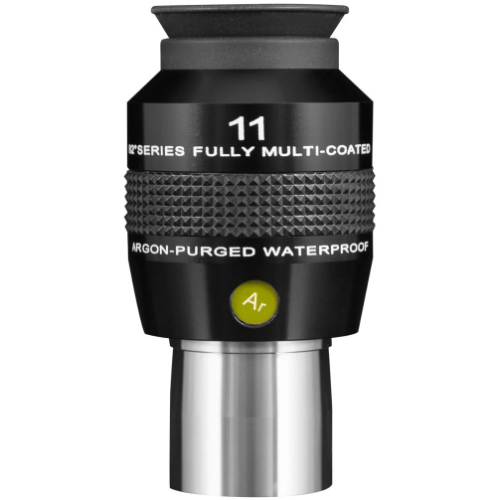
A wide angle eyepiece is one that offers a more immersive experience than standard eyepieces thanks to their large apparent field of view. Anything wider than 80° is typically classified as a wide angle eyepiece, though many models with a 68° and 72° AFOV have been designated as wide angle as well. The TeleVue Nagler series changed the game when it was released in 1980 with its then impressive 82° field of view, though some wide angle eyepieces now offer AFOVs of up to 120°!
These eyepieces are typically designed with five internal lenses and are excellent for viewing large deep space objects. For those who are eager to experience captivating, immersive viewing experiences, wide angle eyepieces are the way to go.
Zoom
Zoom eyepieces are designed with multiple focal lengths, offering varying magnifications with one system. In instances where you need to quickly reduce and increase magnification repeatedly, zoom eyepieces will save you the hassle of switching out eyepieces in rapid succession. In addition, these eyepieces are highly beneficial for outreach use and terrestrial observing thanks to the convenience of a range of magnifications offered.
An important thing to remember about zoom eyepieces is their field of view and eye relief will shrink as you move from high to low focal length. Additionally, it may be possible that the focal lengths offered with a zoom eyepiece may not cover the entire range of magnifications your telescope can support. Understanding your specific observing goals will be highly beneficial in selecting the right zoom eyepiece for you.
Caring for Your Eyepieces
Just like any other optical accessory, keeping your eyepieces clean and safe is key in ensuring their longevity. Eyepiece screw-top bolt-style cases, such as the ones by StarDust Covers, are a simple, inexpensive way to add a first layer of protection. When not in use, these cases keep your eyepieces shrouded from dust, scratches, and fingerprints. For further protection during trips to dark skies, a hard or soft-sided eyepiece case adds another layer of defense. The cases designed by Explore Scientific and Tele Vue are great choices, helping to prevent eyepiece damage while on the move.
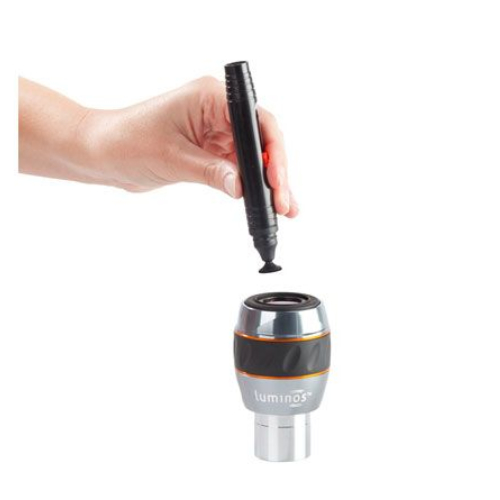
When it comes to cleaning your eyepieces, it’s important to do so with the utmost care. This means utilizing cleaning fluid that’s specially designed to not degrade the delicate coatings on the lenses. Additionally, it’s necessary to use soft, lint-free brushes and cloths to avoid accidental scratches on the glass. A LensPen is great to have on hand for a quick dusting and removing the occasional spot or watermark, while an Air Blower helps gently remove dust and dirt. Cleaning kits are a great way to get everything you need in one package. The Apertura 20 Piece Cleaning Kit, for example, comes complete with cleaning essentials like microfiber cloths, anti-bacterial wipes, lens paper, cleaning solutions for lenses, and plenty more!
Bear in mind, cleaning your eyepieces should only be done when necessary, as over-cleaning can do more harm than good. Being as gentle as possible and only doing as much as what’s needed to keep dust, fingerprints and eyelash marks from building up on your optics is key, as even the most careful cleaning with top-notch products will, over time, erode your eyepiece coatings.

Learn More
Now that we’ve covered the ins and outs of eyepieces, it’s time to find the right eyepiece for you! The extensive collection of eyepieces we offer here at High Point Scientific includes everything from standard Plössls to high-end models. Of course, if you have further questions, don’t hesitate to contact us, our team of gear experts are eager to provide guidance and clarification wherever needed!
Click the arrow above to see MLA, APA, and Chicago Manual of Style citations.
MLA:
High Point Scientific Team. "The Ultimate Telescope Eyepiece Guide," AstronomyHub, High Point Scientific, 11 Aug. 2021, https://www.highpointscientific.com/astronomy-hub/post/telescope-eyepieces-guide.
APA:
High Point Scientific Team. (2021, August 11). The ultimate telescope eyepiece guide. High Point Scientific. https://www.highpointscientific.com/astronomy-hub/post/telescope-eyepieces-guide
Chicago Manual of Style:
Bibliography:
High Point Scientific Team. "The Ultimate Telescope Eyepiece Guide," AstronomyHub (blog), High Point Scientific, August 11, 2021. https://www.highpointscientific.com/astronomy-hub/post/telescope-eyepieces-guide.
Footnote:
High Point Scientific Team, "The Ultimate Telescope Eyepiece Guide," AstronomyHub, High Point Scientific, August 11, 2021, https://www.highpointscientific.com/astronomy-hub/post/telescope-eyepieces-guide.
This Article was Originally Posted on August 11th, 2021


