Automation is a beautiful thing. Nothing is more satisfying than sending a series of short commands and then sitting back and watching as everything moves precisely into place. Electronic focusers are one of the many advances in astronomy hardware that have brought the full motorization of amateur setups closer to reality and are allowing users to easily set focus straight from the comfort of their smartphone, PC, or even from a convenient hand controller.
As these become more and more common, electronic focuser compatibility is becoming more and more common with the design of telescopes today. However, with the wide variety of focuser designs on the market and a growing number of electronic focuser options, how can one be sure any two will work together? In this article, we’ll cover the two most common electronic focuser attachment methods and how to measure your focuser to ensure your model of choice will work immediately!
How does an electronic focuser attach to a telescope?
The telescope focusers we’ll be looking at are the common Rack & Pinion/Crayford-style found on refractors, Newtonians, and RCs. These are what most electronic focusers are set up to work with out of the box. It is worth noting, however, that some of these models can be converted to, or have separate offerings dedicated to, adding motorized to SCTs.
An electronic focuser is installed on a telescope with two main components: a coupling that connects the motor to the focusing mechanism and a support that rigidly connects the body of the electronic focuser to the telescope. The coupling connection method is common across almost all electronic focusers, and ensuring the couplers included will work with your telescope is our focus. However, the support component has two different common connection methods that require additional consideration.
“Bracket” Style Attachment
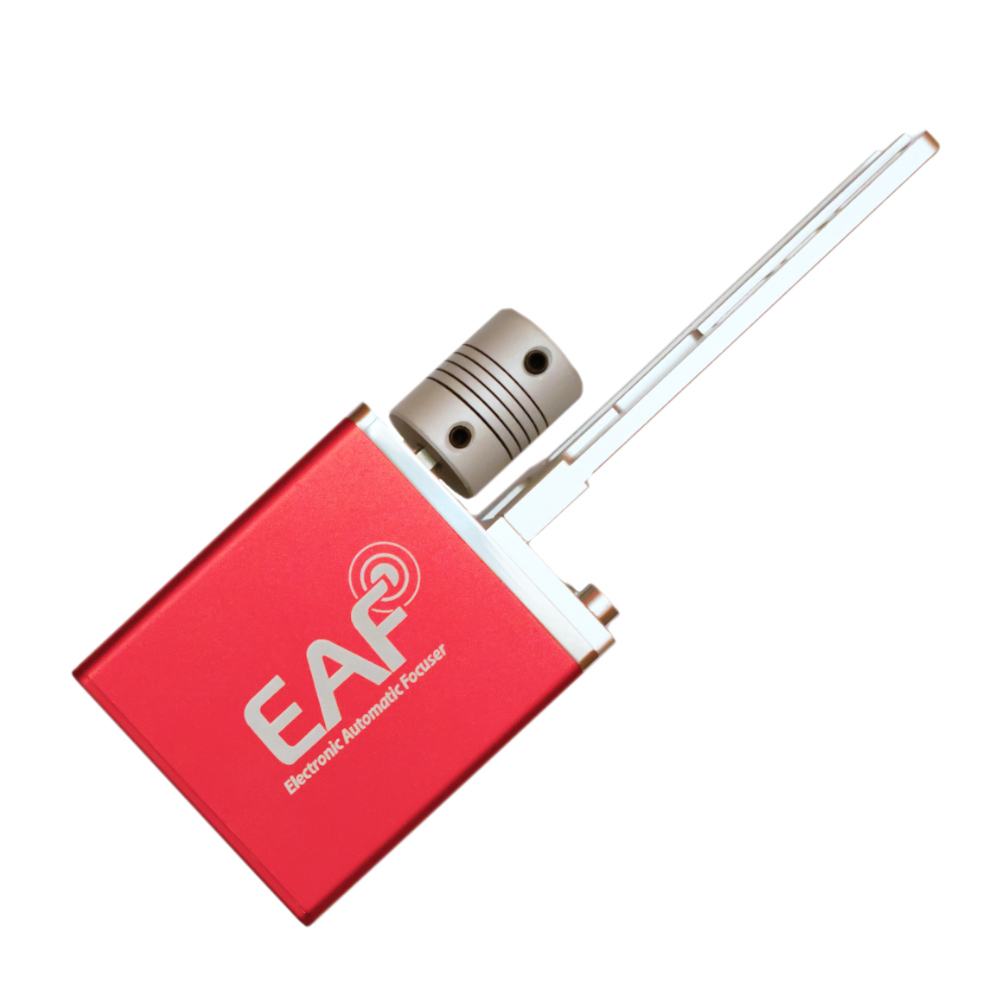
This is the much more prevalent attachment style, seen on the very popular ZWO EAF and also on the QHY QFocuser, iOptron iEAF, and Pegasus Astro FocusCube 3. As seen in the picture here, the electronic focuser is attached to a bracket that is connected to the telescope via screws threaded into the focuser housing. While this guide will cover the flexible coupling portion of this style of electronic focuser compatibility, it is just as important to ensure your focuser can additionally accommodate the bracket screws. Please consult your telescope’s manual or the manufacturer for more information on bracket compatibility.
“Clamp” Style Attachment
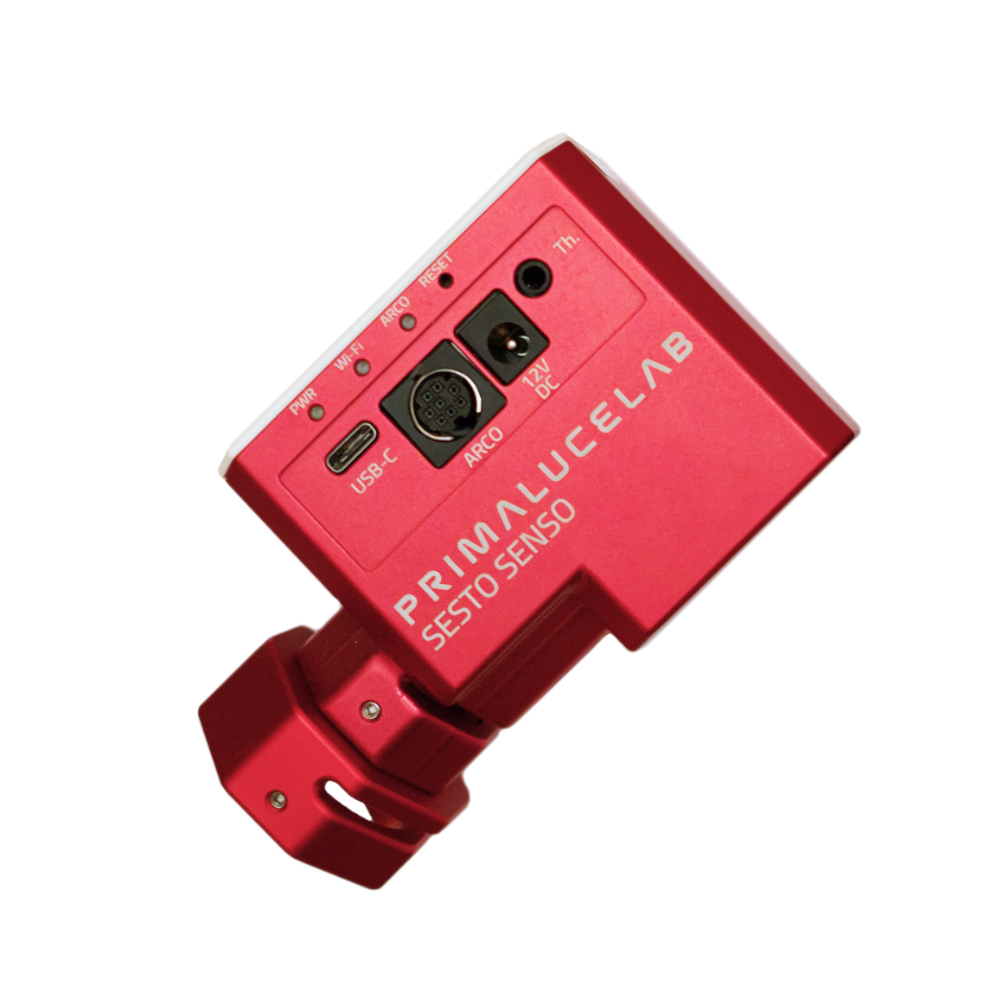
This attachment style is seen on models such as the PrimaLuceLab Sesto Senso 2, which connects the electronic focuser housing to the telescope body by clamping onto part of the focuser. This eliminates the need for threaded attachment on the focuser but does require the focuser to have an adequate amount of “collar” or “shoulder” protruding out that is compatible with the size of the clamp..
Which Electronic Focuser is Best?
Each style comes with its own benefits and weaknesses. Bracket-style attachments provide a much more universal fit and are arguably the most popular electronic focuser to date. The ZWO EAF uses this support connection style. Owing to that compatibility and the large body of available information/support, this style will be well-suited to most users. Though it does entail working with he threaded holes and screws in the bottom of your focuser. This style requires a bit more research as some of these telescope focuser components are not intended to be touched by the end user.
This is not to say clamp style electronic focusers are bad. They do allow installation in a variety of orientations after all and remove any concerns of working with the focuser body’s screws - but they do require additional clamp adapters in situations where the focuser does not support the stock electronic focuser configuration. Being the less popular of the two styles, it is more difficult to find whether your telescope is compatible. However, in this article, we’ll cover how to measure your telescope focuser for these interesting electronic focuser offerings!
Tools You’ll Need
Generally speaking, you will need just four things:
- A set of calipers
- A hex head wrench to remove the focus knob(s)
- A large, clean work surface where you can comfortably rest the telescope without concerns of it falling
- Something to record your measurement on
As mentioned before, a wide variety of focuser designs are available today, so the exact size of the hex wrench or hardware removal tool you’ll need will vary depending on which telescope you have. This information may be listed in your manual or available from the manufacturer.
Measuring Your Telescope For A “Bracket” Style Electronic Focuser
Note: Most all bracket-style electronic focusers on the market today replace the coarse focus knob. However, some unique models replace the dual speed knobs. For these exceptions, you will need to remove that corresponding set of knobs instead. How to remove the dual speed knobs is covered in the clamp style measuring section.
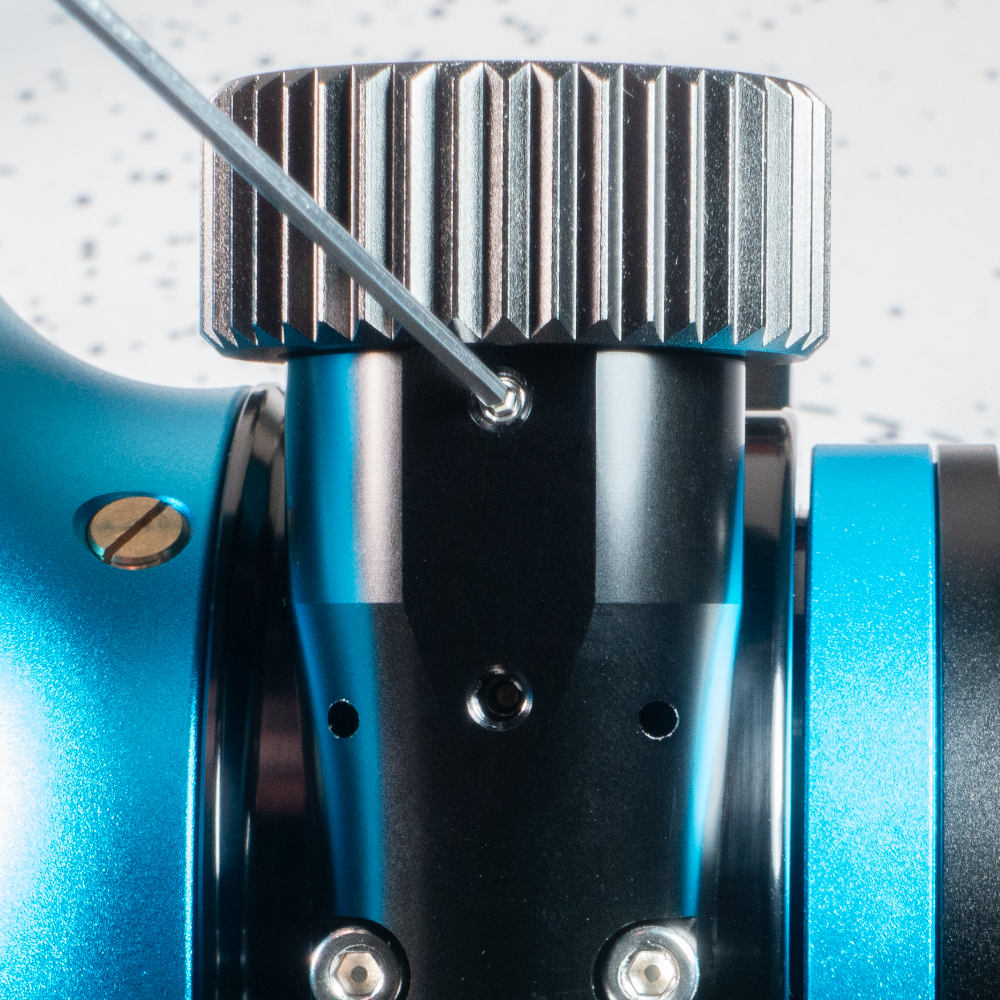
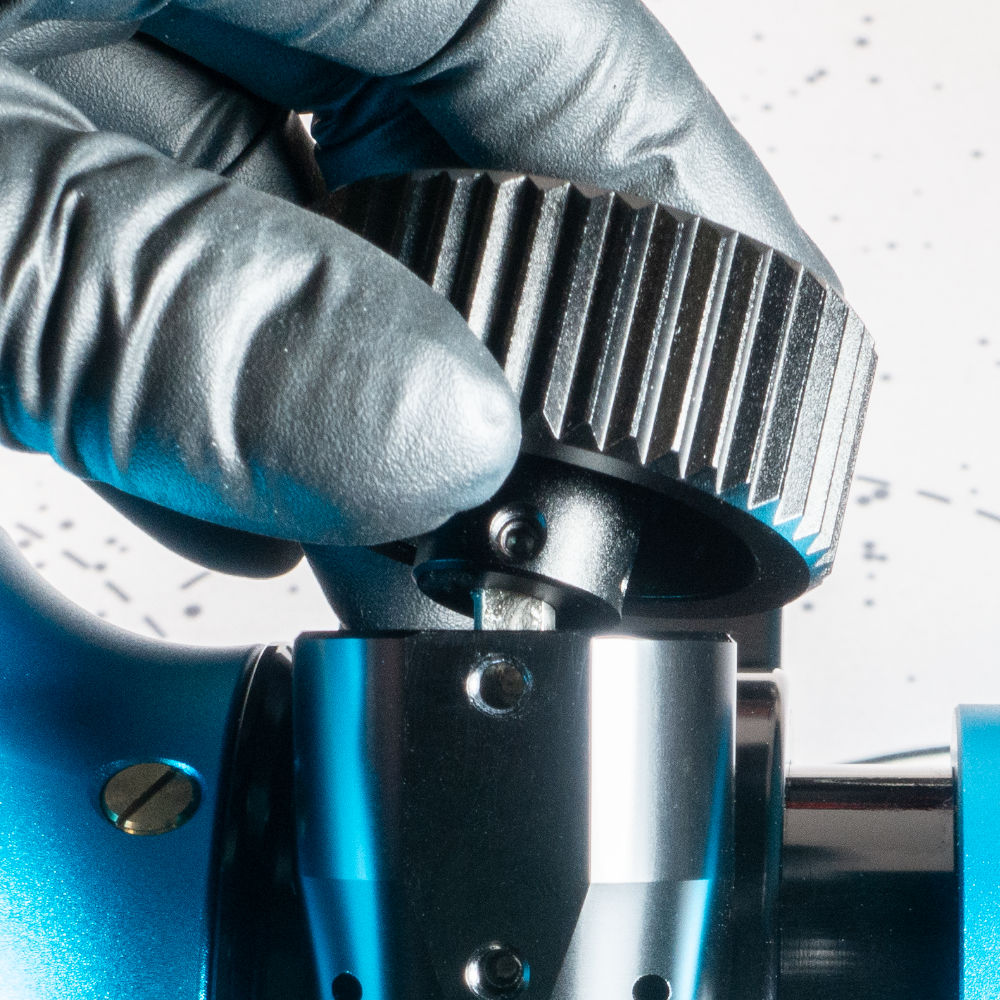
Step 1: Remove the Coarse Focus Knob
This can be as easy as locating a hole on the exterior of the knob and loosening (not removing) the set screw within while pulling gently on the coarse focus knob until it is free. Other scopes may require a bit more because the set screws are only accessible through a hole in the bottom of the focuser (which typically has a set screw preinstalled to block this off). If your telescope uses this type of design, consult your manual for more information.
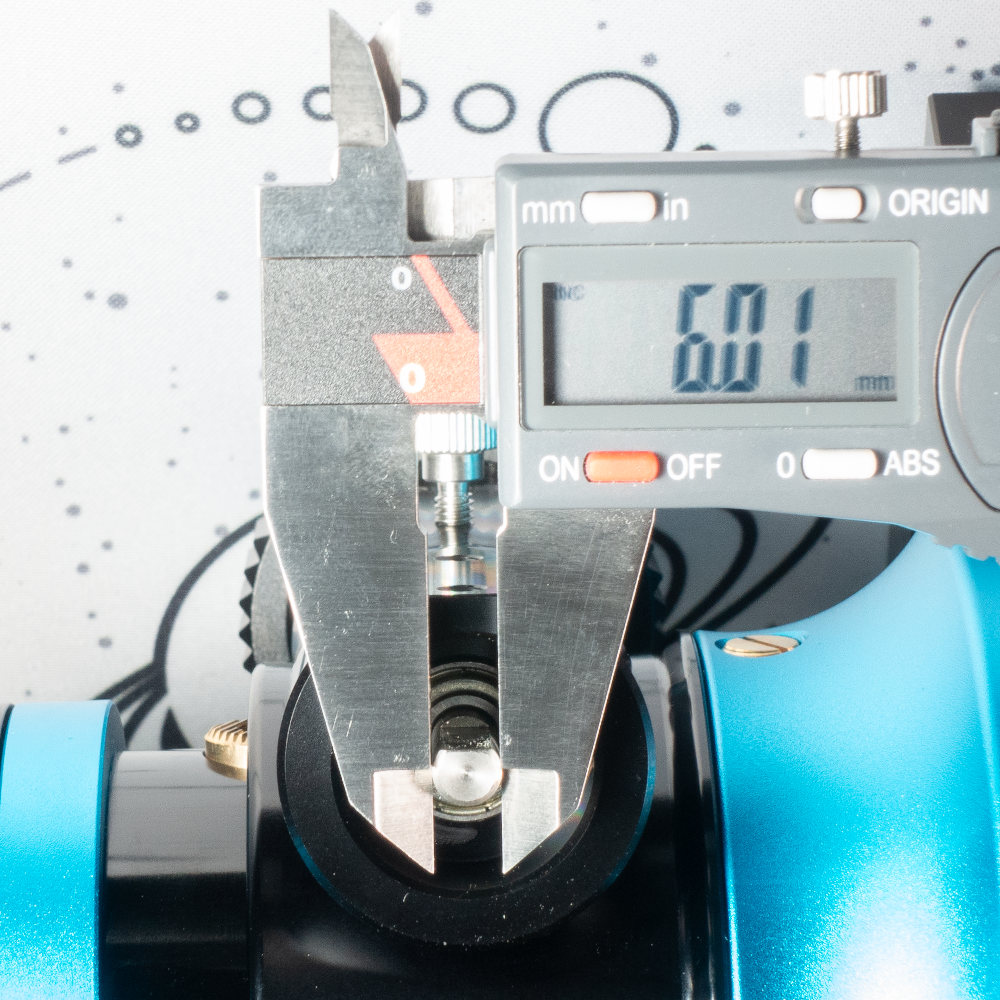
Step 2: Measure the Focuser Shaft
Once the coarse focus knob has been removed, there will be a thin shaft protruding from the focuser. Grab your calipers and measure this. If your focuser has a D-shaped shaft (i.e., not perfectly round, but instead has a flat spot and looks like a “D”), you will want to ensure you are not measuring on the flat surface, as this will give you an incorrect measurement.
Step 3: Check the Electronic Focuser Product Listing or Manual
Review the sizes listed for the included couplings and ensure that there is one close in size but larger than your measurement. For example, the ZWO EAF currently comes with 4mm, 5mm, 6mm, and 7mm couplers, so it will work with the Apertura 90mm Triplet APO and its 6.01mm focuser shaft shown in this example.
Tip: When reinstalling the coarse focus knob, push this in until it touches the focuser housing and then pull outwards very slightly. If this is not done, the coarse knob may rub against the focuser housing. Additionally, if your telescope has a D-shaped focuser shaft, be sure to line up the set screw with this when tightening the knob back on.
Measuring Your Telescope For A “Clamp” Style Electronic Focuser
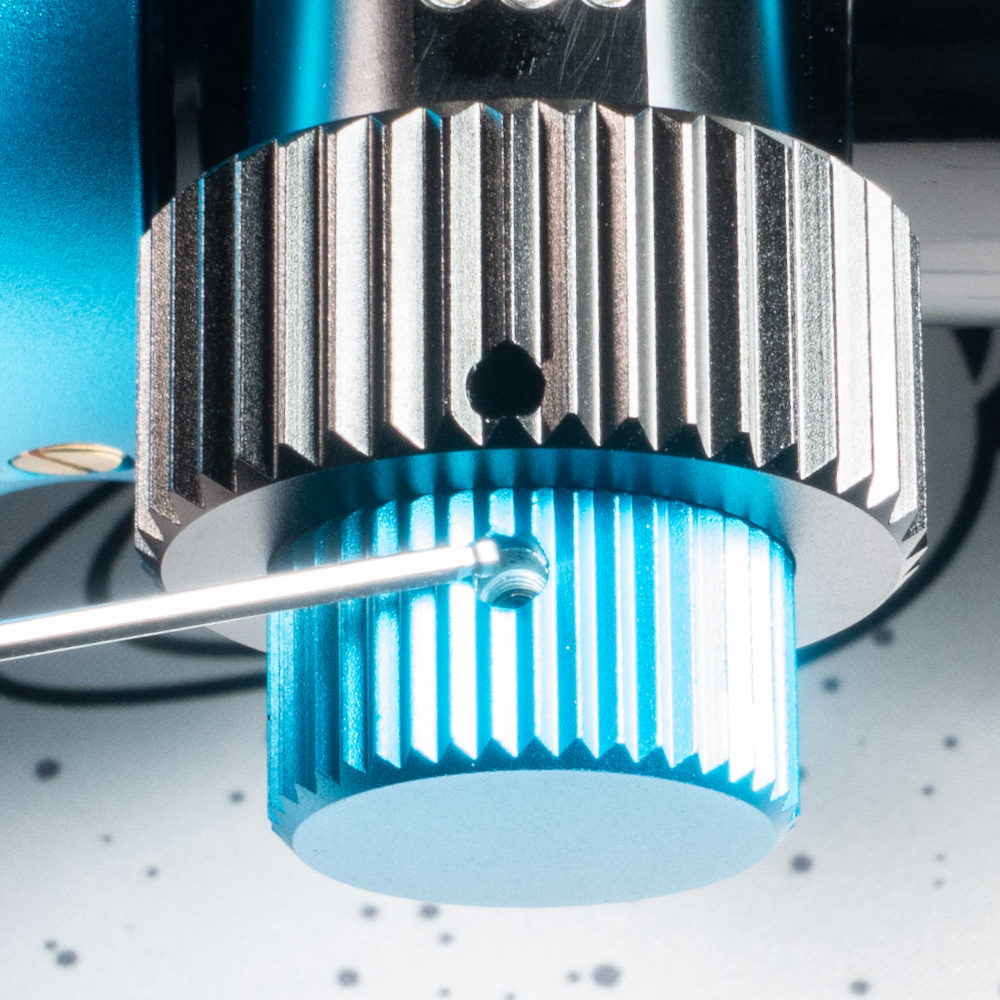
Step 1: Remove the Dual Speed Knobs
First, locate the hole(s) in the fine and coarse focus knobs. Begin loosening (not removing) the set screw recessed in the outermost knob while gently pulling on it until it comes free. Repeat this process for the remaining knob. Most dual speed knobs are attached in this fashion, making the process easy. If, however, your telescope dual speed knobs are different, please consult the manufacturer or manual for more information.
Step 2: Measure the Focuser Shaft
Once these focus knobs have been removed, there will be a thin shaft protruding from the focuser. Grab your calipers and measure this. If your focuser has a D-shaped shaft (i.e., not perfectly round, but instead has a flat spot and looks like a “D”), then you will want to ensure you are not measuring on the flat surface, as this will give you an incorrect measurement.
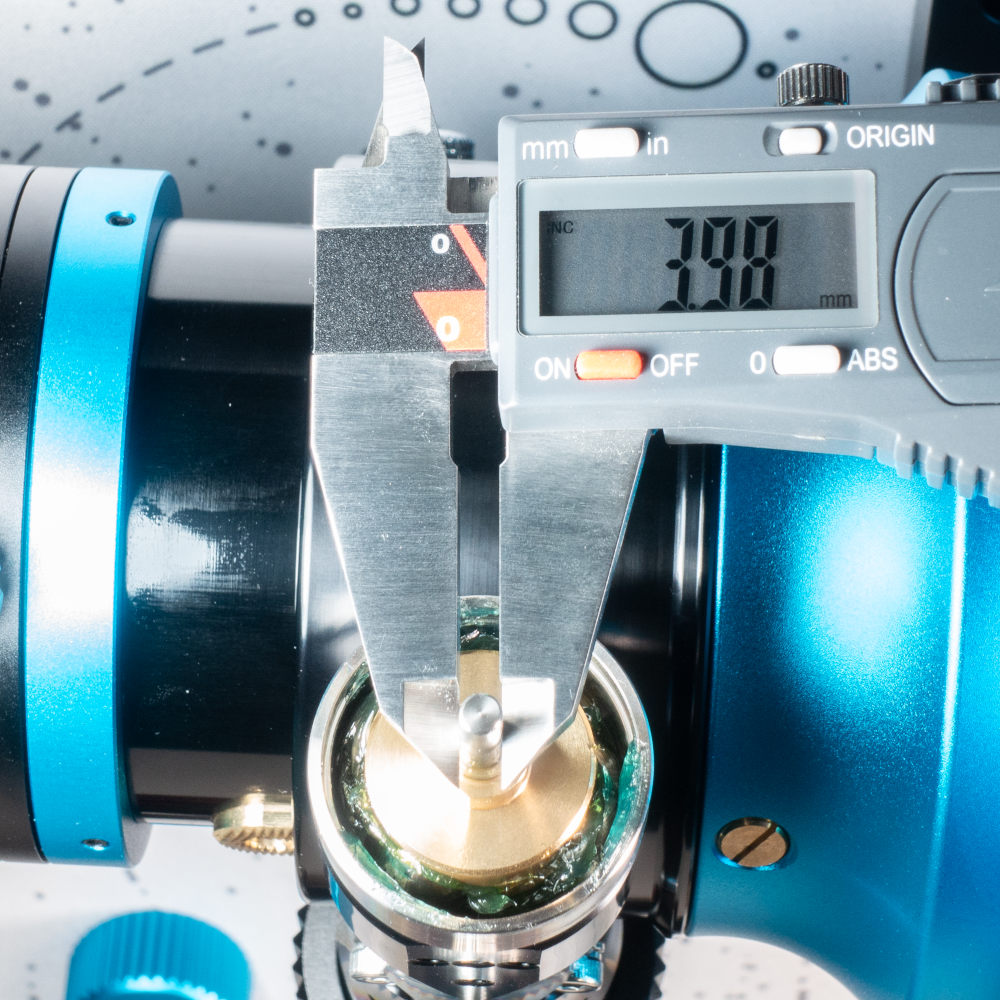
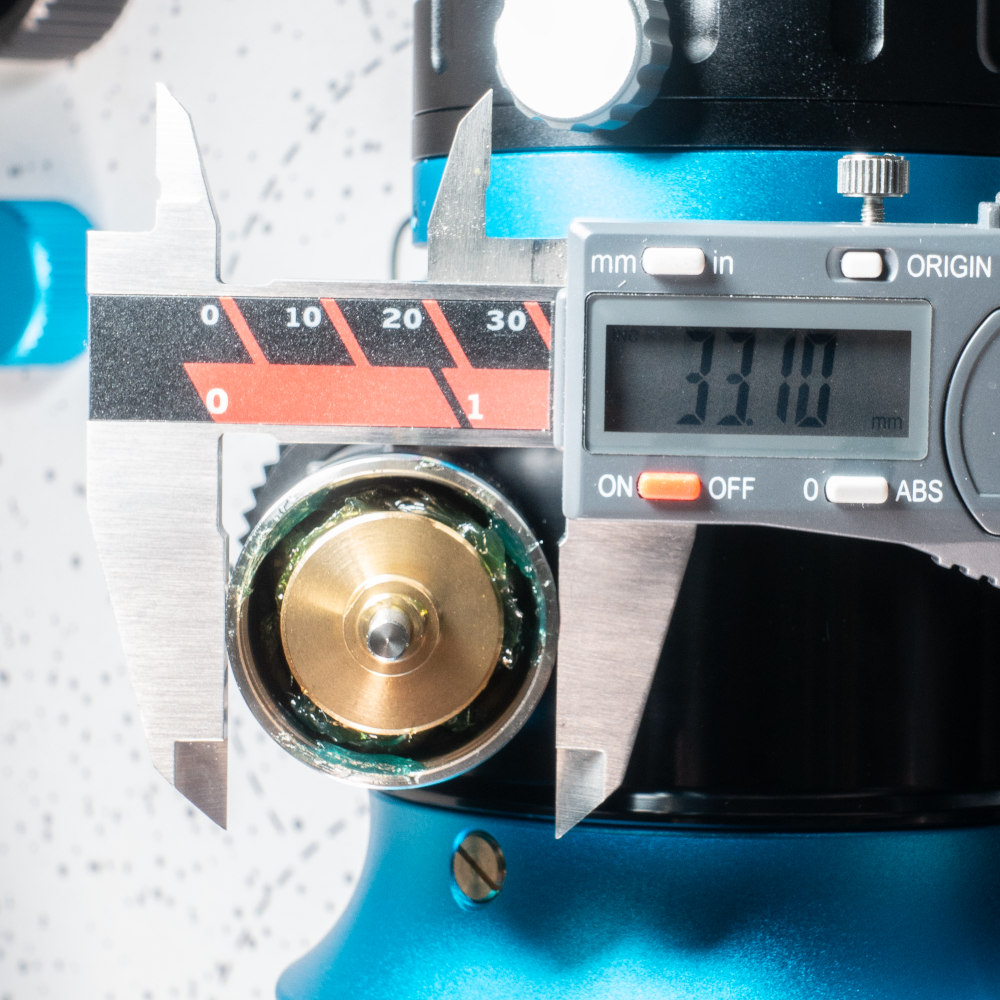
Step 3: Measure the Collar/Shoulder
Next, measure the “collar” or “shoulder” section that previously was covered by the dual speed knobs. This is what the clamp will attach to. Be sure to keep your calipers as straight as possible for an accurate measurement.
Step 4: Check the Electronic Focuser Product Listing or Manual
First, review the coupler sizes that come with the electronic focuser and ensure that there is one that is close in size but larger than your measurement for the focuser shaft. For example, the Sesto Senso 2 comes with 2.4mm, 2.5mm, 2.8mm, 3.1mm, 3.5mm, and 4mm couplings (they refer to them as bushings), so these will fit the focuser’s 3.98mm shaft from our example.
Next, review the collar/shoulder size and the size of the electronic focuser clamp. Returning to our example, the Sesto Senso 2 has a clamp size of 25mm, which is too small for our example, the Apertura 90mm Triplet APO, which has a 33.10mm collar. This means we would need the 33mm Sesto Senso 2 clamp adapter and extended bushing kit, allowing the electronic focuser to attach to this scope.
Tip: When reinstalling the focus knobs, push them in until they are at the end of travel, and then pull outwards very slightly. If this is not done, the knobs may rub against each other or the focuser housing. Additionally, if your telescope has a D-shaped focuser shaft, be sure to line up the set screw with this when tightening the knobs back on.
While this may seem like a lot of steps, it is a pretty straightforward process for most telescopes on the market today and well worth the time to guarantee your electronic focuser of choice will install without a hitch!