Congratulations on your purchase of the Apertura Roll Easy Kit For Dobsonian Telescopes!
There is no doubt that the factory configuration of Apertura Dobsonian telescopes offers an incredible user experience. While this is true, we continued our quest to increase the ease of use and performance of this telescope - adding to the already wildly successful Apertura Performance Upgrade Kit. The multifaceted Apertura Apertura Roll Easy Kit does just that!
How do we improve this already great user experience?
Increased mobility of the telescope base
The roller kit will outfit your Dobsonian telescope with its own built-in caster system. This allows your AD Dobsonian to easily be moved around without lifting or disassembly. Once you're done moving the scope, each caster can be fully locked both in the swivel and the wheel. This locking functionality helps to keep your targets steady in the eyepiece as you manually track your Dobsonian through the night, just as the scope operates in the factory configuration.
Increased eyepiece height
The caster kit adds approximately 7” of height to the Dobsonian telescope base, thus increasing the height of the eyepiece by about 7”. For many users, this is a welcome addition as bending over at the eyepiece without an observing chair can become tiresome. The added height can even add to the comfort of observing with a chair.
Maintains Stable Platform
These mobility and lift upgrades are securely tied into your existing base with the sturdy caster mounting bars. The bars, proudly fabricated and finished right in New York, USA, are easy to install but still ensure your Dobsonian remains just as firmly planted as it originally was.

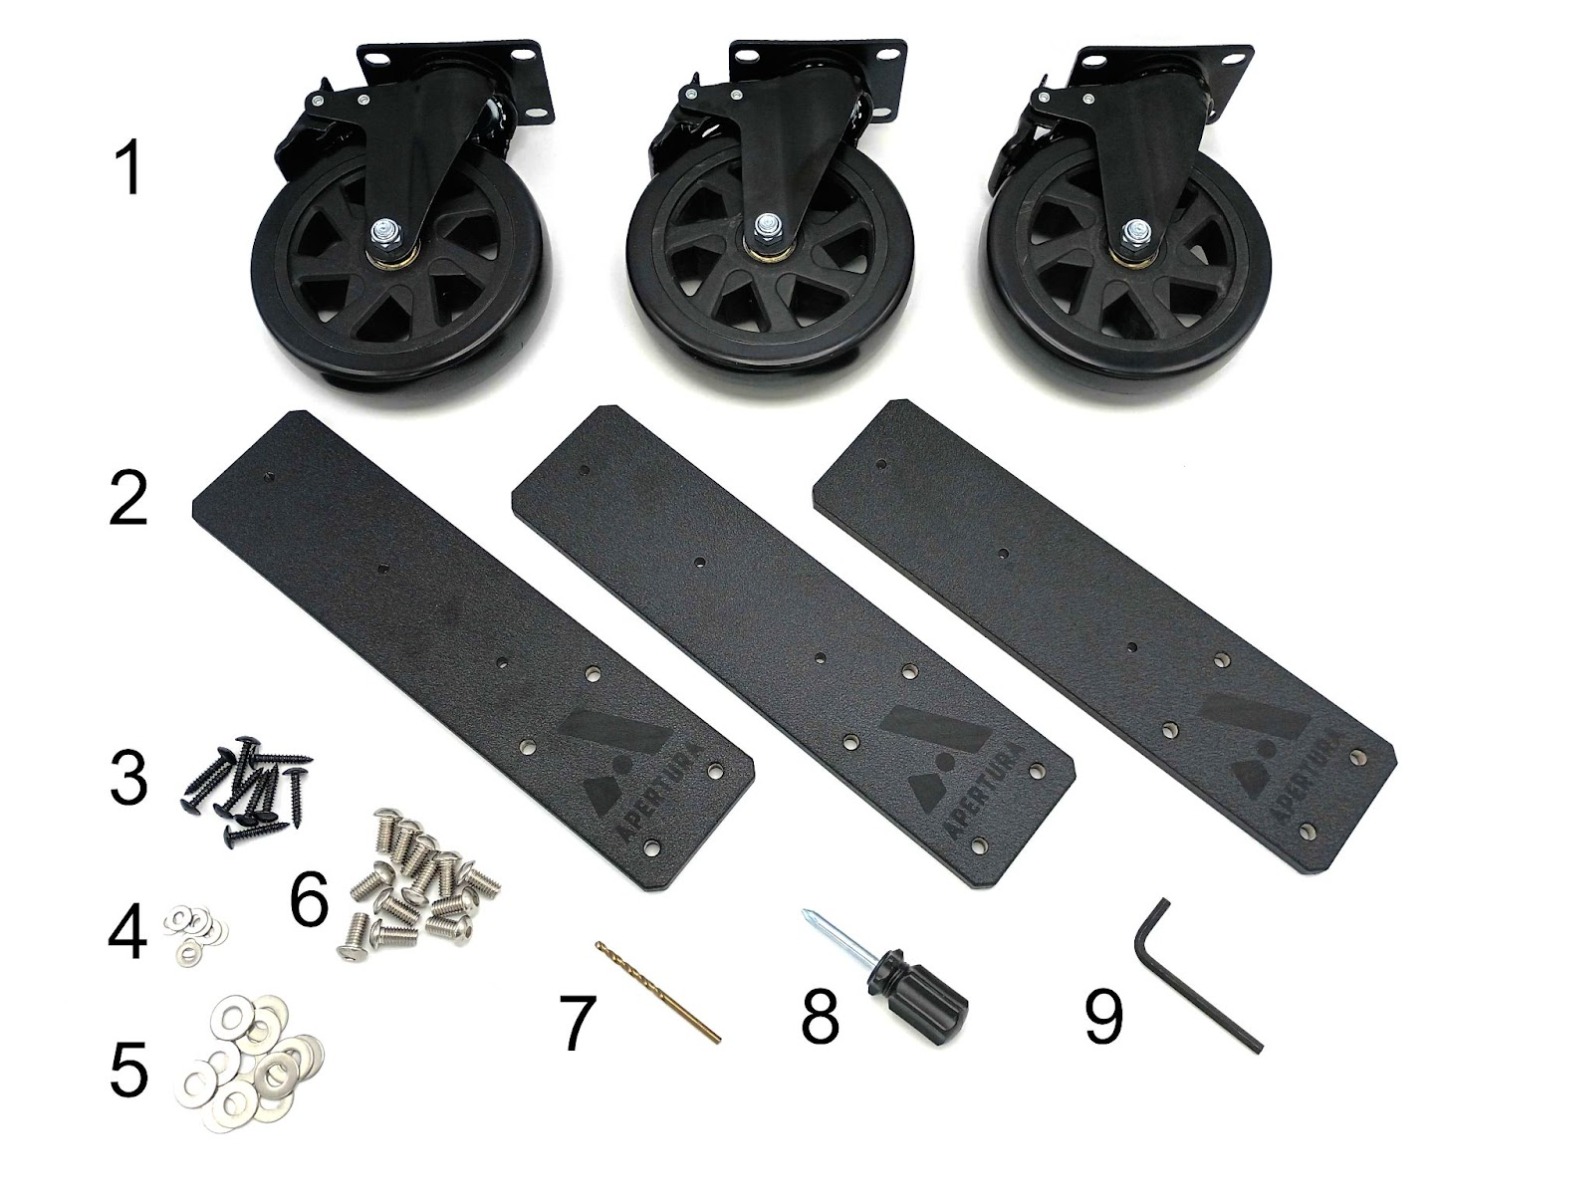
Parts of the Kit
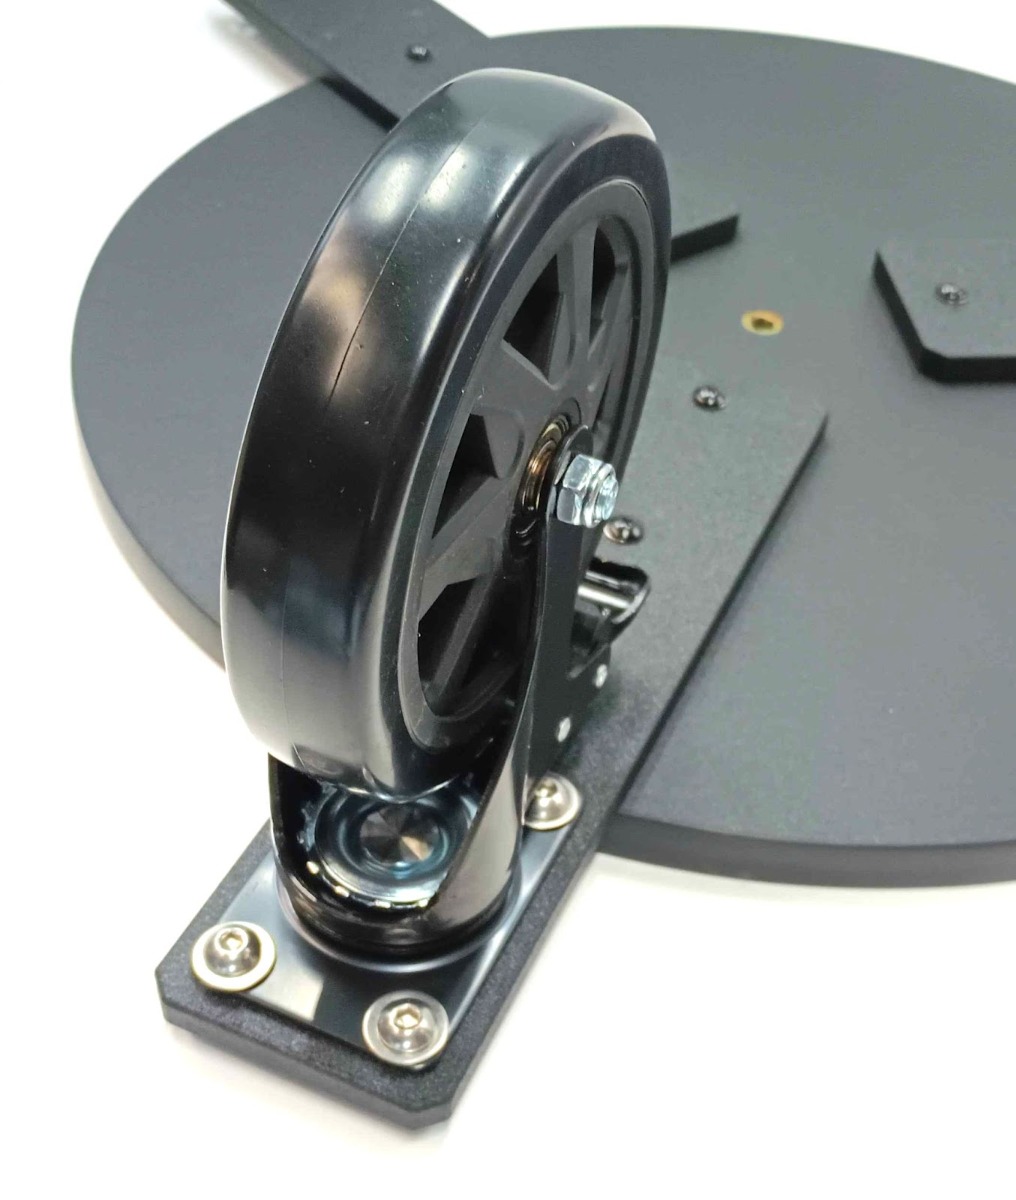
- Premium 6” casters
- Caster Mounting Bars (Made in the USA)
- Mounting Bar Screws (#10 x 1" Black Oxide Stainless)
- Mounting Bar Washers (Small Stainless)
- Caster Mounting Washers (Large Stainless)
- Caster Mounting Screws (5/16-18 Stainless)
- 1/8” Drill Bit *
- #2 Phillips head screwdriver
- 3/16” Hex Key
* The installation will also require the use of a hand drill, not included.
Installation Process
The upgrades will be installed working from the base out to the casters. It is important to understand the process of each subsection prior to installing any upgrade parts. The installation of the upgrade has been planned in a systematic process.
Caster Mounting Bar Installation
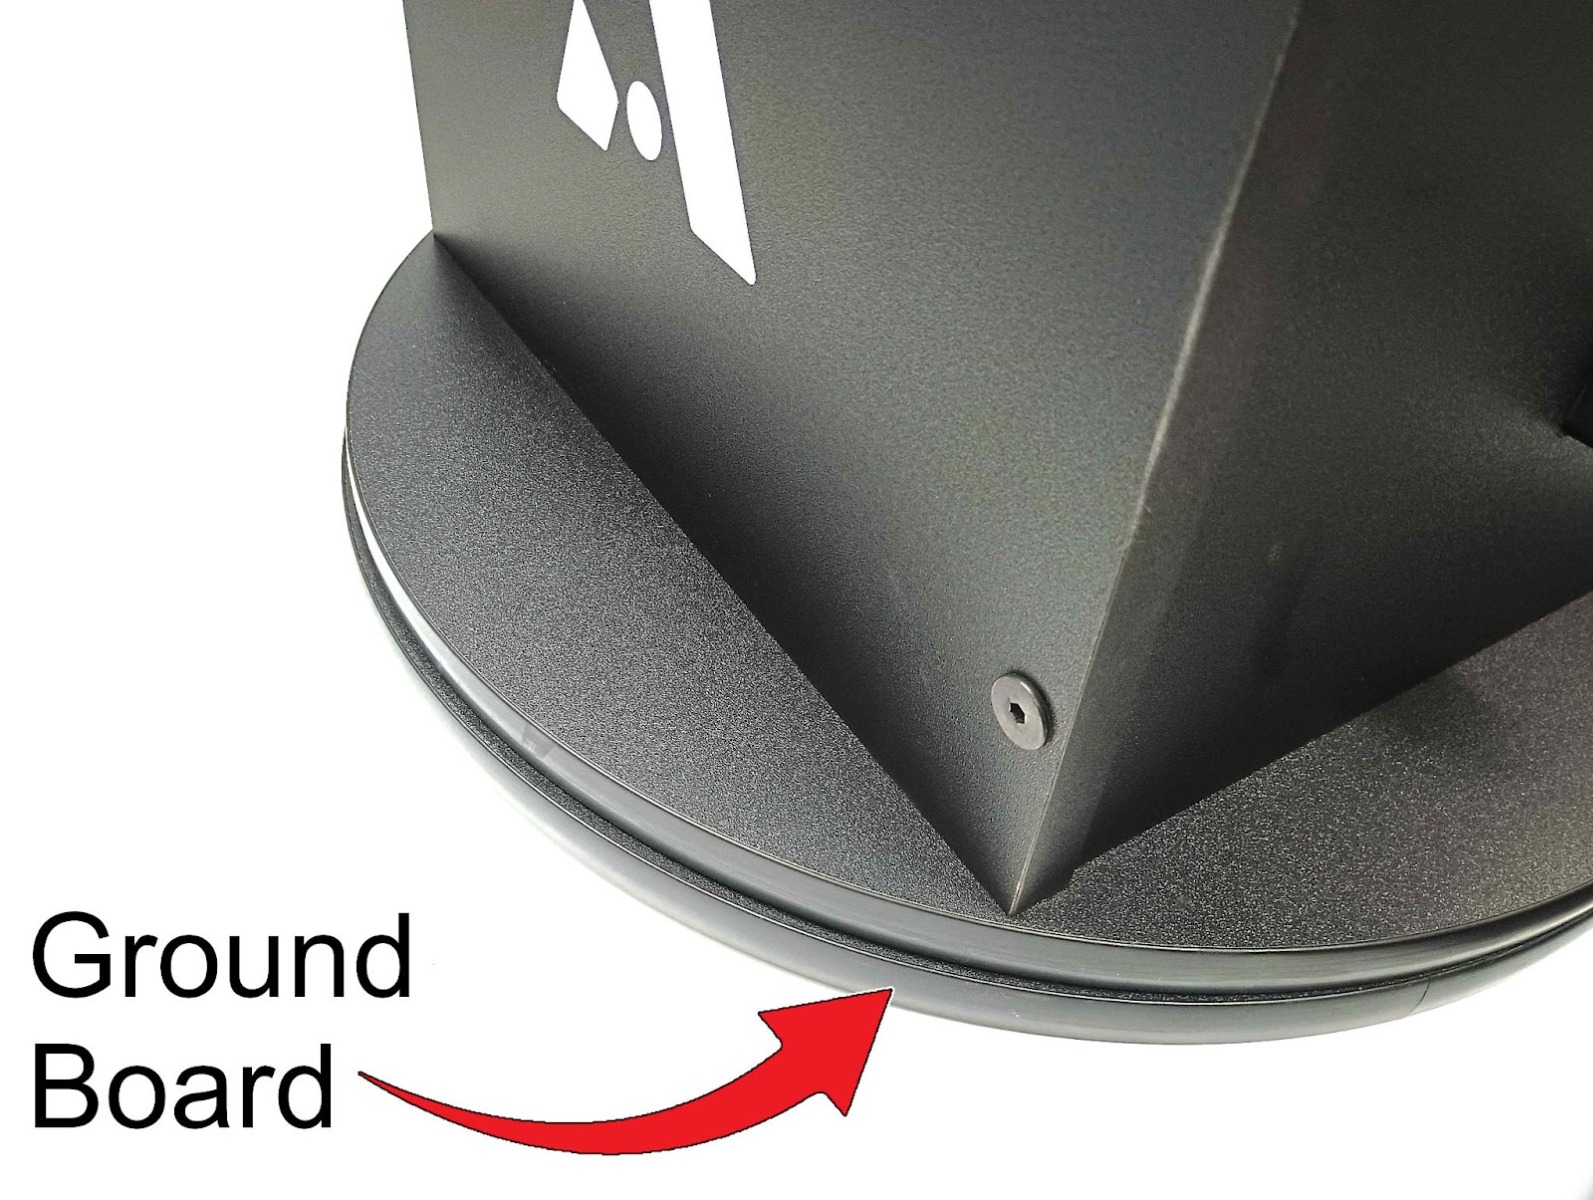
Prior to installing any parts, you should prepare a well-lit work area with room to place the telescope’s ground board. The ground board is the bottom portion of the telescope base. This ground board needs to be removed from the telescope base so that holes can be drilled in it, without drilling into other parts of the telescope base.
Remove the telescope from the base. Then, remove the locking knob and hardware from the center of the base. Next, pick the base up off of the ground board, being careful to keep track of the hardware. Once the base has been removed from the ground board, turn the base over onto its side so that the bottom of it is clearly visible and place it on your work area.
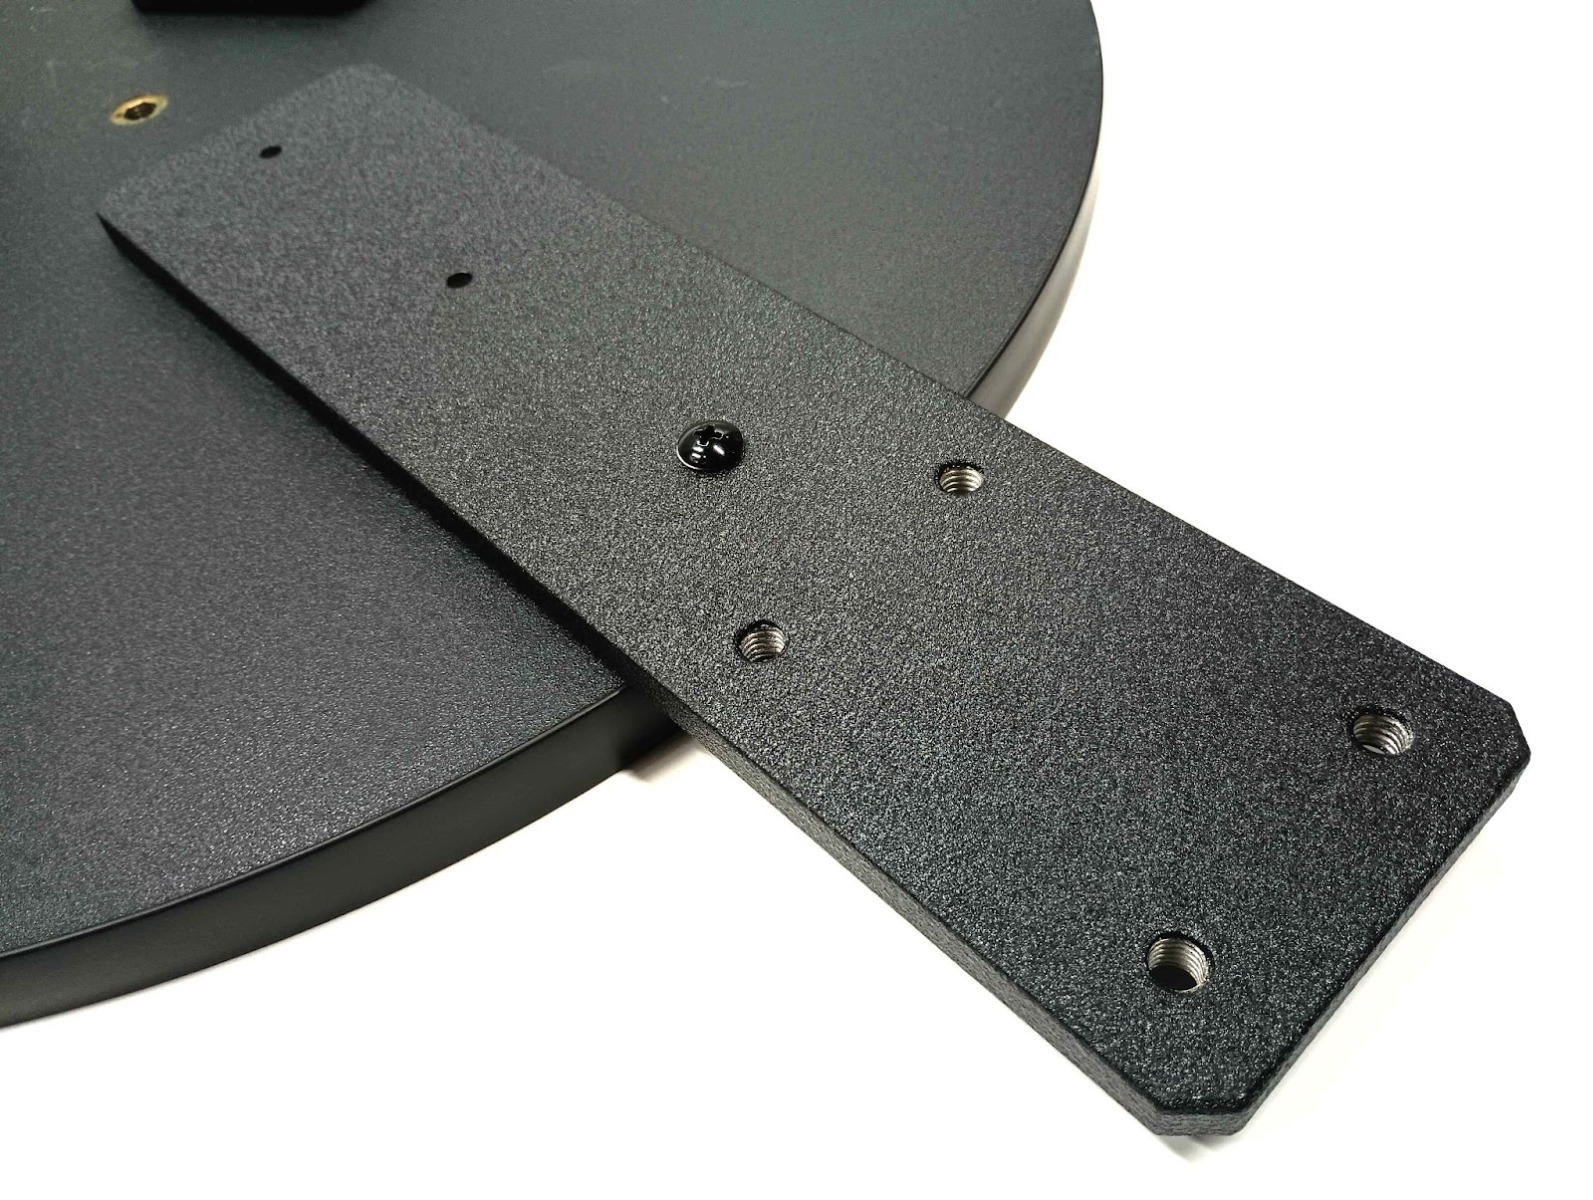
Use the included screwdriver to remove the three rubber feet from your telescope ground board. Take each of the mounting bars (#2) and position them so that the first hole lines up with the factory hole used in attaching the rubber feet to the telescope, originally. You’ll want to place the laser-marked logo facing down at this step so that once the bars are installed and the base flipped over they will be visible.
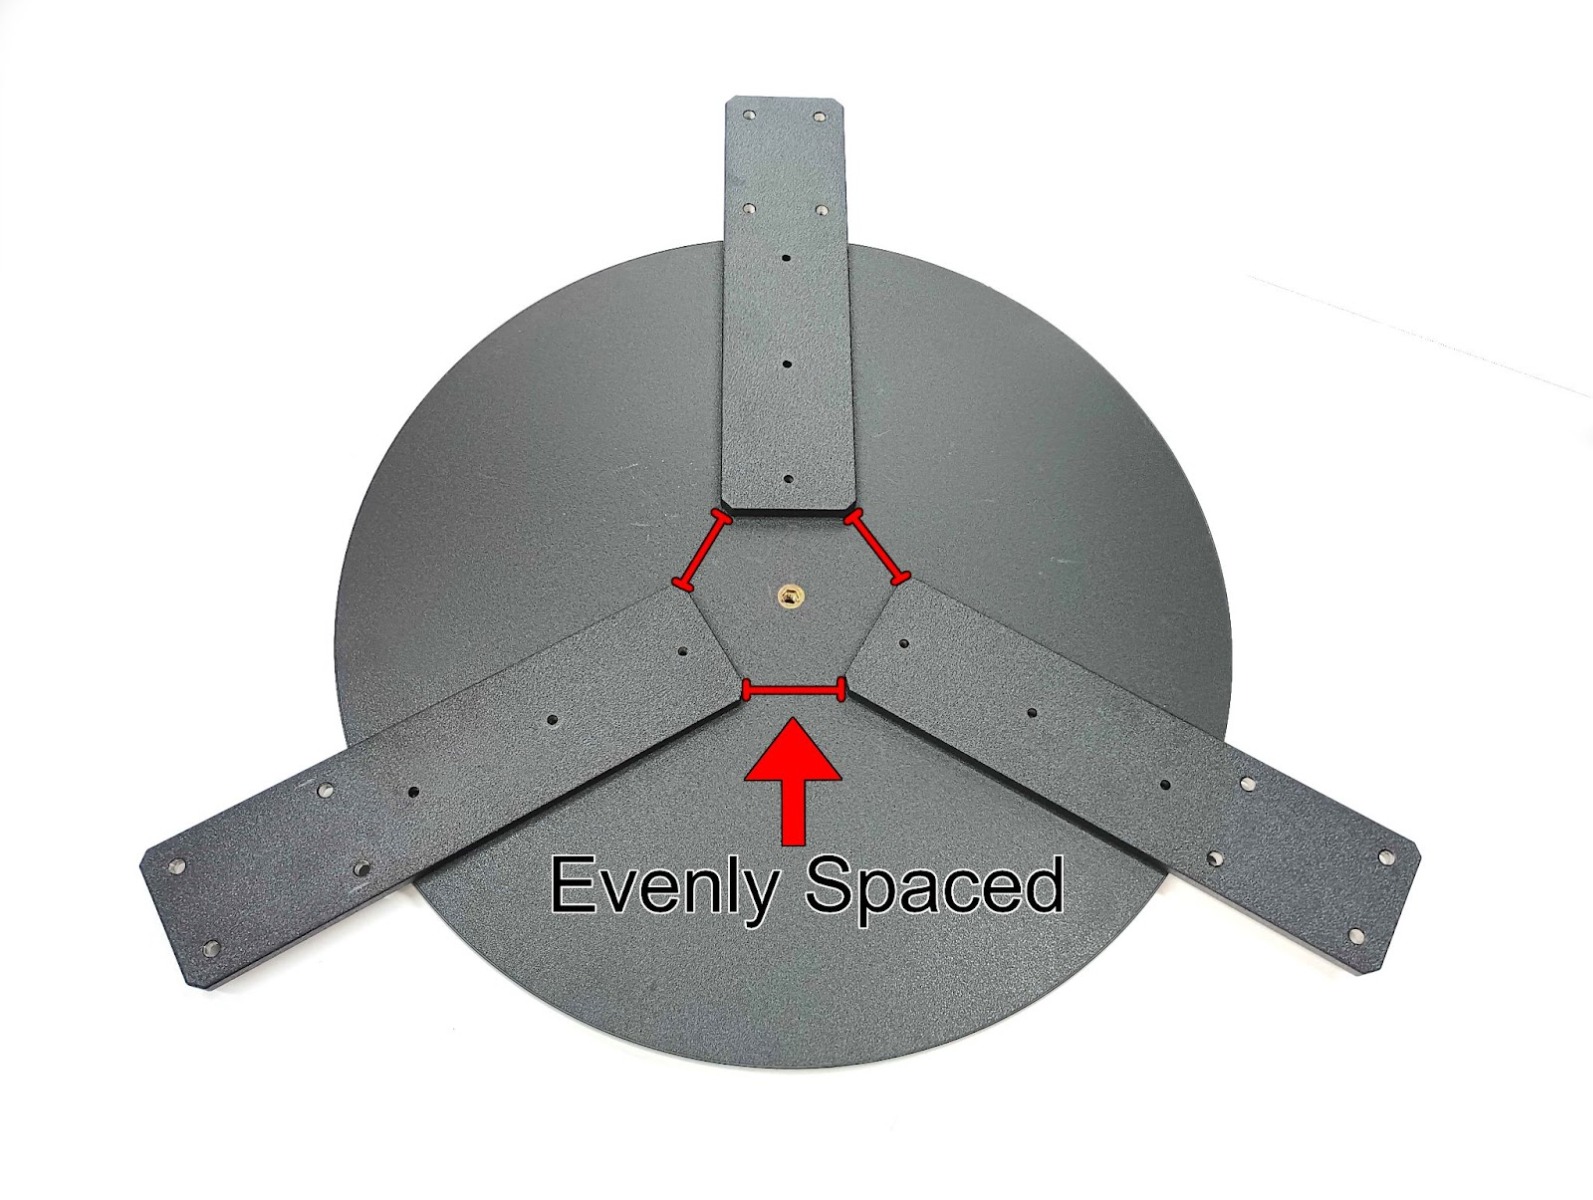
Use one screw (#3) and one washer (#4) per bar, attaching them to the ground board. Snug them into place but do not fully tighten the screws yet. Adjust the position so that the space between the ends of the bars is even. Then tighten the screws fully before moving on to the next step.
Position the base in such a way that you can safely drill holes into the base without over-drilling into your bench or work area. Some people might use scrap pieces of wood to place them under the board that is being drilled. Others might overhang the base off of their workbench. You might even consider using saw horses or similar support for this portion. Please be sure that you are knowledgeable or comfortable with the use of power tools and follow all manufacturer safety recommendations. Wear appropriate safety gear for the task at hand.

Use the current position of the bars to mark your drill hole locations. The bars can be used in place as they are, like a drill guide. Drill one hole with the ⅛” drill bit included in the kit, and then grab a (#3) screw and (#4) washer. Install these just the same as you did the initial set of bar mounting hardware - inserting the screw with a washer attached through the bar and into the hole you just drilled, and tightening down until snug.
Caster Installation
Now that the mounting bars have been installed, the casters can be attached to them. Four of 5/16-18 stainless steel caster mounting screws (#6) and four washers (#5) are used to hold each caster to the bar. This is a simple matter of starting each machine screw by hand and then using the included 3/16” hex key to drive to tighten the screws. The bar is aluminum so be mindful of overtightening the screw; tightening this down until it is flush and slightly snug will correctly set the tension on the caster. The machine screws are oversized, and therefore extreme tension is not necessary to secure the part.
Reassembling the Telescope Base
Carefully flip the ground board, now with bars and casters installed, and gently place it on the ground. Lock both the swivel and wheels of the casters to ensure this does not move while the rest of the base is being reinstalled. Insert the axle sleeve into the center hole of the ground board, and then install the roller bearing assembly.
Now place the rest of the base on top of the ground board, and secure the assembly with the locking knob and hardware. If you encounter any issues with this reassembly step, please refer to steps 7-10 from your Apertura Dobsonian manual.
With this reinstalled, the kit installation is now complete!
Locking and Unlocking The Casters
The casters are fully locking and can be locked and unlocked through the use of the locking level. Folding the lever down locks the casters into place. Flipping the lever up allows the casters to move freely and the telescope to roll.
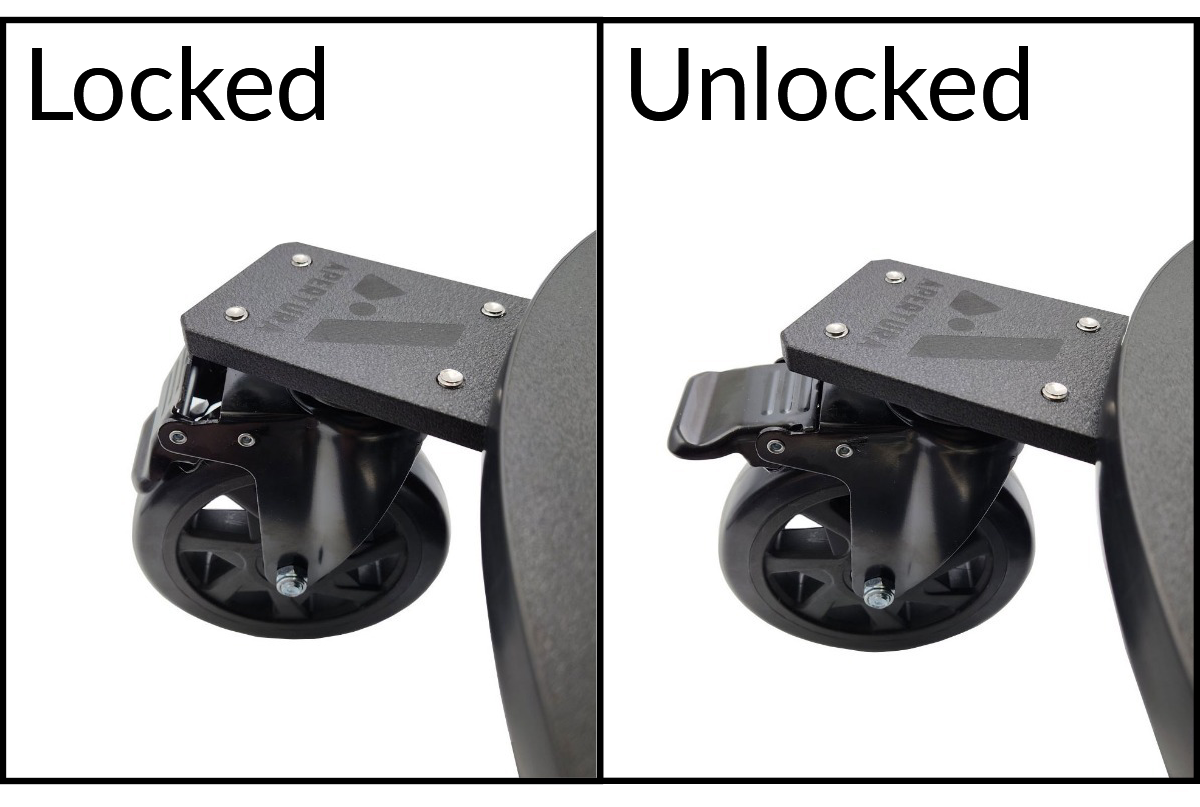
NOTE: When the casters are locked, you might notice that they lift slightly and that they can be shaken from side to side. This is normal and is a result of the locking mechanism on the caster. It does not negatively affect the telescope in use.
Congratulations!
Your Apertura Roll Easy Kit For Dobsonian Telescopes is now ready to use and improve the already great experience of your Apertura Dobsonian! Enjoy the increased freedom of movement and viewing comfort, and be sure to visit High Point Scientific to view the complete line of Apertura accessories!
Apertura Absolute Warranty
The Apertura Absolute Warranty provides two years of coverage against product defects. After the initial two-year warranty expires this product qualifies for Apertura's Three-Year SHARP coverage, an accidental replacement program. In addition, the Apertura Absolute Warranty is transferable! It is important to keep your original receipt and the product's original boxes and packaging, should you need to make a claim.

Contributing Writers
 Vincent
Giordano