Maybe you’re shopping for telescopes and want to know what’s so great about computer controlled versions, or maybe you just bought one and are eager to learn everything you can about it. Either way, there’s a lot to know about computerized telescopes, how they work, and what you can do with them. Whether you’re a beginner stargazer or a seasoned astronomer, computer controlled telescopes can easily become your favorite tool—if you know how to use them, of course.
What Are Computerized Telescopes?
Traditional manual telescopes are, you guessed it, manually operated. You have to choose what you want to find, locate it in the sky, then line up the telescope’s optics so that you can see it clearly through the eyepiece. As the object moves across the sky (or more accurately, as the Earth moves and the orientation of the sky changes), you will have to manually follow it.
Computerized telescopes work just like traditional ones do, but they have the obvious added benefit of computer systems that can serve as navigation aids. Computer controlled telescopes incorporate what’s called a GoTo system, which will locate and move to the object you choose from an onboard database. They’re designed to be as close to automatic as you can get; all you have to do is set it up and operate it with a remote control.
What Are the Advantages and Disadvantages of Computerized Telescopes?
Advantages
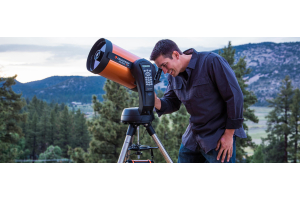
Clearly, the main advantage of a computerized telescope is the technology. It makes locating celestial objects not only simpler, but quicker. If you’re not that familiar with the night sky or have been frustrated by the control mechanisms of manual telescopes, you’ll love the hands-off approach you can take with computerized options. They’re also fantastic for astrophotography, since you can focus on your camera equipment while the telescope stays focused on what you’re trying to photograph.
Another advantage to computerized telescopes is their ability to locate faint deep sky objects that would be difficult to find with the naked eye. This is a significant benefit for more experienced observers who have already familiarized themselves with most of the sky and are looking to expand their horizons, literally.
Disadvantages
Of course, as with everything there are some disadvantages to computerized telescopes. The first and most significant is cost. The added computer system and technology give them a higher price tag, which could be an issue for budget shoppers. They’re not outlandishly priced, and you can most certainly find a good one at a reasonable cost. But when you compare the starting prices of beginner computerized versus beginner manual telescopes, the difference will be obvious.
Another disadvantage is tied into one of its benefits, which is the GoTo system. While it makes stargazing easy, it also takes away the need to learn the layout of the night sky. Manual telescopes force you to learn to identify constellations and planets, whereas GoTo systems know where everything is already and can be heavily relied upon as navigators.
Lastly, if you’re not proficient with technology, you might encounter some difficulties when trying to set up your computerized telescope. They don’t come ready to use, unfortunately. You’ll need to calibrate yours to the night sky in your area so that it can accurately go to objects. Any mistakes during this process can cause inaccurate navigation.
How Do I Shop for a Computerized Telescope?
Now for the fun part: shopping! Shopping for a telescope can be an arduous process if you don’t know what you’re looking for, but if you go into it prepared you’ll soon find that it’s an exciting adventure.
There are some criteria you need to decide on before you even start shopping. These apply to all telescopes, not just computerized:
- Optics - how the telescope takes in and focuses light. The two main types are reflecting and refracting. Reflecting telescopes use mirrors to reflect and focus light, while refracting telescopes use lenses to bend and focus light.
- Mount Style - what the telescope sits on. There are three main mount styles, which are alt-az (altazimuth), equatorial, and Dobsonian. Since your telescope will move on the mount automatically, it’s slightly less important which type you get. What’s more important is how sturdy the mount is. Lightweight plastic mounts will cause you some trouble in moderate to high winds, while heavy mounts might be too cumbersome to move around.
- Aperture - the most important aspect of your telescope. Aperture determines how much light your telescope will be able to collect, and as a result will also place an upper limit on the magnification you can achieve. The more light you can collect, the better the image will be and the more you’ll be able to see. Of course, larger aperture also means higher cost.
- Focal Length - another important aspect after aperture, focal length tells you about the magnification and angle of view. A long focal length will have a narrow angle of view but higher magnification, while a short focal length will have a wide angle of view but lower magnification.
One important consideration that applies specifically to computerized telescopes is:
- Database - stars, planets, galaxies, and other celestial objects that the computer system knows how to locate. You might stumble upon a computerized telescope that claims to have a database with a few thousand objects, which sounds pretty great. However, what you really want is tens of thousands of objects in the database you get. After all, that stored information (along with the navigation) is what you’re paying for.
All of these factors will determine what you can do with your telescope, from how portable it is to what you’ll be able to see. Do some research into optics, mounts, aperture, and focal length to decide what you need for your purposes. Then, start looking at computerized telescopes and see if you can find one that matches up to the specs you’re looking for. Searching based on specs rather than browsing and treating the specs as secondary will help you save time and pick the best telescope for your needs. Don’t forget to compare databases as well. If you can’t decide between a few different models with similar specs and prices, lean towards the one with a larger database.
How Do I Set Up a Computerized Telescope?
The set up process will probably be the most difficult part of using your computerized telescope, but luckily you’ll only have to do it once as long as you do it correctly. Just as with manual telescopes, your computerized telescope will need to be aligned so that the GoTo system can correctly navigate the sky for you. Your telescope should come with directions that are specific to your model, but most GoTo systems follow similar set up steps.
First, you’ll need to put together your telescope and take it outside to get it calibrated. Make sure the legs of the tripod are all level and that you have a clear, open view of the sky. You’ll need your computer’s remote control to input the information it needs.
The first bit of information you’ll put in will be the date, time, and location. For your location, you’ll either have to choose the city in your telescope’s database that you’re closest to, or input latitude and longitude data. You can find your latitude and longitude online or using your phone’s GPS. The more exact you are about your location, the more accurate your telescope’s navigation will be.
The next step is to give your telescope some reference points so that it can align itself. Each system will have its own requirements, but most will ask you to find two or three common stars, planets, or other celestial objects that are in the telescope’s database. Align your telescope with the star or planet of choice and follow the prompts on your remote’s screen. After you do this with a few different stars, your telescope will be able to calculate the positions of all the other objects in its database. This step does require that you know the locations of a few stars, which you can easily verify using a stargazing app or star chart.
How Do I Use a Computerized Telescope?
That’s it! That’s all you have to do to align your computerized telescope, and after that it’s ready to use.
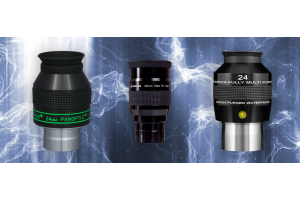
Start off with your lowest magnification eyepiece so that you can take stock of your viewing conditions. Low magnification will make it easy to tell if you’re centered properly and if atmospheric conditions are favorable. Distortions in the atmosphere will create a bit of blurring, which only gets worse with higher magnification. If the image is clear, you can gradually work your way up to higher magnification. However, don’t underestimate the power of low power eyepieces!
Next, pick something in your telescope’s database to look at, and watch as your telescope automatically moves to it. You may have to make minor adjustments using your remote control in order to center what you’re looking at, but for the most part all you’ll have to do is press go. Even though you won’t have to find stars and planets yourself, try to make note of where some stars are in relation to others. Use your GoTo system as an aid rather than a crutch, and you’ll get more out of the experience.
Computerized telescopes offer up a whole new way to stargaze and can be a simple, frustration-free way to get started in astronomy. Hopefully this guide has answered any questions you had about computerized telescopes and given you more insight into why they’re useful and what to look for as you begin your search and stargazing hobby.

Learn More
Interested in learning more about telescopes and astronomy? Not sure where to begin? Check out our Astronomy Hub to learn more!