


The Dwarf 3 is the latest entry in a series of innovative smart telescopes that promise to make astrophotography more accessible. With its streamlined functionalities, affordable price point, and lightweight design, this exciting device has the potential to bring the wonders of the night sky into the lives of many. But with all this hype, you might be wondering, "Are these features too good to be true?" Let’s find out together!
Before diving into the written review, take a moment to see the Dwarf 3 in action. Check out Teagan's video review!
Dwarf 3 Smart Telescope
As a newcomer to this hobby, making the decision to invest in a fully loaded imagining system isn’t easy. Discovering what tools are best for my needs while fighting buyer’s remorse, often leaves me feeling overwhelmed. That’s why I find the Dwarf 3 so enticing; it paves the way for beginners and enthusiasts like me to ease into the hobby and kindle our curiosity. So, follow along as I show you firsthand how the Dwarf 3 will ignite your passion for astronomy and bring more people under the night sky than ever before!
Unboxing

Removing the Dwarf 3 out of its packaging has a slow, almost surgical, feel. Each component is neatly arranged such that all the available space is filled. No hidden compartments, no hard plastic shells, and even the smooth internal wrapping is easy to remove without making a mess.
With everything unboxed and arranged in front of me, It was easy to see why the Dwarf 3 is considered an “all-in-one” system. It only comes with a charging cable, solar filter, cleaning cloth, and start up guide, all of which fit perfectly in the included carrying bag. The only thing missing is a tripod, but with the compact and lightweight design, I was sure it would work fine with most tripods.
Before heading out to put the Dwarf 3 to the test, I followed the instructions on the start up guide and downloaded the Dwarf Lab app. This turned out to be a great idea because the app interface isn’t nearly as neat as the packaging, and many of the functions are hidden within other menus. I also used this time to connect my smartphone to the Dwarf 3, explore the basic controls, check for updates, and troubleshoot any potential issues.
So far, the Dwarf 3 had all the marks of being a thoughtfully designed system, and I was excited to see how it will perform under the night sky. So, let's get into my experience!
Setup & First Light
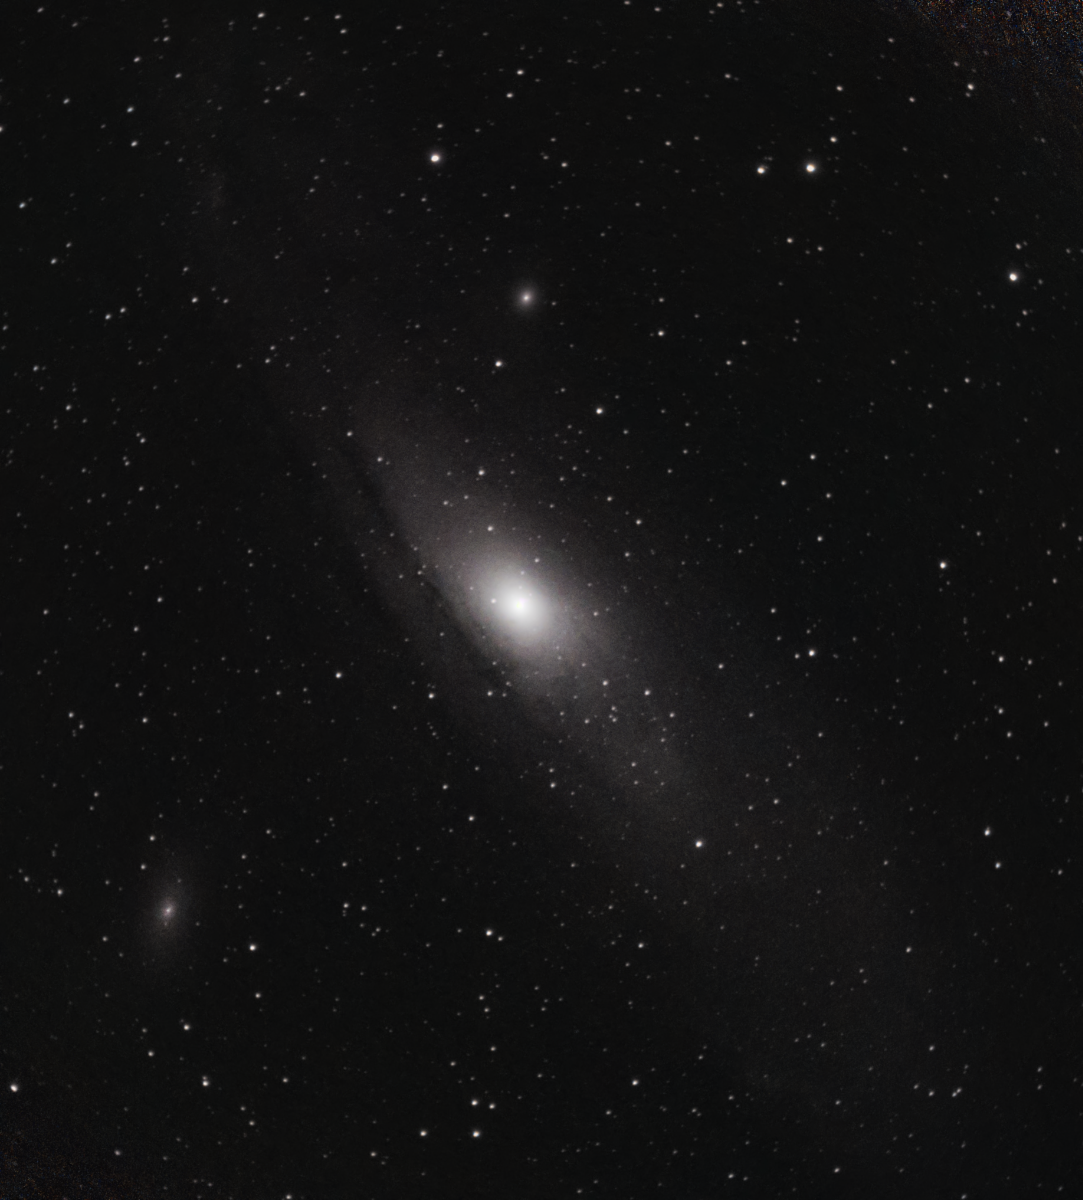
Setting up the Dwarf 3 for its first light was incredibly easy. All I had to do was mount the device on a tripod, connect my smartphone, focus the camera, and initiate the "plate-solving" calibration. Then, I used Atlas (the on-board celestial simulator) to select one of the available objects. Ten minutes later, I was looking at the rich details of the Andromeda Galaxy from the comfort of my living room. For a device that promises to expand access to astrophotography, this was certainly a great start. Check out the image below.

Really, it's that easy. But let's walk through everything step-by-step:
- After mounting the Dwarf 3 on my tripod and connecting my smartphone, I navigated to the Astro mode from the live view interface, and then selected Atlas from the functions menu.
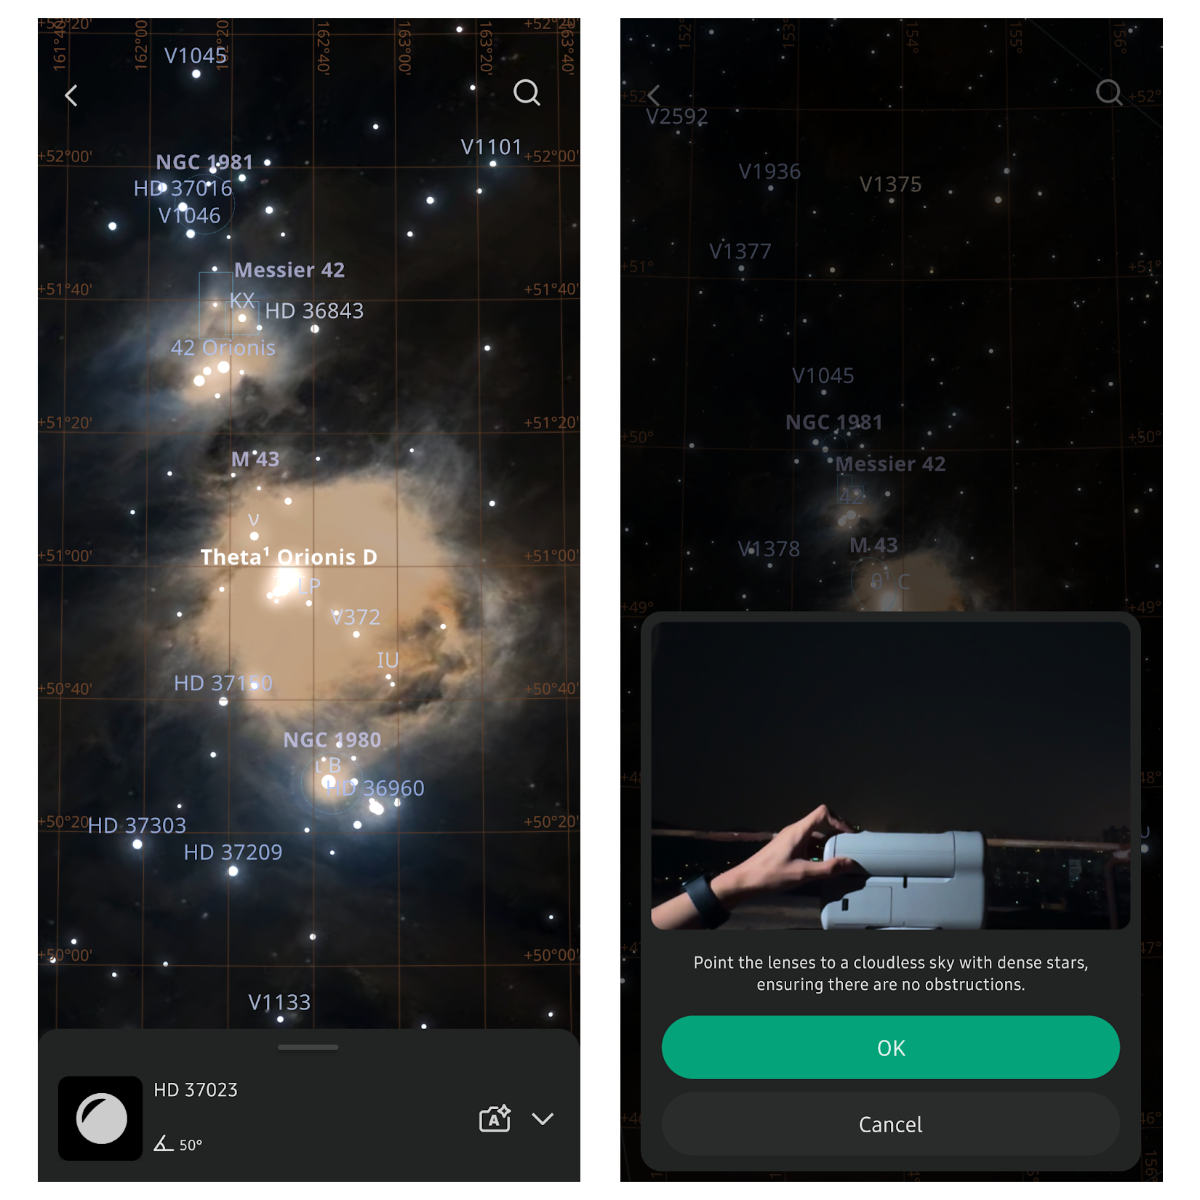
- This automatically opened Atlas, the onboard celestial simulator, which I used to locate the Andromeda Galaxy.
- Then, I selected the Andromeda Galaxy as my target, and the app reminded me to ensure the tele camera is focused, and the smart telescope is level. I confirmed both, clicked okay, and watched as the Dwarf 3 began zipping around and scanning the sky.
- Once the plate solving producer was complete, I made adjustments to the gain and exposure and started the live stacking mode.
And as they say, the rest was history. After 10 minutes, I could clearly see the Andromeda Galaxy, and that’s all it took for this little device to have me hooked. I couldn’t wait to see what else it could do!
Tips
If you haven’t already captured “darks,” the app will prompt you to do so before beginning the imaging session. However, if it's your first time using the device, you can simply select the option to proceed without darks. However, the resulting images will be noisier than usual, and taking darks isn’t very difficult. Simply attach the solar filter that comes with the dwarf, and follow the instructions in the app!
EQ Mode
After testing the alt-az mode on the Andromeda Galaxy, I knew I had only scratched the surface of the Dwarf 3’s potential. So, the following night, I tested the EQ mode on The Orion Nebula (M 42).
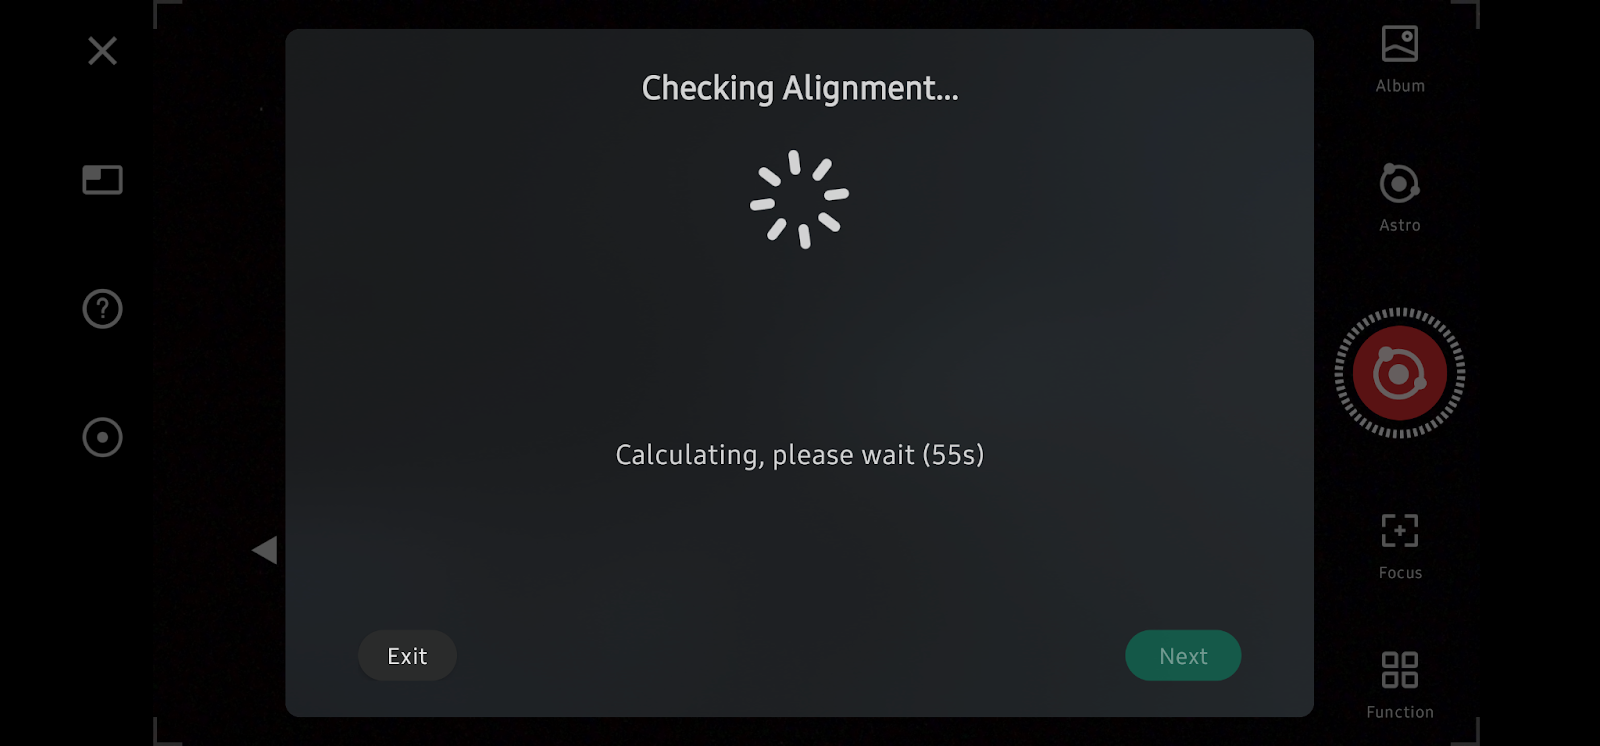
I started by setting up, just like I had the night before. Then, I navigated to the functions menu (while in the astro imaging mode) and selected “EQ” from the options. The app provided some basic instructions explaining how to correctly position the device, and eventually, it applauded my efforts and said I was “close enough”. Unfortunately, it didn’t take long to notice the star trailing, so I gave it another go.
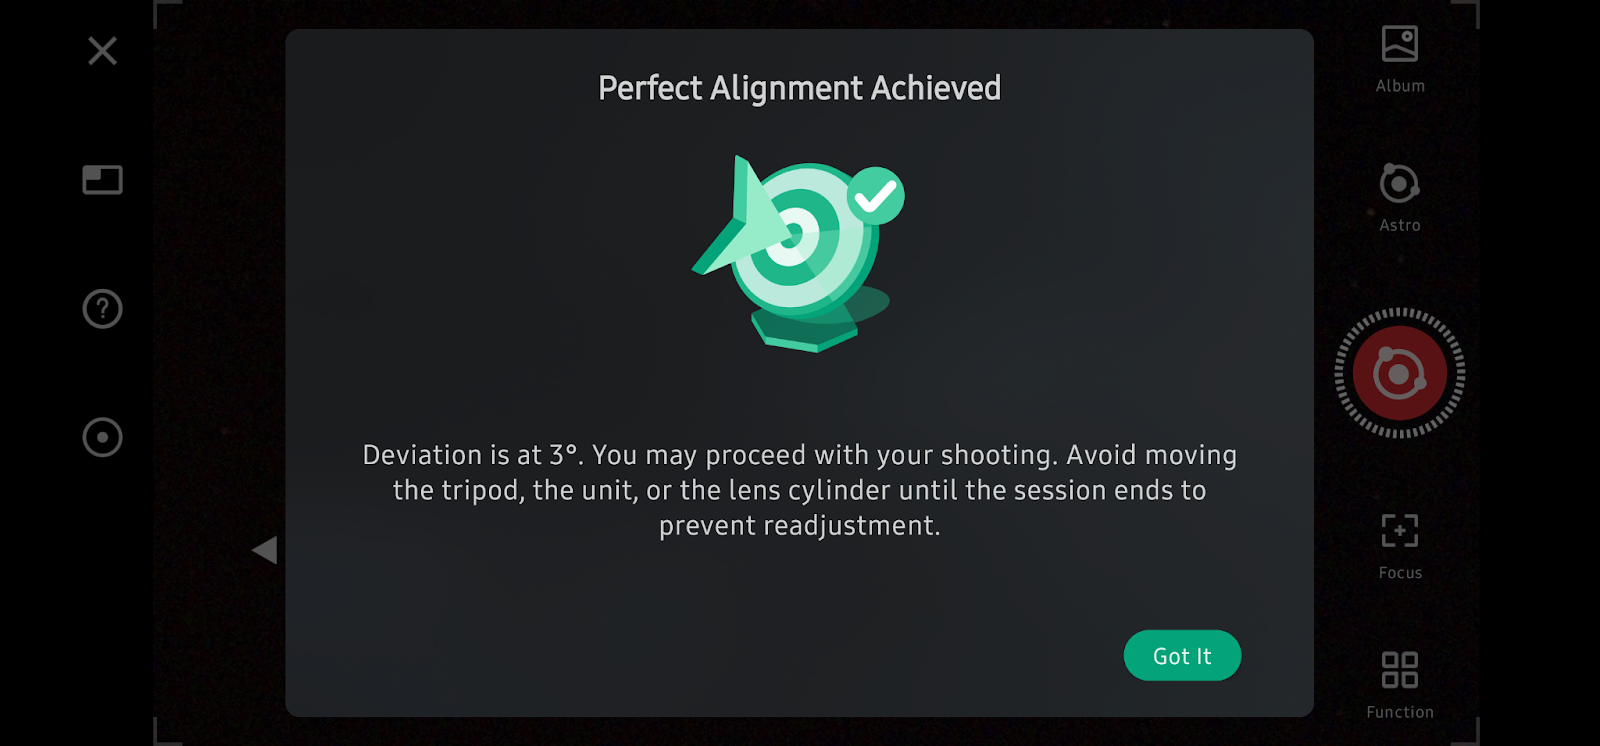
On my second attempt, I managed to get within three degrees of deviation, which improved the star trailing, but it was still noticeable in the final image. Overall, I’d say it was good enough, and had I been using a tripod with an equatorial wedge, I likely could have achieved something closer to “perfect” alignment.
After troubleshooting the alignment, targeting M 42 was easy, and I was excited to begin the imaging session. Unfortunately, I wasn’t fully prepared. When you press the capture button, the app reminds you to capture “darks” which improve image quality and are necessary for noise reduction. This wouldn’t normally be an issue, but since it requires attaching the solar filter and returning the lens tube to its “home” position, it would have saved me time if I had captured the darks before setting up the EQ mode. If you want to avoid having the same problem as me, I suggest using the alt-az mode to find the object, tune the settings, then capture the darks. After which, you can set up the EQ mode and begin your imaging session.
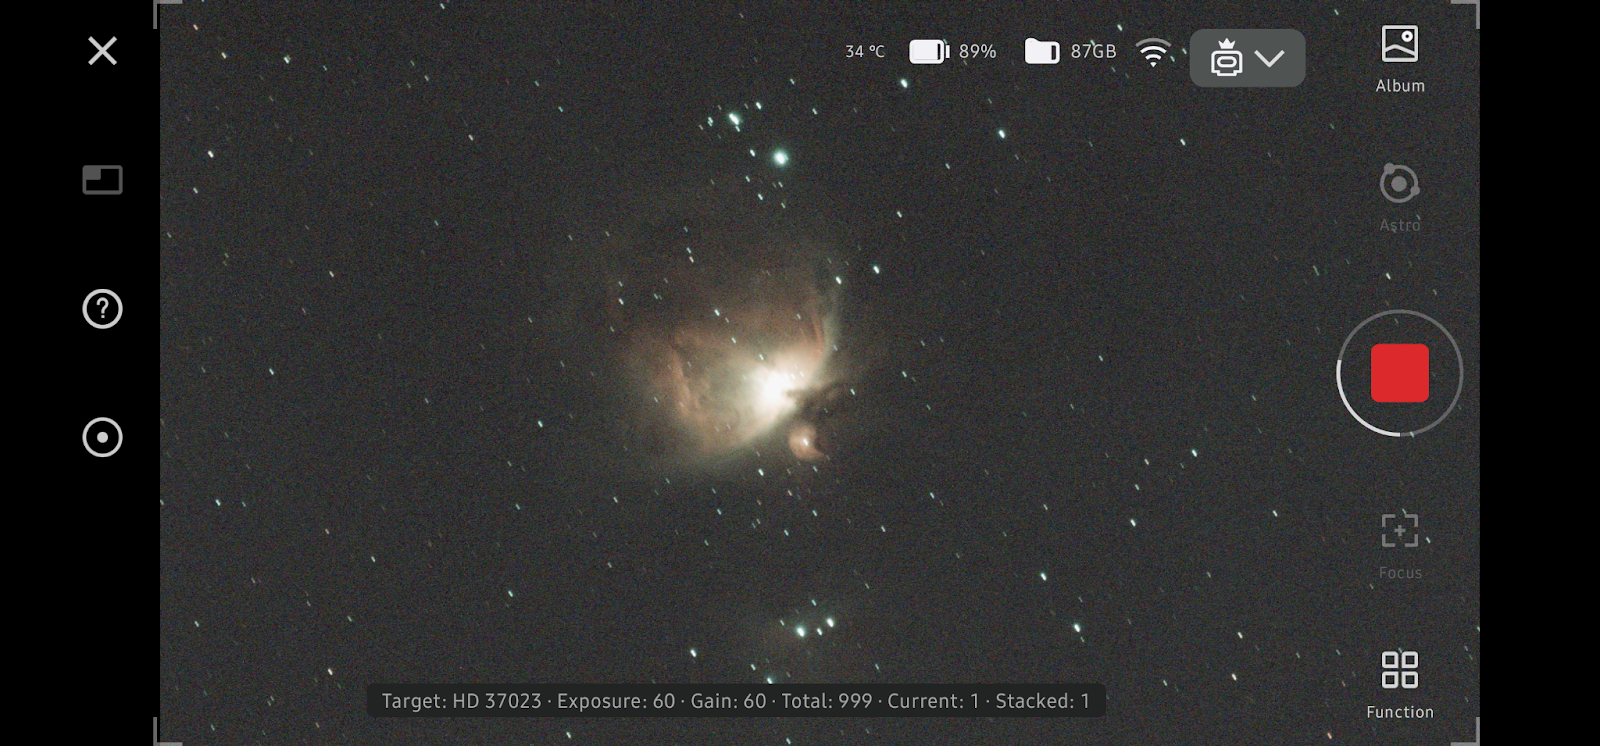
Given that I’ve never captured an image of a nebula, I’d say I’m pretty happy with the results and even more excited to for what I can achieved with a bit more practice. Check out the image below!

Tips
When initiating the EQ mode, the app tells you to position the device so the logo side is facing south and the tele camera is facing zenith (directly above). When I did this, the alignment seemingly worked, and I selected M 42 from the atlas database. It was at this point that I realized something had gone wrong. As I watched in disappointment, the device began scanning the ground, and eventually landed on a few rocks that it proudly called “The Orion Nebula.” After reversing the instructions (with the logo face north instead of south) the problem was solved. This may have been due to calibrating the device in the alt-az mode before initiating the EQ mode.
What You Need to Know About The Dwarf 3
So far, I’ve truly enjoyed using the Dwarf 3 (despite the frustrations I encountered with the EQ mode), and I think it's safe to say this smart telescope has a lot of potential. But before I reveal my final thoughts, I want to share a few things I think you should know before your first light with the Dwarf 3.

The Dwarf 3 has three internal filters: When using the tele view camera, you’ll have the option to switch between three different filters: visual, astro, and dual bandpass. How these filters work will depend on the object you are imaging. The visual filter is similar to those found in traditional digital cameras and works great for day time photography, lunar, and solar imaging. The astro filter has an expanded range of sensitivity, making it great for most objects in the night sky and lowlight terrestrial photography. Finally, the dual bandpass filter works by isolating two specific ranges of the visual spectrum, allowing it to combat the the effects of light pollution and enhance the details of emission nebulae.
The Dwarf 3 has an object tracking mode: This neat feature is found in the function menu, under the imaging and video modes. Once selected, you'll simply need to highlight the area of the screen with the object you are trying to track, and the Dwarf 3 will lock on to the object and follow it as it moves beyond the frame. Keep in mind that this feature only works in the tele view mode, and some objects simply move too fast for the device to stay locked on. For those with an interest in the more "mysterious" aspects of the cosmos, you'll be excited to learn that Dwarf Lab included a "UFO" tracking mode for the Dwarf 3.
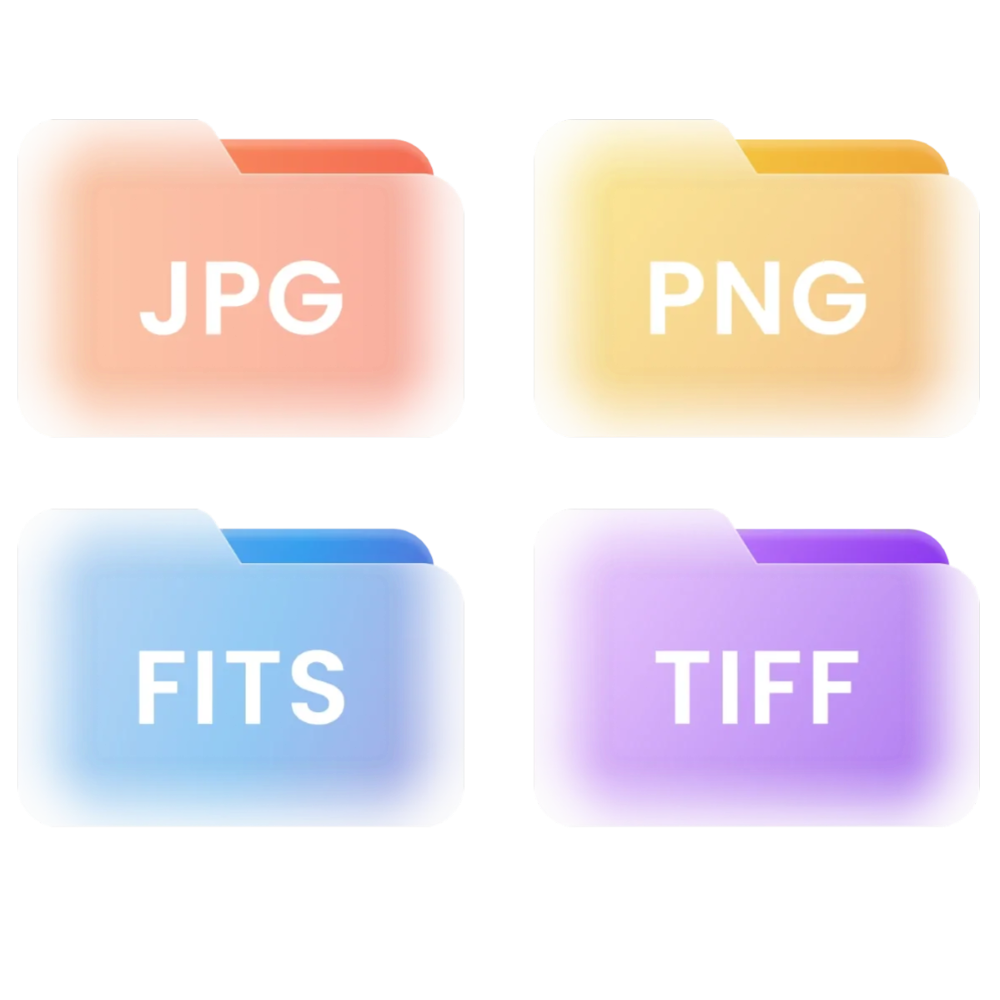
You can customize and download the raw files for every imaging session: This feature opens up the imaging possibilities significantly. All you need to do is connect to the scope via the included USB-C charging cable, and you’ll find all the files organized into folders labeled by the corresponding imaging mode. You can even customize the output file type before beginning an imaging session, which can be found in the top settings menu under the functions tab. If you are using the astro mode, setting the file type to “FITS” will save you some time if you choose to further process your images.
All things considered, this smart scope has a lot to offer, and in time, it will likely get even better! In the next section, I’ll close with some of the highlights and my overall opinion of this all-in-one imaging system!
Final Thoughts
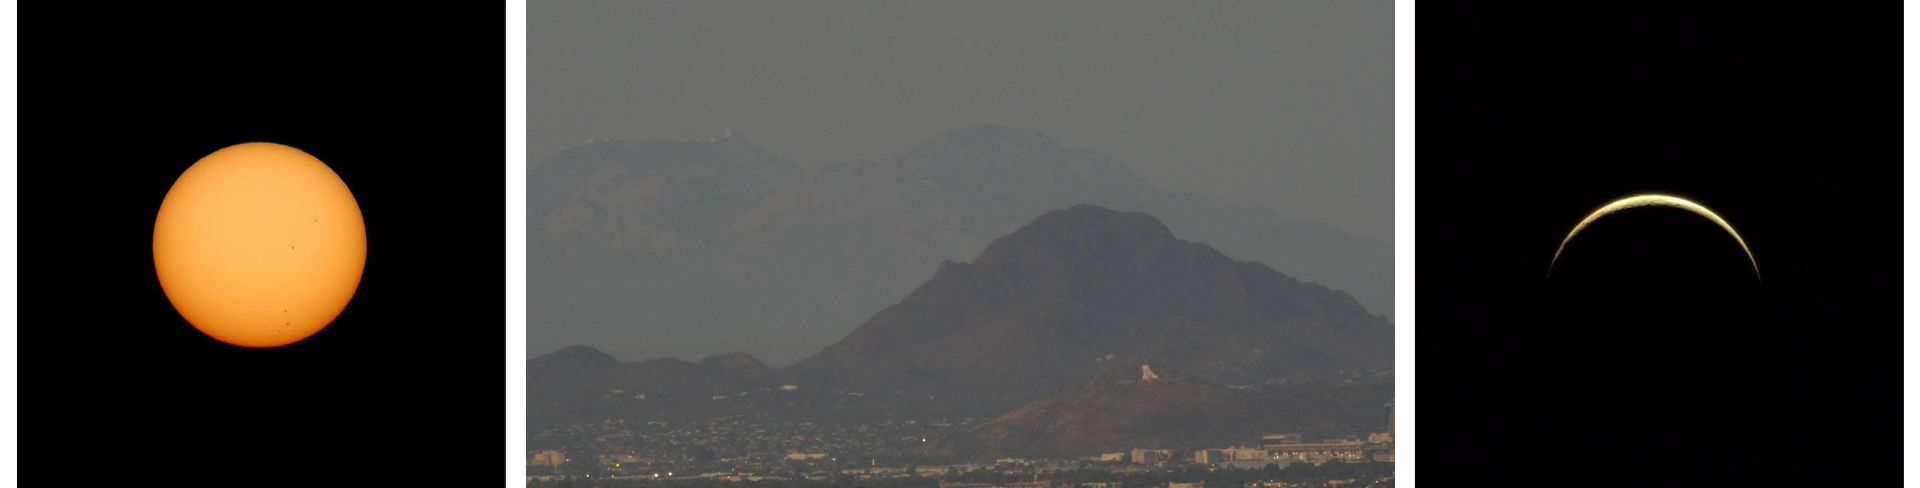
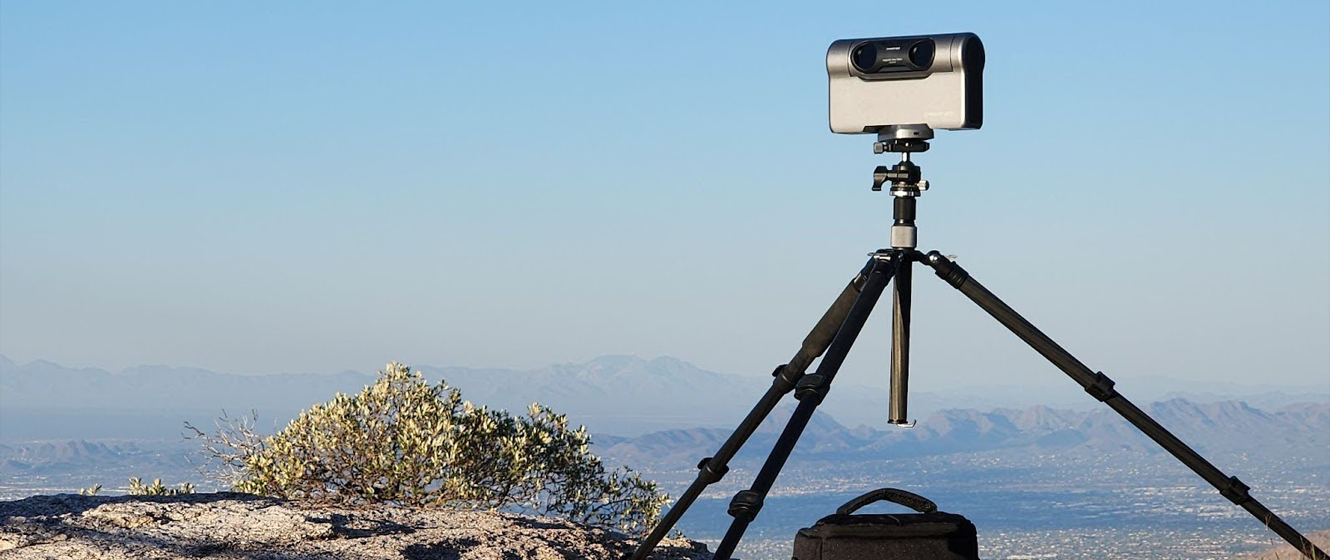
Having the chance to use the Dwarf 3 smart telescope was incredibly rewarding. From imaging galaxies and nebulae for the first time to exploring the breathtaking landscapes of the Sonoran Desert from atop Mt. Lemmon, every step of the way, this feature packed smart telescope was impossible to put down. It will definitely be a permeant part of all my future adventures.
If you are like me and trying to learn the ins and outs of astrophotography before investing in a fully loaded imaging system, the Dwarf 3 will certainly feel like leveling up. And for those looking for an extremely portable all-in-one system, I'm positive you'll enjoy everything the Dwarf 3 has to offer.
Finally, I’ll leave you with one last reason why I find the Dwarf 3 to be an such an impressive imaging system: the potential to further process images in a robust software, like Siril or Pixinsight. Check out the images below to see what you can accomplish with a just a little editing in a free program like Siril!


Click the arrow above to see MLA, APA, and Chicago Manual of Style citations.
MLA:
Burchett, Daniel. "Dwarf 3 Smart Telescope Overview & How to Use," AstronomyHub, High Point Scientific, 10 Oct. 2024, https://www.highpointscientific.com/astronomy-hub/post/astro-photography-guides/dwarf-3-smart-telescope-overview.
APA:
Burchett, D. (2024, October 10). Dwarf 3 smart telescope overview & how to use. High Point Scientific. https://www.highpointscientific.com/astronomy-hub/post/astro-photography-guides/dwarf-3-smart-telescope-overview
Chicago Manual of Style:
Bibliography:
Daniel Burchett. "Dwarf 3 Smart Telescope Overview & How to Use," AstronomyHub (blog), High Point Scientific, October 10, 2024. https://www.highpointscientific.com/astronomy-hub/post/astro-photography-guides/dwarf-3-smart-telescope-overview.
Footnote:
Daniel Burchett, "Dwarf 3 Smart Telescope Overview & How to Use," AstronomyHub, High Point Scientific, October 10, 2024, https://www.highpointscientific.com/astronomy-hub/post/astro-photography-guides/dwarf-3-smart-telescope-overview.
FAQs
How do I use Dwarf 3’s object tracking mode?
The Dwarf 3 smart telescope features an auto object tracking mode that allows the user to select an object for the scope to follow. This mode is incredibly useful for day-time photography and tracking fast moving objects like birds. To activate this feature, select tele live view mode and then choose “object tracking” from the right hand pop up menu. From here, you’ll need to select a point on the screen and highlight the object you want to track. Keep in mind, this feature only works for the “tele” view and not for the “wide angle” view.
How do I update my Dwarf 3?
One of the best parts of owning a smartscope is their ability to be updated with new and useful features. The Dwarf 3 smart telescope can be easily updated using the Dwarf Labs app and a compatible smart device. You’ll first need to connect Dwarf 3 to your smart device, and then navigate to the “my devices” tab from the settings menu. If your Dwarf 3 is properly connected, you’ll find the option to “update firmware” near the bottom of the menu. Once you click this option, the app will first check for available updates, and if one is available, it will ask you to confirm the update, and begin the installation process. Keep in mind, you’ll need to be connected to the internet via Wifi or with a cellular data connection.
How do I connect my smart device to my Dwarf 3?
In order to operate the Dwarf 3 smart telescope, you’ll need to use the Dwarf Labs app and a compatible smart device. This will allow you to control the smart scope. Begin by downloading the Dwarf Labs app from your device’s app store. Once downloaded, power on the Dwarf 3 and enable your smart devices Wifi and Bluetooth. You’ll find the option to “connect” on the home screen of the app, press this and place your device near the smart scope. After a few moments, you should see an option to connect to the Dwarf 3 appear on the screen, confirm that you are connecting to the correct device and press “connect”. If everything worked properly, you should now be connected to the smart scope.
If your device couldn’t find your Dwarf 3, or the connection failed, review the trouble shooting step below:
- Ensure your device is not connected to another Wifi or Bluetooth signal.
- Restart your device, and if the issue persists, try reinstalling the app.
- Try manually connecting to your Dwarf 3 using the information on the bottom of the smart scope. This should include the name of your Dwarf 3’s Wifi and bluetooth signal, as well as any passwords needed. Your device may provide a warning suggesting that your device is attempting to connect to a signal without an internet connection. This is okay, and simply confirm that you want to connect to the device.
- If your smart device has a NFC tag (also known as tap-to-pay) you may be able to use this feature to connect to the smart telescope.
- Finally, if you are still unable to connect to the device, reach out to Dwarf Labs for further assistance.
How do I charge my Dwarf 3?
The Dwarf 3 comes with a standard USB-C cable that can be used to charge the device. Simply plug the cable into a converter and wait for the device to reach a full charge (indicated by the charge light beneath the power bottom). You can also plug the cable into a laptop, portable power bank, or cigarette lighter car charger with the correct voltage.
How do I power off my Dwarf 3?
Your Dwarf 3 smart telescope can be powered off using the power button on the smart scope, or by using the “shutdown” option from the settings menu in the Dwarf Labs app. Keep in mind, the smart telescope will not return to its original position automatically, so you will need to use the app to move the device to its “home position”. The shutdown option from the settings menu will move the to the home position, but not the (scope body). To ensure the smart scope is not damaged when storing, it is best to move the device to its original “home” position (with the camera rotated down and the body flush with the base).

Learn More
Interested in learning more about telescopes and astrophotography? Not sure where to begin? Check out our Astronomy Hub!


