The Sky-Watcher Star Adventurer GTi is a fully GoTo equatorial mount, the successor of the well-known star tracker “The Sky-Watcher Star Adventurer 2i”. Performance in tracking and guiding is the name of the game when it comes to equatorial mounts. I was determined to put this 11lb weight cap mount to the test. My goal in doing these tests was to determine the longest possible exposure times achievable with two scopes of different weights and focal lengths. The William Optics RedCat 51 and the Apertura 72EDR. The RedCat 51 is a favorite among Star Adventurer 2i users because of its short 250mm focal length and its slim design. It would be a great option in testing the GTi’s consistency and true abilities. The Apertura 72EDR is likely the largest scope I would put on an 11lb payload EQ mount. With a focal length of 430mm, The Apertura 72EDR would truly test the limits of the GTi. I experimented with maximum exposure times (both guided and unguided) with both of these refractors. Before we dive in, let's take a look at what comes included with the GTi.
Check out our Sky-Watcher GTi full review video!
Unboxing and Features
Upon opening the box you will find the following items.
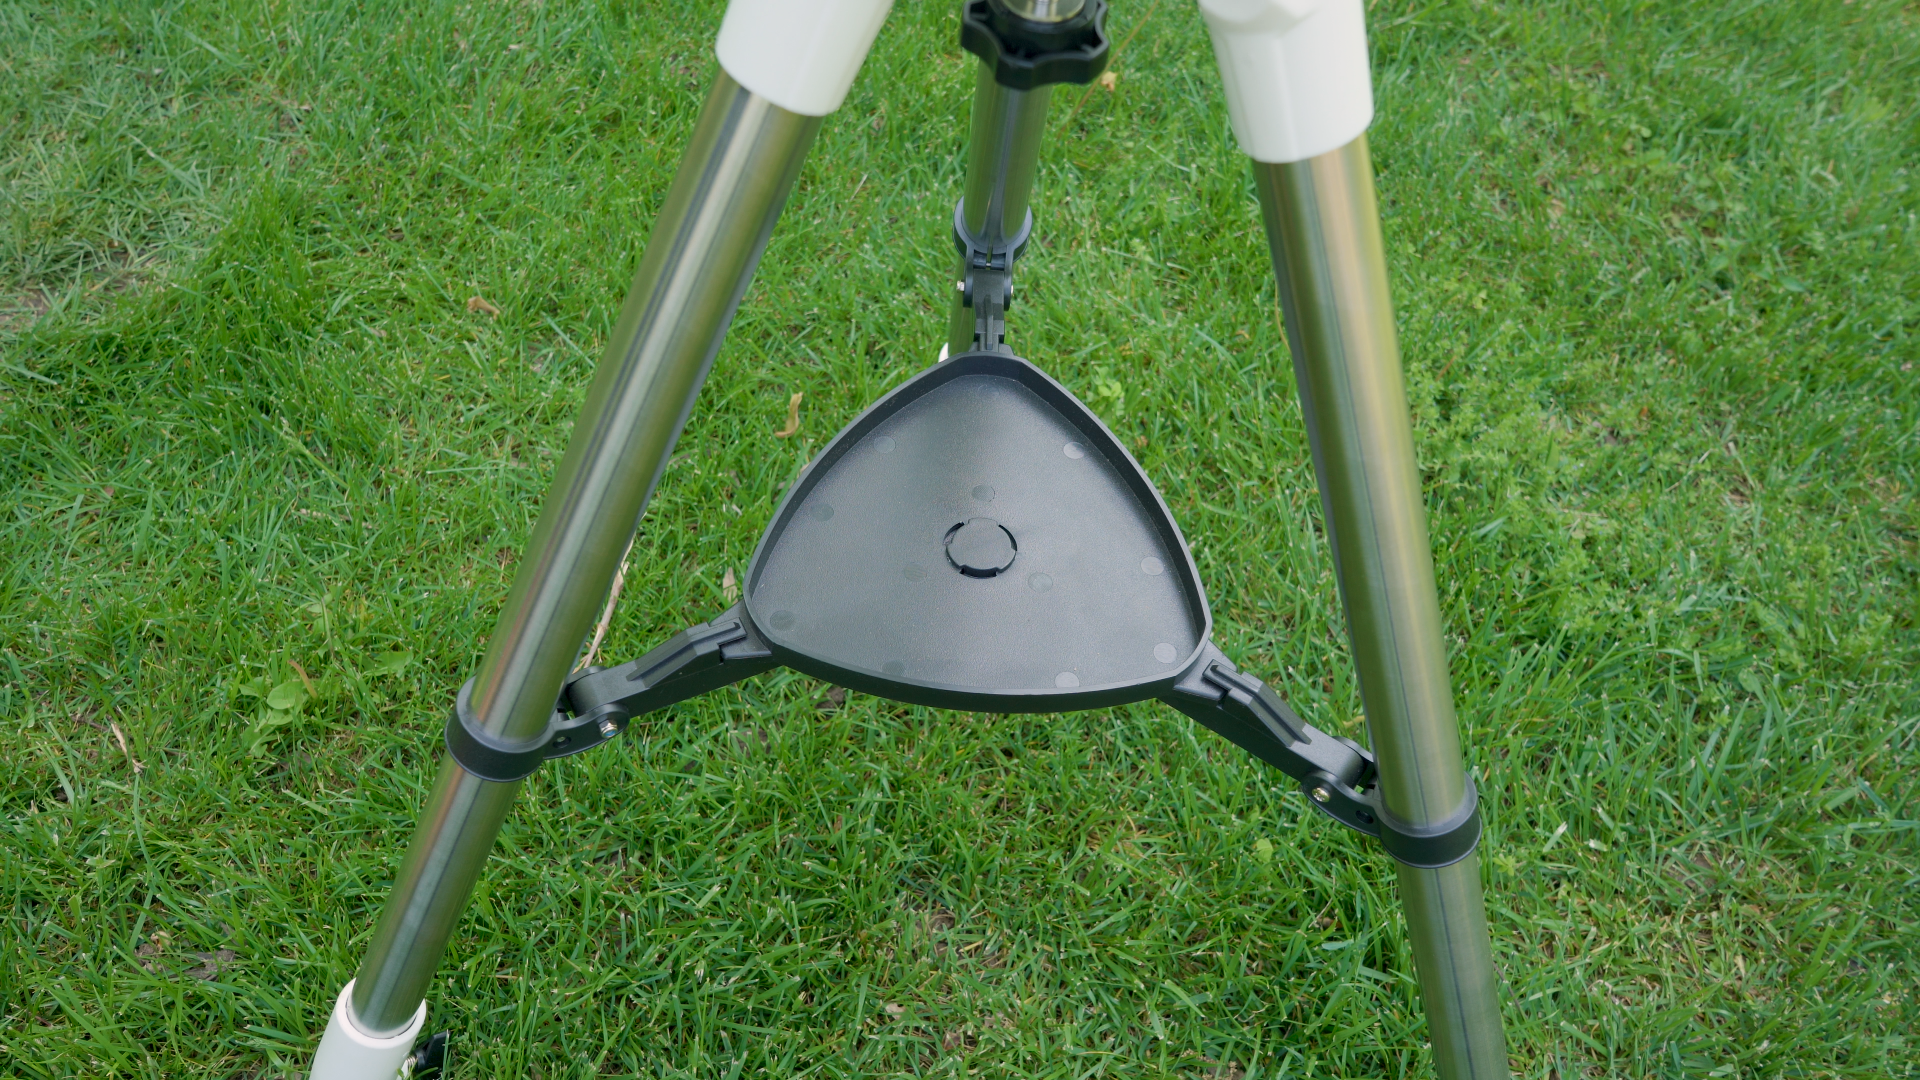
A Tripod and Spreader Bar
The tripod was sufficiently sturdy and it came with a spreader bar to increase stability and to act as a table to hold accessories. If you already own a photographic tripod with a standard ⅜-16 bolt, you can purchase the mount head only as it comes standard with ⅜ -16 threads on the bottom.
A Pier Extension
This was a nice addition to help prevent longer telescopes from coming into contact with the tripod when slewing to high altitudes. It was sturdy when sufficiently tightened down and was very simple to install.
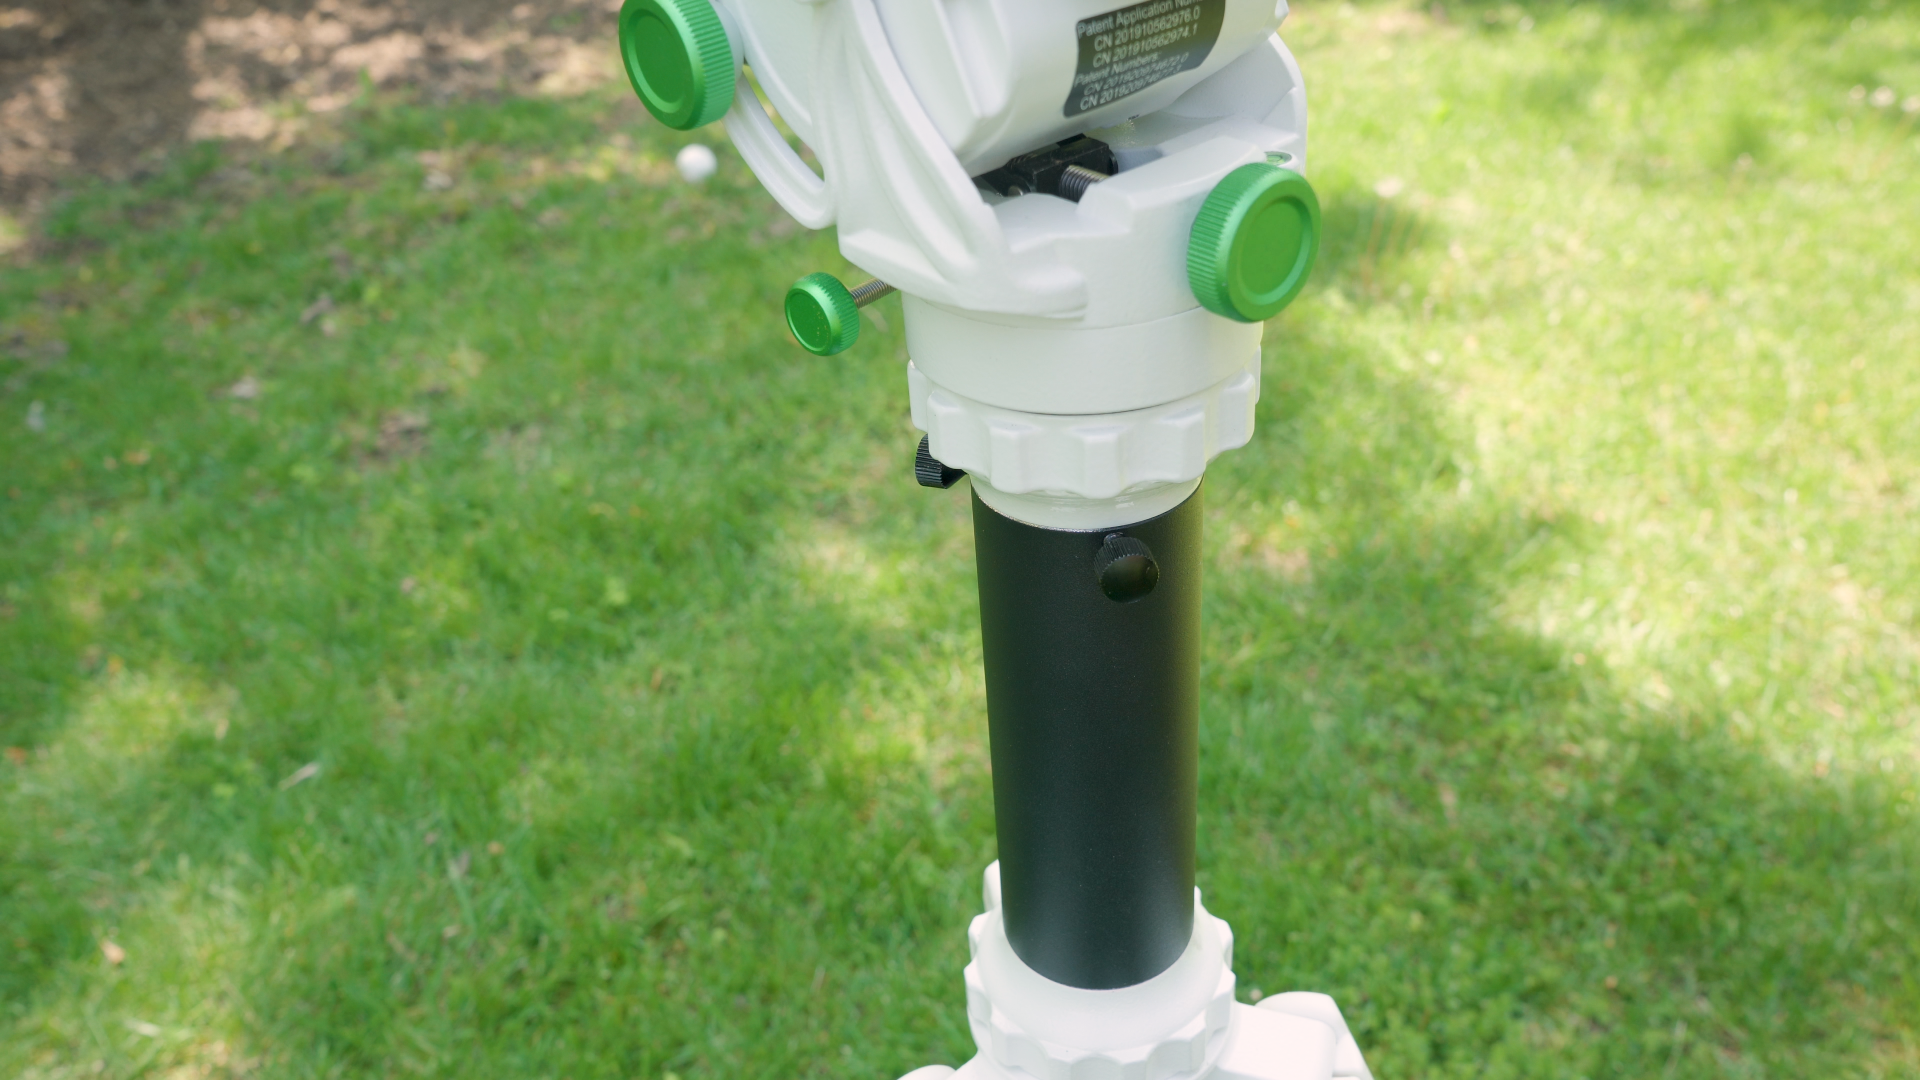
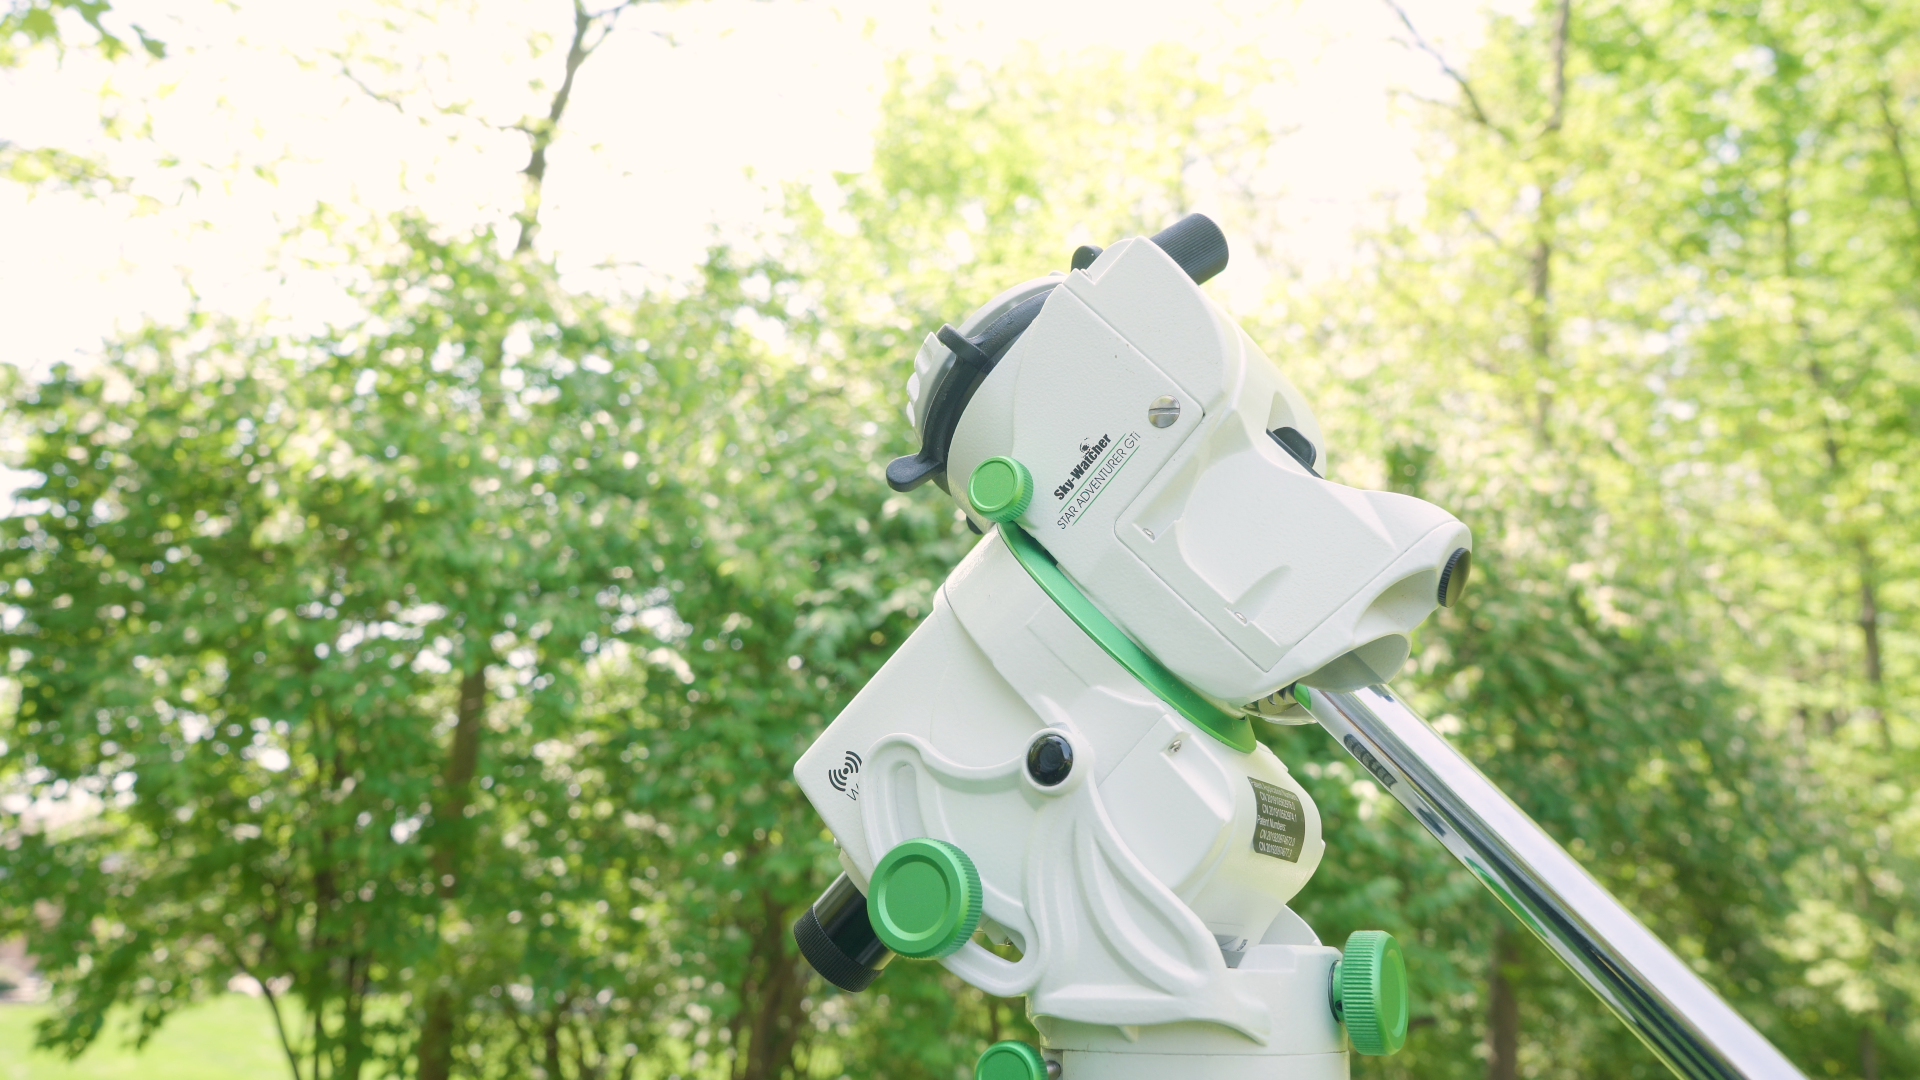
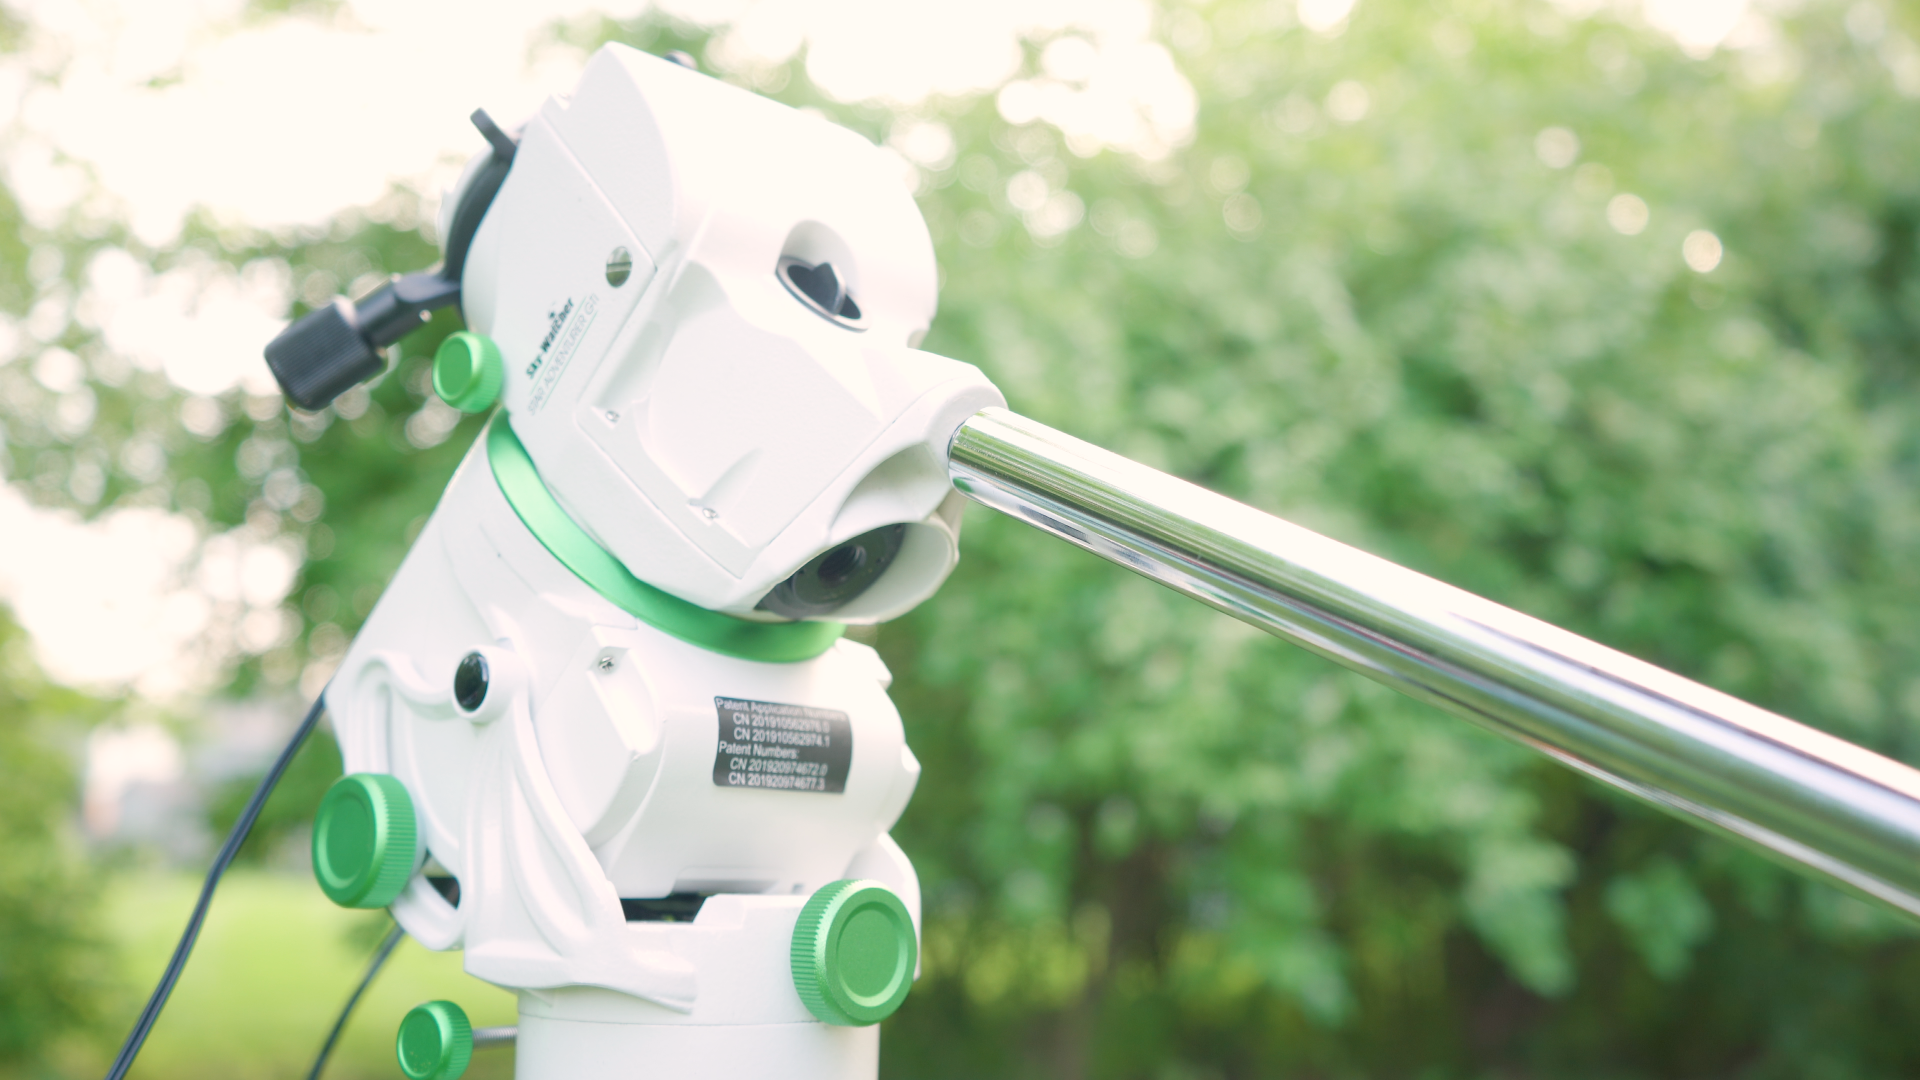
The Mount Head
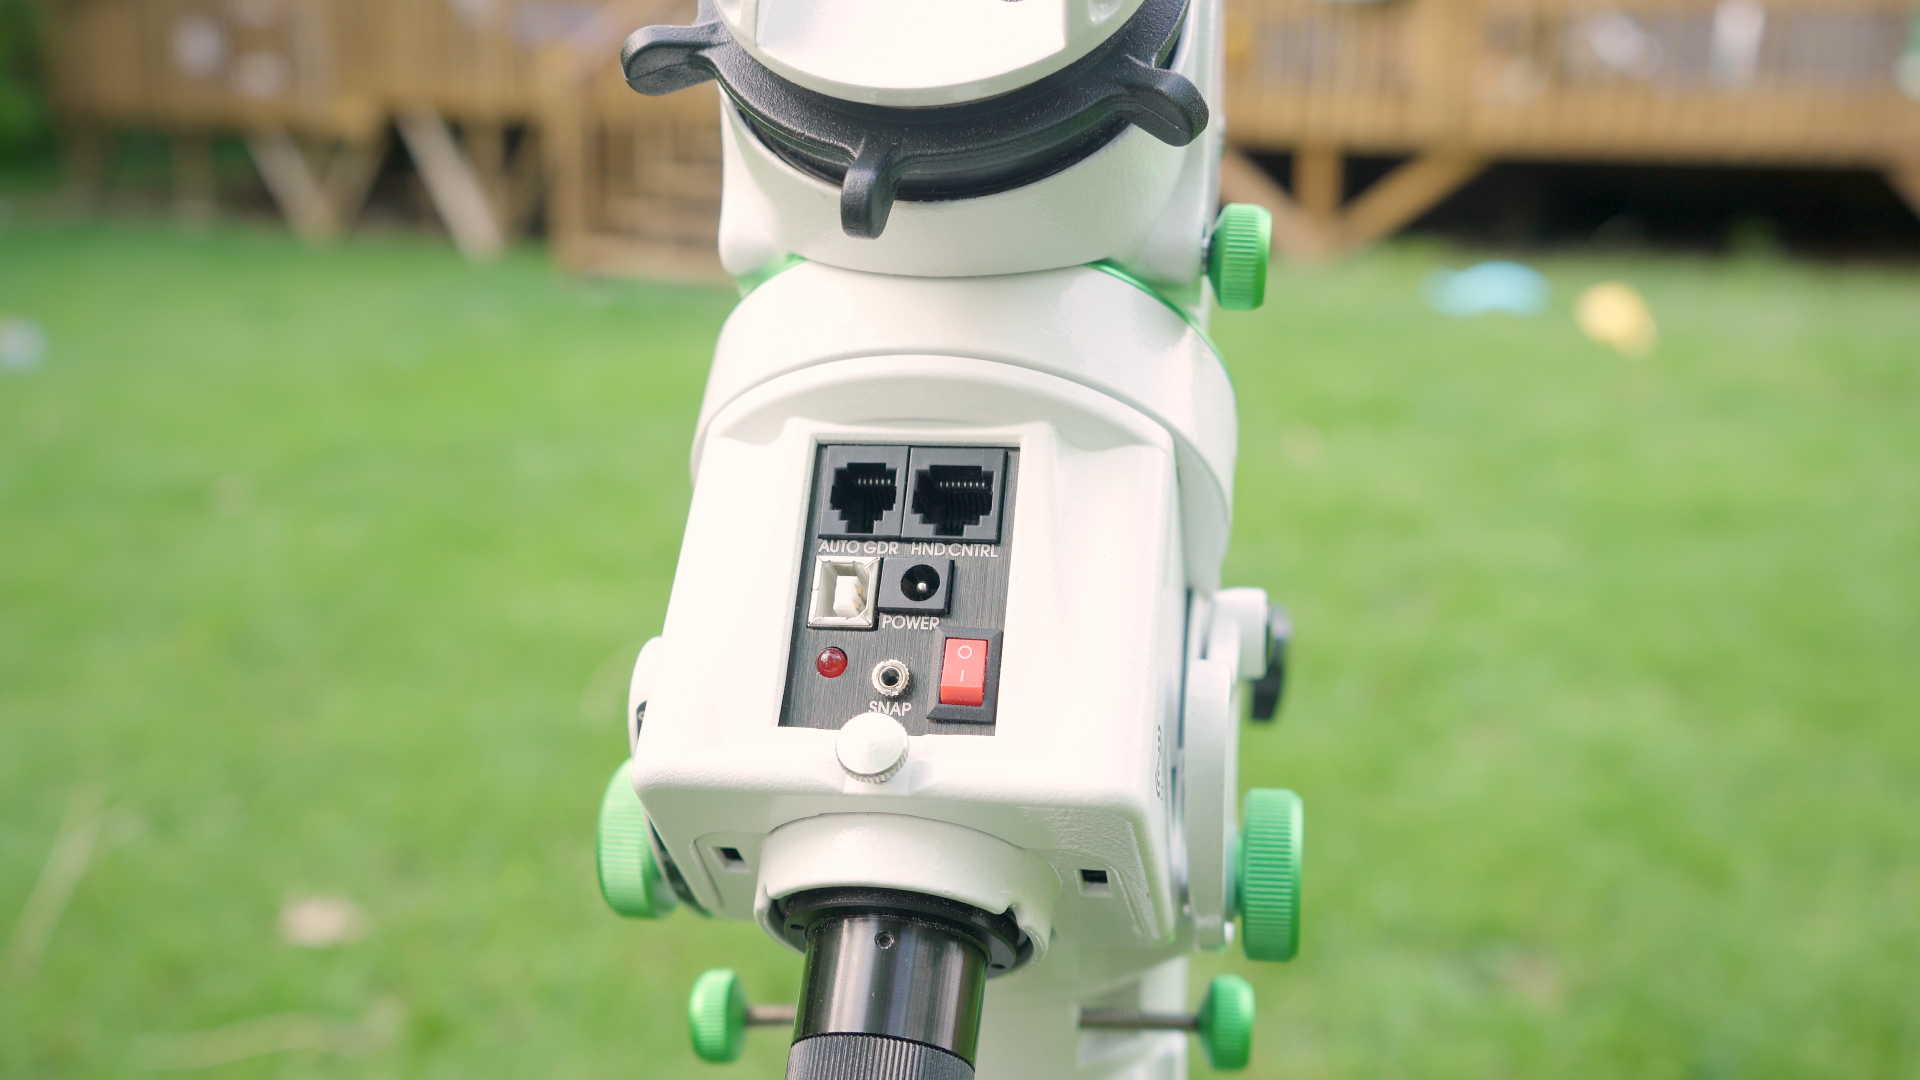
Chock full of features, the mount head was surprisingly lightweight but it also gave me a sense of durability and quality. On the mount head, you can find a USB port for laptop control, an st4 port for autoguiding (most autoguiding systems nowadays are now running via the USB port) as well as a port for a SynScan Hand Controller. This is useful for those who use this mount for visual use or for those who do not want to bring a laptop or phone out into the field. The mount also comes with a Wi-Fi signal! By downloading the SynScan app on your phone, you have full operational control of the mount via Wi-Fi. The response time from the mount is almost immediate and having Wi-Fi gives you the ability to operate this mount without a single cable.
The altitude and azimuth knobs for polar alignment adjustment are simple to turn and surprisingly easy to use. The declination axis has a similar clutch to the Star Adventurer 2i but the RA clutch is vastly improved and consists of only a small knob which is easy to tighten and loosen. On the back of the mount is the included polar scope for polar alignment. We recommend the use of the Mobile SynScan App for Polaris’ position when polar aligning with the Polar Scope. The SharpCap Pro polar alignment wizard is recommended for the most accurate polar alignment. Lastly, Sky-Watcher gives you the option to power the GTi with 8 AA batteries or a standard 2.1x5.5mm AC adapter (12v 5amp recommended).
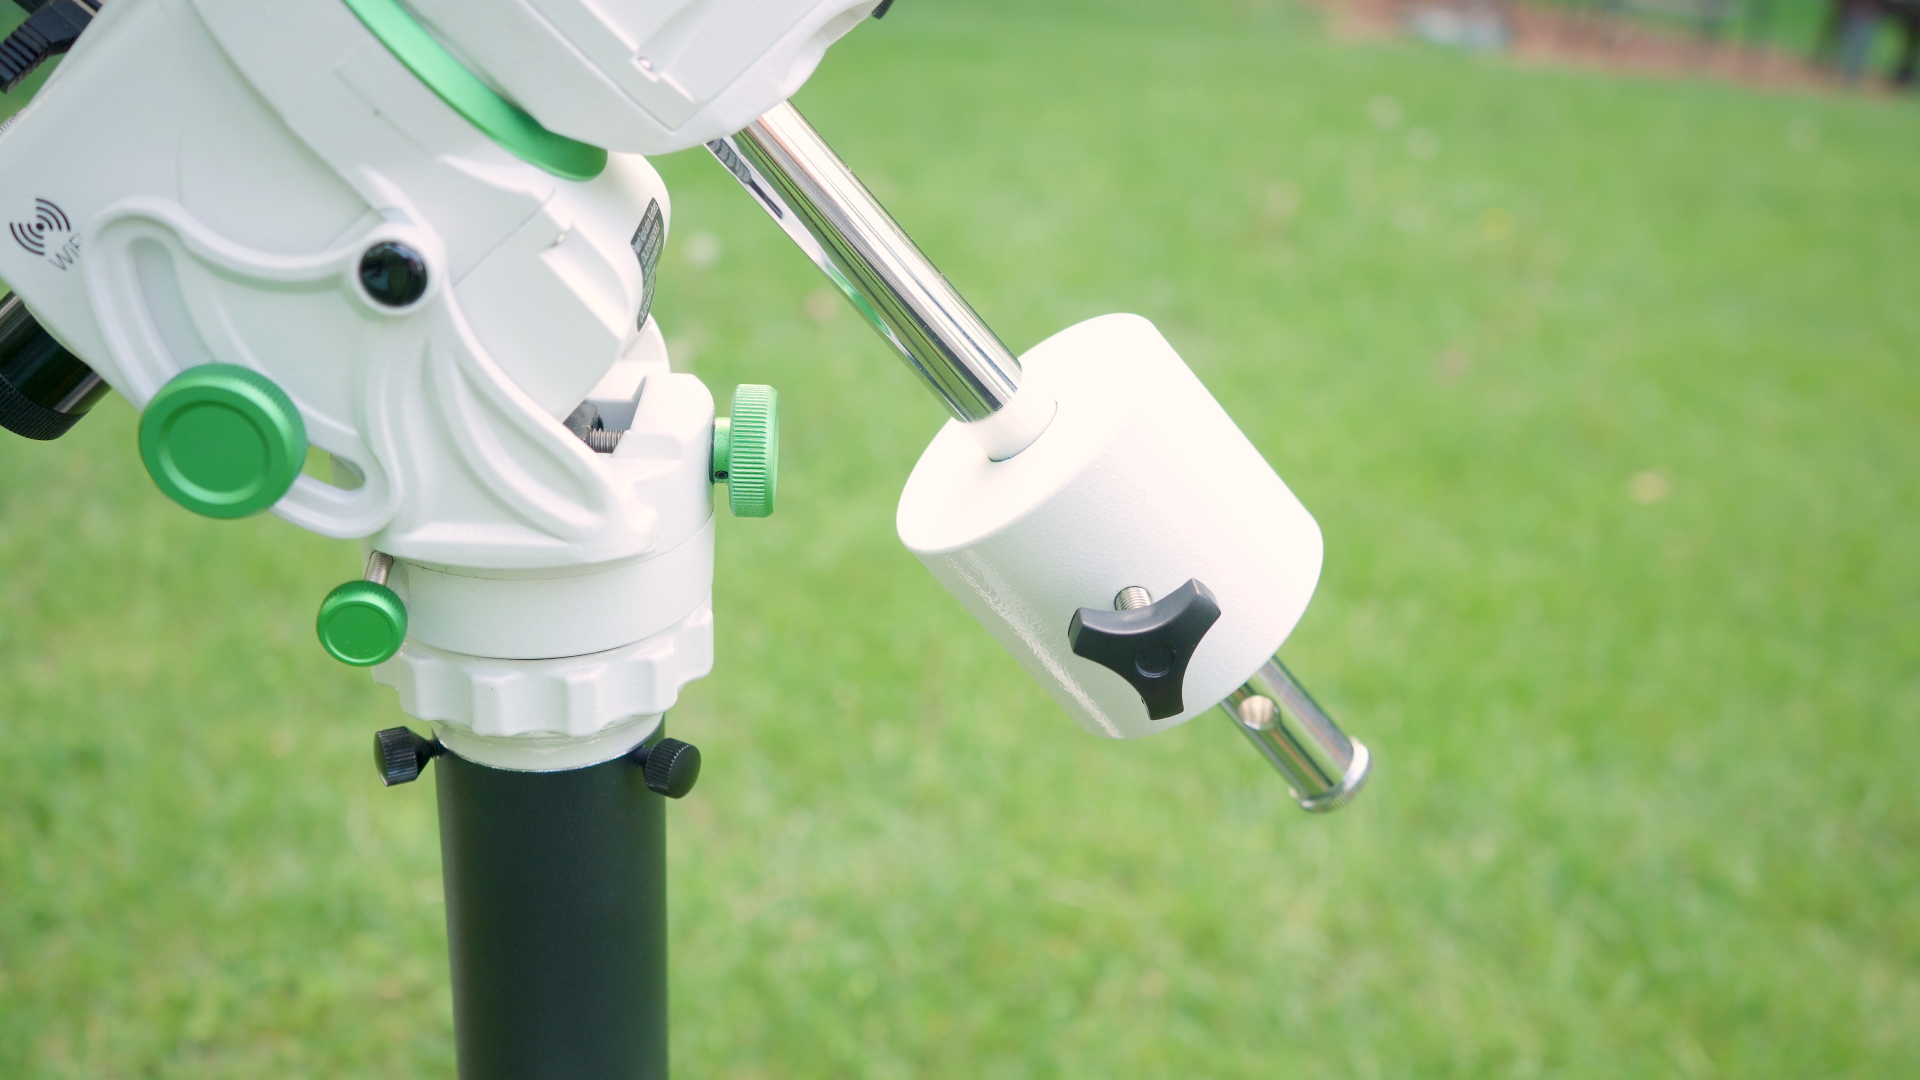
Counterweight Bar and 5lb Counterweight
Standard with an equatorial mount is a counterweight bar and the counterweight itself for balance. The mount head includes two positions for your counterweight bar. For those who live in lower latitudes, and for those who use very lightweight imaging systems where the counterweight needs to be pushed up towards the mount head. The top counterweight bar position prevents the counterweight from hitting the latitude adjustment knob when using these lightweight imaging systems.
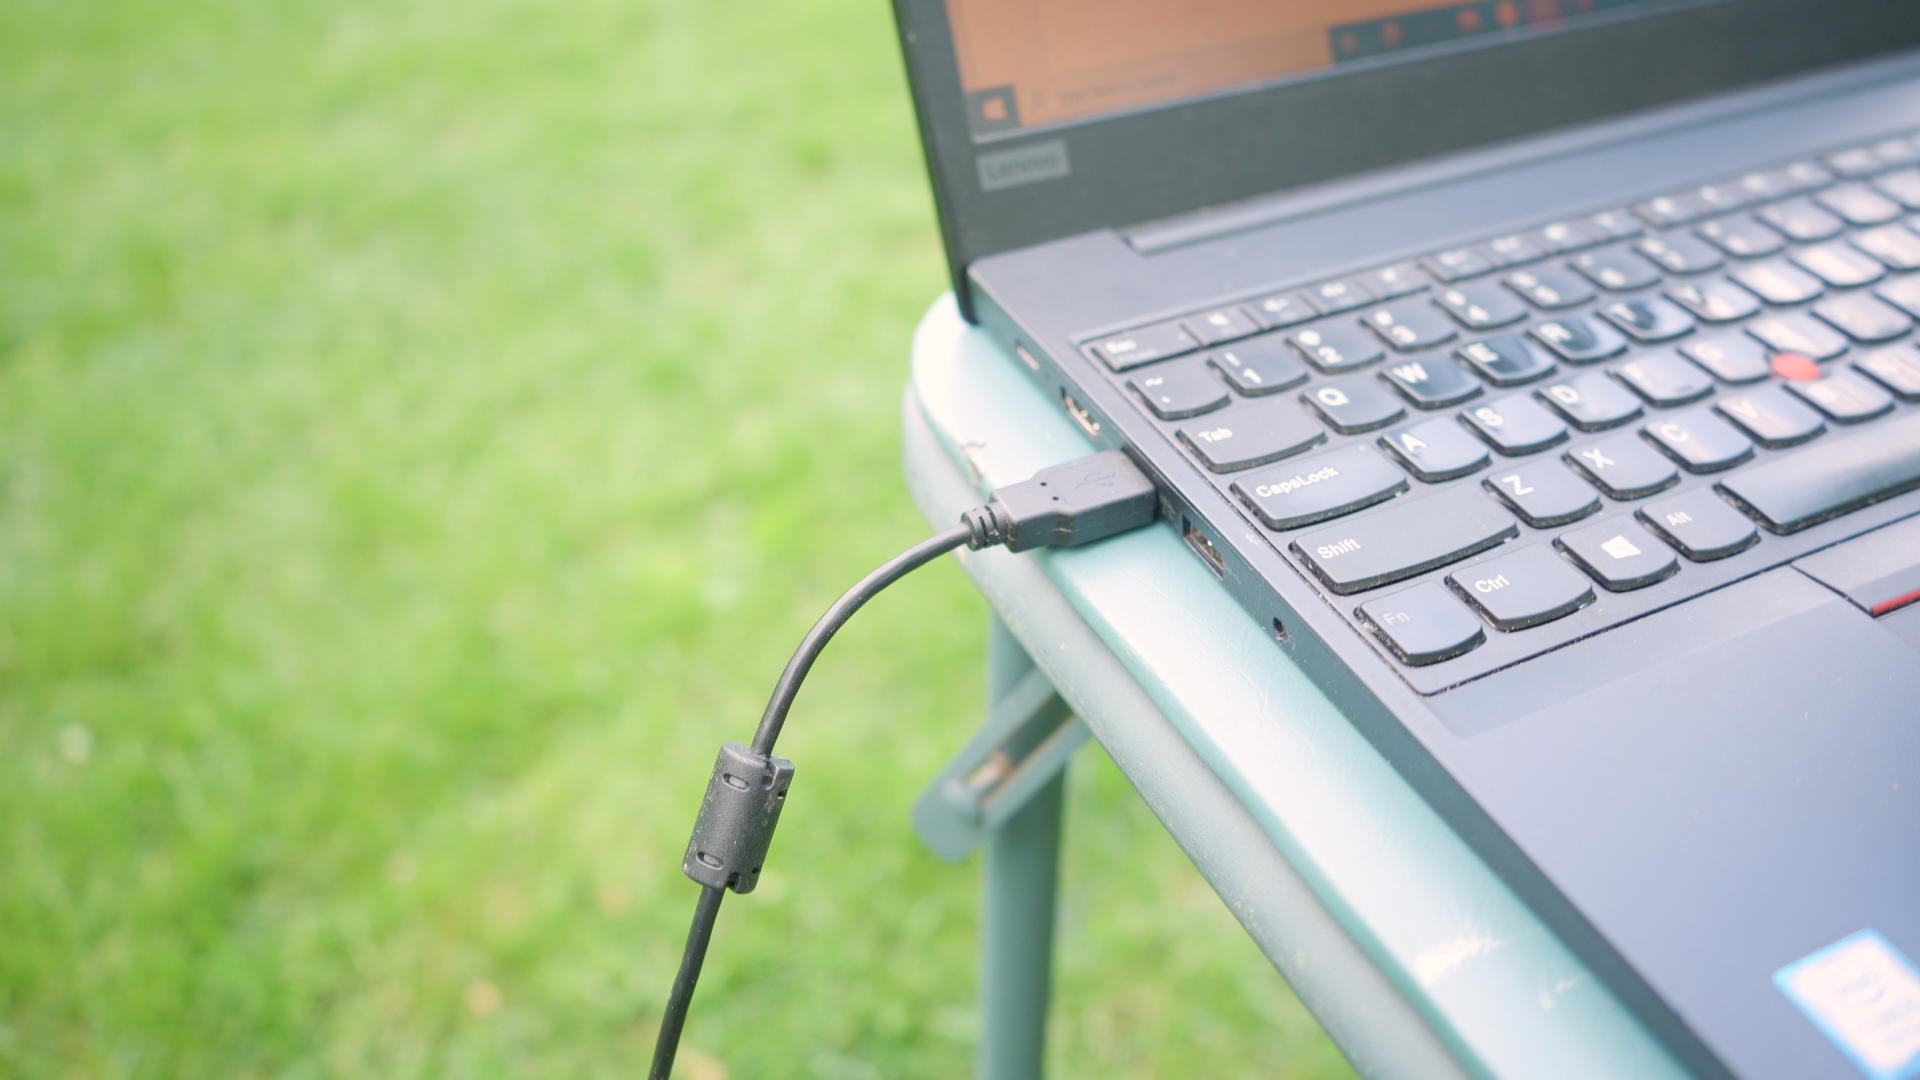
USB Cable
A standard USB cable comes included for laptop control via the SynScan app or other third-party software such as SharpCap, Sequence Generator Pro, Nina, etc.
Mount Connection
To connect my mount to my laptop there were a couple of drivers that I needed to install as well as the SynScan App for my computer. The process is VERY simple and can be viewed in our YouTube video as well!
- First, download the ASCOM driver from ascomstandars.com
- Go to SkyWatcher.com and under the “Support” tab click on “Software and Firmware”. Download “SynScan App” most recent version. Windows Version: SynScan Pro App, Version x.xx.xx
- Return to the Driver and Firmware page on Sky-Watcher’s website and select “ASCOM Driver” located on the left side of the webpage
- Download the ASCOM Driver for SynScan App, Version x.xx.xx
There were a couple of additional settings that I needed to change within the SynScan app itself in order to connect to my mount.
- Open the App and select “Settings” and then “Connection Settings”
- Make sure “Serial” is the method of connection that is highlighted
- Manually enter your GPS location under “Settings”
- Power your mount, connect your USB cable to the mount, and hit “Connect”
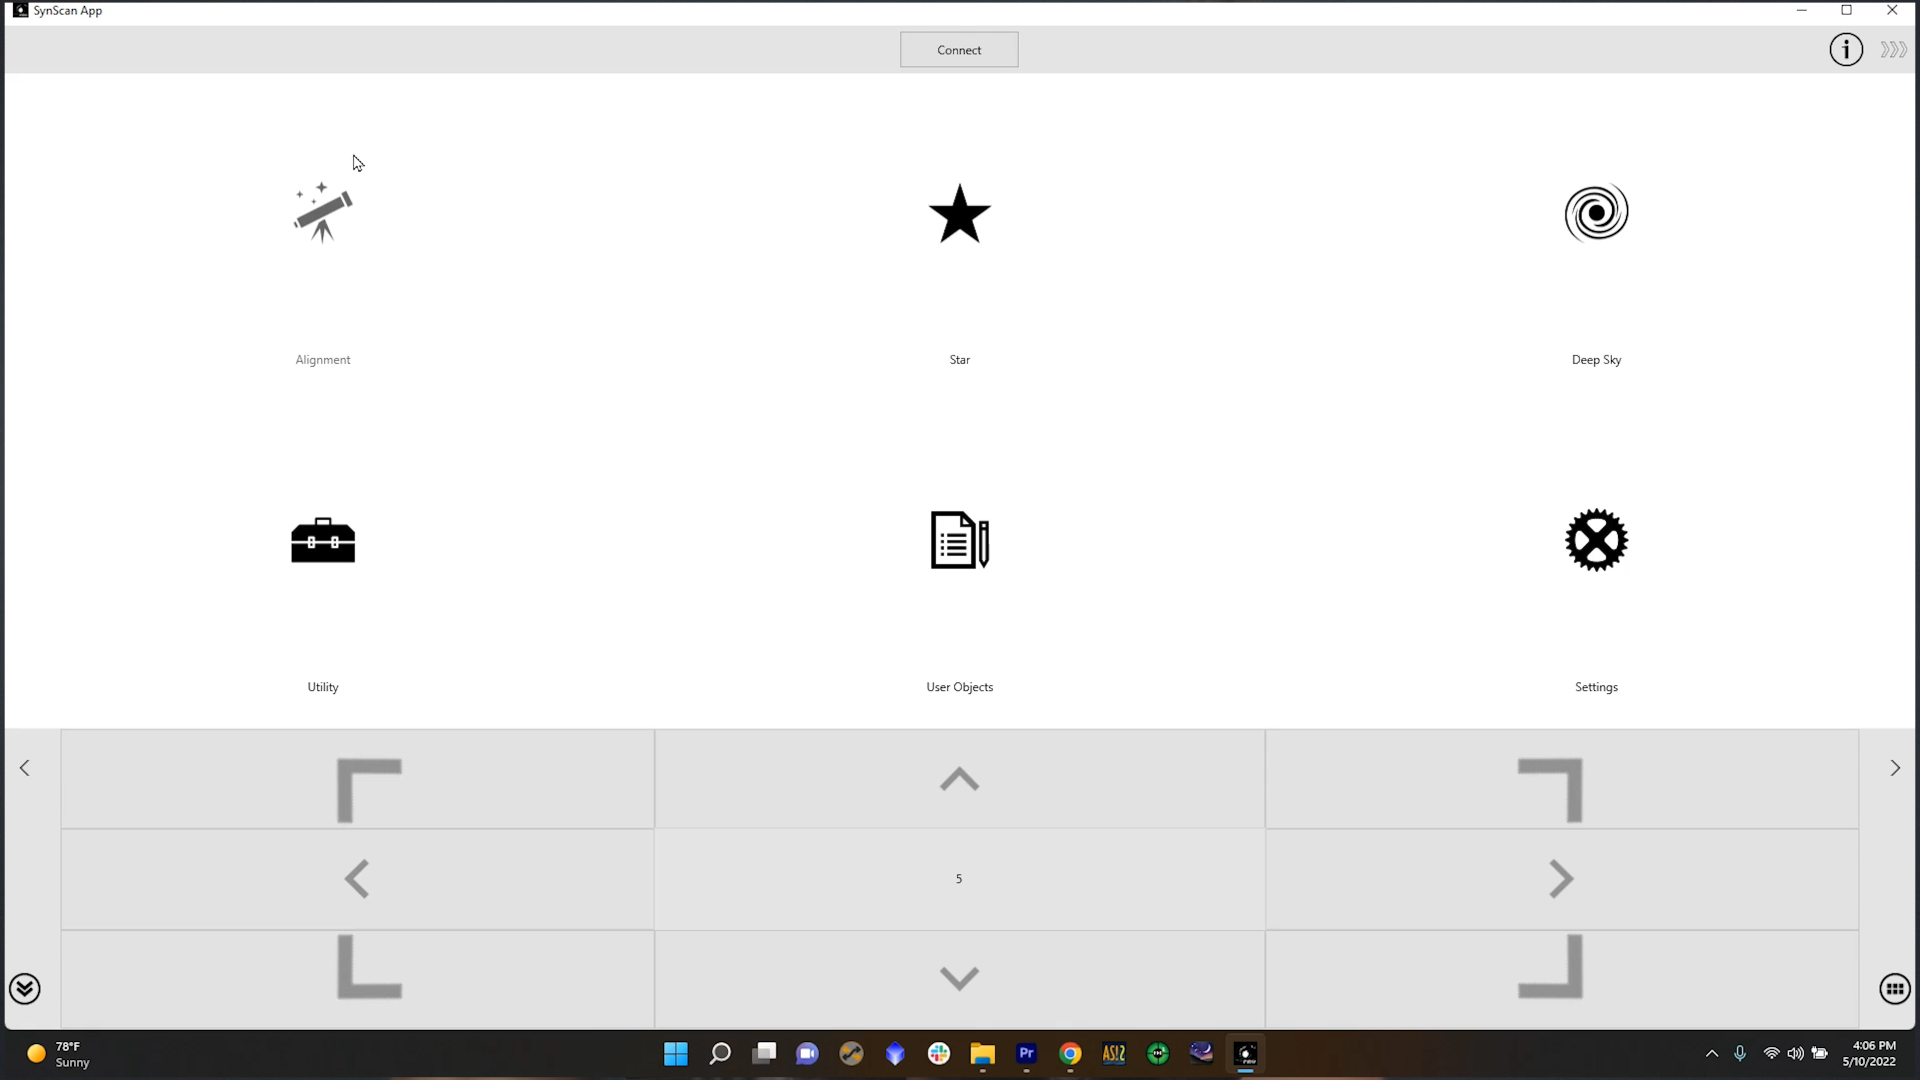
The SynScan App/Software
The SynScan app comes full of features for those who want to control their mount via Wi-Fi (SynScan Mobile App) or directly through their laptop. Star Alignment, PPEC, and Polaris position are only a few of the functions you can find within the app. You have the ability to search for nearly any deep space object and you even have the ability to identify deep space objects within the app. Camera control is also a possibility, as is the ability to manually slew anywhere in the nighttime sky!
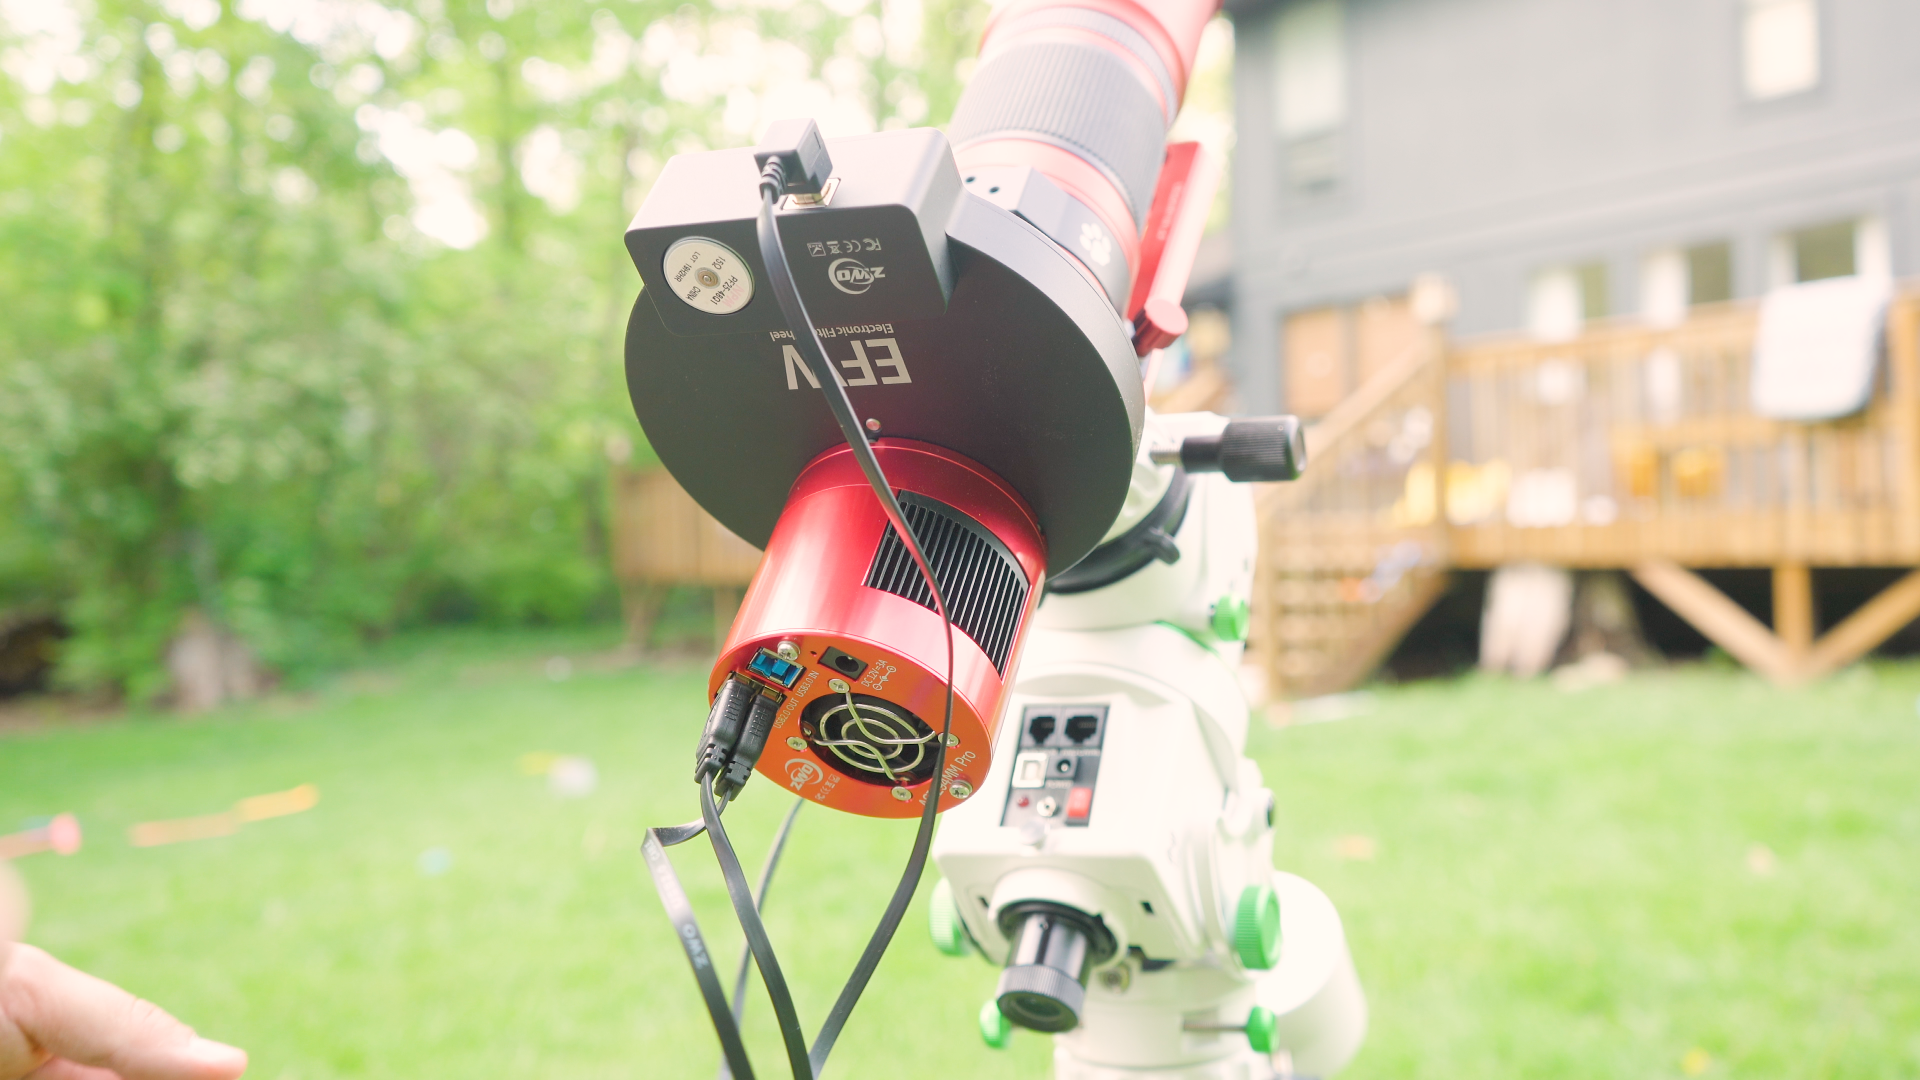
My Imaging Train and Setup
My imaging train remained the same as I switched from one scope to the other during this experiment. Fortunately for me, I was able to remove my entire system from one scope and attach it to the back of another as both the RedCat 51 and Apertura 72EDR require 55mm of backfocus. My imaging train consisted of the following items:
- ZWO ASI294mm
- ZWO Electronic Filter Wheel
- Astrodon 3nm Narrowband Filters / LRGB Filters
- ZWO Off Axis Guider
- QHY5L-ii Monochrome Guide Camera
In regards to connections, my cable management was sup-par. I had the GTi directly connected to my mount via the included USB cable. My filter wheel and guide camera were connected to the back of my ZWO ASI294mm with short USB cables. The ASI294mm was connected directly to my laptop via USB 3.0 cable. Both my camera and mount were powered with 12v 5amp AC adapters. All of this was being run through a sequencer called Sequence Generator Pro (SGP). From this software, I operated all of my equipment including the mount. Within SGP you can choose exposure times, exposure count, framing, and nearly anything else you can imagine

IMPORTANT: Regardless of the sequencing software that you are using (SharpCap, SGP, NINA, etc.) there should be an option under mount connection called “SynScan App” that allows you to connect to your mount. You must have the drivers mentioned in the “Mount Connection” installed and you need to be connected through the SynScan app before you connect to the mount within your third-party software.
Test Prep
Before testing, I had to select two different targets to image, one target to test the guiding capabilities of this mount and a different target to test the tracking (unguided) capabilities of this mount. My thought process was that I would be shooting through my Hydrogen Alpha (Ha) filter for the guiding tests as these exposures were likely to be significantly longer than my unguided sub-exposures. My images would likely be washed out due to heavy light pollution if I were to shoot via broadband filters at these exposure lengths. For the autoguiding tests, I chose to image the Butterfly Nebula near Sadr through my 3nm Ha Filter. For testing tracking only exposure lengths, I decided to shoot Messier 13 - The Great Hercules Cluster. I simply used my luminance filter for these exposures as they were going to be shorter.
I started these tests off with the RedCat 51. Balance was simple in both the RA and Declination Axis but I did run into one problem! The RedCat 51 is a short refractor so my filter wheel, when positioned below the scope, would run into the mount head. A set of dovetail risers would help increase the height of the tube above the declination axis. I rotated my filter wheel so that it was positioned directly upwards to prevent any contact with my mount.

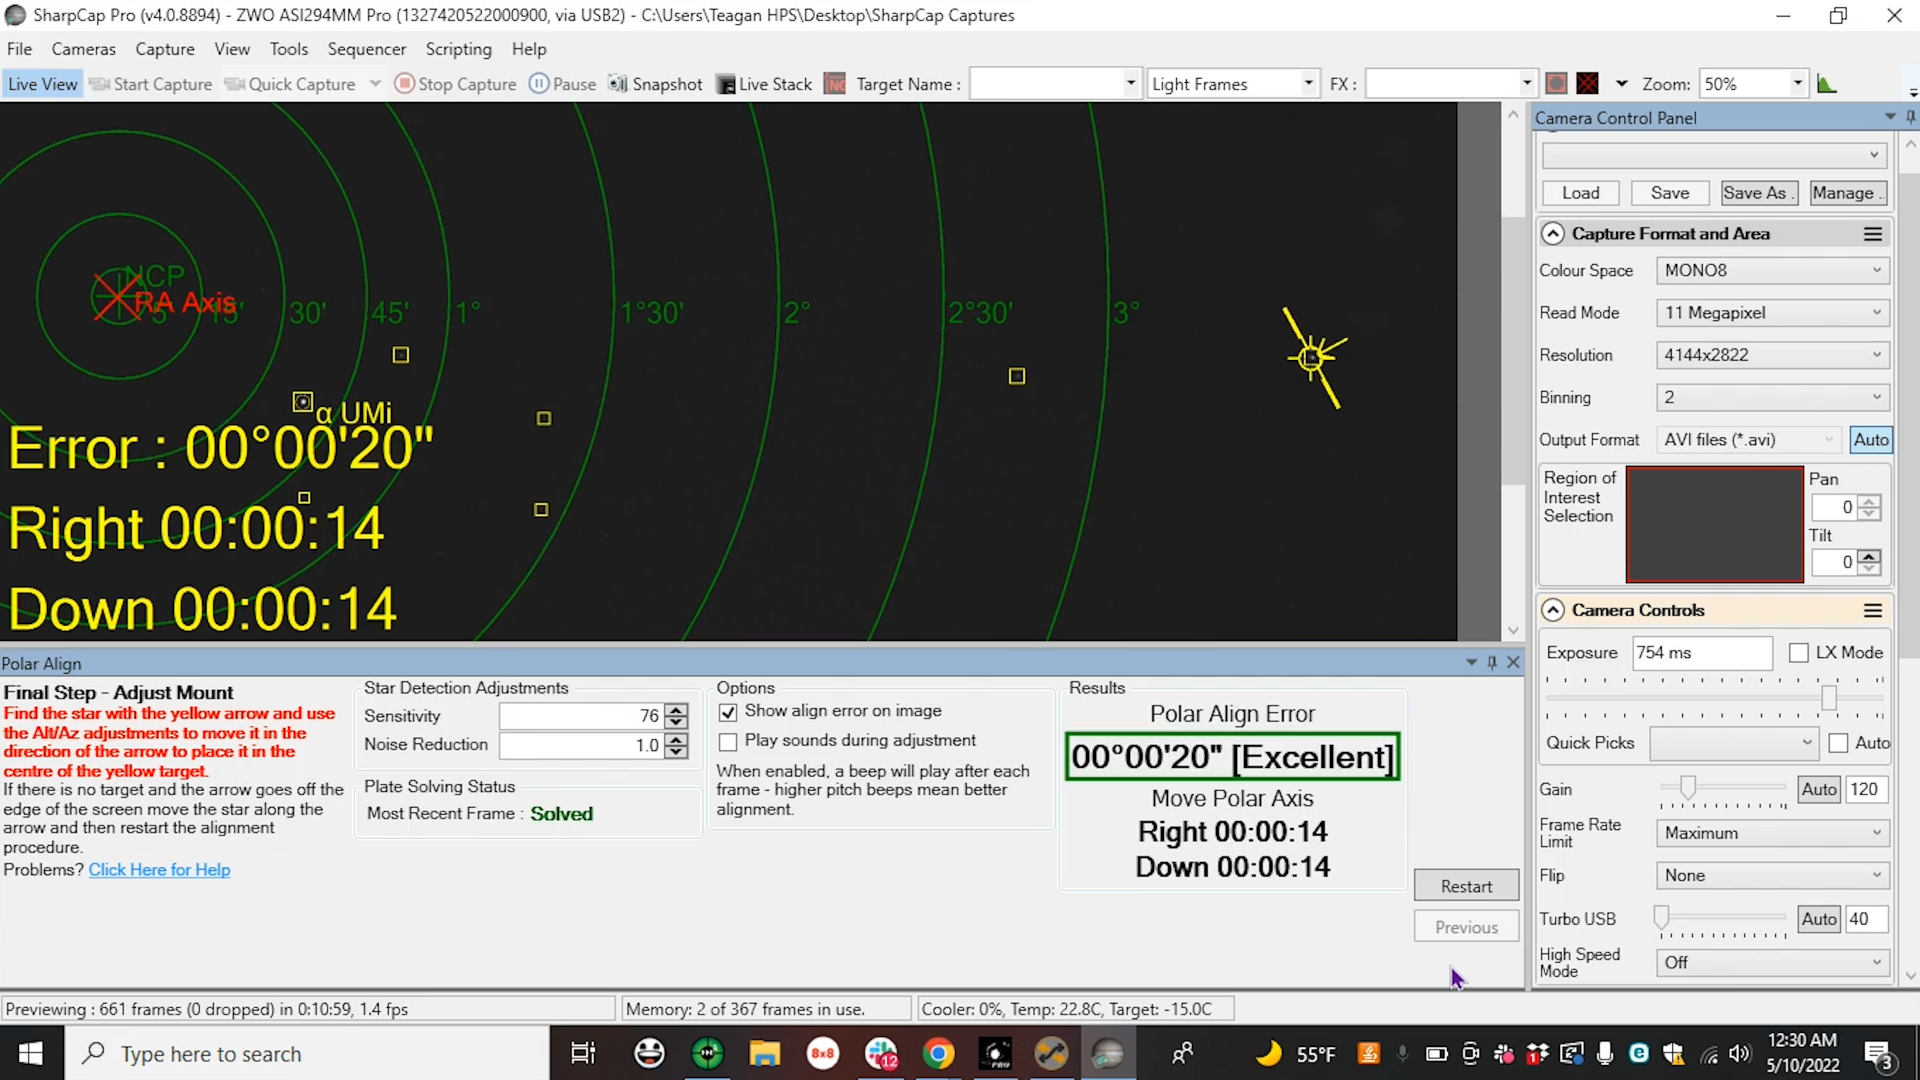
For my polar alignment process, I used the SharpCap polar alignment wizard. Typically these are used with a guide camera and a guide scope but since I was using an Off Axis Guider, I ran the polar alignment process with the RedCat51 and ASI294mm. Between all tests, I made sure that I achieved a polar alignment accuracy of “Excellent”. This was going to be especially important for my unguided sub exposure tests.
After balance and polar alignment were finished, I returned the mount to the home position with the counterweights down and the scope pointing towards Polaris.
IMPORTANT: Your mount assumes you are in the home position when you slew to your first target so you need to put your mount in the home position prior to the imaging session. Additionally, if you are using a third-party software to control your mount and equipment, you need to run all processes through your software. The SynScan App is only used to connect to your mount. You dont want to run a star alignment process through the SynScan app and then switch to SGP or NINA and slew to your target, as SGP and NINA still assume you are pointing towards Polaris. You could possibly run platesolving in SGP or NINA after you perform a star alignment in the SynScan app but it's best practice to start with the mount in the home position and slew to your target from within SGP or NINA. If you are NOT using a third-party software for equipment control, you can absolutely use the SynScan app for star alignment, GoTo purposes.
Testing the RedCat51 Unguided
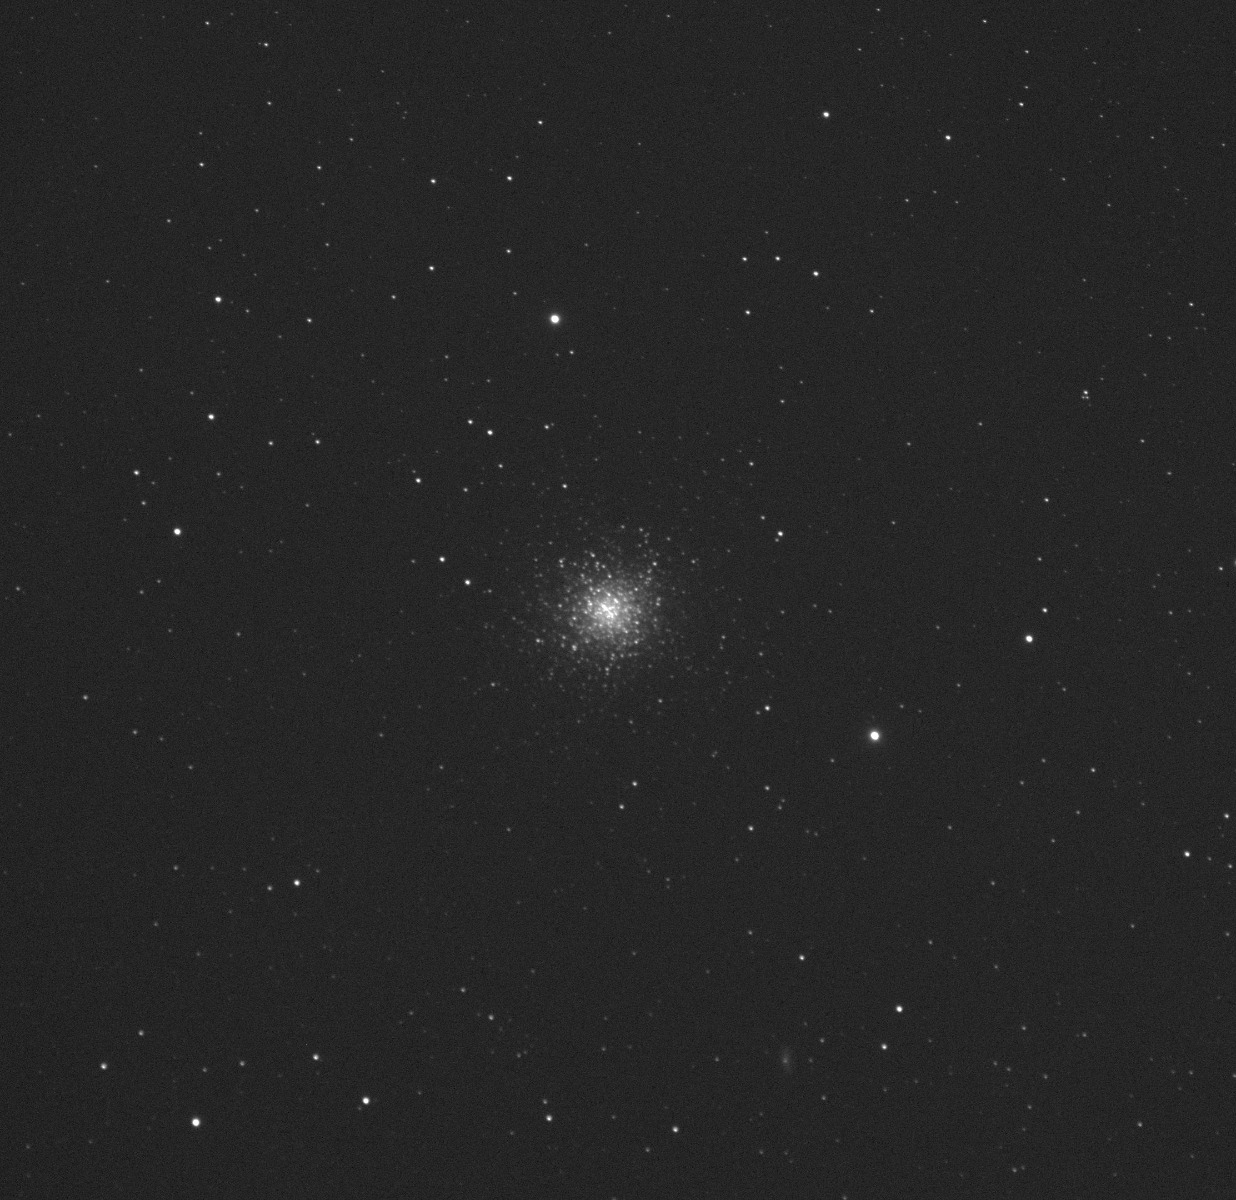
Messier 13 was sitting at about 60 degrees altitude when I finished polar aligning. The Butterfly Nebula hadn't even peaked above the horizon yet. I slewed to Messier 13 from SGP and ran my platesolving routine. I tested several different unguided exposure lengths to test the true tracking capabilities of this mount. The RedCat51 was lightweight and it tracked extremely well. Precise balance and polar alignment played a major role in my results. I ran a series of exposures as 30, 60, 120, 180 and 300 seconds. I had round stars in the 30, 60, 120, and 180s exposures. My 300s exposure had very slight trailing in the stars but it was negligible. Five-minute exposures UNGUIDED were extremely impressive. This opened up the possibility of exposing even longer with short focal length camera lenses under dark skies.
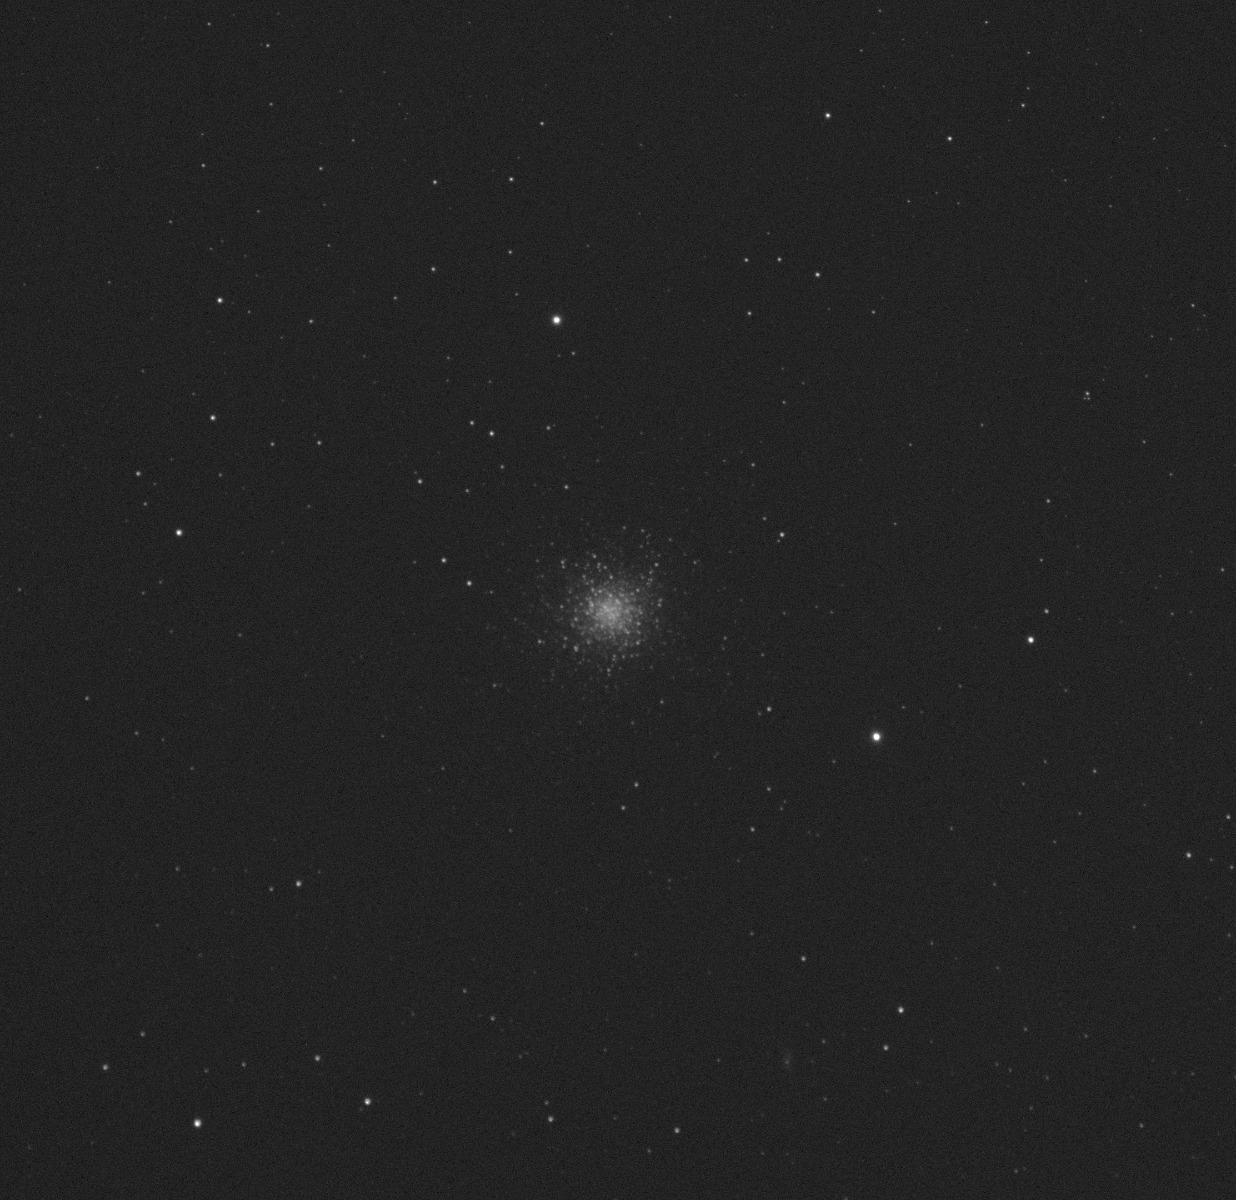
30 second exposure
60 second exposure

120 second exposure

180 second exposure
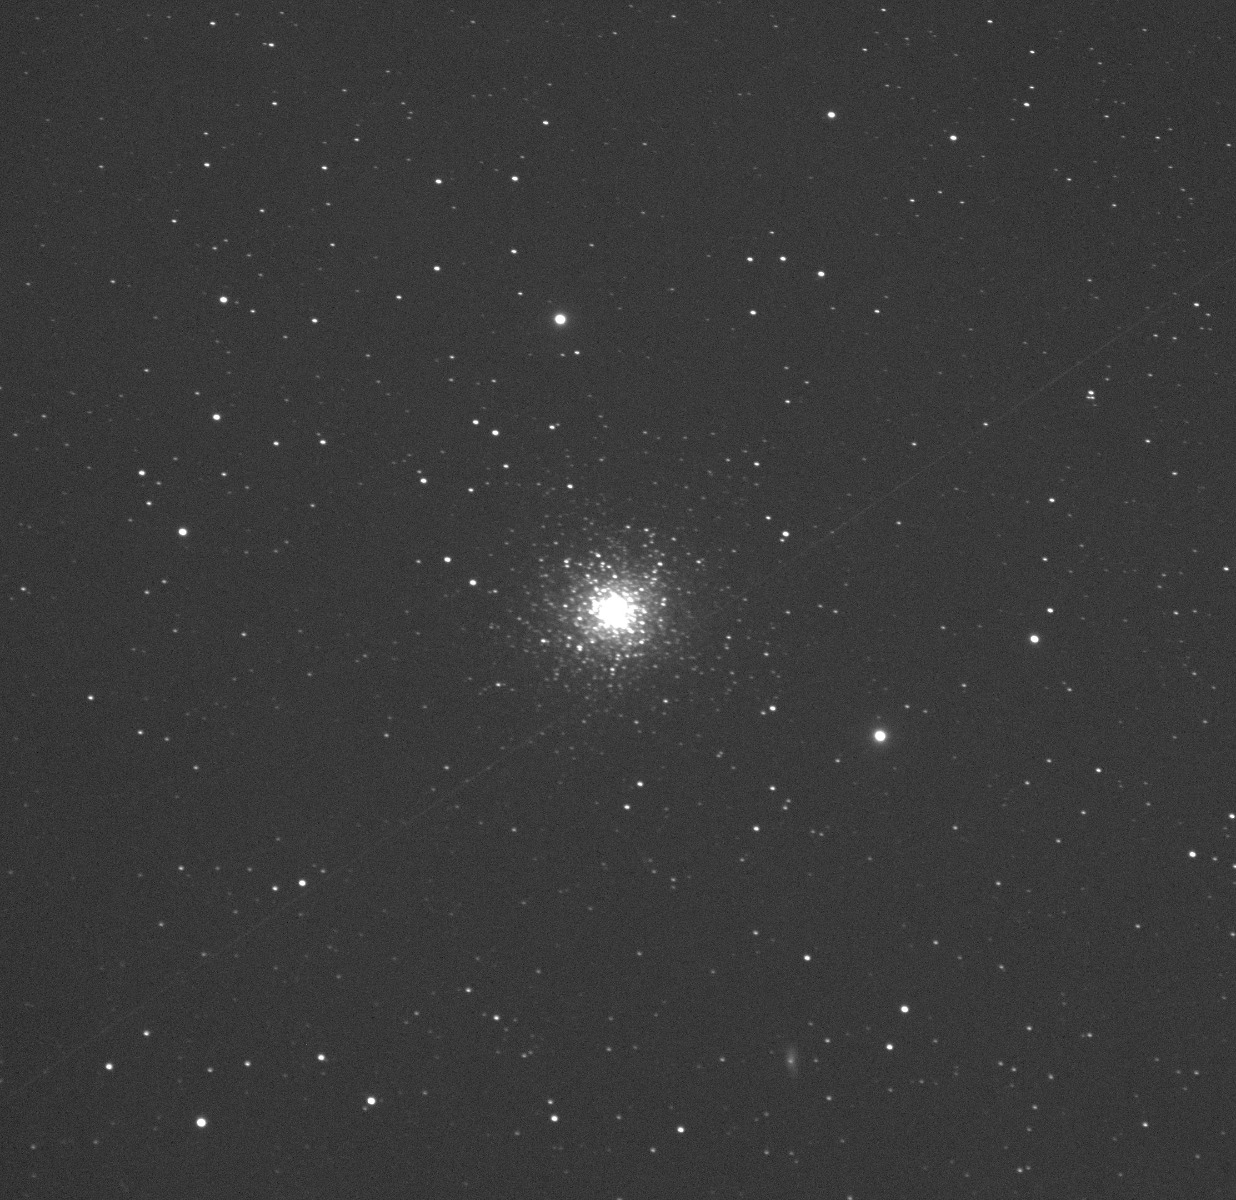
300 second exposure
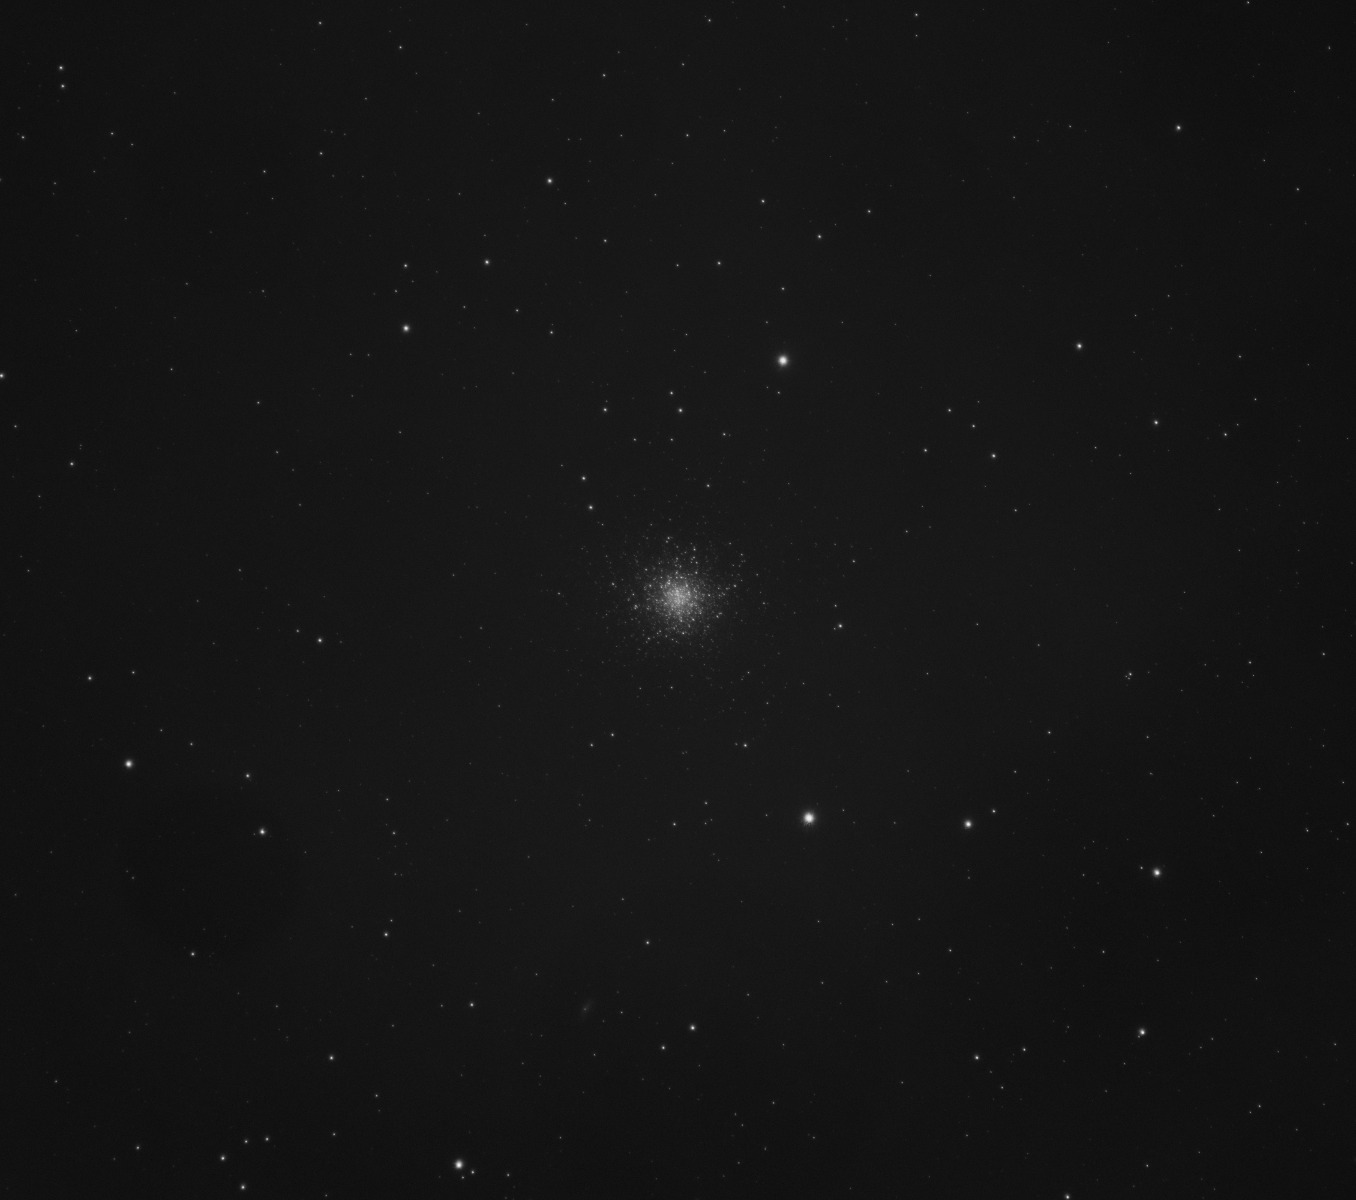
Testing the Apertura 72EDR unguided
The Sadr region was still below the horizon after my unguided tests with the RedCat51 so I swapped out the RedCat for the Apertura 72EDR. I want to be sure that Messier 13 was in a similar position during both tests to remove any extra variables. Balancing the 72EDR in the dec axis was simple but to properly balance in the RA axis, I would need an additional 5lb counterweight. I did not have an extra 5lb counterweight so I slid the weight to the bottom of the counterweight bar and called it a night. I didn't have any other option.
I made sure to polar align again as switching from the RedCat51 to the 72EDR moved the mount around a bit. Again, a polar alignment reading of “Excellent” was achieved before I started the next round of exposures. I slewed back to Messier 13 and ran another series of 30, 60, 120, 180, and 300s exposures.
I was able to achieve consistent 30s exposures with the Apertura 72DR unguided. The rest of the 60s, 120s, 180s, and 300s exposures did have trailing in them. Given that the focal length of this scope was 430mm, I was still impressed with the results I did see. I was convinced that I may have achieved longer sub-exposures if I was properly balanced in the RA axis. I was able to take 60x30s exposures and stack them to achieve a nice, 30-minute stack of Messier 13.With several hours worth of 30-second exposures, you can achieve a really nice image. This was definitely doable with the Apertura 72EDR.

RedCat51 / Apertura 72EDR Guided tests
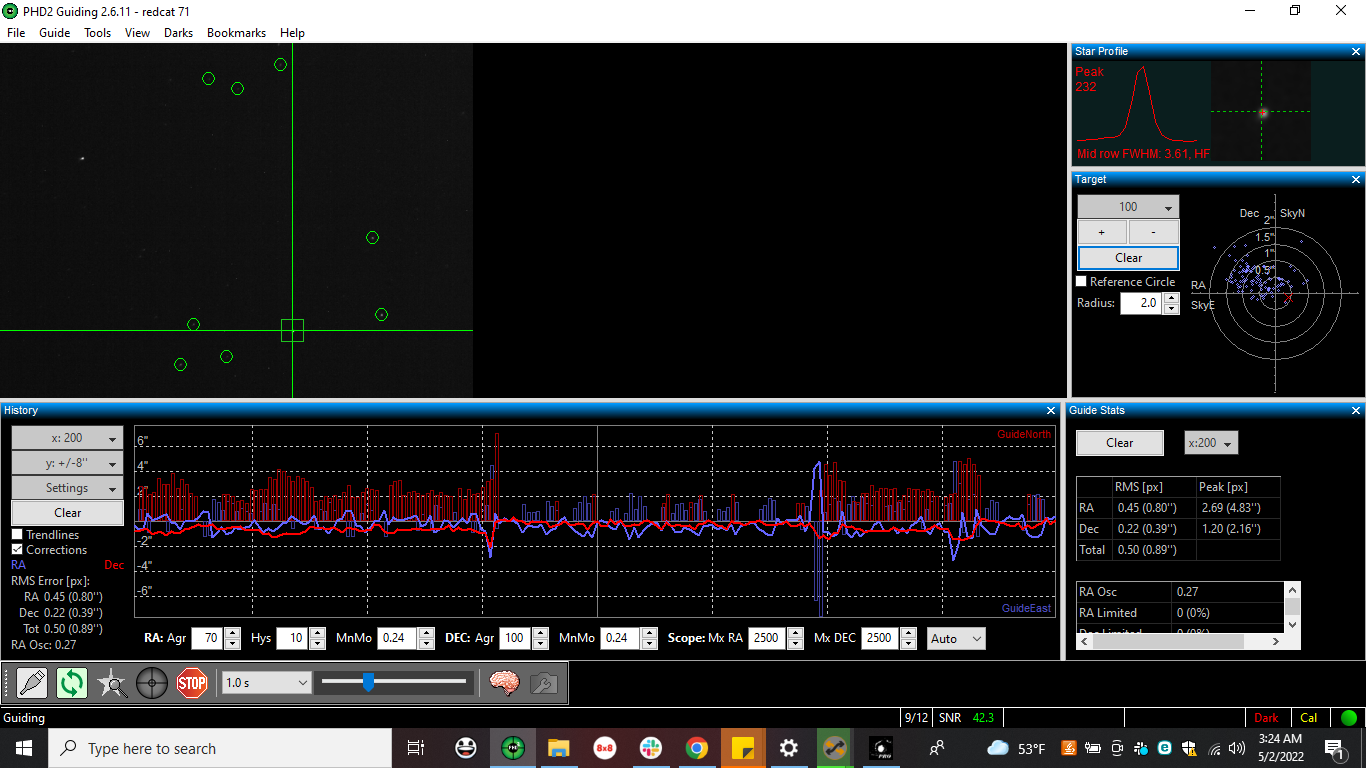
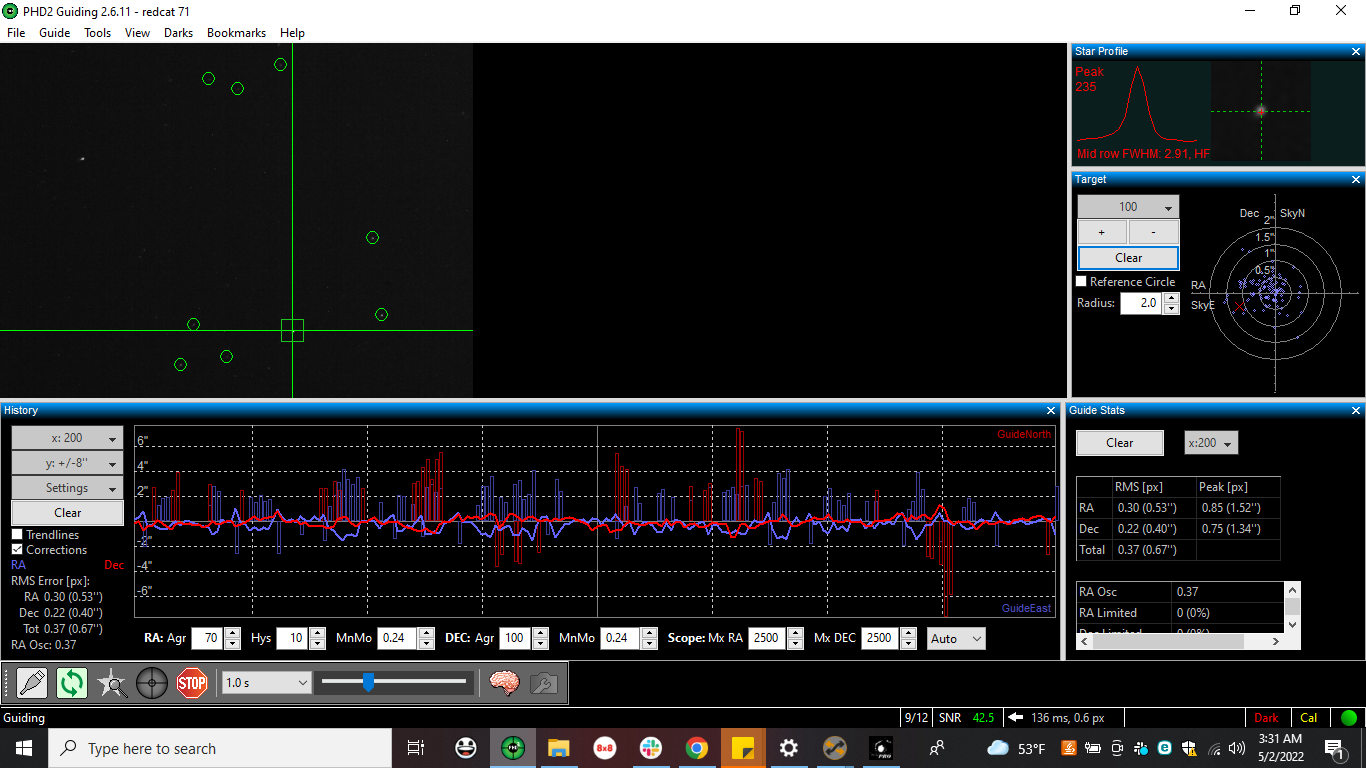
By this time, the Butterfly nebula was sitting at about 28 degrees altitude which was high enough in my books to start the next phase of testing. I had the 72EDR already attached to my mount from the previous test and I was already precisely polar aligned so I pointed towards the Butterfly Nebula. I was autoguiding during these tests so I opened up my guiding software ( PHD2) and did a star calibration. I also ran the guiding assistant and applied its suggested settings changes. I started with another single 15-minute exposure through My 3NM Ha filter. I knew not many astrophotographers took 20+ minute exposures with modern CMOS cameras so testing a 15-minute exposure seemed appropriate. The clouds were moving in rapidly so I quickly swapped the Apertura 72EDR with the RedCat51. I did another precise balance and polar alignment routine. I pointed towards the Butterfly Nebula and quickly changed my focal length settings within PHD2 and re-ran guiding calibration and guiding assistant. I then took another 15-minute sub exposure with the RedCat51.
I was able to achieve perfectly round stars in a single 15-minute exposure with BOTH systems. This was exceptional! It was awesome seeing these results after a long night of testing. Not only that, but my guide graphs show sub arc-minute guiding!
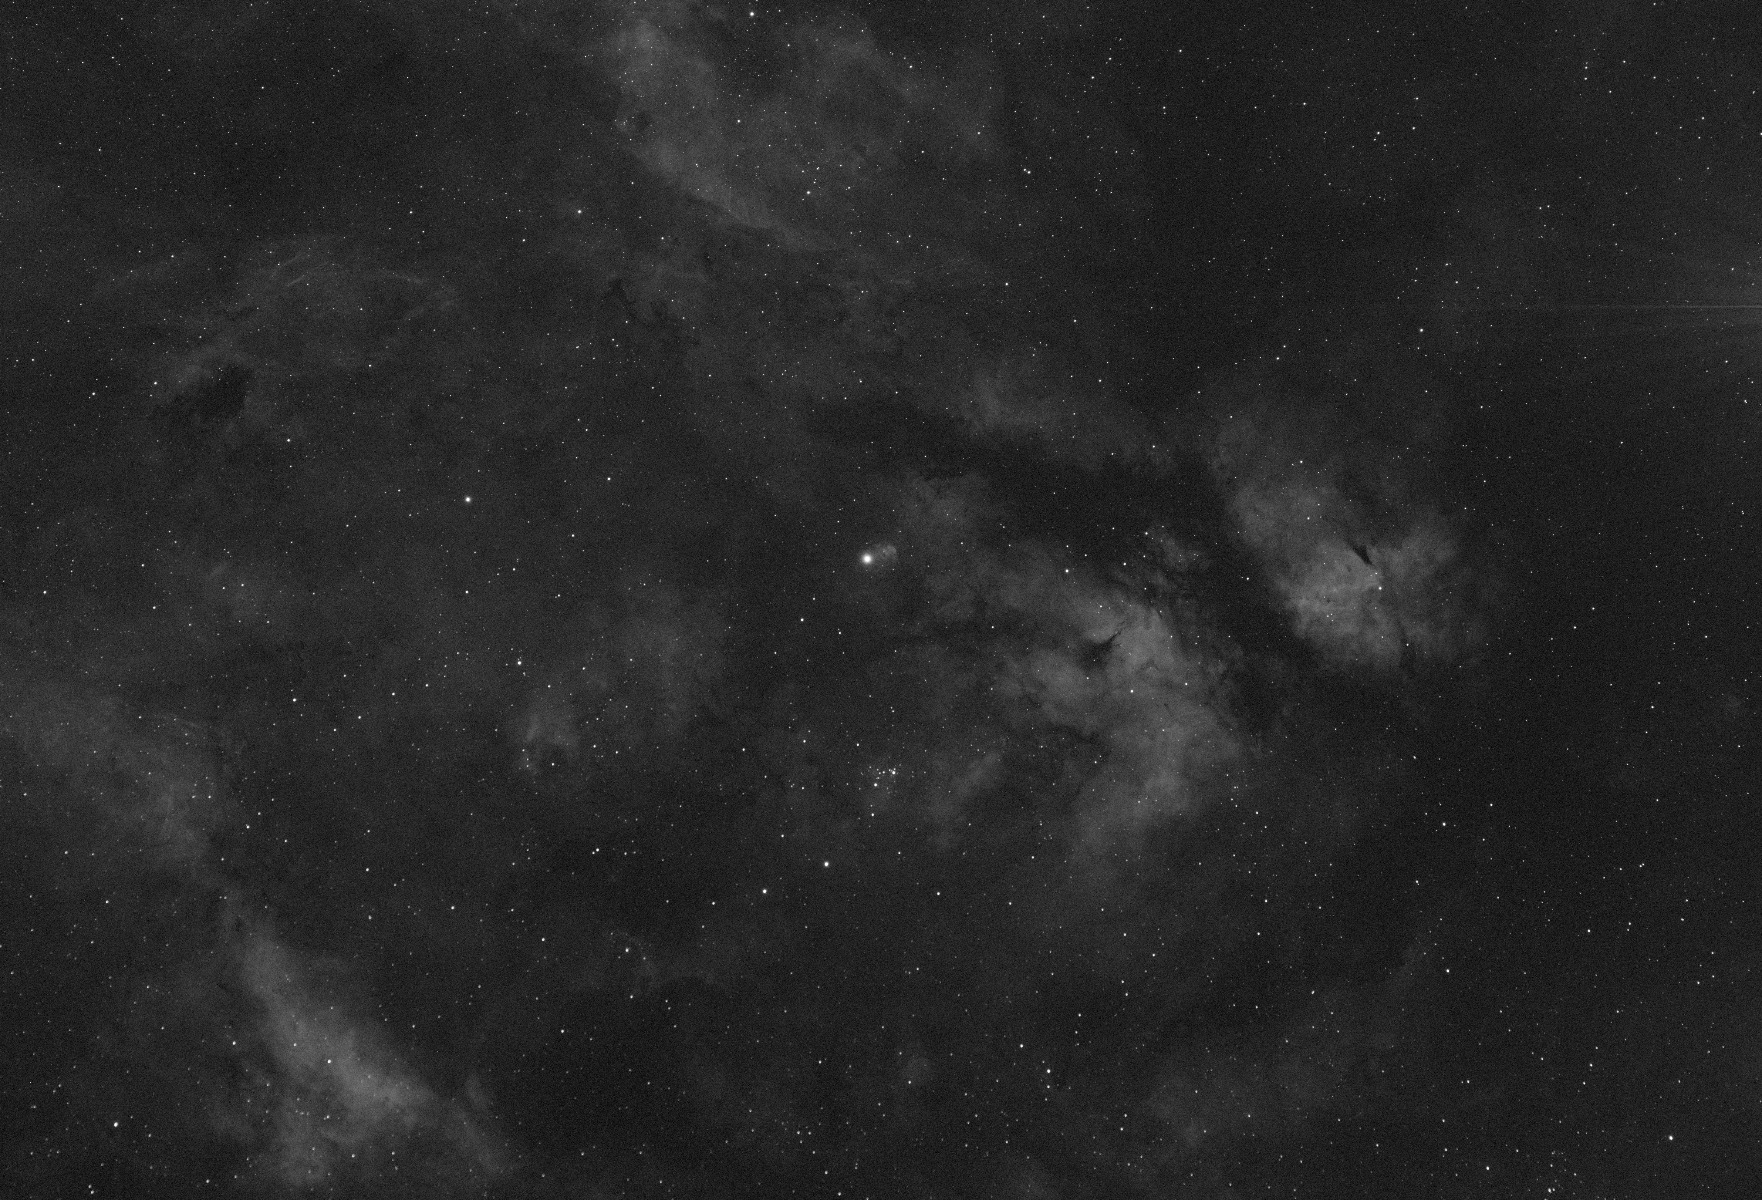
15-minute photo taken with William Optics RedCat 51
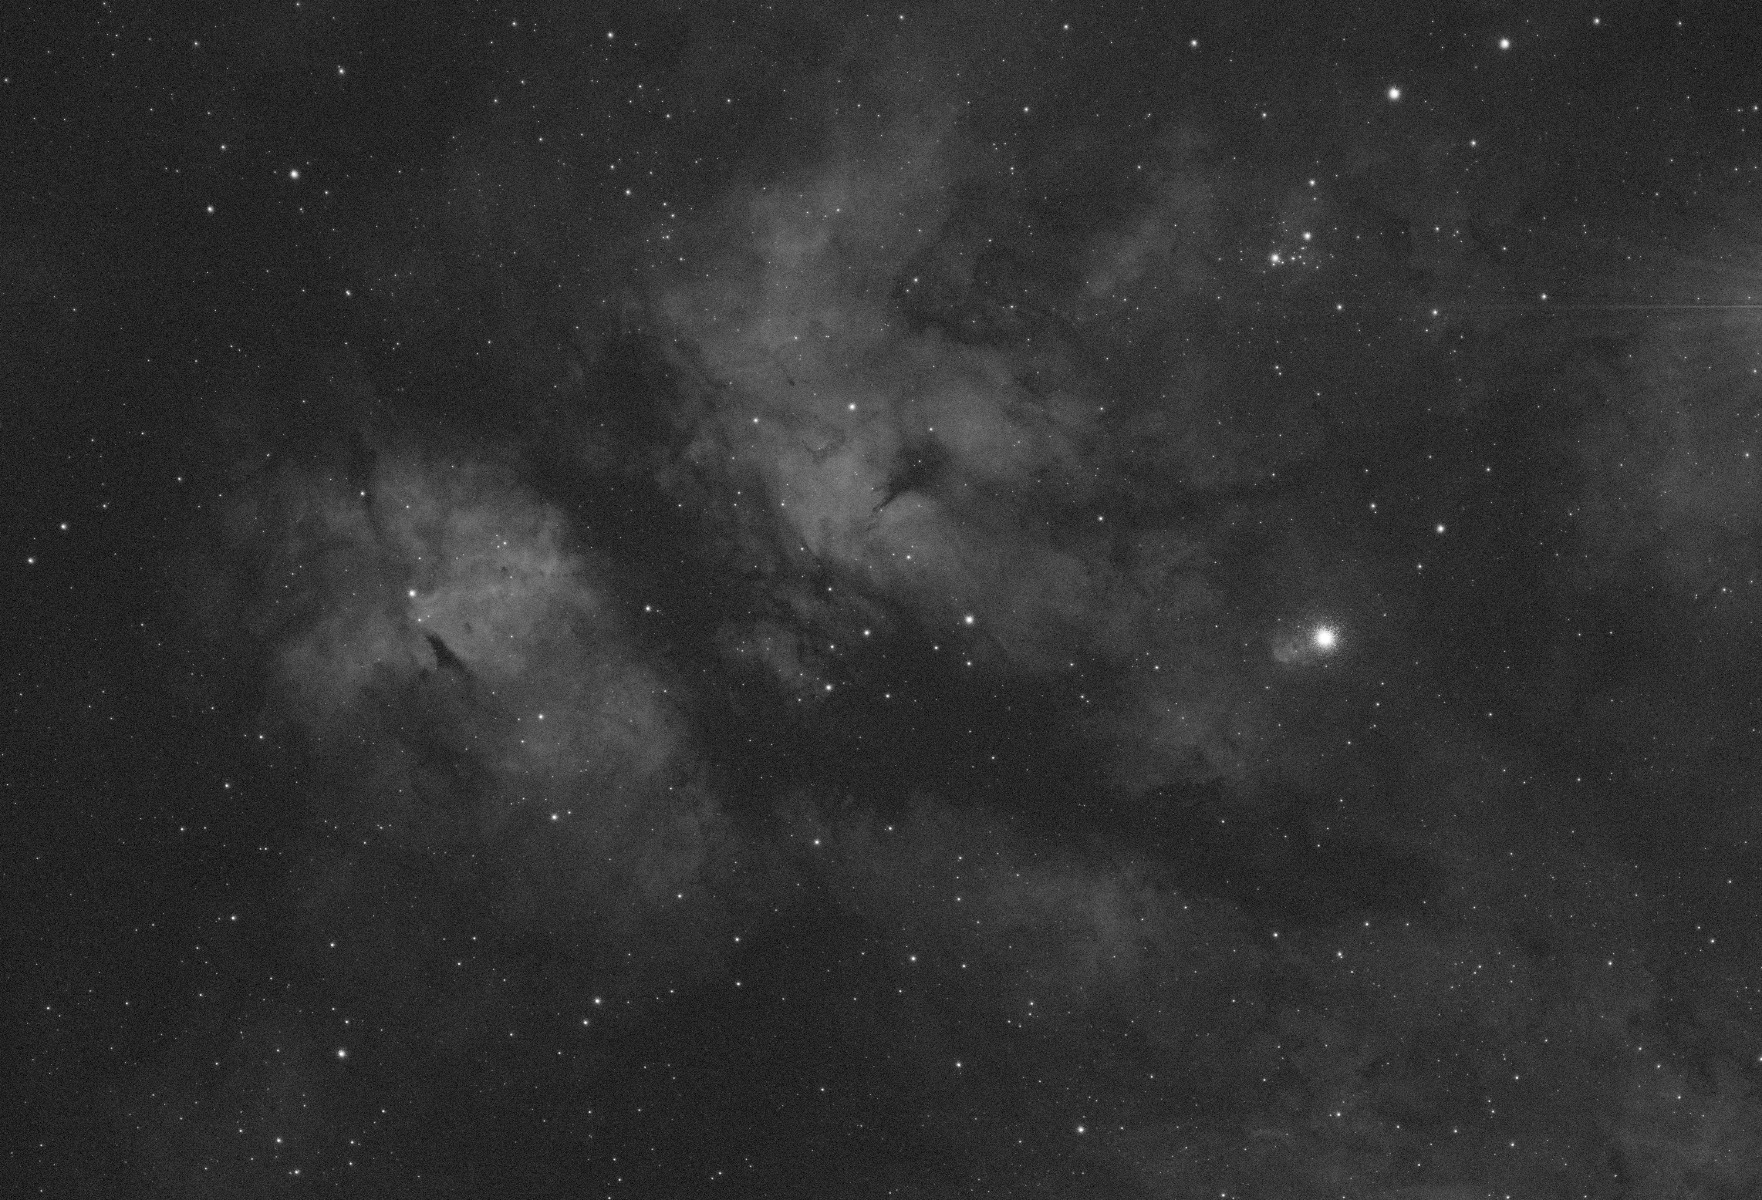
15-minute photo taken with Apertura 72EDR
Test Conclusion
Given the test results, anyone using this mount may expect to take exposure times similar to the ones taken in this test. Focal length, the weight of the scope and camera, and seeing conditions are at play here as well as balance and polar alignment precision.
Who Should Buy The Star Adventurer GTi
Final Thoughts
If you are...
☑ Looking for the most portable EQ mount on the market?
☑ New to the hobby and looking to get into astrophotography?
☑ Looking for an incredibly simple set up with very little learning curve?
☑ Looking to use photography equipment you already own or getting your first Astrophotography Refractor?
☑ A seasoned imager looking for full automation and guiding capabilities?
The Sky-Watcher GTi is quite literally the most portable GoTo equatorial mount on the market. The full GoTo capability of this mount is the central feature that sets it apart from the Star Adventurer 2i and it's also what makes this mount the perfect option for the astrophotographer on the go. The GTi is a great upgrade from the Star Adventurer 2i for those who strive for full automation. The integrated smartphone app allows for complete control over your mount via Wi-Fi and the response time is incredible. The Windows SynScan App is equally as impressive and identical in functionality. If you’re looking for a quality equatorial mount for your short focal length refractor or camera lens that performs like a dedicated imaging platform, look no further than the Sky-Watcher Star Adventurer GTi.