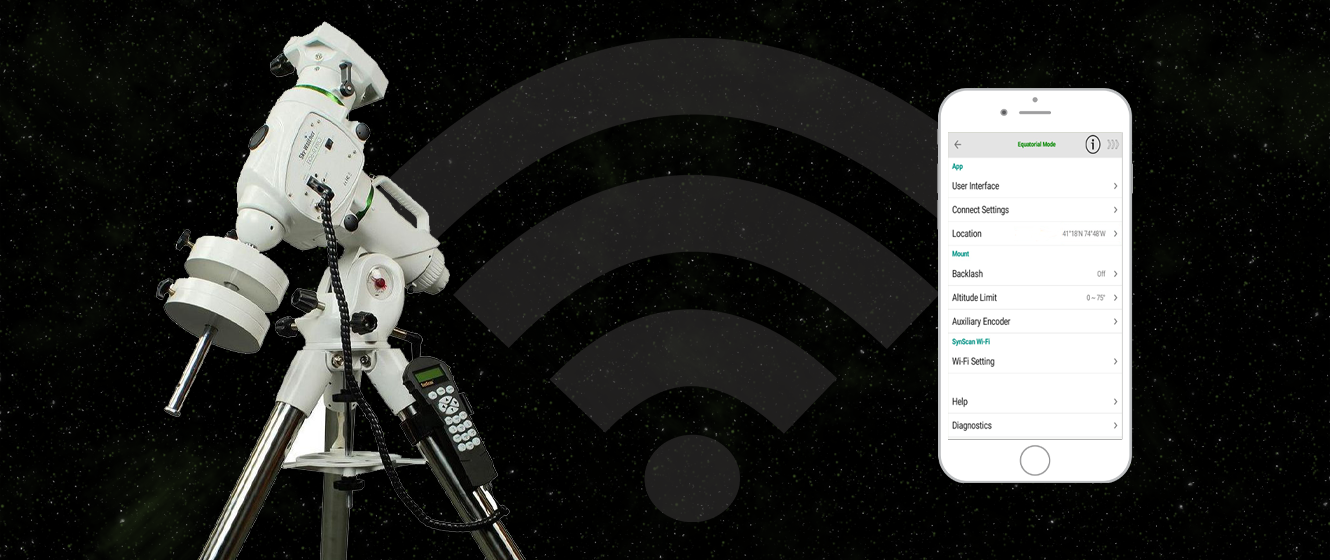
The SynScan Wi-Fi module is a great way to control your Sky-Watcher EQ6-R Pro Mount or your Sky-Watcher EQ6-Ri Pro Mount without having to use the hand controller! To use this Wi-Fi device and a smartphone, simply follow the process outlined below and you’ll be observing in no time!
Step 1: Download SynScan App from Google Play or Apple Store.
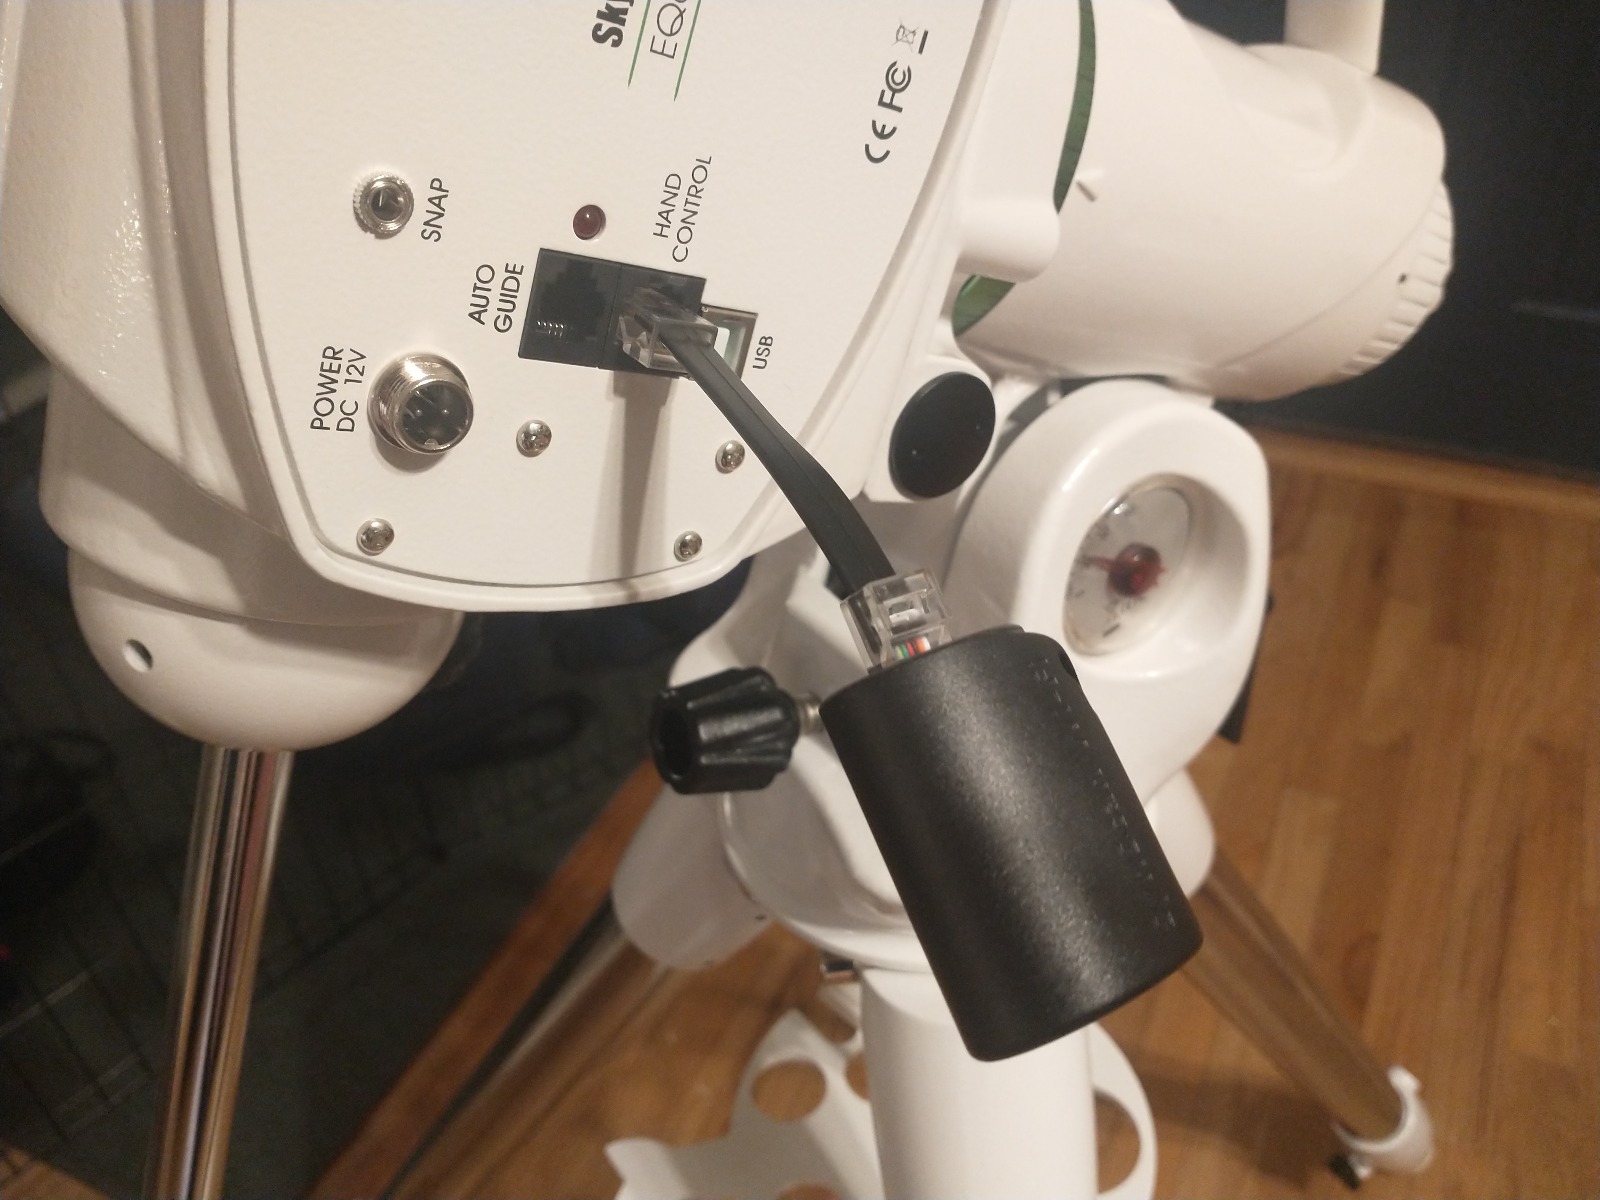
Step 2: Connect the Wi-Fi adapter to the Hand Controller Port on the mount.
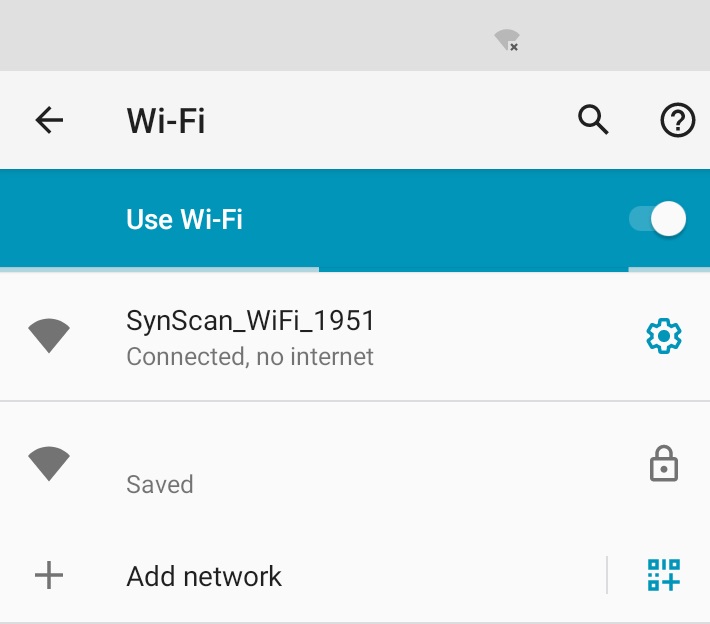
Step 3: Connect to Wi-Fi on the mount from your smartphone.
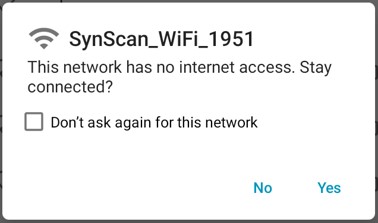
Step 4: Make sure that device stays connected to this Wi-Fi network. On some phones, you will see a brief prompt letting you know that the network has no internet access, and asking if you want to keep the connection. Select yes.
Step 5: Open SynScan App and select “Connect” at the top of the page. Then, select “Settings.
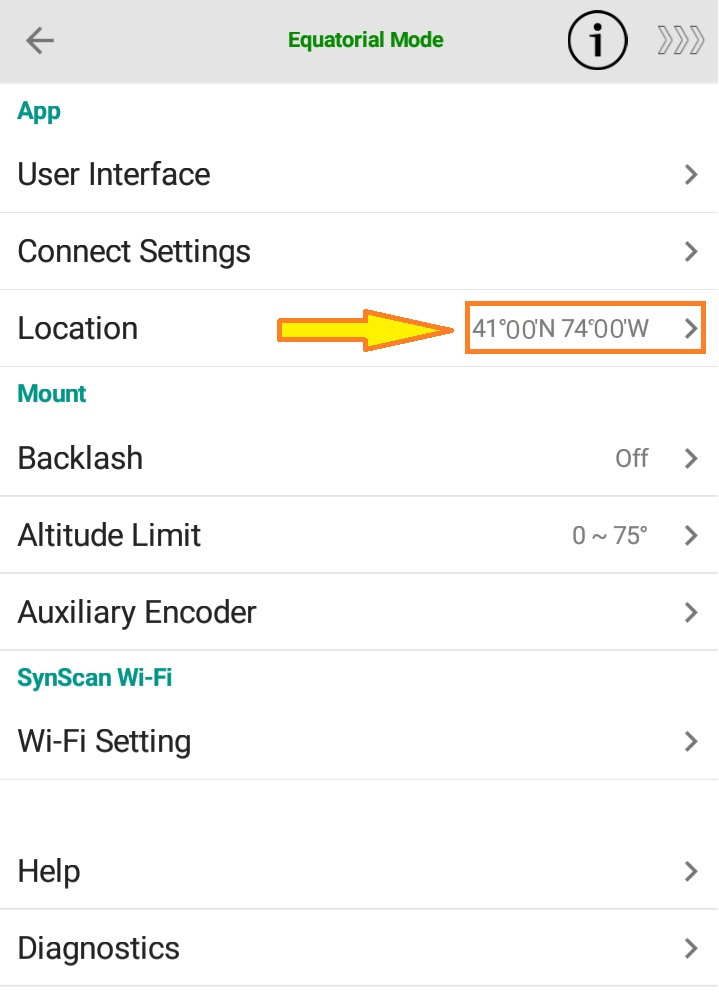
Step 6: Select “Location” in Menu.
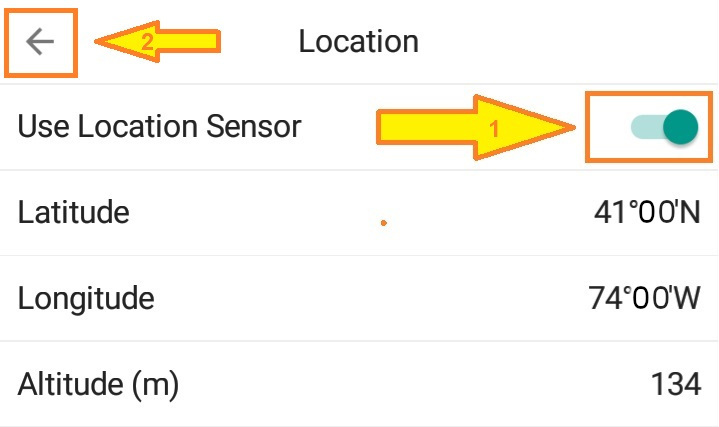
Step 7: Turn on “Use Location Sensor” to use the phone’s GPS – Or – input your latitude and longitude manually.
In the event that the App does not pull GPS location from the phone – check your location settings in the phone to see if the app has permission or not. This will be different depending on what brand of phone you have. Then select the back button which will always be located in the top left of the app.
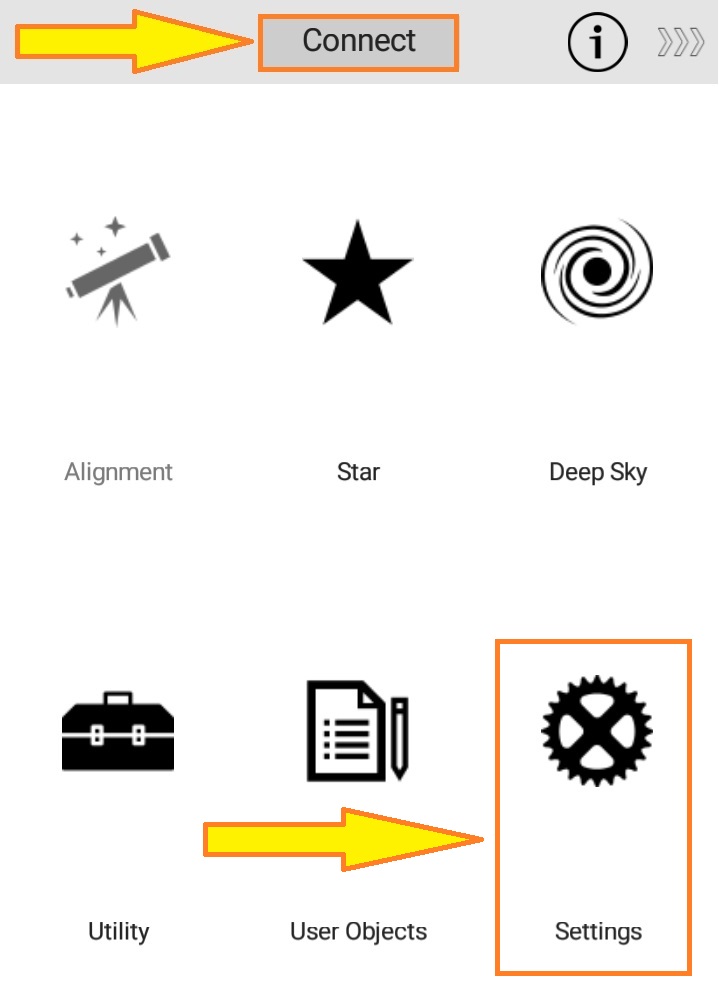
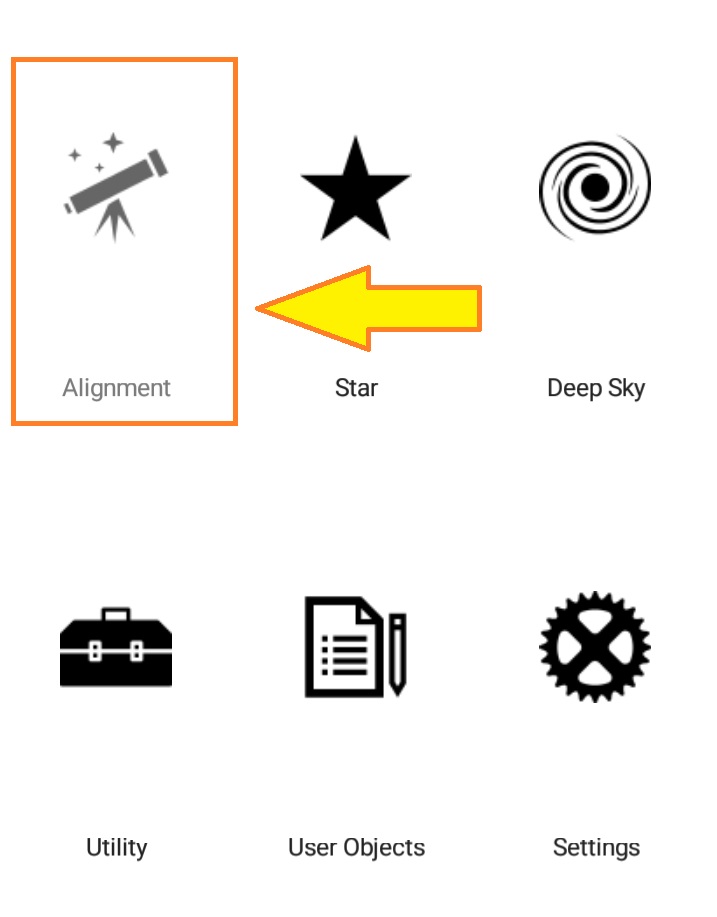
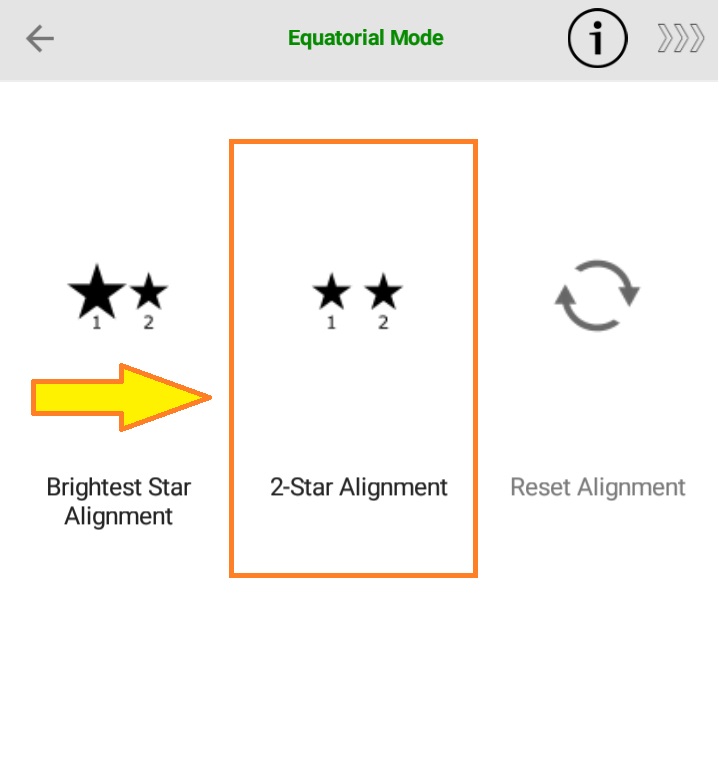
Step 8: Select “Alignment” on the main screen.
Step 9: Choose Two-Star alignment. You could choose the Bright Star Alignment, but we generally recommend using the Two-Star Alignment if possible.
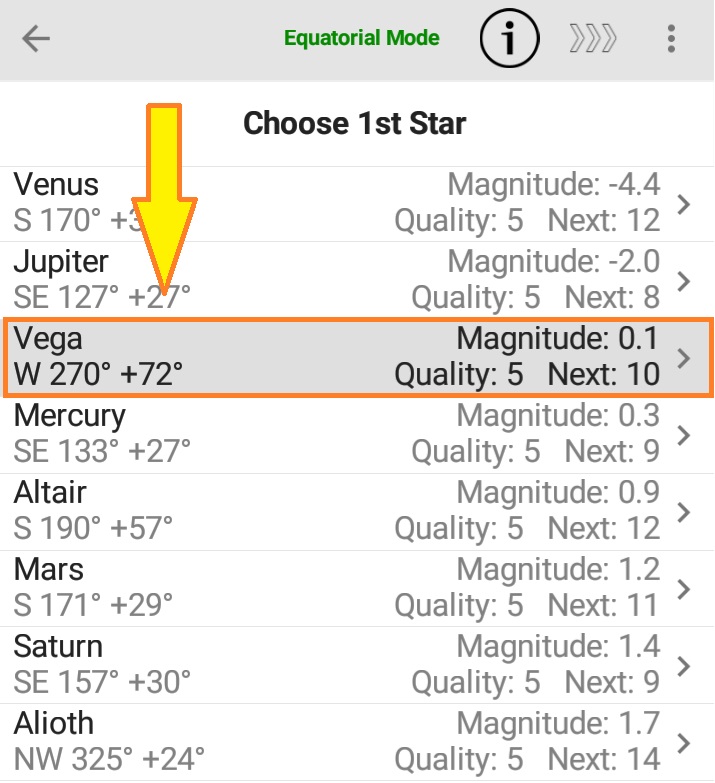
Step 10: Select 1st Star.
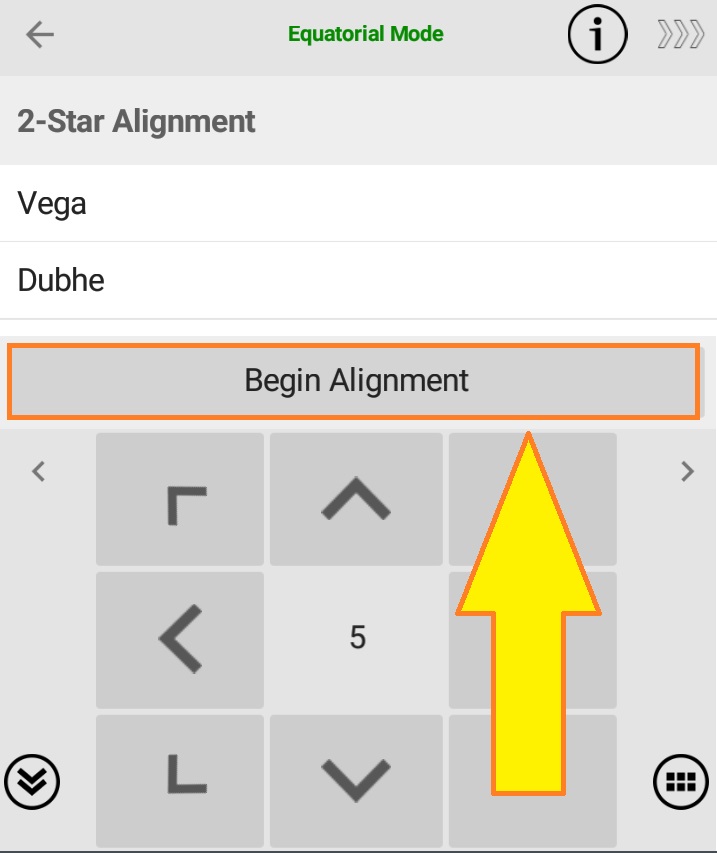
Step 11: Select “Alignment” on the main screen.
Step 12: Both stars will be listed, select “Begin Alignment” at the bottom of the screen.
 Click to Enlarge Image
 Click to Enlarge Image
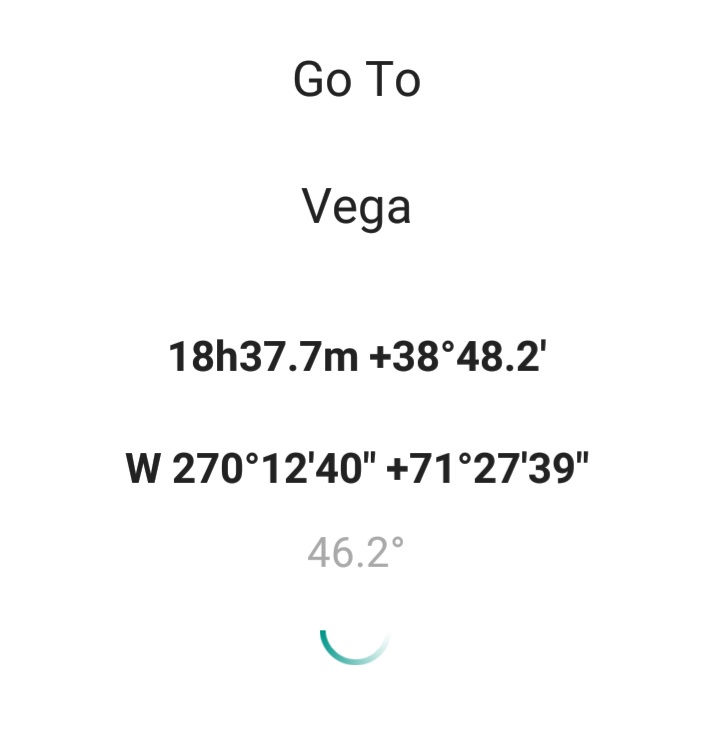
Step 13: Mount will slew to target star.
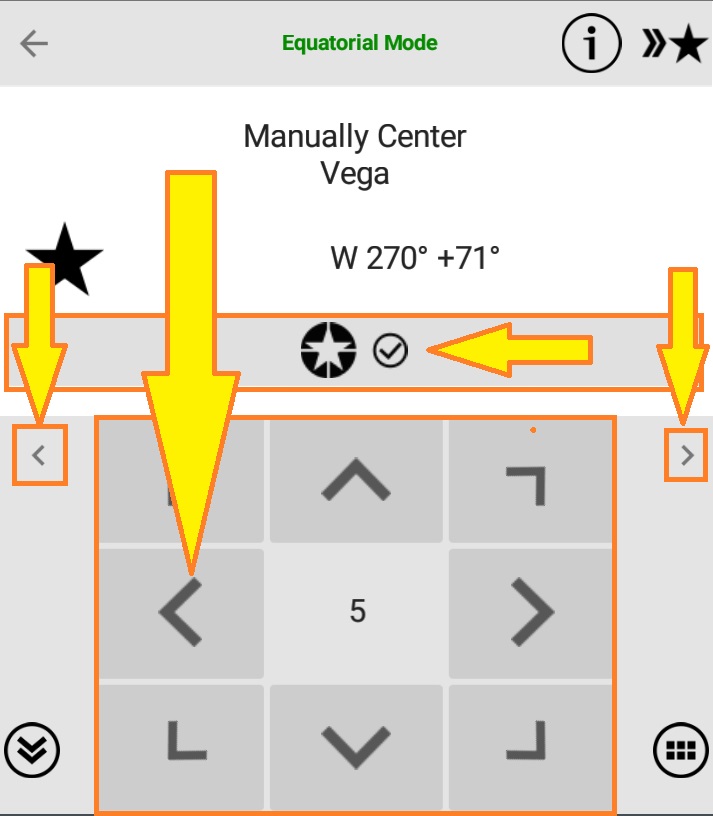
Step 14: Use the direction arrows at the bottom of the screen to center the star in your field of view.
If you do not see this, press the two small arrows in the bottom left corner which hides or shows the direction arrows in most screens.
To change the speed of the mount, pressing the “>” icon will increase the speed from 5 to 6 and up. Pressing the “
In the very top right corner of the app, you will see an icon that looks like >> with a star next to it. This indicates that the mount is tracking at sidereal rate.
When you slew the mount, this icon will change to show this.
If you accidentally click the six squares on the bottom right of the screen, you can go back through the Alignment menu choosing the same two stars and it will bring you back to the “Center Target” screen.
Once the star is centered select the checkmark in the screen center.
 Click to Enlarge Image
 Click to Enlarge Image
Step 15: The mount will slew to your second alignment star.
Step 16: Repeat the process of centering the star that you use for the previous alignment star.
Step 17: You will see an “Alignment Successful” message that will disappear after a few seconds.
Step 18: You can press the back arrow in the top left corner of the app to return to the main screen.
Congratulations! Your mount is now aligned and calibrated!
Additional Notes
To slew to a deep sky object, select “Deep Sky” You can choose from any of the major catalogs, such as Messier, NGC, Caldwell, or IC. Then you can type in the number. By pressing “More..” the app will give you positional and transit data for the object. Selecting “Go-To” slews the mount. The app will ask you to manually center the object using the arrow keys. Press the checkmark and you are off to observe! If you are unsure of what objects you might want to observe or image, you can select the Utility menu, and then choose “Tonight’s Best.”
In the Utility screen, you can select “Information” to see data on the current mount position, Polaris Clock position for Polar Alignment, Time & Location data, as well as Alignment errors, app version, and motor board firmware version.
The Tracking Menu allows you to choose Sidereal or Lunar rates.
“Tonight’s Best” menu gives a large list of objects to view for Deep Sky, Solar System, and Double Star targets. Each has some information such as location being listed. If you select a target, the app shows detailed information about visibility, coordinates, basic visual magnitude, constellation, and positional information.
There is a “Point and Go To” option in the app. From the manual: “POINT AND GO Point the long axis of your mobile device to a region in the sky and tap Utility > Point and Go, and the telescope will GOTO to that rough region. Next, app will show you a list of objects in the region. You can then select an object and perform another, higher precision, GOTO to that object. This function is available for a mobile device that has tilt sensor and compass. The accuracy of the compass sensor in the mobile device is typically around plus and minus 20 degrees. On some Android devices, denying app’s location permission also affects its ability to read the compass”
You can also select “Identify” on the “Utility” menu. This is an amazing function that lists the brighter objects in the area of the sky where the mount is pointed to help identify possible objects that you see.
The app also has a Night Mode which totally blacks out the screen with dark red line images to save night vision.
There is also backlash compensation and can connect to a local network to extend range.
To power the mount down, select “Utility” then “Hibernate” This will allow you to park the mount and save alignment. You can choose “At Home Position” if you want the mount to return to the star position, which we recommend.
Did you know you can also control your Sky-Watcher EQ6-R with your PC? Check out our step-by-step guide to learn how!

Contributing Writers
 Vincent
Giordano