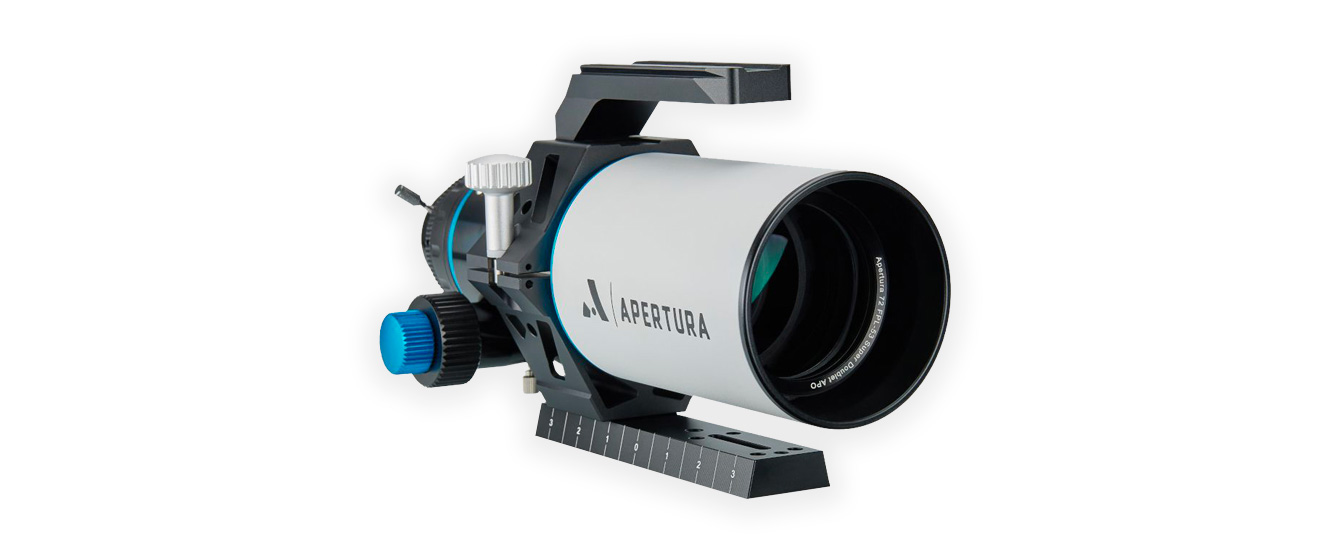
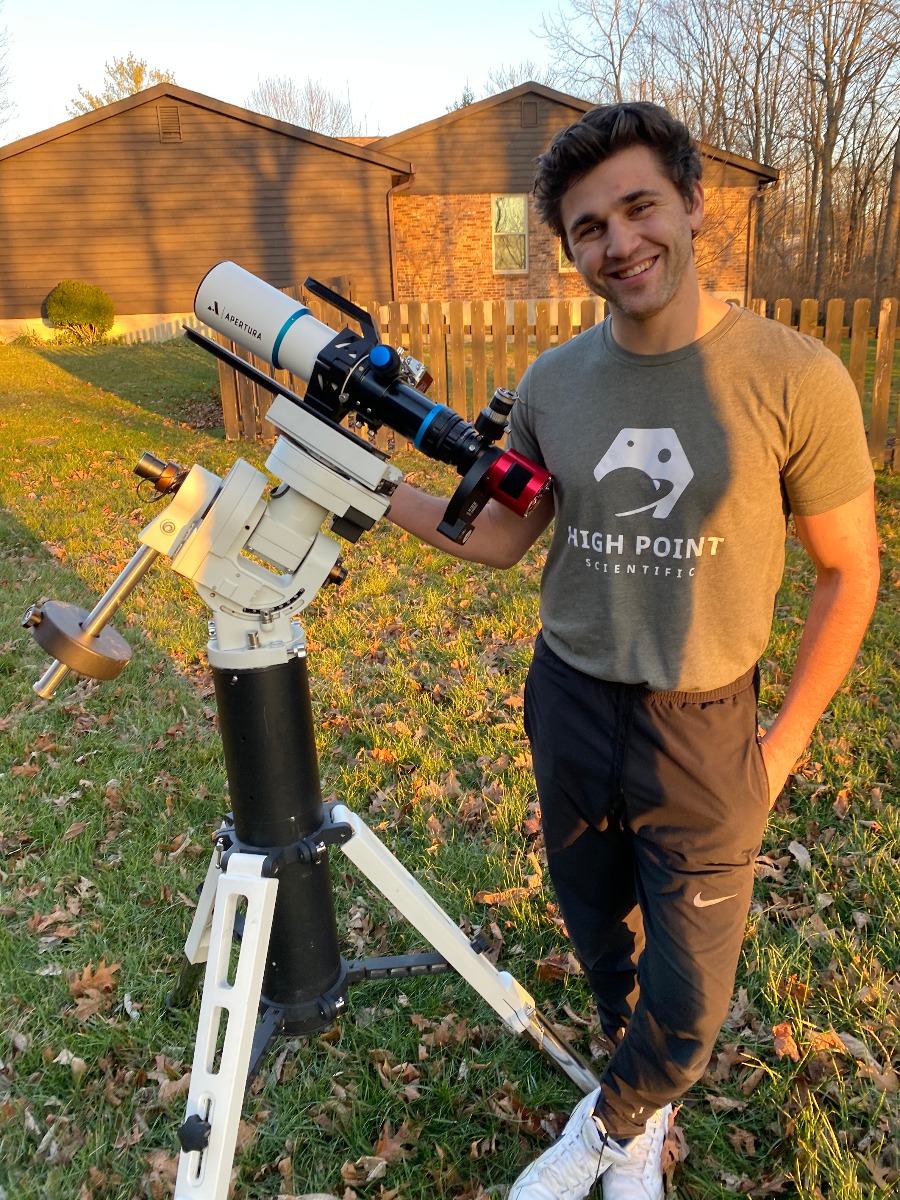
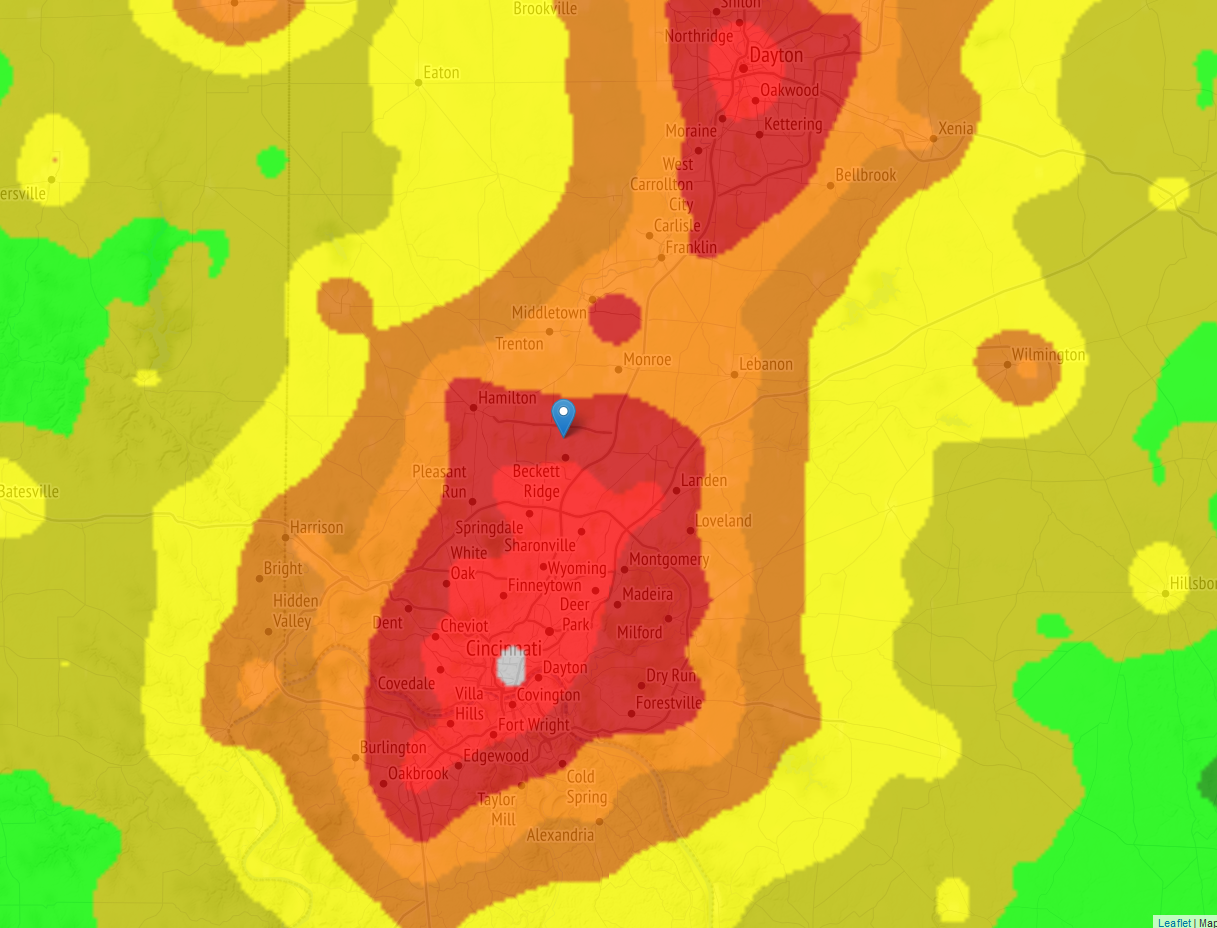
I had the opportunity to review the Apertura 72EDR APO Doublet & adjustable field flattener from a light-polluted suburb of Cincinnati -- the result? Some incredible wide-field, high-resolution imaging.
Choosing a target
I found it difficult to choose a target when testing out the Apertura 72EDR. Now that the aft-end of the Milky Way is starting to set at dusk, I was left to choose between a few bright broadband targets (LRGB) or some emission nebulae around the constellation of Orion. Orion is chock-full of some incredible nebulae like the Horsehead and Orion Nebula, but due to the trees in my yard, I would have been limited to about 3 hours of exposure times a night on both of these targets. This eliminated any of these targets if I wanted to collect some serious exposure time. On top of the clouds and variable weather here in Cincinnati, I wasn't willing to waste several hours of potential data on a clear night.
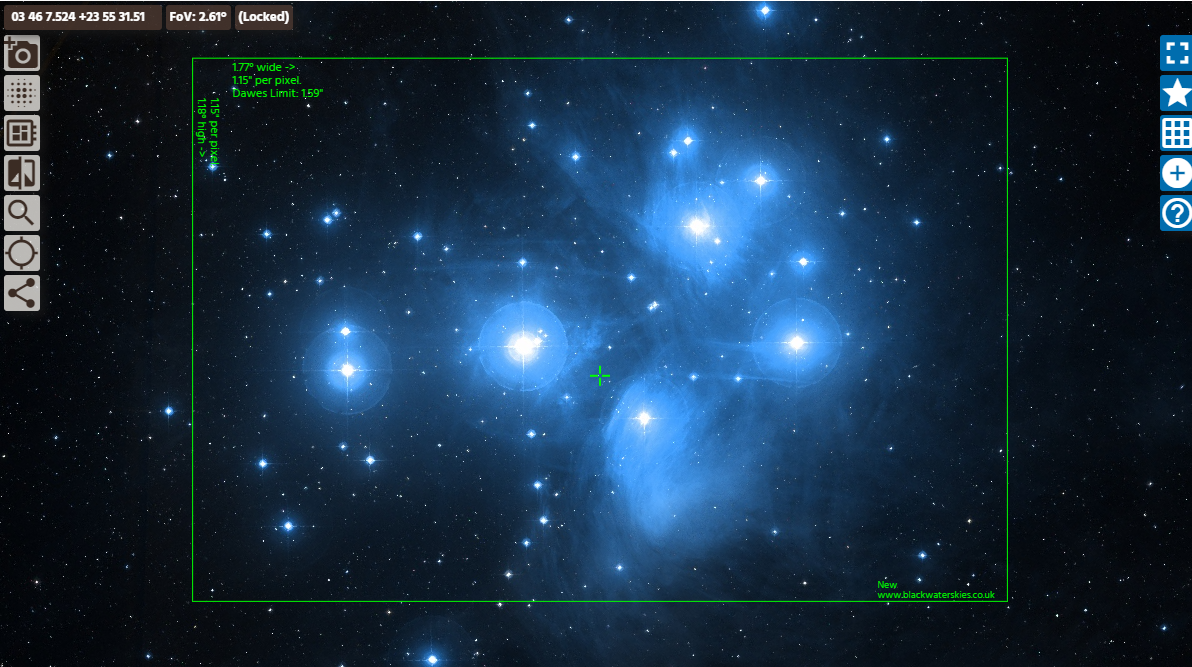
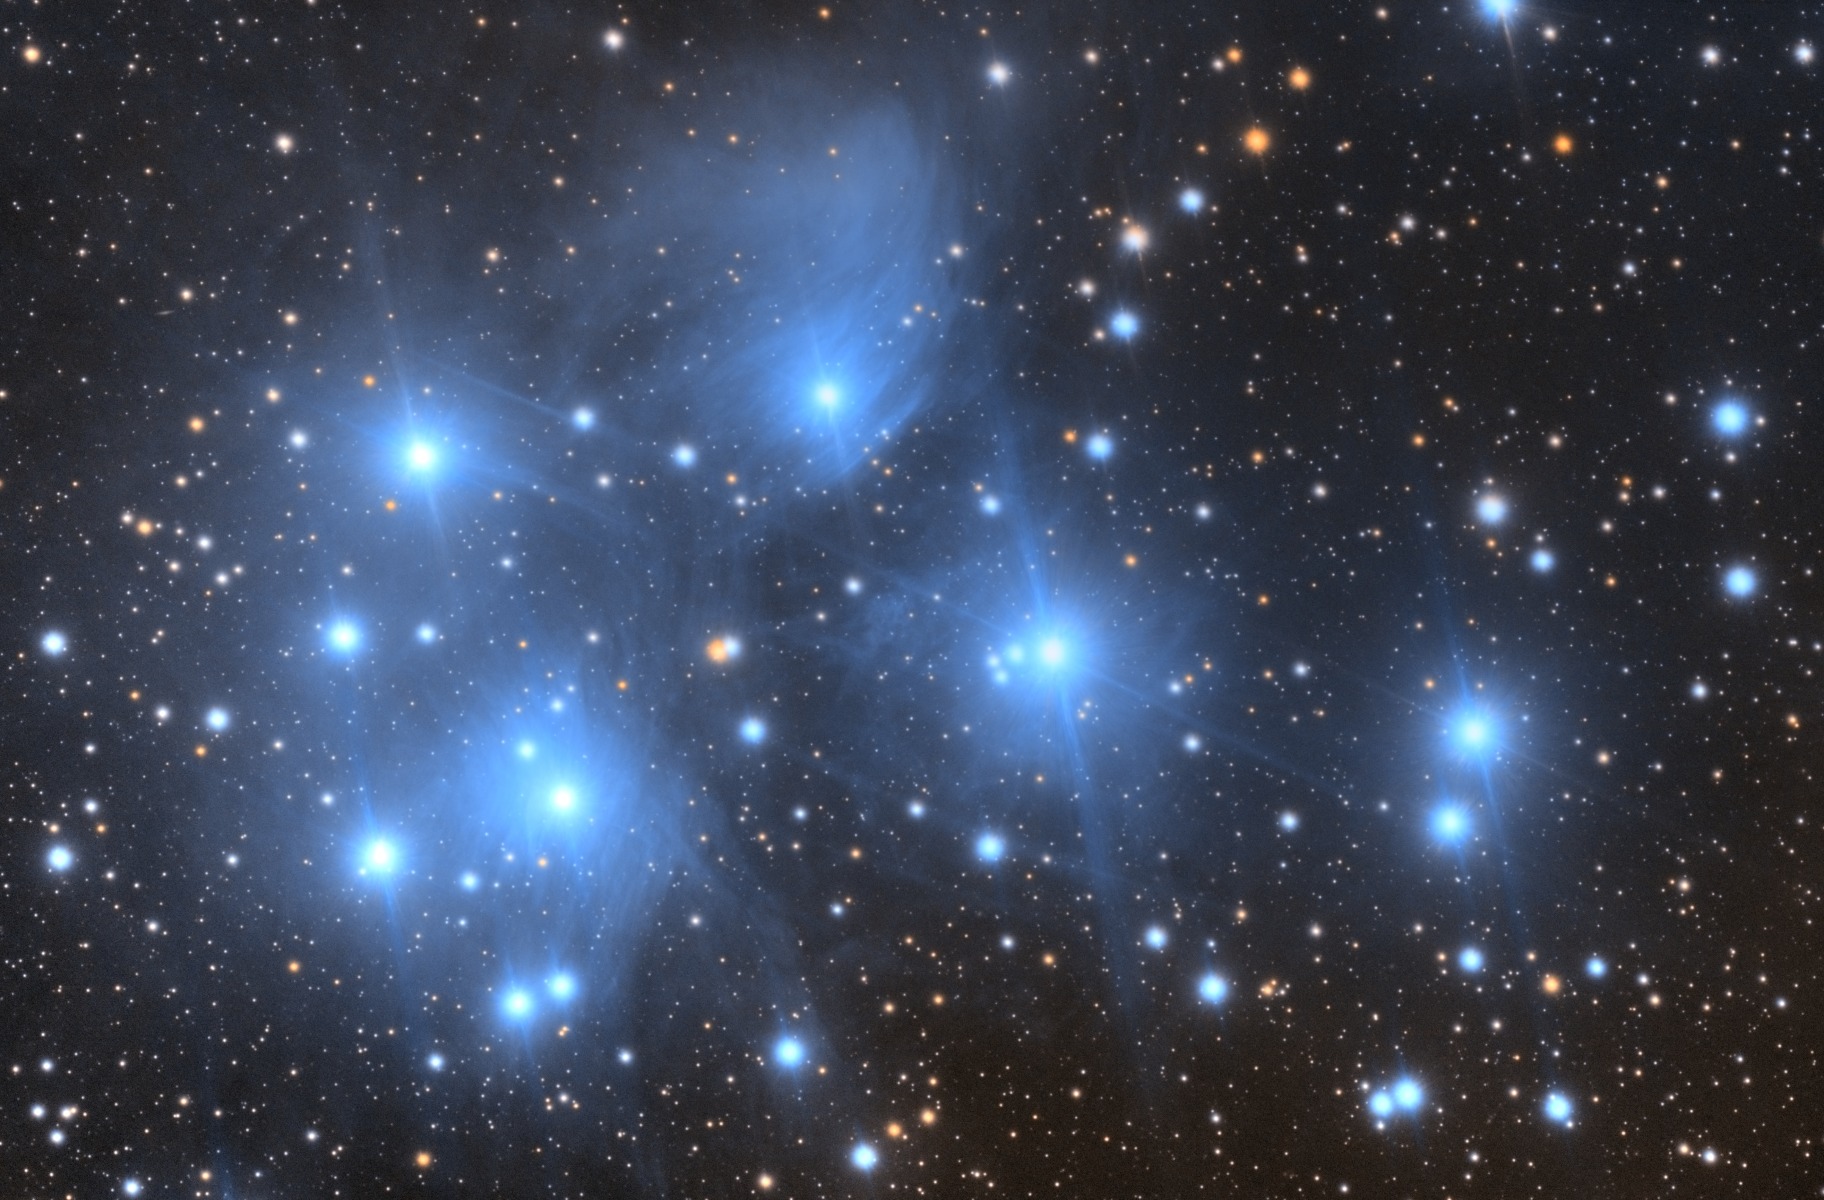
From my front yard, I did have a very nice view of the northeastern and eastern skies. Through Stellarium, I found that I would be able to collect 6-7 hours of data on either the Triangulum Galaxy, Pleiades Star Cluster, California Nebula, and IC443 (Jellyfish Nebula). The Jellyfish Nebula was ultimately my first choice, but I really wanted to test the power of this scope in heavy light pollution. The Jellyfish Nebula, being a narrowband target, would have been an easy target with my 3nm Ha, OIII, and SII filters. I decided to image the Pleiades Star Cluster and invest several hours of exposure time into this target.
Soon after deciding on the target, I input my camera and scope specifications into Sequence Generator Pro to produce an accurate field of view. Through the framing wizard, I saw that I was able to encompass the entirety of The Pleiades Star Cluster if I rotated my camera correctly. I started collecting data on November 17, 2020!
Choosing the setup & location
Before starting this project, I knew that the Pleiades Cluster (M45) rises due East. I had access to M45 from my backyard but setting up there would result in many hours of imaging time lost. There are two very tall trees blocking most of my Eastern skies which would delay the start of each imaging session approximately 2 hours per night! I decided that capturing data from my front yard would be the most efficient place to start. I can always relocate if I find the side yard provides a better view. Here is a comprehensive list of the equipment I will be using for this project:
- 72EDR / Field flattener
- iOptron CEM60
- ZWO ASI183MM
- ZWO 8-position filter wheel
- ZWO Off-Axis Guider (OAG)
- Astrodon E-Series LRGB 1.25" filter set
- ZWO Electronic Automatic Focuser (EAF)
- QHY PoleMaster
First Night Out (11/17/20)
The first night of data collection started out very well but ended with some minor hiccups preventing me from collecting my goal of 6-7 hours per night. Thankfully, having already attached the ZWO EAF to the Apertura 60EDR as noted in our previous writeup, attaching it to the 72EDR was a breeze. I started collecting luminance data at 8 PM EST when The Pleiades was high enough in the sky for collecting higher quality data.
This cluster has some very bright, very young stars, so not saturating or overexposing them was going to be a challenge. With the ZWO ASI183MM, I decided that gain 53 (between unity and 0) was a good starting point for 3-minute exposures. To improve the dynamic range in the cores of stars, I plan on taking several short exposures about 15-20 seconds long.
Come midnight, I had collected a solid 4 hours of data. I had accidentally set my sequence to run for only 80 frames, or until meridian flip. My sequence had ended around midnight and I had lost 3 hours of potential data. These are the kinds of mistakes you only make once (usually)! I stacked the 4 hours of data the following morning and was relatively disappointed with the lack of nebulosity in my photo. This is strictly due to the heavy light pollution in the suburbs of a larger city. I assumed that a lot more data would be needed anyway. Was I a tad disappointed? Yes. Was I surprised by the lack of nebulosity I saw so far? Absolutely not.
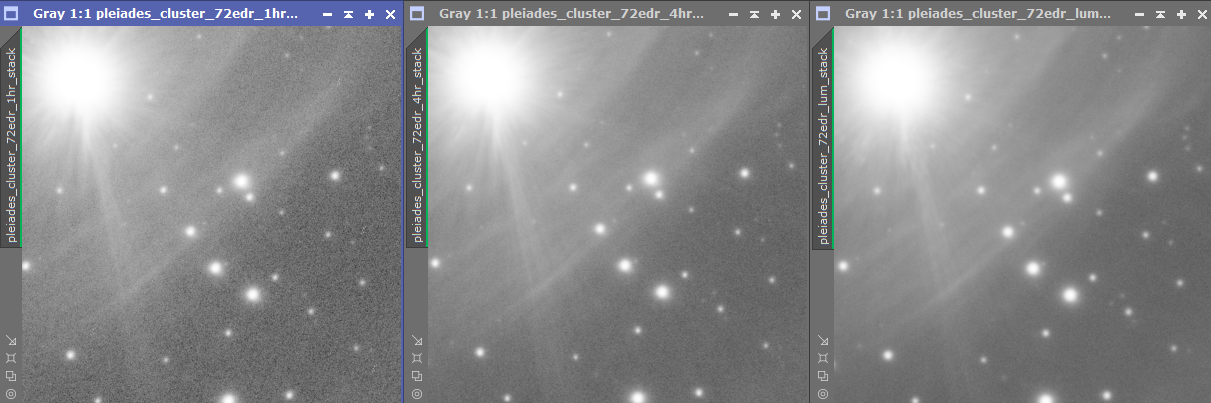
Displayed here are the differences between 1, 4 and 12 hours of exposure time. As you can see, the image consisting of 1 hour of exposure time is considerably noisier than image on the far right which consists of 12 hours of exposure time. Increasing your total exposure time is crucial to image quality!
Second Night Out (11/18/20)
I started early the second night (around 7 PM EST) to get a head start, hoping to make up for lost data the previous night. Halfway through the night, everything was running smoothly. Set up took no time at all as I left my entire rig set up from the previous night. I typically have an active repeating 35 ft. USB cable running from my iOptron CEM60 to my laptop inside. Due to the position of Pleiades, I was set up too far from my house for the USB cable to reach. Instead, I had my laptop sitting on a card table only a couple of feet away from my mount. A 6 ft. USB sufficed! Data collection went very well all night and I collected a total of 7 hours, leaving me with a total of 11 at the end of the night.
Third Night Out (11/19/20)
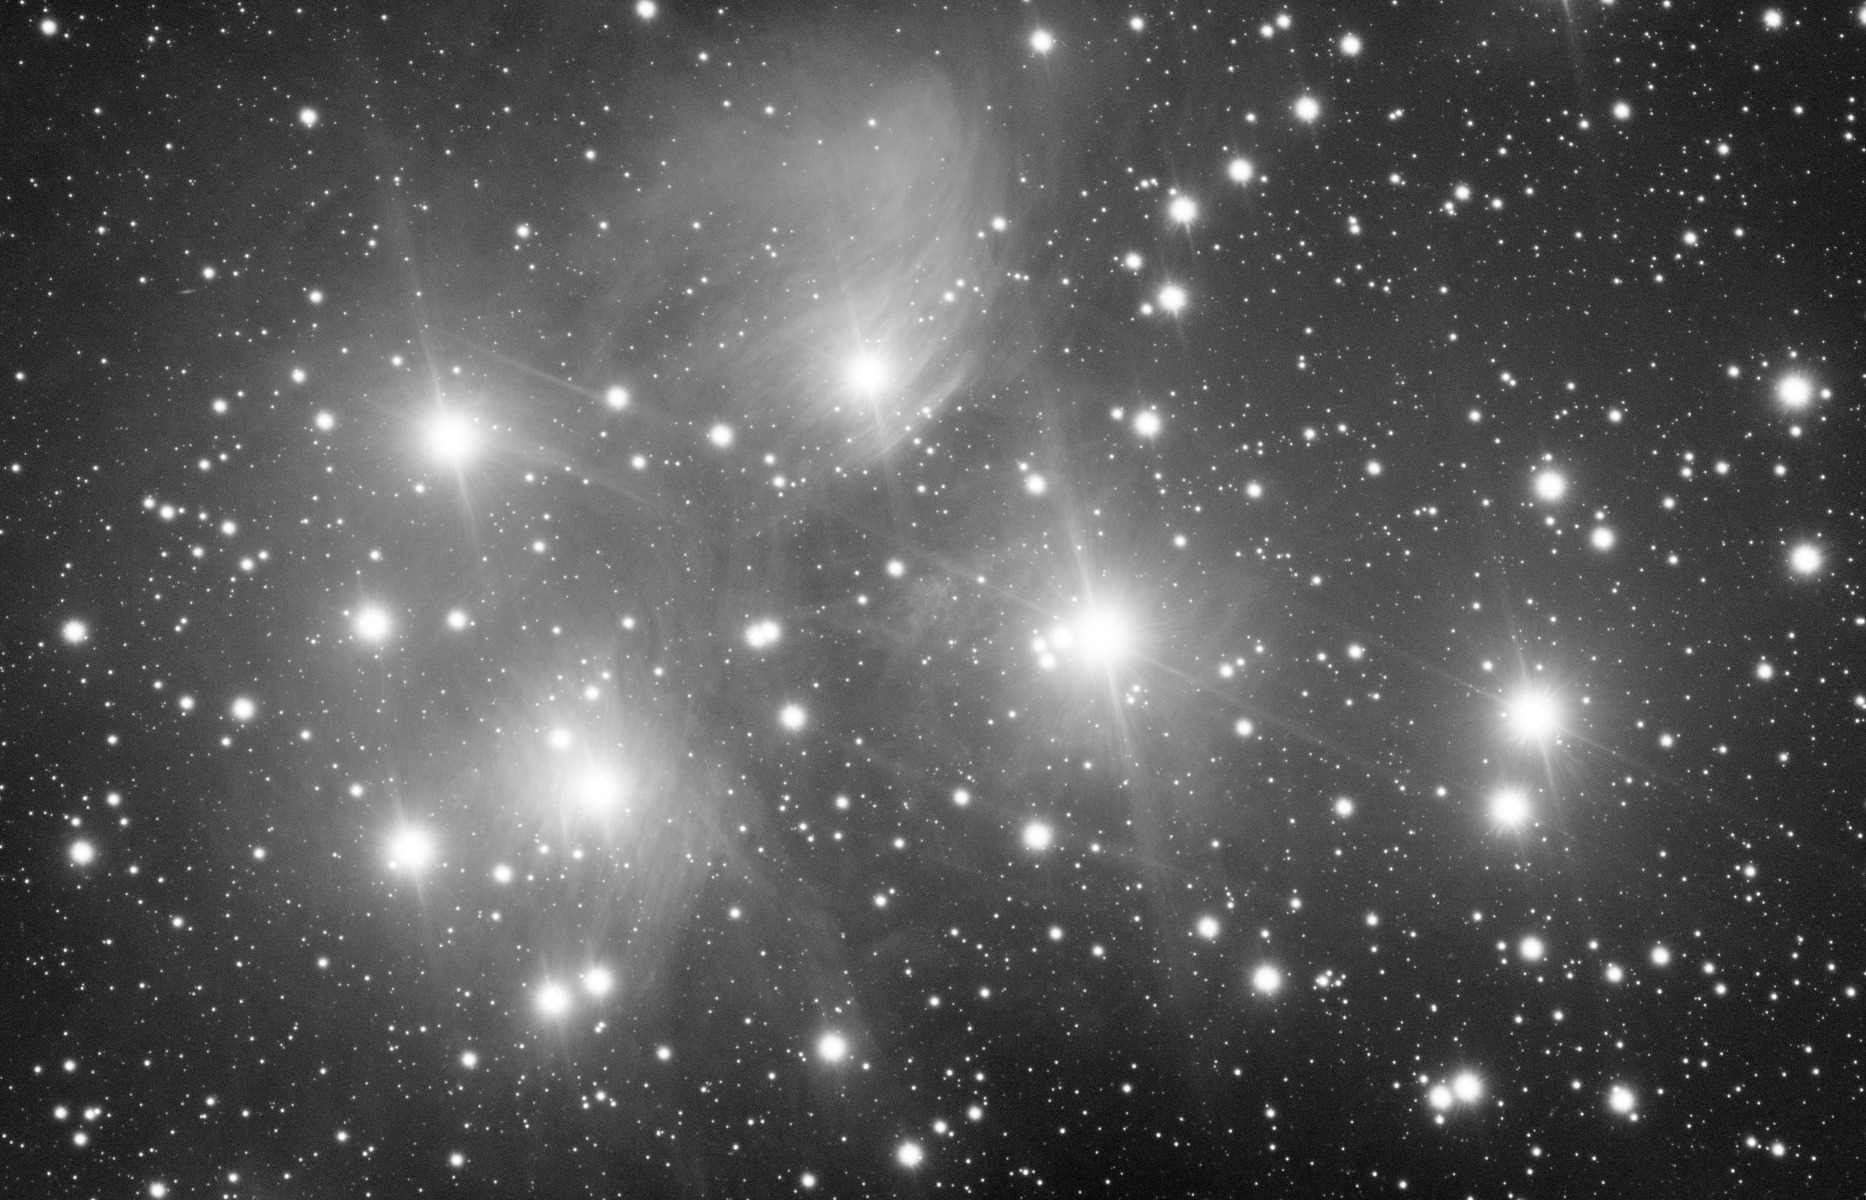
The third night out was my last night collecting luminance data for my Apertura 72EDR review. Again, I was already set up from the previous night so I started collecting data around 7:30 PM EST. By this time, I had noticed that there were some pretty severe diffraction spikes in my images. I personally don’t mind diffraction spikes as I think it gives the stars a “sparkly” feel. Nonetheless, this is not normal for a doublet or triplet apochromatic refractor. I did further investigate, and found that there were two fingerprints on the objective lens of the scope! I wiped these clean with a fiber cloth. Despite this small obstacle, I finished the third night of imaging with a total of 17.5 hours of luminance data. The first three clear nights were a success and the results were great.
Nights 4-6: RGB Collection (12/01, 12/11, 12/13)
After collecting the luminance data, I was ready to start collecting RGB data. Due to the heavy light pollution, I decided to spend a full night on RGB each. I collected 5.5 total hours through both my red and green filters on Dec 1st and on the 11th respectively. I took the necessary flat frames the following days using a T-shirt method. This method of taking flat frames has always provided me with great results.
On Dec 13th, I set out on collecting the last 5.5 hours through my blue filter that would finish off this project! The skies started out partly cloudy and then began to clear up around 9 PM. I started collecting data around that time. Two and half hours passed and the clouds were back overhead so I called it quits for that night. Again, I took the necessary flat frames through my blue filter the following day. Out of sheer curiosity, I stacked my RGB data and calibration frames together to evaluate my results. Even though I only collected about half of the blue data I set out to collect, the data looked pretty good. After 30.5 hours of data collection, I had finished the acquisition portion of this project!
Post-processing Begins (12/15/20)
Having stacked my LRGB data into their separate stacks, I uploaded them into PixInsight for an initial RGB combination to get a color image. Despite the flats frames I had taken, it was apparent that the gradients from the nearby porch/street lights took their toll. The background of my photo was non-uniform and there were blotches of red, green, and blue spots. It was far from a steady black/grey background. I could spend hours in post-processing trying to fix this but instead, I decided to re-stack my RGB data. I only included the best 60% of exposures in my new stacked image. This would eliminate a good portion of images with high sky background levels, high full width half max (FWHM) readings due to poor seeing conditions, and a higher number of gradients. Before the initial stack, I did go through my data and manually eliminate it of poor frames but not nearly to the extent that I needed to.
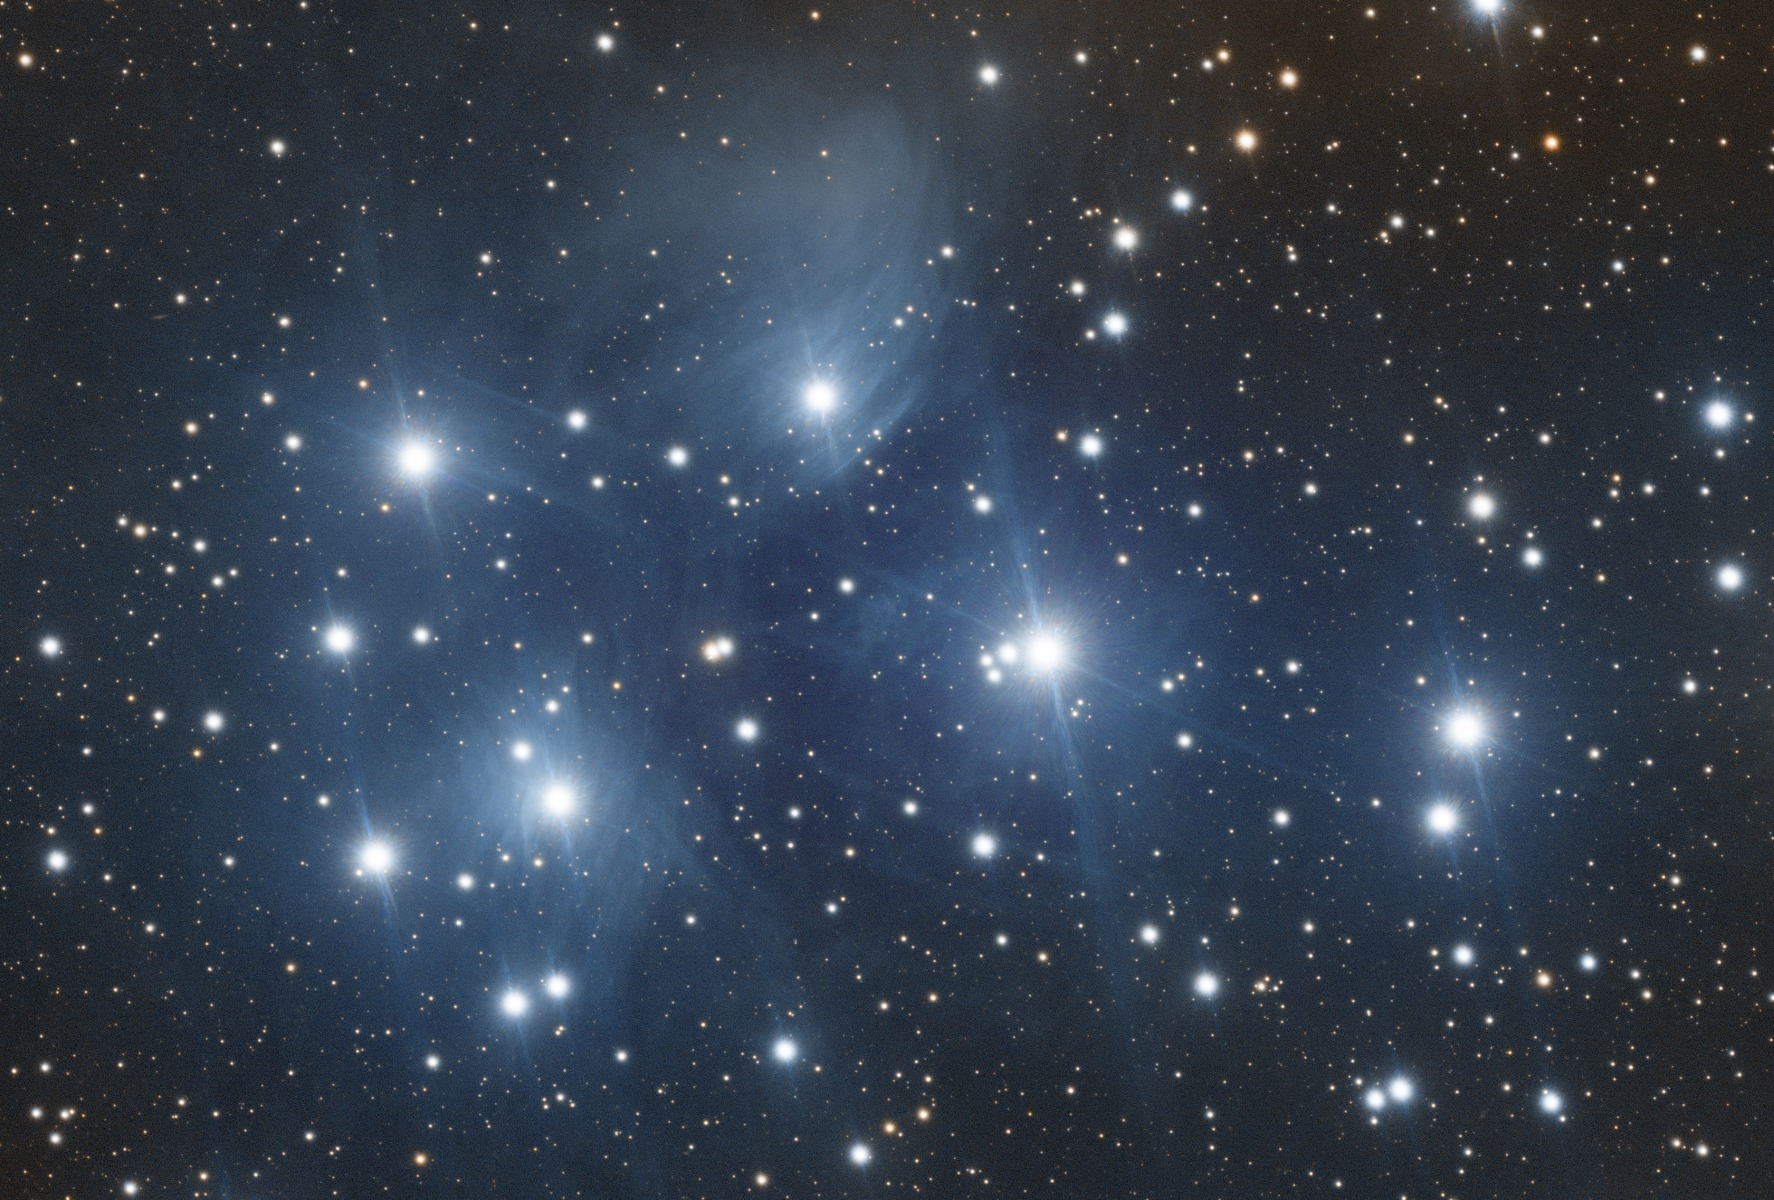
Eliminating 40% of my worst frames turned out to be a great idea and it really improved the overall quality of my image. Astrophotographers have a saying: “In with junk, out with junk.” If you include enough poor data into your final image stack, it can negatively affect your final photo! Gradient reduction was easy with Automatic Background Extraction through PixInsight. I processed my RGB stack and my luminance stack separately. After stretching and color-correcting my RGB stack, I moved on to process my luminance data and layered it over my RGB data to create a final image! Considering the conditions at which this image was taken, I am very happy with my results!
Final impressions & results
Like the Apertura 60EDR, this little 72mm ED doublet refractor was very impressive. While the smudges on the focal reducer and objective lens caused some odd spikes, the overall image quality is quite nice for a doublet. The stars did experience a bit of bloating and fuzziness around them but they were round to the edges of the field of view. Cutting down on sub exposure time may have helped that a bit. Shooting at a lower gain may have helped as well! Despite these minor characteristics common with a lot of doublets, this scope is the ultimate solution for an affordable imaging refractor!
Click the arrow above to see MLA, APA, and Chicago Manual of Style citations.
MLA:
DePrato-Grable, Teagan. "Apertura 72EDR Review," AstronomyHub, High Point Scientific, 19 Jul. 2023, https://www.highpointscientific.com/astronomy-hub/post/apertura-72edr-review.
APA:
DePrato-Grable, T. (2023, July 19). Apertura 72edr review. High Point Scientific. https://www.highpointscientific.com/astronomy-hub/post/apertura-72edr-review
Chicago Manual of Style:
Bibliography:
Teagan DePrato-Grable. "Apertura 72EDR Review," AstronomyHub (blog), High Point Scientific, July 19, 2023. https://www.highpointscientific.com/astronomy-hub/post/apertura-72edr-review.
Footnote:
Teagan DePrato-Grable, "Apertura 72EDR Review," AstronomyHub, High Point Scientific, July 19, 2023, https://www.highpointscientific.com/astronomy-hub/post/apertura-72edr-review.
This Article was Last Updated on 07/19/2023